General Questions

FAQ65

How to install WooCommerce plugin

Migrate to WooCommerce with Cart2Cart: A Step-by-Step Guide

Considering a move to WooCommerce? Cart2Cart offers a streamlined solution for migrating your store's data, including products, customers, orders, and more, to the WooCommerce platform. This guide will walk you through installing the WooCommerce plugin and explain how Cart2Cart simplifies the data migration process.

Installing the WooCommerce Plugin

Before you begin your data migration with Cart2Cart, you'll need to install the WooCommerce plugin on your WordPress site. Here's how:

To install the WordPress WooCommerce plugin for your existing site, follow the instructions below:

  1. Download WooCommerce: First, visit the WooCommerce plugin page and download the plugin. The plugin will be saved as a zip archive.

  2. Access WordPress Admin: Log in to your WordPress admin dashboard.

  3. Navigate to Plugins: In the WordPress admin menu, go to Plugins -> Add New.

  4. Upload Plugin: Click the Upload Plugin button at the top of the page.

  5. Choose File: Click Choose File and select the WooCommerce zip archive you downloaded earlier.

  6. Install Now: Click Install Now to begin the installation process.

  7. Activate Plugin: Once the installation is complete, click Activate Plugin to activate WooCommerce.

After installing and activating the WooCommerce plugin, you'll be guided through the WooCommerce setup wizard to configure your store settings, including payment gateways, shipping options, and product setup.

Simplified Data Migration to WooCommerce with Cart2Cart

Once WooCommerce is installed, Cart2Cart can handle the complexities of migrating your data. Here's how Cart2Cart simplifies the process of migrating your data to WooCommerce:

  1. Connect Your Stores: Cart2Cart connects to both your source store and your new WooCommerce store.

  2. Select Data for Migration: Choose the data you want to migrate, such as products, customers, orders, categories, and more. Cart2Cart supports a wide range of data types.

  3. Start a Free Demo: Test the migration process with a free demo to see how your data will look in your new WooCommerce store.

  4. Perform Full Migration: Once you're satisfied with the demo, perform the full migration. Cart2Cart ensures a secure and accurate transfer of your data.

Benefits of Using Cart2Cart for WooCommerce Data Migration

  • No Technical Skills Required: Cart2Cart's user-friendly interface makes data migration accessible to everyone, regardless of technical expertise.
  • Secure Data Transfer: Cart2Cart uses secure protocols to ensure your data is protected during the migration process.
  • Minimal Downtime: Cart2Cart migrates your data in the background, minimizing downtime for your existing store.
  • Wide Range of Supported Platforms: Cart2Cart supports migration from a wide range of e-commerce platforms to WooCommerce. See the full list of supported carts.
  • Flexible Pricing: Cart2Cart offers flexible pricing options to fit your budget and migration needs.

Ready to Migrate to WooCommerce?

Don't let the complexity of data migration hold you back. Cart2Cart simplifies the process, allowing you to focus on growing your business on the WooCommerce platform.

Next Steps:

More info
How to regenerate thumbnails on PrestaShop store after migration?

If your images haven't regenerated correctly after your shopping cart migration and appear like this:

PrestaShop images not displaying correctly after data migration

Instead of this:

Correctly displayed PrestaShop thumbnails after data migration

You can manually fix this issue in PrestaShop by following these instructions:

  1. Log in to your PrestaShop Admin Area.
  2. Navigate to **Design** in the **Improve** section of the left navigation menu.

PrestaShop Admin Area - Design Section

  1. From the dropdown menu, select **Image Settings**.

PrestaShop Image Settings

  1. Click the **Regenerate Thumbnails** button and check the result.

Regenerate Thumbnails button in PrestaShop

This process regenerates the thumbnails for your product images, ensuring they display correctly on your PrestaShop storefront after the data migration.

If you're still experiencing issues after following these steps, don't hesitate to contact our support team for assistance. You can also start your free demo to see how Cart2Cart simplifies the entire data migration process. You can also schedule a call with a migration expert.

More info
Missing migrated data after a new demo migration

Why is My Data Missing After a New Demo Migration?

Cart2Cart offers a free demo migration, allowing you to transfer a limited amount of data (typically 10 products, customers, and related orders) to your target store. This enables you to test our data migration service and see how your data will appear on the new platform. You can run unlimited demo migrations from a single customer account, all completely free of charge.

However, it's crucial to understand that each new demo migration overwrites the data migrated during the previous demo on the target store. This means that any content transferred during a prior demo will be replaced by the data from the latest demo.

Think of it like this: each demo migration is a fresh start for your test store. The old data is cleared out to make way for the new data being tested. This ensures a clean and accurate representation of how the full data migration will look.

To avoid confusion and ensure you're seeing the most up-to-date results, always remember that the latest demo migration's data is the only data present on your target store.

Ready to see how Cart2Cart can streamline your data migration process? Start your free demo migration now!

More info
Do I risk losing data from my existing store during the migration?

Will I Lose Data During My E-commerce Data Migration?

The Source (current) store data isn't affected by the e-commerce data migration process at all. In layman's terms, your products, customers, orders, and other crucial data are simply copied and pasted into your target store. This process is akin to creating a duplicate of your existing data in a new location.

Therefore, the e-commerce data migration process is completely safe for your original store, and there's no risk of losing any data. We, at Cart2Cart, guarantee 100% uptime and data security throughout the entire migration. You can continue selling without interruption while your source store's data is being migrated to the new platform. Consider it as seamlessly moving your business to a new location without closing doors for even a moment.

Ready to migrate your e-commerce data safely and efficiently? Start your free demo now!

More info
Why products are not displayed correctly on my PrestaShop store after migration?

Why are products not displayed correctly on my PrestaShop store after data migration?

If you've migrated your store to PrestaShop using a data migration service like Cart2Cart and your products aren't displaying correctly, the issue might be related to product combinations and the EAN13 field configuration.

In case your products are associated with combinations, check if they have the EAN13 field populated. Then, verify if your PrestaShop store's configuration (under Route to Products) contains the field *{-:ean13}*.

PrestaShop product configuration after data migration

PrestaShop Route to Products settings after data migration

If the *{-:ean13}* field is present in the Route to Products configuration, it's recommended to remove it. This adjustment can resolve the display issues and ensure your products are shown correctly on your PrestaShop store after the data migration.

Removing EAN13 field in PrestaShop Route to Products after data migration

Final PrestaShop Route to Products configuration after data migration

By removing this field, PrestaShop will rely on other identifiers to display your products, which can prevent conflicts arising from the migrated data. This ensures a smoother customer experience and accurate product representation after your data migration.

If you're still encountering issues after making this change, Cart2Cart offers comprehensive support to assist you with your data migration process. Schedule a call with a Migration Expert or contact our support team via live chat for personalized assistance.

Ready to start your data migration? Start your free demo now!

More info
How to create API token for Miva Merchant?

How to Create a Miva Merchant API Token for Data Migration

To perform a data migration from your Miva Merchant store using Cart2Cart, you'll need to create an API token. This token allows Cart2Cart to securely access and transfer your data. Follow these steps:

Navigate to Home -> Users -> API Tokens. Then, click the Add API token button.

Creating a Miva Merchant API token for data migration - Step 1

In the next screen, fill in the Name field with a descriptive name for the token (e.g., "Cart2Cart Migration"). Then, copy the Access Token value. You'll need this later.

Copying the Access Token for Miva Merchant data migration

For the Allowed IP Address(es), enter 0.0.0.0/0 to allow access from any IP address. This is necessary for Cart2Cart to connect. Copy the Signature field value as well; you'll need this value later in the Cart2Cart migration wizard.

Setting Allowed IP Address and copying Signature for Miva Merchant data migration

In the Timestamp field, choose Accept Require Timestamp Within and click the Save button. This ensures the token's validity.

Setting Timestamp and saving the Miva Merchant API token

To complete the API token setup for your data migration, you need the Store Code. Go to Home -> Store Settings. and copy the value.

Locating the Store Code for Miva Merchant data migration

Finally, enter the copied values (Access Token, Signature, and Store Code) into the corresponding fields in the Cart2Cart migration wizard to establish a connection with your Miva Merchant store and initiate the data migration process.

Entering Miva Merchant API credentials in Cart2Cart for data migration

Now you're ready to start your data migration! If you have any questions or need assistance, please contact our support team via Live Chat.

Start your free demo and see how easy it is to migrate your data with Cart2Cart.

More info
301 redirect was not migrated during BigCommerce migration

Why Were My 301 Redirects Not Migrated?

301 redirects are essential for maintaining SEO rankings and ensuring a smooth user experience during and after a store migration. If your 301 redirects weren't migrated, there are a few potential reasons why.

First, ensure that your source platform supports 301 redirect migration and that you've selected the option to migrate them during your data migration setup with Cart2Cart. Not all platforms store redirects in the same way, and some may require specific permissions or configurations to access this data.

Another common reason is related to the target platform's capabilities or limitations. For example:

In BigCommerce, 301 redirects are available only within a paid store plan. Therefore, to migrate 301 redirects to or from BigCommerce, upgrading to a paid plan is necessary. This ensures the platform supports the functionality required for the migration. Cart2Cart can migrate your 301 redirects seamlessly once you have a paid BigCommerce plan. This is a critical step in preserving your SEO and customer experience during your BigCommerce migration.

Here are a few other things to consider:

  • Check your Cart2Cart migration settings: Double-check that you selected the "Migrate 301 redirects" option during the migration setup.
  • Verify platform compatibility: Ensure both your source and target platforms fully support 301 redirect functionality.
  • Review your data: Confirm that the 301 redirects are correctly configured in your source store.

If you've checked these points and are still experiencing issues, please contact our support team via Live Chat for assistance. We're here to help ensure a smooth and complete data migration.

Next Steps:

More info
Is it possible to migrate the Product Cost from/to WooCommerce?

Can I Migrate Product Costs During Data Migration?

Yes, transferring product costs is supported by Cart2Cart during your data migration. This feature allows you to accurately maintain your product profitability data when switching platforms.

Migrating Product Costs to WooCommerce

When migrating product costs specifically to WooCommerce, it's essential to ensure your store is properly configured to handle this data. While Cart2Cart facilitates the transfer, WooCommerce requires a plugin to natively display and manage product costs. We recommend installing one of the following plugins before initiating your data migration:

These plugins will allow you to seamlessly view and manage product costs within your WooCommerce store after the data migration process.

Considerations for Accurate Product Cost Migration

Before starting your data migration, ensure that your source cart's product cost data is accurately recorded and formatted. Cart2Cart will transfer the data as is, so data integrity on the source platform is crucial. You can also use additional migration options to filter products or migrate only specific data fields.

Ready to migrate your product costs and other essential data? Start your free demo with Cart2Cart today!

More info
Why should I provide my FTP credentials during WooCommerce migration?

Why Might I Need to Provide FTP Credentials for WooCommerce Data Migration?

During a data migration to WooCommerce, Cart2Cart typically automates the plugin installation process. However, in some cases, due to server configurations or permission restrictions, the plugin cannot be installed automatically. When this happens, providing FTP (File Transfer Protocol) credentials becomes necessary to establish a connection between your source store and your WooCommerce store and complete the data migration. The Cart2Cart plugin facilitates the secure transfer of your data.

To initiate the store data migration to WooCommerce, a Cart2Cart plugin needs to be installed. In case, the plugin cannot be installed in an automated manner (due to technical reasons), you may need to provide FTP credentials to connect the two stores. Below is a step-by-step instruction for you to go through:

  1. Access your WordPress installation's wp-config.php file. This file is usually located in the root directory of your WordPress installation. Add the following line of code at the end of the file: define('FS_METHOD','direct'); This can sometimes resolve permission issues.
  2. If the previous step doesn't work, access your server's console (often through your hosting provider). You'll typically need to log in as the root user with its corresponding password.

Execute the following command in the console, replacing /yourwebsitename/public/wp-content/plugins/ with the actual path to your WordPress plugins directory: chmod 777 /yourwebsitename/public/wp-content/plugins/

Important Security Note: The chmod 777 command grants full read, write, and execute permissions to everyone. While this can resolve installation issues, it's generally not recommended for security reasons. After the data migration is complete, it's highly advisable to revert the permissions to a more secure setting (e.g., 755). Consult with your hosting provider or a server administrator for guidance on setting appropriate file permissions.

If you are uncomfortable performing these steps, please schedule a call with our migration expert to assist you.

Ready to migrate your store to WooCommerce? Start your free demo now!

More info
How can I export the products from my Yahoo store into files?

Exporting Orders from Yahoo Store for Data Migration

When migrating your online store, understanding the data export process is crucial. With Cart2Cart, you can efficiently migrate your data from Yahoo Store to a new platform. From the provided Resources List, you can manually transfer only Orders. Catalog XML and Objinfo XML are exported by Cart2Cart in an automated manner. Cart2Cart simplifies the process of data migration, ensuring a seamless transition for your products, customers, and other essential data.

Yahoo Store orders export for data migration

Below is a step-by-step instruction for you on how to transfer Orders from Yahoo store into files:

  • Go to Yahoo Store admin panel -> click the Orders link in the Process column -> specify a range of Orders to export.
  • Choose an export format from the pull-down, specify XML -> click the Export button.
  • Access and Generic XML format. Click the Download link for Orders.xml and save the file.

While you can manually export orders, Cart2Cart automates the migration of other critical data, including products and categories. This streamlines the entire data migration process and saves you valuable time and effort.

Ready to migrate your store to a new platform? Start your free demo today and experience the ease of automated data migration with Cart2Cart!

More info
Is it possible to migrate my custom attributes?

Is it Possible to Migrate Custom Attributes During Shopping Cart Migration?

Yes, it is often possible to migrate custom attributes during a shopping cart migration with Cart2Cart. The extent to which custom attributes can be migrated depends on the specific shopping cart platforms involved and the nature of the custom attributes themselves.

The list of supported entities that can be transferred from one platform to another is indicated on the corresponding connector page of our website. These connector pages detail the specific data that Cart2Cart can automatically migrate between platforms like Magento, Shopify, WooCommerce, and many others. If you need to migrate entities that are not included in the list of supported data, this should be discussed with our team before the migration. Custom entities migration might require custom development and will likely incur additional costs. To assess the feasibility and cost of migrating custom attributes specific to your store, we recommend contacting our support team.

How to Check if Custom Attributes Migration is Supported

Before initiating your data migration, carefully review the Cart2Cart documentation or the specific migration tool's interface to determine which custom attributes are supported for the platforms you are migrating from and to. If you're unsure, reach out to Cart2Cart support for clarification.

Custom Attribute Migration Options

If the standard migration process doesn't support your specific custom attributes, Cart2Cart offers customization options. This might involve custom coding or database mapping to ensure these attributes are correctly transferred to your new store.

Next Steps for Custom Attribute Migration

  1. Check Supported Entities: Review the list of supported entities for your specific source and target platforms on the Cart2Cart website.
  2. Contact Support: If your custom attributes aren't listed, contact Cart2Cart support for assistance.
  3. Request a Custom Quote: Discuss your specific needs with the Cart2Cart team to get a custom quote for migrating your custom attributes.

Ready to migrate your store? Start your free demo today! Or, schedule a call with a Migration Expert to discuss your specific data migration needs.

More info
How to Migrate to OpenCart via the module?

Looking to migrate your online store to OpenCart? Cart2Cart simplifies the entire process with its automated migration tool. This guide provides a step-by-step walkthrough on how to perform a seamless eCommerce data migration to OpenCart using Cart2Cart.

How to Migrate to OpenCart with Cart2Cart: A Step-by-Step Guide

If you want to migrate to OpenCart with Cart2Cart, follow these instructions:

Step 1: Set Up Source and Target Carts for Your eCommerce Data Migration

First, you'll need to connect your current store (the source cart) and your new OpenCart store (the target cart) to Cart2Cart. Choose your current shopping cart platform from the dropdown menu and provide the store’s URL address (if migrating from an open-source cart like Magento or WooCommerce) or the store’s API details (if migrating from a hosted solution like Shopify or BigCommerce). Then, specify OpenCart as your Target cart and enter the required store details (OpenCart admin URL, login, and password). Once done, click the Choose Entities button to proceed with your eCommerce data migration.

Setting up Source and Target carts for OpenCart data migration with Cart2Cart

Note: The access details are required to establish the connection between the stores automatically. The provided information is totally secure and protected according to the Cart2Cart Privacy Policy.

Step 2: Choose the Data to Migrate to OpenCart

Specify the entities and additional migration options you’d like to migrate to OpenCart. This includes products, customers, orders, categories, and more. Simply click on the respective checkboxes or click on the Select All option to migrate all the store data for your eCommerce data migration.

Selecting data migration options for OpenCart migration using Cart2Cart

Step 3: Perform Data Mapping for Seamless eCommerce Data Migration

Match order statuses and customer groups from your current shopping cart to the corresponding ones in your OpenCart store. This ensures that your data is correctly organized and accessible after the eCommerce data migration.

Mapping data fields during OpenCart data migration with Cart2Cart

Step 4: Launch Demo Migration to Test Your OpenCart Migration

Try out the demo migration to transfer a limited amount of data from your current store to OpenCart. This allows you to verify the accuracy and completeness of the eCommerce data migration before proceeding with the full migration.

Performing a demo migration to OpenCart with Cart2Cart

Step 5: Start Full Migration to OpenCart

Once you’re satisfied with the demo migration, simply activate the Start Full Migration button and get ready to have all the existing store data transferred to OpenCart in a fully automated manner. Cart2Cart will handle the entire eCommerce data migration process for you.

Ready to migrate your store to OpenCart? Start your free demo now and experience the ease of automated migration with Cart2Cart!

More info
How to Migrate to PrestaShop via the module?

How to Migrate to PrestaShop Using Cart2Cart: A Step-by-Step Guide

Are you looking to perform a seamless data migration to PrestaShop? Cart2Cart offers a streamlined solution for transferring your store data. The following instructions will guide you through the process of migrating to PrestaShop using the Cart2Cart service.

Note: These instructions apply to the latest versions of PrestaShop. Ensure your PrestaShop installation is up-to-date for optimal compatibility.

Step 1: Set Up Your Source and Target Carts for PrestaShop Data Migration

First, select your current shopping cart platform from the dropdown menu and provide your store's URL (for open-source carts) or API details (for hosted solutions). Next, specify PrestaShop as your Target cart and enter the required store details: PrestaShop admin URL, admin login, and admin password. Once completed, click the Choose Entities button.

Setting up Source and Target carts for PrestaShop data migration in Cart2Cart

Note: The access details are required to establish the connection between the stores automatically. The provided information is totally secure and protected according to the Cart2Cart Privacy Policy.

Step 2: Choose the Data Entities to Migrate to PrestaShop

Select the specific data entities and additional migration options you want to transfer to PrestaShop. Simply click the corresponding checkboxes or select the Select All option to migrate all store data.

Selecting data migration options for PrestaShop migration using Cart2Cart

Step 3: Perform Data Mapping for Your PrestaShop Migration

Map Order Statuses and Customer Groups from your current shopping cart to the corresponding ones in PrestaShop. This ensures that your data is migrated accurately according to the established relationships.

Mapping data for PrestaShop data migration with Cart2Cart

Step 4: Launch a Demo Migration to PrestaShop

Perform a demo migration to transfer a limited amount of data from your current store to PrestaShop. This allows you to preview the results of the migration before committing to the full process.

Launching demo migration for PrestaShop using Cart2Cart

Step 5: Start the Full Data Migration to PrestaShop

Activate the Start Full Migration button to begin transferring all your existing store data to PrestaShop in a fully automated manner.

Looking to migrate from PrestaShop to Shopify? Consider using this module.

Ready to migrate your store to PrestaShop? Start your free demo now!

More info
How to Migrate to WooCommerce via the module?

Considering a move to WooCommerce? Cart2Cart offers a streamlined solution for migrating your online store data. If you’re planning to replatform to WooCommerce with the help of the Cart2Cart service, the instructions below will guide you through the process:

How to Migrate to WooCommerce: A Step-by-Step Guide

Step 1: Set Up Your Source and Target Carts for WooCommerce Migration

First, choose your current shopping cart platform from the dropdown menu and provide the store’s URL address (if migrating from an open-source cart) or the store’s API details (if migrating from a hosted solution). Next, specify WooCommerce as your Target cart and enter the required store details: WooCommerce admin URL, admin login, and admin password. Once you've entered the information, click the Choose Entities button.

Setting up source and target carts for WooCommerce data migration

Note: These access details are required to establish an automated connection between the stores. The provided information is totally secure and protected according to the Cart2Cart Privacy Policy.

Step 2: Select the Data Entities for WooCommerce Migration

Decide which data entities you want to migrate to WooCommerce. You can select specific entities by clicking the corresponding checkboxes, or choose the Select All option to migrate all of your store data. Additionally, explore the additional migration options to enhance your WooCommerce migration.

Choosing data migration options for WooCommerce migration

Step 3: Perform Data Mapping for Accurate WooCommerce Migration

Match the Order Statuses and Customer Groups from your current shopping cart to the corresponding ones in your WooCommerce store. This data mapping ensures that your data migrates accurately and maintains its relationships in the new platform.

Mapping data fields for WooCommerce migration

Step 4: Launch a Demo Migration to WooCommerce

Take advantage of the demo migration to move a limited number of store entities from your current store to WooCommerce in just about 15 minutes. This allows you to preview the migration results and ensure everything looks correct before proceeding.

Launching a demo migration to WooCommerce

Step 5: Start the Full WooCommerce Data Migration

Once you're satisfied with the demo migration, activate the Start Full Migration button to launch the complete transfer of all your store data to WooCommerce in a fully automated manner.

Ready to migrate to WooCommerce? Start your free demo now or schedule a call with a migration expert to discuss your specific needs.

More info
How to Migrate to BigCommerce via the "Migration for BigCommerce" app?

Looking for a seamless data migration to BigCommerce? If you wish to replatform to BigCommerce using the "Migration for BigCommerce" app, the following instructions will guide you through the process. Start your free demo now and experience effortless data transfer!

Set Up Source and Target Carts for BigCommerce Data Migration

Begin by selecting your current platform from the list of supported carts on the Cart2Cart website. Provide the necessary store credentials: either your store's URL (for open-source carts) or API details (for hosted solutions). Next, click the "Install Plugin" button to add the "Migration for BigCommerce" app, enabling the connection with your BigCommerce store. Once installed, click the Choose Entities button to proceed.

Setting up source and target carts for data migration to BigCommerce

Note: These access details are essential for establishing an automated connection between your stores. Rest assured, the information you provide is securely protected in accordance with the Cart2Cart Privacy Policy.

Choose Data for Your BigCommerce Migration

Specify the store entities you want to import to BigCommerce. Select the corresponding checkboxes or activate the Select All option to migrate all your store data. Additionally, explore the additional migration options to enhance your BigCommerce data migration.

Choosing data migration options for BigCommerce migration

Map Data Fields During BigCommerce Migration

Match your current shopping cart's Order Statuses and Customer Groups to the corresponding ones in your BigCommerce store. This data mapping ensures accurate data transfer according to the relationships you define.

Performing data mapping during data migration to BigCommerce

Launch a Demo Migration to BigCommerce

Take advantage of the demo migration feature to transfer a limited number of store entities from your current store to BigCommerce. This process takes approximately 15-30 minutes and allows you to observe the Cart2Cart service in action and preview your BigCommerce store with migrated data.

Launching a demo data migration to BigCommerce

Start the Full Data Migration to BigCommerce

Once you're satisfied with the demo, activate the Start Full Migration button to initiate the complete data migration from your current store to BigCommerce in a fully automated manner. Begin your full migration today!

More info
How to Migrate Shopify via "Cart2Cart Store Migration App" app?

Looking for seamless Shopify data migration? If you want to relocate your Shopify store using the "Cart2Cart Store Migration App", this step-by-step guide will walk you through the process. Cart2Cart offers a streamlined solution for your Shopify data migration needs.

How to Perform Shopify Data Migration via "Cart2Cart Store Migration App" in 7 Steps

  1. Step 1: Source & Target Cart Setup for Shopify Data Migration

    In the migration wizard, specify your current shopping cart platform. Provide the store’s URL address (if migrating from an open-source cart) or the store’s API details (if migrating from a hosted solution). Then, choose Shopify as your target cart.

    Source cart setup for Shopify data migration

    Enter your Shopify store's URL and install the "Cart2Cart Store Migration App" by activating the corresponding button.

    Target cart setup for Shopify data migration

    Note: The access details are required to establish an automated connection between the stores. The provided information is secure and protected according to the Cart2Cart Privacy Policy.

  2. Step 2: Install the Cart2Cart Store Migration App for Shopify

    Install the "Cart2Cart Store Migration App" and proceed with the migration setup within your Shopify Admin Panel. After installation, you can proceed with the migration.

    Installing Cart2Cart app for Shopify data migration

  3. Step 3: Choose the Data to Migrate to Shopify

    Select the specific store data you’d like to transfer during your Shopify data migration. Click the respective checkboxes or use the Select All option to transfer all store data.

    Selecting data for Shopify data migration

  4. Step 4: Perform Data Mapping for Shopify

    Match Order Statuses and Customer Groups from your current shopping cart to the corresponding ones on your Shopify store. Data will migrate according to these established relationships, ensuring accurate Shopify data migration.

    Data mapping during Shopify data migration

  5. Step 5: Select Additional Options for Your Shopify Data Migration

    Choose additional options that best suit your specific migration needs. These options can customize your Shopify data migration for optimal results.

    Selecting additional options for Shopify data migration

  6. Step 6: Launch a Demo Migration to Shopify

    Test the service by launching a demo migration. This allows you to transfer a limited amount of data to your Shopify store and preview how your store entities will appear on the new platform. This is a crucial step in ensuring a successful Shopify data migration.

    Demo migration for Shopify data migration

  7. Step 7: Start Full Shopify Data Migration

    Activate the Start Full Migration button to migrate all your current store data to Shopify in a fully automated manner. Get ready to launch your store on Shopify!

    Starting full Shopify data migration

Ready to start your Shopify data migration? Start your free demo now!

More info
Does the service preserve all IDs during the migration to Shopware?

Does Cart2Cart Preserve IDs During Shopware Data Migration?

Yes, Cart2Cart offers options to preserve IDs during data migration to Shopware. Preserving IDs can be beneficial for maintaining SEO rankings and ensuring continuity for your customers.

Preserving Customer and Order IDs in Shopware

The options for Preserving the IDs for customers and orders are available for all Shopware versions. This ensures that your customer accounts and order history remain consistent after the data migration, which is crucial for customer satisfaction and operational efficiency.

Product ID Preservation Limitations in Shopware

Important: The option to Preserve the IDs for products is not available in Shopware versions 6 and above (e.g., 6.0.0, 6.2.0, and later). This is due to changes in the Shopware architecture. If you are planning a Shopware data migration, consider this limitation.

Shopware data migration - Preserve IDs options

When migrating to Shopware, Cart2Cart provides a comprehensive solution for transferring your store's data efficiently and securely. While product ID preservation might have limitations in newer Shopware versions, other data like categories, customers, orders, and product attributes are migrated seamlessly.

Ready to migrate your store to Shopware? Start your free demo now and see how Cart2Cart can simplify your Shopware data migration!

More info
Why weren’t my Volusion customers migrated to WooCommerce?

Why weren’t my Volusion customers migrated to WooCommerce?

During a Volusion to WooCommerce migration using Cart2Cart, only customers with the "Customer" status are migrated by default. This status is indicated by the "C" symbol in the "accesskey" file exported from your Volusion store. Users with other statuses, such as "Admin" or "Wholesale," are not included in the standard migration process.

This limitation is due to the structure of the data provided by Volusion's export files. Cart2Cart's automated migration tool is designed to work with the standard Volusion export format, which designates customer status via the accesskey file.

Volusion customer access key file showing customer status for data migration

Troubleshooting Missing Customers in WooCommerce After Volusion Migration

If you find that some of your customers are missing after migrating from Volusion to WooCommerce, verify the accesskey file you exported from Volusion. Ensure that the missing customers have the "C" status. If they have a different status, they were not migrated during the default process.

Possible Solutions:

  • Custom Migration: Contact Cart2Cart's support team via Live Chat to discuss a custom migration. This may involve extracting customer data with different statuses and importing it into WooCommerce.
  • Manual Import: Manually export customer data from Volusion (if possible) and import it into WooCommerce using a CSV import plugin.

Need Help with Your Data Migration?

Migrating your online store can be complex, but Cart2Cart simplifies the process. If you're facing challenges migrating your Volusion customers to WooCommerce or any other platform, we're here to help. Cart2Cart supports a wide range of platforms, including WooCommerce, Shopify, Magento, and many more.

Next Steps:

More info
How to deal with the IP blocking

Understanding Cart2Cart's Connection Bridge for Seamless Data Migration

Store migration with Cart2Cart involves securely transferring data entities between your Source and Target platforms' databases. Since our automated tool doesn't directly interact with these carts, a Connection Bridge is crucial to establish a secure connection. This ensures a smooth and reliable data migration process.

The Connection Bridge acts as a secure gateway, enabling Cart2Cart to access and transfer data. It's essentially a file that links to your database, executing requests to delete, import, or retrieve data. Cart2Cart interacts with these Bridges, instructing them on how to manipulate the data. Therefore, these Bridges must remain active throughout the entire store migration process to facilitate a complete and accurate data transfer.

To execute a bridge request (instructions for data manipulation), we use regular HTTP queries. The request ports depend on the protocol (HTTP or HTTPS) used by your source and target carts, typically ports 80 and 443, respectively. Most requests utilize the HTTP POST method, which is more secure than the GET method and allows for sending and receiving larger volumes of data, optimizing the data migration process.

The frequency of Bridge usage depends on the speed of the Internet connection with your store and the complexity of the request. More complex requests require more processing time, leading to longer wait times for responses. Cart2Cart's system is designed to handle these variations to ensure a robust and reliable data migration.

Common Causes of Hosting Blocking During Data Migration

The most common reason for hosting blocking is an excessive number of requests per time unit from a single PC (IP address). Blocking can also occur due to the use of the HTTP POST method, as browsers typically use the GET method for standard web surfing. Occasionally, hosting providers may block all requests sent to the same address – i.e., the Bridge (bridge2cart/bridge.php).

How Cart2Cart Mitigates Hosting Blocking Issues During Data Migration

Cart2Cart employs several strategies to deal with hosting blocking:

  • Making requests from a different IP address.
  • Using a network of servers to distribute the load and avoid triggering security measures.
  • Implementing sophisticated request throttling mechanisms to stay within hosting providers' limits.

Troubleshooting: How to Unblock Migration Requests

If you encounter hosting blocking during your data migration, here are some steps you can take to resolve the issue:

  • Allow more requests to the server per time unit.
  • Ensure your store is accessible in all countries (check for IP address blocking).
  • Permit additional inbound/outbound Internet traffic.
  • Remove restrictions on database request execution and the number of connections.
  • Contact your hosting provider to whitelist Cart2Cart's IP addresses (you can obtain these from our support team).

Need help with your data migration? Explore Cart2Cart's platform migration services or schedule a call with our migration experts for personalized assistance.

Ready to start your data migration? Start your free demo today and experience the ease of seamless data transfer!

More info
How long is Cart2Cart accountable for the migration results?

How Long is Cart2Cart Accountable for Data Migration Results?

Cart2Cart is committed to providing accurate and reliable data migration services. To ensure your satisfaction, we offer a 30-day accountability period following the completion of your Full Migration.

This means that Cart2Cart accepts complaints concerning the accuracy of the transferred data only for 30 days upon the Full Migration completion. This timeframe allows you to thoroughly verify that all your data has been migrated correctly and that no critical information is missing or corrupted. After this period, we won’t be liable for any changes (e.g., database modifications, data deletion, corruption, loss, etc.) that may distort the data migration results. It's crucial to inspect your newly migrated store immediately after the process to ensure data integrity.

During this 30-day period, please carefully review your new store and compare it to your source store. Pay close attention to:

  • Product details (names, descriptions, prices, images)
  • Customer information (names, addresses, order history)
  • Order data (order status, payment information, shipping details)
  • Category structure
  • Other relevant data specific to your business

If you identify any discrepancies or issues with your data migration within the 30-day accountability period, please contact our support team immediately. We will investigate the issue and take corrective action to resolve it. You can reach us via Live Chat, email, or phone.

After the 30-day period, we assume that the migrated data is accurate and complete. Any changes made to your new store after the migration, such as manual data entry, database modifications, or third-party app installations, are your responsibility. These changes could potentially affect the integrity of the migrated data, and Cart2Cart will not be liable for any issues arising from such modifications.

To learn more about Cart2Cart's data migration services and how we ensure data accuracy, please visit our website.

Ready to migrate your store? Start your free demo now!

More info
What if I can't find my cart in the list of supported carts.

Troubleshooting Shopify Product Visibility During Data Migration

Shopify merchants leverage various sales channels to reach their customers. These channels can sometimes lead to confusion during a data migration, specifically regarding product visibility.

During the migration process with Cart2Cart, our app requires access to your Shopify storefront. When you grant this access by checking the Allow this app to access data from your storefront checkbox, Shopify may interpret the app as a separate sales channel. As a result, Shopify might temporarily hide your products from this "new" channel.

Rest assured, this doesn't affect your Shopify data migration in any way. Your products remain visible to your customers on your active sales channels. To resolve this perceived visibility issue within the Cart2Cart app, simply uncheck the Allow this app to access data from your storefront checkbox and then re-check it. This will refresh the connection and ensure product visibility within the app.

Shopify sales channel visibility settings during data migration with Cart2Cart

What if I can't find my cart in the list of supported carts?

Cart2Cart supports a wide range of shopping carts for data migration. However, if you cannot find your specific cart platform listed, there are a few options:

  • Check for alternative names: Sometimes, a platform may be listed under a slightly different name or an older version name.
  • Request custom migration: Cart2Cart offers custom migration services for platforms not officially supported. Contact our support team to discuss your specific needs.
  • Consider a CSV migration: If your platform allows exporting data to a CSV file, you may be able to migrate data using the CSV import/export feature of your target platform. Cart2Cart can assist with this process.

Ready to experience a seamless data migration? Start your free demo now!

More info
What does the error “Drupal Commerce CSV file got corrupted” mean?

Troubleshooting: "Drupal Commerce CSV file got corrupted" Error During Data Migration

Encountering a "Drupal Commerce CSV file got corrupted" error during your eCommerce data migration with Cart2Cart? This usually indicates a problem with the structure or content of your CSV files. To ensure successful upload of your Drupal Commerce files into the migration wizard, carefully check the following:

  • Empty First Line: Ensure the first line of your CSV file is not empty. The first line should contain the header row with column names.
  • Column Consistency: Verify that the number of columns in the header row matches the number of columns in each subsequent data row. Discrepancies will cause parsing errors.
  • Data Integrity: Confirm that the data within each column corresponds correctly to its header. For example, the 'category' column should only contain category names, not product weights or other unrelated information.
  • Character Encoding: Save your CSV file with UTF-8 encoding to avoid issues with special characters.

Additionally, for optimal data recognition and accurate migration, rename your column names to standard English equivalents. This helps the Cart2Cart system correctly interpret and map your data fields. Here’s an example of a valid CSV template for Drupal Commerce data migration:

Example of a valid Drupal Commerce CSV file for data migration - Part 1 Example of a valid Drupal Commerce CSV file for data migration - Part 2

If you're still facing issues with your Drupal Commerce data migration, don't hesitate to contact Cart2Cart support for assistance. You can also Schedule a Call with Migration Expert to discuss your specific migration needs. Alternatively, start your free demo now to see Cart2Cart in action.

More info
Why my products' thumbnails haven’t been migrated to Shopware?

Why Are My Product Thumbnails Not Migrated to Shopware During Data Migration?

During a data migration to Shopware, product thumbnails are not automatically migrated by default. This is due to how Shopware handles image generation. Instead, you need to generate them within your Shopware store after the migration is complete.

For older versions of Shopware, like Shopware 5, you can generate thumbnails using the Thumbnail Generator. This tool allows you to create thumbnails from your original product images in configurable sizes.

Shopware 5 thumbnail generation

In Shopware 6 and later, you can find the Thumbnail Settings in your admin panel. Simply activate the thumbnail generation for the desired products.

Shopware 6 thumbnail settings for data migration

Ensure your product images are properly displayed by generating the thumbnails after your data migration to Shopware is complete.

Ready to migrate to Shopware? Start your free demo today!

More info
How to display metafields in Shopify store?

There are a few options to make metafields visible in your Shopify store after performing a data migration to Shopify with Cart2Cart:

How to Display Metafields in Shopify After Data Migration (4 Steps)

If you have experience with Liquid (Shopify’s template language), you can configure your theme to display metafields. If your theme doesn't support metafields, follow these steps to edit your Shopify theme code:

  1. Find Your Theme's Code in Shopify Admin

    Go to Shopify Admin → Online Store → Themes → Actions → Edit Code.

    Accessing Shopify theme code editor for data migration

  2. Locate product.liquid

    The product.liquid file controls the layout of your product pages.

    Locating product.liquid file for Shopify data migration

  3. Add Code to Display Your Metafield

    Add the following code to display the metafield you created:

    • Material: {{ product.metafields.specs.material }}

    If it's a Variant Metafield, use:

    • Material: {{ current_variant.metafields.specs.material }}

    Adding code to display metafields after Shopify data migration

  4. Save and Check Your Store

    Checking product page after Shopify data migration

Alternatively, use the Metafields Guru app. Copy the necessary code, paste it into the product.liquid file, and the metafield will display where you want it. You can also create, update, and delete metafields for products, collections, customers, and more directly from the Shopify admin after your Cart2Cart migration.

Metafields Guru app for Shopify data migration

More info
Why wasn’t the price and quantity of my Etsy store product variants migrated to my current store?

Why Wasn’t the Price and Quantity of My Etsy Store Product Variants Migrated to My Current Store?

Due to the technical peculiarities of Etsy, it is impossible to export the price and quantity of product variants directly during a data migration. This limitation stems from how Etsy structures its product data. The price and quantity information is inherently tied to the parent product listing, not the individual variant. Therefore, during a data migration, only the price and quantity of the parent product can be extracted.

If migrating from Etsy is important to you, Cart2Cart offers a solution. While direct migration of variant pricing and inventory is unavailable, our service can migrate the core product data, including descriptions and images. You can then manually update the price and quantity for each variant within your new store after the migration is complete. This ensures all your product information is accurately represented.

Next Steps:

More info
How will the order statuses of my current store be migrated to Shopify?

How are Order Statuses Migrated to Shopify During Data Migration?

Due to Shopify's platform structure, you cannot create custom order statuses. However, during your data migration to Shopify with Cart2Cart, you can map the order statuses from your current store to the corresponding payment and fulfillment statuses available within Shopify.

Cart2Cart offers a flexible mapping feature to align your source store's order statuses with Shopify's existing options, ensuring a smooth transition of your order data. This is a crucial aspect of ensuring accurate records after your data migration.

The following payment statuses can be transferred by Cart2Cart: pending, authorized, partially_paid, paid, partially_refunded, refunded, voided. The fulfillment status can be migrated as partially fulfilled or unfulfilled.

By carefully mapping your order statuses, you can maintain data consistency and easily manage your orders within your new Shopify store. Data migration with Cart2Cart ensures that this process is as seamless and efficient as possible.

Next Steps for Shopify Data Migration

Ready to migrate your store to Shopify? Start your free demo now and see how Cart2Cart can simplify your data migration. If you have any questions, contact our support team via live chat or schedule a call with a Migration Expert.

More info
Is it safe to provide your company with my access details?

Is it Safe to Provide My Store Access Details for Data Migration?

Yes, absolutely. At Cart2Cart, we understand your concerns about data security. We treat your store access details with the utmost confidentiality and security. We do not transfer your access details anywhere and use them exclusively for researching the migration process and resolving any potential issues during your data migration.

To further enhance your data security during the migration process, we strongly recommend the following two security measures:

  1. Restrict Access by IP Address: Create temporary access with restrictions based on IP addresses. Please whitelist the following IP addresses to grant our system access:
    • 5.58.76.130
    • 116.202.82.183
    • 154.38.131.10
    • 23.19.115.248
    • 23.19.116.221
    • 31.186.34.167
    • 188.116.5.34
    • 154.30.33.133
    • 31.186.37.115
    • 154.3.253.49
    • 168.81.41.61
    • 168.81.16.90
    • 154.13.147.141
    • 86.125.93.44
    • 5.101.148.187

  2. Revoke Access After Migration: Once your data migration is complete and you've verified the results, immediately delete or revoke the granted access.

By following these steps, you can be confident that your store data is protected throughout the entire data migration process.

Ready to migrate your store? Start your free demo now!

More info
Why are my Shopware orders not visible after migration?

Shopware Orders Not Visible After Migration? Clear Your Cache!

If your Shopware orders grid appears empty after completing your data migration to Shopware, the most common reason is cached platform data. Shopware, like many e-commerce platforms, uses caching to improve performance, but sometimes this cache needs to be cleared to reflect recent changes, such as your migrated orders.

We recommend clearing your Shopware cache files. You can do this by navigating to Settings -> System -> Caches & Indexes within your Shopware administration panel.

Shopware orders grid empty after data migration Clearing Shopware cache after data migration

Clearing the cache will force Shopware to rebuild its indexes and display the correct order information. This simple step usually resolves the issue of missing orders after a data migration.

Still having trouble with your Shopware data migration? Contact our support team for assistance or start your free demo now!

More info
Where can I find API access details when migrating to Visualsoft?

Where can I find API access details when migrating to Visualsoft?

When performing a data migration to Visualsoft, you'll need specific API (Application Programming Interface) access details to allow Cart2Cart to securely connect to your Visualsoft store and transfer your data. These details are crucial for a successful and seamless migration process.

When migrating to Visualsoft, you need the following API access details:

  • API Client ID
  • Username
  • Password

Unfortunately, these API access details aren't readily available within the Visualsoft admin panel. The most efficient way to obtain them for your Visualsoft data migration is to contact Visualsoft Support directly. Explain that you require the API credentials for a third-party data migration service like Cart2Cart. They will be able to provide you with the necessary information.

Need help with your Visualsoft data migration? Schedule a Call with a Migration Expert to discuss your specific requirements and ensure a smooth transition.

Ready to begin? Start your free demo now and experience the ease of migrating your data to Visualsoft with Cart2Cart!

More info
When should I install the theme on my Target store - before or after migration?

When Should I Install the Theme on My Target Store?

It's up to you whether you install the theme before or after the data migration. However, we strongly recommend completing the data migration first.

Migrating your data first allows you to set up and design your new store with real data, ensuring the theme fits seamlessly and accurately reflects your product catalog and customer information. This approach provides a more informed and efficient design process.

More info
Does Cart2Cart support migration to WooCommerce multistore?

WooCommerce Multistore Data Migration with Cart2Cart: Is it Possible?

No, automated data migration to WooCommerce multistore setups is not possible by default with Cart2Cart's standard self-service tool.

This limitation stems from the unique architecture of WordPress multisite installations. While these setups share a common database for users, each individual store within the network maintains separate tables with distinct prefixes.

In essence, a WordPress multisite is a collection of independent WordPress sites linked by a shared user database table.

Why Automated WooCommerce Multistore Data Migration Isn't Available

Cart2Cart doesn't currently possess the specialized software required to handle this complex migration scenario. Developing such a solution would necessitate significant time and resource investment.

Given the relatively limited demand for migrations specifically targeting multistore environments, we typically handle these projects as custom migrations on a case-by-case basis.

Custom WooCommerce Multistore Data Migration Services

Migrating data to a multistore environment involves in-depth analysis and requires access to your store's credentials. Therefore, this type of migration is exclusively offered through our Service Packages. Our experts can tailor a solution to meet your specific needs and ensure a seamless data migration process.

Next Steps

To explore your options for WooCommerce multistore data migration and receive personalized guidance, please schedule a consultation with our migration experts. We'll be happy to discuss your requirements and provide a customized solution.

More info
Why does Cart2Cart migrate images with 777 rights?

Why Does Cart2Cart Assign 777 Permissions During Data Migration?

During the data migration process, Cart2Cart creates a directory structure on your target store to house all the images imported from your source platform. According to the target cart's requirements, these directories, as well as the images themselves, are initially assigned 777 permissions (read, write, and execute for all users). This ensures that the image migration process is successful, regardless of server configurations.

While these permissions are necessary for the migration, it's important to understand the security implications. After the data migration is complete, you can and should change the permissions for these directories and files to a more restrictive setting that suits your security needs. Consult with your hosting provider or a security expert for guidance on the most appropriate permissions for your specific environment.

Need help with your data migration? Contact our support team via Live Chat for assistance.

More info
How should I set up my Squarespace account before migration?

How should I set up my Squarespace account before migration?

To ensure a smooth and successful eCommerce data migration from Squarespace, it's essential to configure your account correctly before initiating the process with Cart2Cart. Specifically, you need to disable Two-Factor Authentication.

Disabling Two-Factor Authentication in Squarespace

Here's how to disable Two-Factor Authentication:

  1. Log in to your Squarespace account.
  2. Navigate to your Account settings.
  3. Click the Account & Security tab.
  4. Change your login provider to Email & Password.
  5. Log in via your email and password (not a social media account).
  6. Return to the Account & Security tab.
  7. Turn Two-Factor Authentication off.

By disabling Two-Factor Authentication, you'll enable Cart2Cart to automatically access and migrate your Squarespace store data to your new platform.

Squarespace Two-Factor Authentication settings for data migration

Once you've disabled Two-Factor Authentication, you're ready to begin your eCommerce data migration with Cart2Cart. Start your free demo now!

More info
How to enable multiple languages on your Shopify store?

How to Enable Multiple Languages on Your Shopify Store for Data Migration

Note: It's crucial to configure multiple languages in your Shopify store before initiating the data migration process with Cart2Cart. This ensures that the language settings are correctly set up before any data is transferred. While Cart2Cart automates most of the migration, this initial setup is essential for proper multilingual functionality.

Steps to Add Languages in Shopify Before Data Migration

1. In your Shopify admin, navigate to Settings -> Languages and click the Add language button.

Adding languages in Shopify settings for data migration

2. Choose the required language and click the Add button.

Selecting language to add in Shopify for data migration

3. Once done, go to the section and activate the chosen language by hitting the Publish button.

Publishing added language in Shopify for data migration

Note: Shopify allows adding up to 5 languages, and Shopify Plus - up to 20.

4. Go to the Shopify App Store and install one of the available translation apps (e.g., Translate My Currency and Store).

Installing translation app from Shopify App Store for data migration

5. Use the app to translate and publish your store’s content.

Note: Due to Shopify's platform peculiarities, Cart2Cart doesn't directly migrate multiple languages to this eCommerce solution. The translation and publication of your store's content must be handled through a Shopify translation app after the data migration.

Ready to migrate your store to Shopify? Start your free demo now!

More info
Is carrier migration available for PrestaShop?

PrestaShop Carrier Migration: Can Cart2Cart Help?

Yes, Cart2Cart fully supports automated carrier migration, but currently only between PrestaShop stores. This feature streamlines your PrestaShop to PrestaShop migration process, ensuring a seamless transition of your shipping configurations.

To migrate your carriers, simply select the "Carriers" entity within the Migration Wizard during the configuration stage. Cart2Cart will then automatically transfer your carrier data from your current PrestaShop store to your new PrestaShop platform.

PrestaShop to PrestaShop carrier migration with Cart2Cart

This automated process saves you valuable time and effort, eliminating the need for manual data entry and reducing the risk of errors. With Cart2Cart, migrating your PrestaShop carriers is quick, easy, and reliable.

Benefits of Migrating PrestaShop Carriers with Cart2Cart:

  • Automated Migration: Eliminates manual data entry and reduces errors.
  • Seamless Transition: Ensures your shipping configurations are accurately transferred.
  • Time-Saving: Streamlines the migration process, saving you valuable time.
  • Reliable Results: Guarantees accurate and reliable transfer of your carrier data.

Ready to migrate your PrestaShop store? Learn more about PrestaShop migration with Cart2Cart or start your free demo today!

More info
How to set up integration with Shopware?

Setting Up Shopware Integration for Data Migration

To perform a successful Shopware data migration with Cart2Cart, you'll first need to configure an integration within your Shopware store. This integration allows Cart2Cart to securely access and transfer your data. Here's how to set it up:

How to Create a Shopware Integration for Data Migration

To create a new integration for data transfer in Shopware, navigate to Settings → System → Integrations within your Shopware administration panel.

Shopware integration settings for data migration

Click the Add integration button. In the configuration window, type in the Name of the integration (e.g., "Cart2Cart Migration"). Assign the Administrator permissions to it. This is crucial for Cart2Cart to access all necessary data for a complete Shopware data migration. Then, press the Save integration button.

Adding Shopware integration for data migration

After saving, you'll receive an access ID and a security key for your integration. Important: Note that the security key is displayed only once due to security concerns. Store it in a safe place as you'll need it to configure the connection in Cart2Cart.

Once you have the Access ID and Security Key, you can use them within the Cart2Cart migration wizard to establish a secure connection to your Shopware store and begin your data migration process.

Ready to migrate your data to or from Shopware? Start your free demo now!

More info
Why do I get the “Invalid credentials” error at the 1st step of the Migration Wizard?

Why do I get the “Invalid credentials” error during data migration with the Migration Wizard?

An "Invalid credentials" error during the data migration setup with the Migration Wizard typically indicates that the provided credentials (store URL, admin email, and admin password) do not match the target store's actual credentials. This prevents the Wizard from accessing the store and performing the data migration.

Troubleshooting Invalid Credentials for WiziShop Data Migration

If you are encountering this error while migrating to WiziShop, follow these steps to ensure you have the correct credentials:

Step 1: Create a Dedicated User with Admin Rights in WiziShop

For a seamless data migration, create a dedicated user account within your WiziShop admin panel specifically for the Migration Wizard. This ensures the tool has the necessary permissions without compromising your primary admin account.

In your WiziShop admin panel, navigate to Manage users -> Add user.

WiziShop: Manage users - data-lazy-src=
More info
How to cancel a 2-step verification for my GoDaddy store?

How to Cancel Two-Step Verification (2-SV) for Your GoDaddy Store

If you're looking to simplify access to your GoDaddy store or preparing for a data migration, you might need to disable Two-Step Verification (2-SV). Here's how to do it:

Steps to Disable GoDaddy Two-Step Verification

To cancel 2-SV for your current GoDaddy store, follow these instructions. Keep in mind that disabling 2-SV might make your account less secure, so ensure you have other robust security measures in place. If you are planning to migrate your store's data to another platform, disabling 2-SV can simplify the data migration process. Many users choose data migration when they want to move their online store to a more robust or feature-rich platform.

  1. Navigate to your GoDaddy Login & PIN page. You'll need to enter the code from your phone or authenticator app, or insert your security key to proceed.
  2. Under 2-Step Verification, select Edit. This will allow you to modify your current 2-SV settings.
  3. Specify the authentication method you want to remove and activate the Delete button. For example, if you're using an authenticator app, you'll need to select that method for removal.
  4. Select Remove. A success message will appear, confirming that your 2-SV has been turned off immediately.

If you encounter any issues while cancelling 2-SV, please contact the GoDaddy Support Team for direct assistance. They can provide specific guidance based on your account setup.

Considering a Platform Change?

If you're disabling 2-SV as part of a larger plan to migrate your online store, consider using Cart2Cart for a seamless data migration experience. Cart2Cart simplifies the process of moving your products, customers, orders, and other critical data between e-commerce platforms.

Ready to explore your data migration options? Start your free demo today!

More info
Does Cart2Cart support product reviews migration?

Can Cart2Cart Migrate Product Reviews?

Yes, the Cart2Cart migration service offers the capability to transfer product reviews during your store migration. Specifically, when migrating from Shopify to WooCommerce, you'll need to install the Air Product Reviews App & UGC on your Shopify store before initiating the migration process to ensure the reviews are accessible for transfer.

Cart2Cart streamlines the often complex process of eCommerce data migration, ensuring a smooth transition of your valuable data, including product reviews, to your new platform. Migrate your store with Cart2Cart and provide your customers with the same experience they are used to!

Next Steps:

More info
What is a root folder and where can I find it?

What is a Root Folder and Where Can I Find it for Data Migration?

The root folder, also called the root directory, is the "highest" directory in the hierarchy of file systems. It contains your store's source code and all other essential files. When performing a data migration with Cart2Cart, you need to upload our connection bridge to your store's root folder to establish a secure connection.

Typically, your store's root folder is located within the "home" folder of your server. However, if you're having trouble locating it, you can try using the path "/sub_folder/site_root_folder" to directly access the root directory. If you are still unsure, please contact your hosting provider for assistance.

Examples of Root Folder Locations for Popular Platforms

Here are some examples of where the root folder might be located for popular e-commerce platforms. These examples can assist you in finding the correct directory for your data migration.

For example, this Magento store is located in the "platforms/magento" folder:

Magento root folder location for data migration

WooCommerce and other WordPress Plugins

WooCommerce root folder location for data migration

Magento

Magento root folder example for data migration

OpenCart

OpenCart root folder example for data migration

PrestaShop

PrestaShop root folder example for data migration

Shopware

Shopware root folder example for data migration

Once you've located your root folder, you're ready to proceed with connecting your store to Cart2Cart for a seamless data migration.

Ready to migrate your store? Start your free demo now!

More info
How to get an Access Key for migration to PrestaShop Cloud?

How to Get Your PrestaShop Cloud API Access Key for Data Migration

To migrate your data to another platform using Cart2Cart, you'll need an API Access Key from your PrestaShop Cloud store. Here's how to retrieve it:

Steps to Obtain Your PrestaShop Cloud API Access Key:

1. From the PrestaShop Cloud admin panel, navigate to Advanced Parameters and select Webservice. You can find Advanced Parameters on the left-hand side menu of your PrestaShop Cloud admin panel.

2. Once you’ve enabled your PrestaShop API, click on the "+" icon to add a new webservice key.

3. Generate the API key by clicking the Generate! button. Then, set the permissions for all the entities that Cart2Cart needs to access for a complete data migration. Make sure to grant full access (view, add, edit, delete) to entities like Categories, Products, Customers, Orders, and CMS pages. Finally, click the Save button.

4. Next, go to Shop Parameters and click Traffic & SEO (or, depending on your PrestaShop version, it may be labeled SEO & URLs). Enable the Friendly URL option. This ensures that your URLs are properly formatted for the migration.

Note: If you encounter any issues during this process, don't hesitate to contact our support team for assistance.

Ready to migrate your store? Start your free demo now!

More info
Who can become a Cart2Cart partner?

Who Can Become a Cart2Cart Partner?

The Cart2Cart Partner Program is designed for web development and marketing agencies, individual developers, and freelancers looking to enhance their service offerings by providing seamless data migration solutions to their clients. As a Cart2Cart partner, you'll gain access to a range of benefits, including:

  • Recurring Revenue: Earn commissions on every migration you facilitate.
  • Dedicated Support: Receive priority support from our expert team.
  • Marketing Resources: Access co-branded marketing materials to promote your services.
  • Technical Training: Get comprehensive training on how to use the Cart2Cart platform effectively.

The program is ideal for those who:

  • Build and maintain e-commerce websites.
  • Offer digital marketing services to online businesses.
  • Provide consulting services for e-commerce platform selection.
  • Are looking for a reliable and efficient data migration solution to offer their clients.

By partnering with Cart2Cart, you can expand your service portfolio, attract new clients, and increase your revenue stream. Learn more and become a Cart2Cart partner today!

More info
How do I keep track of my referrals and my earnings on them?

How do I track my referrals and earnings on Cart2Cart?

You can track your sign-ups and the earned commission in your affiliate account.

To monitor your performance as a Cart2Cart affiliate and gain insights into your referrals and earnings from eCommerce data migration, follow these steps:

  1. Access your Affiliate Dashboard: Log in to your dedicated Cart2Cart affiliate account. If you don't have one, you can easily sign up here.
  2. Navigate to the Reporting Section: Within your dashboard, locate the "Reports" or "Statistics" section. The exact name may vary slightly depending on the affiliate platform interface.
  3. Track Key Metrics: Here, you'll find a comprehensive overview of your affiliate activity, including:
    • Referral Sign-ups: The number of users who signed up for Cart2Cart through your unique affiliate link.
    • Completed Migrations: The number of successful data migrations initiated by your referrals.
    • Earned Commission: The total commission you've earned based on the completed migrations of your referrals.
    • Click-Through Rates (CTR): The percentage of users who clicked on your affiliate link.
  4. Analyze Performance and Optimize: Use the data provided to analyze your most effective promotional strategies. Experiment with different approaches to attract more referrals and increase your earnings.

By regularly monitoring your affiliate dashboard, you can effectively track your progress, identify areas for improvement, and maximize your earning potential with Cart2Cart.

Ready to start earning? Join the Cart2Cart Affiliate Program today!

More info
How to migrate reviews from Shopify?

How to Migrate Reviews from Shopify using Cart2Cart

Migrating your customer reviews from Shopify is crucial for maintaining trust and credibility in your new store. Here’s how to seamlessly transfer your Shopify reviews using Cart2Cart, the automated data migration service:

1. Start by accessing the Cart2Cart Migration Wizard and filling in the required fields, such as your Source Store URL and Admin API access token. Ensure the information you provide is accurate to facilitate a smooth and successful data migration.

Cart2Cart Migration Wizard setup for Shopify data migration

2. On the Choose entities step of the Migration Wizard, select "Reviews". If you haven’t installed the Product Reviews plugin yet, install it now.

Selecting Reviews entity in Cart2Cart for Shopify data migration

3. Click the “Add App” button to install the Product Reviews plugin.

Installing Product Reviews plugin for Shopify data migration

4. Once installed, navigate to the APP menu item, and choose “Product Reviews → Export” to export your reviews.

Exporting Shopify Product Reviews for data migration

5. Upload the exported CSV file to the Cart2Cart Migration Wizard.

Uploading Shopify review CSV file to Cart2Cart for data migration

Ready to migrate your Shopify store and all its valuable data? Start your free demo now!

Need personalized assistance with your data migration? Schedule a call with a Cart2Cart migration expert today.

More info
Why the order total price in my new Shopify store differs after the import?

Why Does the Order Total Price Differ in My New Shopify Store After Data Migration?

In Shopify, the order subtotal and order total are calculated automatically by the platform. Because different e-commerce platforms employ various calculation methods for taxes, discounts, and shipping, slight discrepancies of a few cents may appear after the import, especially when dealing with orders containing numerous products. When migrating your store using a data migration service like Cart2Cart, we transfer your order data accurately, but the final calculation is always determined by Shopify's internal algorithms.

To ensure accuracy, you can review Shopify's tax settings, discount codes, and shipping configurations after the migration to align them with your previous platform's settings.

Data migration process to Shopify using Cart2Cart

Troubleshooting Order Total Discrepancies After Migration

If you encounter significant differences in order totals after migrating to Shopify, consider the following:

  • Tax Settings: Verify that your tax rates and settings in Shopify match those of your previous platform.
  • Discount Codes: Ensure that any discount codes are correctly configured and applied in Shopify.
  • Shipping Costs: Review your shipping rates and methods to ensure they are consistent with your previous setup.
  • Currency Conversion: If applicable, confirm that currency conversion rates are accurate and up-to-date.

If you're still experiencing issues, contact our support team via Live Chat for assistance. We can help you identify and resolve any discrepancies in your order totals.

Next Steps: Ready to migrate your store to Shopify? Start your free demo now! You can also Schedule a Call with our Migration Expert to discuss your specific requirements.

More info
I've got my BigCommerce categories structure broken after migration. Why did it happen?

BigCommerce Category Structure Issues After Migration: Why Did It Happen?

It's possible that your original store had a category structure exceeding BigCommerce's limitations. BigCommerce has a category depth limit of 8 levels. Therefore, if your source store contained categories nested deeper than 8 levels, Cart2Cart will automatically adjust these categories, placing any categories beyond the 8th level as root categories during the data migration process to ensure data integrity and compatibility with the BigCommerce platform.

To avoid this situation, carefully review your category structure before migration and restructure any categories exceeding the 8-level limit. Alternatively, consider adjusting your category structure after the migration within your BigCommerce admin panel.

Need help planning your data migration? Schedule a call with a Migration Expert to discuss your specific needs.

More info
Why did a large amount of 302-type & 307-type redirects appeared on my new WooCommerce store after migration?

Why did a large amount of 302-type & 307-type redirects appeared on my new WooCommerce store after data migration?

If there are lots of products and redirects on the Source store that need to be transferred to the WooCommerce platforms, Cart2Cart transfers 301 redirects as 301 redirects, and 302 redirects as 307 redirects. In this way, Cart2Cart ensures the URLs of your new WooCommerce store match those of your previous store, minimizing disruption to your SEO and user experience during the data migration process.

Specifically, during WooCommerce data migration, Cart2Cart carefully handles different types of redirects. A 301 redirect indicates a permanent move, while a 302 redirect signifies a temporary one. Because WooCommerce treats temporary redirects as 307 redirects, Cart2Cart converts 302 redirects from your source store to 307 redirects in WooCommerce. This ensures the intended behavior of your redirects is preserved after the migration.

To ensure data migration accuracy, Cart2Cart offers the service of transferring redirects during the migration process. If you have a large number of 302 redirects set up on your source store, these will be migrated as 307 redirects to your new WooCommerce store, maintaining the temporary redirect behavior. This is crucial for preserving SEO value and user experience.

Next Steps:

More info
I have two Cart2Cart accounts and want to transfer migrations from one account to another. How can I do that?

Transferring Migrations Between Cart2Cart Accounts

It isn't currently possible to directly merge separate Cart2Cart accounts. However, if you need to transfer previous eCommerce data migrations from one account to another, the most efficient way is to contact our Support Manager. They can arrange for a Cart2Cart administrator to securely transfer your migration setup and history. This ensures a smooth transition and avoids the need to recreate your migration from scratch.

Next Steps: To initiate the transfer, contact our Support team with details of both Cart2Cart accounts involved. They will guide you through the necessary steps.

More info
How to take a screenshot when reporting an error?

How to Take a Screenshot for Effective Data Migration Support

When reporting a problem to the Cart2Cart Technical Engineer during your data migration, providing clear and informative screenshots is crucial for a swift resolution. Your screenshots should meet the following criteria:

    • Make sure to capture a full-page screenshot that includes the store URL and the menu items. This provides context and allows the engineer to understand the environment.
    • If there’s a problem with the migrated data, please take several screenshots showing the incorrectly transferred entities or populated fields. Highlight the specific issues you're encountering.
    • Here are some examples of detail-rich screenshots (they highlight the problem with red color and outline the important points with green):

Example of a good screenshot for data migration support with highlights

Another example of a helpful screenshot for data migration troubleshooting with highlights

Detailed screenshot example for reporting data migration issues with highlights

  • Below are examples of the screenshots that lack context and give Cart2Cart specialists no understanding of how to help you with your data migration:

Example of an unhelpful screenshot for data migration support - lacks context

Poor screenshot example for data migration troubleshooting - missing store URL

Inadequate screenshot example for reporting data migration problems - too small and unclear

Insufficient screenshot example for data migration support - no clear indication of the issue

By providing clear, full-page screenshots with highlighted issues, you'll help the Cart2Cart team quickly diagnose and resolve any problems encountered during your data migration. The more information you provide, the faster and more efficient the support process will be.

Ready to experience seamless data migration? Start your free demo today!

More info
Is the Smart Update function available for all shopping carts?

Is the Smart Update Function Available for All Shopping Carts?

The Smart Update feature by Cart2Cart allows you to migrate only the newly added or updated data from your source store to your target store, minimizing downtime and ensuring a seamless data migration process.

Which Shopping Carts Support Smart Update for Data Migration?

Currently, Smart Update is available for the following shopping carts, helping you streamline your data migration:

  • Opencart
  • PrestaShop
  • Magento
  • Shopware
  • Shopware Cloud
  • BigCommerce
  • Shopify
  • WooCommerce

Our list of supported platforms for Smart Update is constantly expanding to accommodate more data migration needs. If you don't see your platform listed, please contact us for the latest information. We're continually adding new shopping carts to the list to simplify your data migration experience. We offer various data migration options to suit your needs.

Ready to simplify your data migration process? Schedule a call with a Migration Expert to discuss your specific requirements.

More info
The Short & Essential Guide to Access Credentials for Cart2Cart

During a data migration, particularly when using a service like Cart2Cart, our support technicians may occasionally require access to your online store, web server, or database. This is only necessary to investigate issues or troubleshoot problems that may arise during the migration process.

We understand that this type of access information is sensitive and should be treated with the utmost respect. We only request access to your online store when it is absolutely essential for ensuring a smooth and successful data migration.

We take extensive precautions to ensure the security of our systems where access information is stored. You can learn more about our Security Policy here. Additionally, we recommend that our customers take specific precautions before providing us with their access credentials.

Whenever access to your online store is needed, we will clearly explain the specific access requirements and the reasons behind them.

Depending on the task at hand, a Cart2Cart technician might need the following access credentials for your online store to facilitate a seamless data migration.

Understanding FTP/SFTP Access for Data Migration

FTP (File Transfer Protocol) and SFTP (Secure File Transfer Protocol) are standard protocols for exchanging files between computers over the Internet. FTP/SFTP access might be needed to install the connection bridge and exchange files between your store and the Cart2Cart server during the data migration process. You can usually find your FTP/SFTP information in the welcome email you received from your hosting provider.

Here's an example of what FTP/SFTP credentials look like:

  • Host: 10.4.5.24
  • Port: 72 (or skip the field if your port is 21)
  • Login: User
  • Password: 555222

Note:

  • Your FTP/SFTP username and password are often the same as your cPanel username and password.
  • Your hostname (FTP/SFTP host) can also be referred to as the Connection host and is typically your domain name (e.g., yourdomain.com) or your domain name with "ftp" at the beginning (e.g., ftp.yourdomain.com).

If you don't have FTP/SFTP access, you can usually create it through your cPanel.

Understanding SSH Access for Data Migration

SSH (Secure Shell) is a remote administration protocol that allows users to securely control and modify their remote servers over the Internet. It's used for secure communication between the client and the host server. During data migration, SSH access may be required for specific tasks that need secure server-level access.

SSH credentials typically include:

  • Source SSH Host:
  • Source SSH Port: 22
  • Source SSH User:

If the authentication type is "password," you'll need to provide the password. If the authentication type is "Key Pair" (OpenSSH or PuTTy), you'll need to provide the Private Key and Passphrase.

When you enter the password, nothing will appear on the screen, but your password is being transmitted. After typing, press enter again. If your password is correct, you'll be greeted with a remote terminal window.

Understanding cPanel Access for Data Migration

cPanel is a web hosting control panel software that provides a graphical interface (GUI) and automation tools to simplify website hosting management. It allows you to efficiently manage your web hosting account, including FTP users, email addresses, subdomains, and software installations. During data migration, cPanel access may be requested to manage files, databases, or other hosting-related settings.

Log in to your cPanel account and navigate to the FTP section to find your existing FTP details or create a new FTP account.

cPanel credentials include the service URL, username, and password:

  • URL to C-panel/WHM: https://198.51.100.1:2083 / https://example.com:2083
  • Username: User
  • Password: 555222

If you're unable to locate this information, contact your web hosting provider for assistance.

Need help with your data migration? Start your free demo now!

More info
Does Cart2Cart synchronize store data?

Does Cart2Cart Synchronize Store Data?

Cart2Cart primarily focuses on migrating store data from one e-commerce platform to another, and does not synchronize it. While our service efficiently moves data – including products, customers, orders, and other essential information – between platforms, Cart2Cart doesn't perform ongoing, real-time synchronization of data between the Source and Target stores. Think of it as moving your store from one location to another, rather than constantly mirroring the two.

Note: For synchronizing data after the initial migration, you can explore the Smart Update or Recent Data Migration services. These options allow you to update your Target store with recent changes from your Source store, paying only when you need to actualize your data.

Efficient E-commerce Data Migration with Cart2Cart

Cart2Cart provides a streamlined solution for e-commerce data migration, transferring your store's crucial data from your current platform to a new one without disrupting your business. This includes:

  • Products: Migrate all product details, including images, descriptions, and variations.
  • Customers: Transfer customer accounts, order history, and contact information.
  • Orders: Move order data, including order status and payment details.
  • Categories: Replicate your store's category structure.
  • Other Data: Migrate reviews, blog posts, CMS pages and more.

With Cart2Cart, you can migrate to various popular platforms like Magento, Shopify, WooCommerce, OpenCart, PrestaShop and many more. See the full list of supported platforms.

Keeping Your Data Current After Migration

While Cart2Cart excels at the initial e-commerce data migration, keeping your data synchronized long-term requires a different approach. That's where our Smart Update and Recent Data Migration services come in.

  • Smart Update: Allows you to selectively update data on your Target store after the initial migration, focusing on recent changes.
  • Recent Data Migration: Performs a complete re-migration of data that has changed since the initial migration.

These services are ideal for keeping your stores aligned without the need for constant, resource-intensive synchronization.

Ready to Migrate Your Store?

Start your free demo of e-commerce data migration now and see how easy it is to move your store to a new platform! Start your free demo.

Need help planning your migration? Schedule a call with a Migration Expert to discuss your specific needs.

More info
How to generate a Wix API token?

How to Generate a Wix API Token for Data Migration

To perform a data migration to or from Wix using Cart2Cart, you'll need to generate an API token to grant Cart2Cart access to your site's data. You can generate an API key to access your site's data in your Account Settings.

To generate an API key:

  • Go to API Keys in your Account Settings.
  • Click Generate API Key.
  • Enter a name for your new API key under Key details.
  • In the Permissions section, select the All Permissions checkbox. This ensures Cart2Cart can access all necessary data for the migration.

Note: Keep in mind: Each key you generate has access to all of your sites.

Wix API Key Generation Step 1

  • Click Generate Key.
  • Click Send Code to send a 6-digit verification code to the email address linked to your account.
  • Get your verification code from the email.
  • Enter the code in the Verify your account pop-up.
  • Click Verify & Generate Key.

Wix API Key Generation Step 2

  • Click Copy Token & Close.
  • Store the token in a safe location. You'll need this token to connect your Wix store to Cart2Cart for the data migration process.

For more detailed info, visit this page.

When done, insert the API Token in the corresponding field of the Migration Wizard:

Cart2Cart Migration Wizard - Enter Wix API Token

Ready to start your data migration? Start your free demo now!

More info
Is it possible to transfer my current store coupons to the new Shopware store?

Can I Migrate Coupons to Shopware with Cart2Cart?

Absolutely! Cart2Cart offers the necessary functionality to migrate coupons from various e-commerce platforms to Shopware. Our robust data migration service ensures a smooth and accurate transfer of your promotional codes, helping you maintain your marketing strategies after the switch.

However, it's important to note that coupon migration is primarily compatible with Shopware 6 and later versions. While migrating to older versions like Shopware 5 might not directly support coupon migration through Cart2Cart, consider exploring custom solutions or extensions within Shopware 5 to achieve similar functionality. Contact our support team via Live chat or Schedule a Call with Migration Expert - https://meet.shopping-cart-migration.com/team/csm. They can help you to define the most efficient data migration option.

With Cart2Cart's seamless data migration, you can ensure a smooth transition to Shopware. Learn more about our services and start your free demo today!

More info
Can you migrate pages from X-Cart?

Can You Migrate Pages from X-Cart?

Absolutely. Cart2Cart offers comprehensive data migration services, including the ability to seamlessly migrate Pages from X-Cart to numerous other shopping cart platforms. To ensure a smooth and successful migration of pages, it's important to note that this functionality is available for X-Cart versions 5 and above. If you're using an earlier version of X-Cart, page migration will not be supported. We recommend upgrading to the latest X-Cart version to take advantage of this feature.

Cart2Cart simplifies the process of transferring your important content, ensuring that your website's structure and information are preserved during the data migration. We understand the importance of maintaining your website's integrity, and our platform is designed to handle the complexities of migrating pages with ease.

Ready to migrate your X-Cart data? Start your free demo now!

More info
How to make my old store SEO URLs working after PrestaShop migration?

How to Preserve SEO After PrestaShop Data Migration

When performing a data migration to PrestaShop, we strongly recommend selecting the additional option “Create 301 redirects after migration.” This crucial step ensures that your existing SEO URLs remain functional, minimizing any negative impact on your search engine rankings. By creating 301 redirects, you seamlessly direct users and search engines from your old URLs to the corresponding new ones on your PrestaShop store.

To implement these redirects, you'll need to purchase and install a 301, 302, 303 URL Redirects – SEO Module on your PrestaShop store before initiating the full migration.

Why Migrate SEO URLs During PrestaShop Migration?

Due to PrestaShop's default URL structure, category and product URLs often include ID numbers. This can negatively impact your store's SEO after migration. For example:

  • Product URL (without SEO module): music-ipods/1-ipod-nano.html
  • Product URL (with SEO module): music-ipods/ipod-nano.html
  • Category URL (without SEO module): 3-music-ipods
  • Category URL (with SEO module): music-ipods

To avoid these SEO complications, Cart2Cart offers the option to “Migrate categories and products SEO URLs.” Selecting this option requires the installation of the aforementioned SEO module.

By using the "Migrate categories and products SEO URLs", you will keep your URLs clean and SEO-friendly, avoiding any potential ranking drops.

To ensure a seamless and SEO-friendly eCommerce migration to PrestaShop, install the SEO module and select both the "Create 301 redirects" and "Migrate categories and products SEO URLs" options during the migration setup. If you have any questions, please don't hesitate to contact our Support Team.

Ready to migrate to PrestaShop? Start your free demo now and see how easy it is to migrate your store with Cart2Cart!

More info
Can I migrate duplicate coupons to Shopify store?

Can I Migrate Duplicate Coupons to Shopify?

Unfortunately, due to Shopify's technical limitations, the platform doesn't directly support the import of coupons with duplicate codes. This is a common constraint across many e-commerce platforms. However, there are workarounds to consider when migrating your store to Shopify using a service like Cart2Cart.

Here are a few options to manage duplicate coupons during your e-commerce data migration:

  • Consolidate Coupon Codes: Before migrating, consolidate duplicate coupon codes in your source store into a single code with a higher usage limit.
  • Modify Coupon Codes: Slightly alter the duplicate codes to make them unique. For example, append a number or letter to the end of each duplicate code.
  • Use Shopify Apps: Explore Shopify apps designed for advanced coupon management. Some apps might offer features to handle duplicate coupons or create more complex promotional rules.
  • Post-Migration Adjustments: After the migration, manually recreate the duplicate coupons with unique codes within Shopify's admin panel.

While Cart2Cart automates the transfer of most of your store's data, including coupons with unique codes, it's important to understand platform-specific limitations like this one. Planning ahead and considering these alternatives will ensure a smoother migration process.

Next Steps:

More info
Where can I find some extra data after Shopify migration?

Where Can I Find Extra Data After Shopify Migration?

During the data migration to Shopify, all product sizes (length, width, height), as well as attributes not included in variant creation are migrated to Metafields by default. These Metafields provide a flexible way to store additional information about your products, orders, customers, and other store elements that are not part of the standard Shopify data structure. To access this data, navigate to the relevant entity (e.g., a product) in your Shopify admin panel and look for the Metafields section. You can also use Shopify's API to access and manage Metafields programmatically. This ensures that all your crucial data is transferred and accessible post-data migration.

If you need assistance locating specific data or understanding how it was migrated, please contact our support team. We're here to help you ensure a smooth and complete data migration process.

Ready to migrate your store to Shopify? Start your free demo now!

More info
Shopify Payments Terms of Service: Prohibited Businesses

Due to the Shopify Payments Terms of Service, certain business categories and practices are prohibited. These restrictions may stem from Payment Network Rules or the requirements of financial service providers. The list below is representative, not exhaustive.

Consider these restrictions when planning your migration to Shopify. If you're unsure whether your products or services are permissible, contact the Shopify Help Center for clarification. Note that the Prohibited Business list is subject to change. Cart2Cart values your time and convenience, so please review this information carefully!

Shopify Payments Prohibited Businesses: Is Your Business Eligible for Data Migration?

1) Financial and Professional Services

  • Investment & credit services
  • Securities brokers; mortgage consulting or debt reduction services; credit counseling or repair; real estate opportunities; lending instruments
  • Money and legal services
  • Money transmitters, check cashing, wire transfers, money orders; currency exchanges or dealers; bail bonds; collections agencies; law firms collecting funds for any purpose other than to pay fees owed to the firm for services provided by the firm (e.g., firms cannot use Shopify Payments to hold client funds, collection or settlement amounts, disputed funds, etc.)
  • Virtual currency or stored value
  • Virtual currency that can be monetized, resold, or converted to physical or digital products and services or otherwise exit the virtual world (e.g., Bitcoin); sale of stored value, quasi-cash or credits maintained, accepted and issued by anyone other than the seller.

2) IP Infringement, Regulated or Illegal Products and Services

  • Intellectual property or proprietary rights infringement
  • Sales, distribution, or access to counterfeit music, movies, software, or other licensed materials without the appropriate authorization from the rights holder; any product or service that infringes or facilitates infringement upon the trademark, patent, copyright, trade secrets, or proprietary or privacy rights of any third party; use of Shopify intellectual property without express consent from Shopify; use of the Shopify name or logo including use of Shopify trade or service marks inconsistent with the Shopify Trademark Usage Guidelines, or in a manner that otherwise harms Shopify or the Shopify brand; any action that implies an untrue endorsement by or affiliation with Shopify
  • Counterfeit or unauthorized goods
  • Unauthorized sale or resale of brand name or designer products or services; sale of goods or services that are illegally imported or exported
  • Gambling
  • Lotteries; bidding fee auctions; sports forecasting or odds-making; fantasy sports leagues with cash prizes; internet gaming; contests; sweepstakes; games of chance
  • Regulated products and services
  • Marijuana dispensaries and related businesses; alcohol or alcoholic beverages; sale of tobacco, e-cigarettes, or accessories including e-juice or e-liquid; online pharmacies or pharmacy referral services; age-restricted goods or services; weapons and munitions; gunpowder and other explosives; fireworks and related goods; toxic, flammable, and radioactive materials; products and services with varying legal status on a state-by-state basis
  • Adult content and services
  • Pornography and other obscene materials (including literature, imagery and other media). Sites offering any sexually-related products or services such as prostitution, massage parlors, dating-services, companion/escort services; international match-making and mail-order brides; pay-per-view, adult live chat or call features; child pornography, fetish gear and services including S&M paraphernalia; hard-core sexually oriented products and services; sex shows, sex clubs, topless bars, strip shows, and other adult entertainment; widgets that allow you to access pornography or pornographic ads.

3) Unfair, Predatory, or Deceptive Practices

  • Get rich quick schemes
  • Investment opportunities or other services that promise high rewards
  • Mug shot publication or pay-to-remove sites
  • Platforms that facilitate the publication and removal of content (such as mug shots), where the primary purpose of posting such content is to cause or raise concerns of reputational harm
  • No-value-added services
  • Sale or resale of service without added benefit to the buyer; resale of government offerings without authorization or added value; sites that we determine in our sole discretion to be unfair, deceptive, or predatory towards consumers.

4) Products or Services Prohibited by Financial Partners

  • Aggregation
  • Engaging in any form of licensed or unlicensed aggregation of funds owed to third parties, factoring, or other activities intended to obfuscate the origin of funds
  • Drug paraphernalia
  • Any equipment designed for making or using drugs, such as bongs, vaporizers, and hookahs
  • Event Tickets
  • Event or festival tickets, event ticket resellers, including theme park ticket reseller
  • Government Services
  • Embassies, foreign consulates or other foreign governments
  • High-risk businesses
  • Human hair, fake hair, or hair-extensions; age verification services; bankruptcy lawyers; computer technical support; psychic services; extended warranties; travel reservation services and clubs; airlines; cruises; timeshares; chain-letters; essay mills; flea markets; prepaid phone cards, phone services, and cell phones; telemarketing, telecommunications equipment and telephone sales; shipping or forwarding brokers; door-to-door sales; negative response marketing; credit card and identity theft protection; the use of credit to pay for lending services; any businesses that we believe poses elevated financial risk, legal liability, or violates card network or bank policies
  • Multi-level marketing
  • Pyramid schemes, network marketing, and referral marketing programs
  • Pharmaceuticals or Pseudo pharmaceuticals
  • Pharmaceuticals and other pseudo-pharmaceutical products that make health claims (e.g. retinol creams, lash growth serums, products containing hyaluronic acid, etc.) and medical devices
  • Social media activity
  • Sale of Twitter followers, Facebook likes, YouTube views, and other forms of social media activity
  • Substances designed to mimic illegal drugs
  • Sale of a legal substance that provides the same effect as an illegal drug (e.g., salvia, kratom)
  • Video game or virtual world credits
  • Sale of in-game currency unless the merchant is the operator of the virtual world
  • Use of Shopify Payments in a manner inconsistent with its intended use or as expressly prohibited in the Terms of Service
  • Use of Shopify Payments principally as a virtual terminal (e.g., submitting card transactions by manually inputting card information); processing where there is no bona fide good or service sold, or donation accepted; card testing; evasion of card network chargeback monitoring programs; sharing cardholder information with another merchant for payment of upsell or cross-sell product or service; offering substantial rebates or incentives to the cardholder subsequent to the original purchase.

To avoid delays, ensure your business doesn't fall into any of these categories before initiating a data migration. If you encounter any issues, the Cart2Cart team can assist you in finding the best eCommerce solution for your needs. Schedule a call with our migration expert to discuss your options. Happy migrating!

More info
Shopify Admin Access Validation Error

Troubleshooting Shopify Admin Access Validation Errors During Data Migration

If you're experiencing issues launching your Shopify data migration with Cart2Cart, it's possible that the provided Admin Credentials are being flagged as invalid. This can occur due to several factors:

  1. The email address or password you've entered is incorrect. Double-check for typos and ensure the credentials are valid for your Shopify store.
  2. Shopify API usage limits. Shopify may restrict the number of active API connections.
  3. Temporary Shopify site unavailability. Your Shopify store might be temporarily unavailable due to maintenance or other issues.
  4. Problems creating API credentials. There might be other reasons preventing the creation of valid API credentials through the standard process.

Fortunately, you can often resolve this by manually providing an API Password for your Shopify store. This allows Cart2Cart to securely access your data for the data migration. Refer to this step-by-step tutorial for detailed instructions on how to generate and use a Shopify API Password.

If you continue to experience issues with your Shopify data migration, please don't hesitate to contact our support team for assistance.

Ready to migrate your store to Shopify? Start your free demo now!

More info
Shopify API calls limit

Once your eStore has created 50,000 Product Variants, the limit is set to 1000 variants per 24 hour period. This means that Cart2Cart can migrate a maximum of 1000 product variants every 24 hours. Since this threshold is imposed by Shopify, Cart2Cart cannot directly influence it. Rest assured, this API call limit primarily affects the data transfer speed and won't compromise the integrity of your shopping cart data migration. You have a few options: you can wait for the migration to complete naturally, or contact Shopify Support to explain your situation and request a temporary increase to your API limits.

Note: This limit doesn’t apply to Shopify Plus shops.

Need help with your shopping cart data migration? Start your free demo now!

If you have any questions or need further assistance, please don't hesitate to contact our support team via Live Chat.

More info
Why didn't my product images migrate to Shopify?

Why Didn't My Product Images Migrate to Shopify During Data Migration?

Due to Shopify peculiarities, a limit of 250 images applies per product (including its variants). This means that for 100 products, you can migrate up to 250 images each, totaling 25,000 images. This limitation is imposed by Shopify's platform architecture.

If you have products with more than 250 images, consider these options during your data migration:

  • Prioritize Key Images: Migrate only the most important product images to stay within the limit.
  • Image Optimization: Reduce image file sizes without significant quality loss to potentially accommodate more images within Shopify's storage limits.
  • Third-Party Apps: Explore Shopify apps designed to handle large numbers of product images. These apps often provide features like image hosting and optimization.

Cart2Cart can assist you in selecting and migrating the most crucial images during your data migration to Shopify. Contact our support team for guidance on the best approach for your specific needs.

Ready to start your data migration? Start your free demo today!

More info
How to create, update and delete metafields on a Shopify store?

After migrating options and attributes from your source store to Shopify using a data migration service like Cart2Cart, you might need to manage metafields within your Shopify store. Metafields allow you to store additional information for products (including variants), collections (both smart and custom), customers, orders (including draft orders), blogs, pages, and the shop itself. To create, update, and delete these metafields directly from your Shopify admin panel, consider installing a free app like Metafields Guru. Without such an app, metafields may not be easily visible or editable through the standard Shopify admin interface.

Here's how to use Metafields Guru to manage your Shopify metafields after your eCommerce data migration:

  1. Once you've installed Metafields Guru from the Shopify App Store, go to the "Apps" section in the left navigation menu of your Shopify admin panel and select the Metafields Guru app. Choose the type of data you want to edit (e.g., products, customers, orders).
  2. Metafields Guru app interface for Shopify data migration management

  3. Use the filter options to find the specific product, customer, or order you want to modify.
  4. Filtering products in Metafields Guru after Shopify migration

  5. Click on the "Metafields" tab (or equivalent) within the item's details. Enter or edit the desired data in the metafield fields. Be sure to save your changes by clicking the "Create Metafield" or "Update Metafield" button.
  6. Editing metafields using Metafields Guru after data migration to Shopify

    Happy migration!

More info
Why is my Shopify migration taking so long?

Why is my Shopify migration taking so long?

Several factors can influence the duration of your eCommerce data migration to Shopify. These include the size of your store (number of products, customers, orders, etc.), the complexity of your data, and API limitations.

Shopify API Limitations and Data Migration Speed

Shopify has implemented limits for orders’ migration. If you are using a trial or Partner development version of Shopify, you might be limited to creating only 5 orders per minute. This restriction can significantly slow down the Shopify data migration process.

How to Speed Up Your Shopify Data Migration

To avoid these delays and ensure a smoother, faster data migration, Cart2Cart strongly recommends upgrading to a paid Shopify plan before initiating the Full Migration.

Looking for Seamless Data Migration to Shopify?

Cart2Cart offers a streamlined and reliable data migration service. We support migrations from a wide range of platforms to Shopify, ensuring your valuable data is transferred accurately and efficiently.

Ready to migrate? Start your free demo now and see how easy data migration can be!

Need help? Contact our support team via live chat.

Want to discuss your migration project? Schedule a call with a Migration Expert.

More info
Why is it impossible to migrate to the Shopify test store?

Why is it impossible to migrate to the Shopify test store?

Due to the technical limitations of Shopify, creating a temporary test store for data migration is not feasible. However, you can still perform a complete data migration to Shopify using their free trial plan. This allows you to fully evaluate the migrated data and store functionality before committing to a paid plan. To ensure a smooth Shopify data migration, consider using a specialized service like Cart2Cart. We offer a streamlined process and expert support to help you transfer your products, customers, orders, and other essential data to Shopify efficiently. Start your free demo now to see how easy it is!

More info
Incapsula service was detected. What should I do to disable it?

What to do if Incapsula is detected during data migration?

In simple terms, Incapsula is a multi-function CDN service designed to enhance website performance by filtering malicious traffic, mitigating DDoS attacks and spam, preventing database injection attacks, providing load balancing, and safeguarding web pages against known and emerging threats like SQL injections, remote file injections, and cross-site scripting.

Incapsula is a popular CDN tool that, due to its robust security measures, can interfere with the data migration process. Therefore, it needs to be temporarily disabled. You can either contact your hosting provider or, if your web store is hosted on your own server, disable it manually. Below are the step-by-step instructions:

How to Disable Incapsula for Data Migration

  1. Log in to your Incapsula account and access your admin panel.
  2. Check your website's Incapsula status (Fully Configured, Partially Configured, or Not Configured).
  3. Click the More button.

Disabling Incapsula for data migration: More button

  1. Click Disable to change the status to Not Configured.

Disabling Incapsula for data migration: Disable button

  1. Your Incapsula service is now disabled. Re-enable it after the data migration is complete.

Incapsula service disabled for data migration

Happy Data Migration!

Ready to migrate your store? Start your free demo now!

More info
BigCommerce Admin Access Validation Error

Troubleshooting BigCommerce Data Migration: Admin Access Validation Errors

Cart2Cart simplifies data migration from BigCommerce by automating API credential creation. Usually, migrating your store only requires your BigCommerce admin email and password. However, you might encounter issues during the admin access validation process. This guide helps troubleshoot those errors and offers alternative solutions for a smooth BigCommerce data migration.

Common BigCommerce Admin Access Issues

Here are the most frequent reasons for BigCommerce admin access validation errors during migration:

  1. The email address or password you entered is incorrect. Double-check for typos and ensure the credentials are valid.
  2. Your BigCommerce Administrator account is disabled. Verify that your account is active and has the necessary permissions.
  3. The BigCommerce site is temporarily unavailable. This could be due to maintenance or other unforeseen issues on BigCommerce's end. Wait a few minutes and try again.
  4. API Credentials cannot be created automatically due to other reasons. This is a rare occurrence but can happen due to specific BigCommerce account configurations.

Alternative BigCommerce Data Migration Method: Using API Path and Token

If you encounter persistent issues with admin access validation, you can still initiate your BigCommerce data migration by providing the API Path and API Token manually. This method bypasses the automatic credential creation and allows you to connect Cart2Cart directly to your BigCommerce store.

Refer to this detailed FAQ to learn how to obtain your BigCommerce API Path and API Token.

Need help with your BigCommerce Data Migration?

If you’re still facing issues with your BigCommerce data migration, don't hesitate to contact our support team via live chat. You can also schedule a call with a migration expert for personalized assistance.

Ready to migrate? Start your free demo now!

More info
You have reached BigCommerce API calls limit

BigCommerce API Call Limits and Data Migration

During your data migration to BigCommerce, you might encounter API call limits. These limits are imposed by BigCommerce to ensure platform stability and performance. Here's what you need to know:

  • BigCommerce Standard and Plus plans have a limit of 20,000 API calls per hour.
  • BigCommerce Pro plans have a limit of 60,000 API calls per hour.
  • BigCommerce Enterprise plans offer unlimited API calls.

If your data migration exceeds these limits, don't worry! Your migration is still in progress. All your product variants and other data will be transferred accurately and securely, but the process may take a bit longer. These limits are set by BigCommerce, and Cart2Cart cannot bypass them. Please be patient, and the replatforming process will be completed as soon as possible.

What can you do to expedite your BigCommerce data migration?

  1. Pre-Migration Audit: Before starting your migration, conduct a thorough audit of your existing store. Remove any unnecessary or outdated products, categories, or customer data. This reduces the amount of data that needs to be migrated, potentially lowering the number of API calls required.
  2. Migration Scheduling: Consider scheduling your data migration during off-peak hours. This might help avoid potential slowdowns caused by high traffic on the BigCommerce platform.
  3. Upgrade Your BigCommerce Plan: If you anticipate needing more API calls, consider upgrading to a BigCommerce Pro or Enterprise plan. These plans offer higher API call limits or even unlimited access, which can significantly speed up the data migration process.

For more information on BigCommerce API limits, please refer to the BigCommerce FAQ.

Next Steps:

More info
How to find BigCommerce Product ID?

How to Find Your BigCommerce Product ID for Data Migration

Need to locate your BigCommerce Product ID for a data migration? Here's how:

  1. Open the product page on your BigCommerce store.
  2. Right-click on the product image and open the image in a new tab or window.
  3. In the product image URL, look for the segment "/products/".
  4. The product ID will be the numerical value immediately following "/products/".

If you're having trouble finding the BigCommerce product ID using the method above, you can also export your product data via CSV file. This file will contain the Product IDs in a dedicated column. For a visual guide, watch this video on exporting product data.

Ready to migrate your data to or from BigCommerce? Start your free demo now!

More info
How to get API key from Ecwid

How to Obtain Your Ecwid Personal Collection URL for Data Migration

To perform a data migration from Ecwid using Cart2Cart, you will need to provide your store’s Personal Collection URL. This URL is essential for Cart2Cart to securely access and transfer your store's data. Keep in mind that access to the Ecwid API, which is necessary for data migration, is only available to merchants with a paid plan (Venture, Business, or Unlimited). Unfortunately, those on the Free plan cannot use the Ecwid API for data migration purposes.

Step-by-Step Guide: Finding Your Ecwid Personal Collection URL for Data Migration

Here’s a step-by-step guide to help you obtain the Personal Collection URL for your Ecwid store:

Step 1: Log in to your Ecwid admin Panel.

Step 2: Go to this page to create a new custom app. Please ensure your app has the following permissions: read_customers, read_brands, create_catalog, update_subscriptions, read_discount_coupons, create_discount_coupons, update_catalog, public_storefront, customize_cart_calculation, update_discount_coupons, delete_staff, read_store_limits, create_customers, read_catalog, update_customers, read_orders, read_staff, add_payment_method, create_orders, read_subscriptions, update_orders, read_store_profile, add_shipping_method, invite_staff, update_store_profile.

Step 3: Request missing permissions (if necessary):

  • Scroll down to “Request Ecwid team to update app details & add new features” and click “Contact”
  • List missing permissions in “Type your answer here…” and click “Submit”

Step 4: After Ecwid updates permissions, please uninstall the app in “Apps > My Apps” and install it in the “develop-apps” section: https://my.ecwid.com/#develop-apps

Step 5: Click on the “Show secret token” button. Copy and paste it into the Secret Token field of Cart2Cart to continue the data migration.

Ready to migrate your data from Ecwid? Start your free demo now!

More info
How to export data from ekmPowershop?

How to Export Data from ekmPowershop for Data Migration

To perform an eCommerce data migration from eKM to CSV using Cart2Cart, you'll first need to export your product and category data from your ekmPowershop store. This involves installing the platform’s Import/Export System feature within your admin panel. This feature allows you to export your store’s data into a CSV file, which can then be used for migration. Here’s a step-by-step guide:

To export your data, follow these steps:

1. Log in to your ekmPowershop admin panel.

2. Go to the Features section, and type “Import” in the search bar.

3. Install the Import/Export System feature.

Installing the Import/Export System feature in ekmPowershop for data migration

4. Choose Export to File in the menu that appears.

Selecting Export to File in ekmPowershop for data migration

5. Now, select Export Products, then All products and press Next.

Exporting all products from ekmPowershop for data migration

6. Press Next again, and then choose CSV File - the first option in the list.

Choosing CSV File format for eKM data migration

7. Once the file is ready press Download.

8. Afterwards, open Import/Export System, click Export Categories and perform the same procedure once again.

Ready to migrate your data from eKM? Start your free demo now and experience a seamless data migration with Cart2Cart!

More info
How can I configure taxes on my Shopware store?

Configuring Taxes in Shopware After Data Migration

When you migrate your store to Shopware, you might notice a difference in how prices are handled. In Shopware's admin area, product costs often include taxes, unlike the gross prices you might be used to seeing directly in your database. Cart2Cart focuses on migrating the core product data, and it's important to configure your tax settings in Shopware to ensure accurate display on your storefront.

Please note that Cart2Cart migrates net prices. To configure taxes and display gross prices in your Shopware frontend, follow these instructions:

  1. Log in to your Shopware store's admin panel.
  2. Navigate to Settings. The location of this may vary slightly depending on your Shopware version.
  3. Go to Shop and then select Customer Groups.
  4. Choose the customer group you want to configure (e.g., Standard customer group).
  5. In the Customer Group details, find the "Displaying prices" section and select the appropriate option:
    • Show prices net: Displays prices without tax.
    • Show prices gross: Displays prices including tax.
  6. Save your changes.

Important Considerations for Shopware Data Migration and Tax Settings

  • The exact location of settings might differ based on your Shopware version. Always refer to the official Shopware documentation for the most accurate instructions.
  • Ensure your tax rates are correctly set up in Shopware under Settings > Shop > Tax.
  • Consider testing your storefront after migration to verify that prices are displayed correctly for different customer groups.

Note: Adjusting these settings allows you to control whether customers see prices with or without tax included. Make sure you configure these settings according to your business requirements and legal obligations.

Ready to migrate your store to Shopware? Start a free demo with Cart2Cart today! If you have any questions during your data migration, don't hesitate to contact our support team for assistance.

More info
How can I download the CSV files for migration from Lightspeed?

How to Export Lightspeed Categories for Data Migration

When performing a data migration from your Lightspeed store using Cart2Cart, you may need to upload CSV files containing your category information. This is particularly useful when migrating categories. Follow these steps to export your category data from your Lightspeed e-shop admin panel:

  1. Navigate to the "Tools" section in the left-hand menu and select the "Export" tab.
  2. Lightspeed Export Tool location
  3. Click the "New Export" button, typically found in the upper right corner.
  4. New Export button in Lightspeed
  5. Choose the specific category you want to export as a CSV file from the dropdown menu.
  6. Selecting category for CSV export in Lightspeed
  7. Once your export request is processed, a "Download" button will become active. Click it to download the file containing your category data.
  8. Download button for Lightspeed category export
  9. During the automated data migration process with Cart2Cart, select the downloaded CSV file when prompted.
  10. Selecting the CSV file in Cart2Cart data migration

By following these steps, you can easily export your Lightspeed categories for a seamless data migration using Cart2Cart.

If you encounter any difficulties during the process, don't hesitate to contact the Cart2Cart Support Team for assistance. Or, schedule a call with migration expert to get personalized consultation. Ready to migrate? Start your Free Demo now!

More info
How can I export data files from Lightspeed?

How to Export Data from Lightspeed for eCommerce Data Migration

To prepare for your eCommerce data migration and transfer data from your Lightspeed eStore, follow these steps to export your data in CSV format:

  1. Log into your Lightspeed Admin Panel.
  2. Navigate to Inventory and then Item Search.
    Lightspeed Admin Panel - Inventory Item Search for eCommerce data migration
  3. Click the Export button to download the file to your computer.
    Lightspeed Export Button for eCommerce data migration
  4. Repeat the export procedure for the following data categories:
  • Inventory → Brands;
  • Inventory → Categories;
    Lightspeed Inventory Categories Export for eCommerce data migration
  • Customers → Customers;
    Lightspeed Customer Export for eCommerce data migration
  • Settings → Tax Classes;
  • Settings → Discounts.
    Lightspeed Discounts Export for eCommerce data migration
  1. Select the appropriate file, upload it to the Cart2Cart Migration Wizard, and proceed to the next step. Ensure that the file name corresponds to the correct data type.
    Cart2Cart Migration Wizard Upload for Lightspeed eCommerce data migration

Ready to migrate your eCommerce data? Start your free demo now!

More info
Where Can I Get DaWanda API Key?

How to Get Your Etsy API Key for Data Migration with Cart2Cart

DaWanda, a popular online marketplace for handmade and vintage items, has closed. If you're looking to migrate your data from DaWanda, a good alternative is Etsy. Cart2Cart can help you migrate your data to a new platform, and for that, you'll need your Etsy API key. Here's a step-by-step guide on how to obtain it:

  1. First, log in to your Etsy store's admin area.

Etsy Login for Data Migration

  1. Follow this link to the Etsy website to find the necessary information about the API Key.

Etsy API Key Location

  1. Then press the “Save” button.

Etsy Save ButtonSaving Etsy API Key Settings

  1. Copy your API key.

Copying Etsy API Key

  1. After this, paste it into the appropriate field on the Cart2Cart Migration Wizard.

Pasting Etsy API Key into Cart2Cart

Ready to migrate your store to a new platform? Start your free demo with Cart2Cart today!

More info
Will my customer passwords be migrated after data migration from JoomShopping?

Will my customer passwords be migrated after data migration from JoomShopping?

Yes, Cart2Cart supports password migration from JoomShopping during your data migration. Get detailed information on the password migration option.

When performing a data migration from JoomShopping, customer passwords can be transferred to the following platforms:

If you have any questions or require assistance with your data migration, please contact our Support Team.

Ready to migrate your store? Start your free demo now!

More info
Can I migrate customer passwords from JoomShopping?

Can I Migrate Customer Passwords from JoomShopping with Cart2Cart?

Yes, Cart2Cart supports customer password data migration from JoomShopping. This feature ensures a seamless transition for your customers, allowing them to log in to your new store without needing to reset their passwords. For detailed information on the password migration option, please follow this link: detailed info.

When performing a data migration with Cart2Cart, you can transfer customer passwords from JoomShopping to several popular e-commerce platforms, including Magento, WooCommerce, PrestaShop, OpenCart, Thirty Bees, WP eCommerce, Shopp, and VirtueMart.

To get all your data migration related questions answered, contact Cart2Cart Support.

Ready to migrate? Start your free demo now!

More info
How do I perform an AspDotNetStorefront migration?

AspDotNetStorefront Data Migration: Addressing the 'default.aspx' Suffix

When performing an e-commerce data migration to or from AspDotNetStorefront, the process generally follows our standard Migration Scenario for API (Hosted) Shopping Carts.

However, there's a specific detail to be aware of during the data migration setup. When you enter your AspDotNetStorefront store's URL into the Cart2Cart migration wizard, the system might automatically append the suffix “default.aspx” to the URL. This can interfere with the connection and prevent the data migration from proceeding correctly.

AspDotNetStorefront data migration: Removing the default.aspx suffix

To ensure a successful data migration, you must manually delete the "default.aspx" suffix from the URL before proceeding. This ensures that Cart2Cart can correctly connect to your AspDotNetStorefront store and initiate the data transfer.

Ready to start your data migration? Try our free demo now!

More info
Not all product images were transferred to the new Wix store during the data migration. What’s the problem?

Why Were All Product Images Not Transferred to My New Wix Store During Data Migration?

Due to the specific limitations of the Wix platform, importing more than 19 product images per product to a Wix store is not possible. During the data migration process, if a product has more than 19 images, Wix will randomly select 19 of those images to import.

This limitation is inherent to the Wix platform and affects how product images are handled. To ensure a smooth data migration, it's important to be aware of this constraint when migrating to Wix.

Workarounds for Wix Image Limitations During Data Migration

While the 19-image limit on Wix is a constraint, here are a few potential workarounds to consider during your data migration:

  • Image Optimization: Prioritize the most important product images and ensure they are high-quality and optimized for web viewing.
  • Image Collages: Combine multiple images into a single image to showcase various product angles or features within the 19-image limit.
  • External Image Hosting: Host additional product images on a third-party image hosting service and link to them from the product description on your Wix store.

Planning your data migration carefully and understanding these limitations will help you manage your product images effectively when moving to Wix.

Ready to migrate to Wix? Start your free demo or schedule a call with a Migration Expert to discuss your specific needs.

More info
Is multilanguage migration to/from Magento possible?

Is Multilingual Magento Migration Possible?

Yes, you can perform a multilingual Magento migration using Cart2Cart, seamlessly transferring your e-shop's data from and to Magento.

When migrating *to* Magento, Cart2Cart supports the transfer of multiple languages from various platforms, including: Magento, OpenCart, osCommerce, PrestaShop, ThirtyBees, VirtueMart, WooCommerce, X-Cart, and Zen Cart. This includes migrations during Magento upgrades. To learn how to add a new language to Magento, refer to this helpful guide.

For data export *from* Magento in multiple languages, you can transfer eCommerce categories to the following platforms: WooCommerce, Magento, PrestaShop, OpenCart, and Shopware.

For a comprehensive list of shopping carts supporting multilingual migration, visit the Cart2Cart Multilingual Migration page.

Ready to Start Your Multilingual Magento Data Migration?

Migrate your online store with all your languages intact! Try Cart2Cart's free demo to see how easy it is to perform a seamless multilingual Magento data migration.

More info
Why weren't all my Wix customers migrated to the new store?

Why weren't all my Wix customers migrated to the new store?

If your current Wix store has 2,000+ customers, they cannot be automatically migrated by Cart2Cart due to technical limitations imposed by the Wix platform. This limitation affects the automated transfer of customer data during the data migration process.

In this case, contact our Support Team to discuss a custom data migration solution. We can arrange to transfer your customers to the new store using alternative methods, ensuring minimal disruption to your business. Learn more about eCommerce migration with Cart2Cart.

Next Steps:

More info
Transferring customer passwords during Magento migration

Can I Transfer Customer Passwords During Magento Data Migration?

Yes, you can! Cart2Cart supports customer password migration to Magento during upgrades and standard data migration processes. With Cart2Cart's automated migration service, you can seamlessly transfer your customer data, including passwords, ensuring a smooth transition for your customers.

Cart2Cart makes it possible to migrate customer passwords to Magento from the following shopping carts:

Platform
Magento
OpenCart
osCommerce
VirtueMart 2.x - 3.x
WP eCommerce
Shopp
PrestaShop
Loaded Commerce
CS-Cart
Thrity Bees
WooCommerce
osCMax
CRE Loaded
Loaded Commerce
Zen Cart
xt:Commerce
modified eCommerce Shopsoftware
JoomShopping
Gambio

Visit the Cart2Cart Password Migration page to get the full list of supported platforms.

To import the passwords to Magento, you’ll need to install the free Cart2Cart Password Migration plugin on your Target Magento store. Click the links below for detailed instructions:

  1. Passwords migration during Magento Upgrade
  2. Passwords Migration to Magento 2
  3. Passwords Migration to Magento 1

Ready to migrate your store to Magento? Start your free demo now!

More info
What are the peculiarities of store data migration to Wix?

What are the Peculiarities of Store Data Migration to Wix?

Basically, the list of entities that can be transferred to Wix in a fully automated manner using our data migration services includes:

  • Products (including names, descriptions, prices, SKUs, and product variants)
  • Product Images
  • Orders
  • Coupons
  • SEO URLs
  • Taxes

Categories cannot be imported to Wix due to the technical peculiarities of the platform. As for customers - they cannot be transferred as well, but are created from the orders data automatically.

Regarding the clearing - the option is available only for products that are visible at your Wix store and coupons. Orders cannot be cleared at all.

Note: In case the products aren't displayed in a transferred order right after the Demo migration, it means the products weren't transferred because only a limited amount of them can be moved within the Demo. Pay attention to the number of entities-orders and subtotal-total.

The Cart2Cart team is continuously working on improving the Wix migration process and adding support for more entities. Stay tuned for future updates!

Ready to migrate your store to Wix? Start your free demo now and see how easy it is to use our data migration services!

More info
Is it possible to migrate customer passwords during Magento Upgrade?

Can I Migrate Customer Passwords During a Magento Upgrade?

Yes, Cart2Cart facilitates the migration of customer passwords when transferring data between different versions of Magento. This ensures a seamless transition for your customers, allowing them to log in to your new store with their existing credentials.

For Magento upgrades, especially when migrating to Magento 2 or later, you'll need to install the free Cart2Cart Magento 2 Passwords Migration Plugin. This plugin is specifically designed to handle the password encryption differences between Magento versions, ensuring a secure and accurate password migration during your Magento data migration.

Learn how to install the Cart2Cart Magento 2 Passwords Migration Plugin.

Also, visit our dedicated landing page for a detailed table outlining password migration compatibility between various platforms.

Ready to migrate your Magento store and ensure your customer passwords are transferred securely? Start your free demo with Cart2Cart today!

More info
How to Migrate to Wix via the "Wix Migration" app?

If you're looking to migrate your online store to Wix using the "Wix Migration" app, Cart2Cart can help! The following instructions will guide you through the data migration process smoothly and efficiently.

Step 1: Set Up Your Source and Target Carts for Data Migration

First, specify your current e-commerce platform as the source cart. Provide the necessary store credentials, which may include your store's URL address (if you're migrating from an open-source platform like OpenCart or Magento) or API details (if you're migrating from a hosted solution like Shopify or BigCommerce). Next, install the Wix Migration app to connect with your Wix store. Click the Install Plugin button and follow the prompts. Once the plugin is installed, click the Choose Entities button to proceed.

Source and Target Cart Setup for Wix Data Migration

Note: The access details are required to establish a secure connection between your stores for automated data migration. The provided information is completely secure and protected according to the Cart2Cart Privacy Policy.

Step 2: Select the Data You Want to Migrate to Wix

Choose the specific store entities you want to migrate to Wix. You can select individual entities by clicking the corresponding checkboxes or choose the Select All option to migrate all your store data. Additionally, explore the available additional migration options to customize your data migration process and enhance your new Wix store.

Choosing Data for Wix Data Migration

Step 3: Launch a Demo Migration to Wix

Before performing the full migration, take advantage of the demo migration feature. This allows you to migrate a limited amount of data from your current store to Wix, typically taking 15-30 minutes. This lets you preview the service in action and ensure that your data is migrated correctly.

Demo Migration to Wix using Cart2Cart

Step 4: Start the Full Data Migration to Wix

Once you're satisfied with the demo migration, activate the Start Full Migration button to initiate the complete data migration of your current store to Wix. Cart2Cart automates the entire process, ensuring a seamless transition of your valuable data.

Ready to migrate your store to Wix? Start your free demo now!

More info
How to install Cart2Cart Magento 2 Passwords Migration Plugin?

How to Migrate Customer Passwords to Magento 2 Using Cart2Cart

To securely migrate customer passwords to your new Magento store during your data migration, install the Cart2Cart Magento 2 Passwords Migration Plugin. This ensures a smooth and secure transfer of customer credentials. Follow these steps:

  1. Download the Cart2Cart Magento 2 Passwords Migration Plugin.
  2. Access your Magento store's directory using an FTP client (e.g., FileZilla) and extract the downloaded .zip file to the root folder.
  3. Connect to your store via SSH and run the following commands in the given order:
php -f bin/magento module:enable --clear-static-content Cart2Cart_PasswordMigrationToMagento2
php -f bin/magento setup:upgrade
php -f bin/magento setup:di:compile

(This command may require increasing the memory_limit PHP directive in your php.ini file.)

After running these commands, the plugin should be functioning correctly. Your customers can now log in to your Magento store using their existing credentials after the data migration is complete.

Important: We strongly recommend keeping the Cart2Cart: Password Migration to Magento 2 Plugin activated until all your customers have logged in at least once. Afterward, you can disable or remove the plugin.

Ready to migrate your store to Magento? Start your free demo now!

More info
Why weren't all my product variants imported to Wix?

Why weren't all my product variants imported to Wix during data migration?

Due to technical limitations of the Wix platform, there are specific considerations for product variant migration when performing data migration to this eCommerce solution. More specifically:

  • The upper limit of product variants and their options is 300 and 6, respectively. Therefore, it’s impossible to import more than 300 variants or 6 options. If there are more, it is necessary to delete some product variants/options so that Wix allows you to import the product using data migration;
  • If the product on the source store has some options and more than 300 variants, then it is recommended to delete some of the variants, so that Wix allows to import the product via data migration;
  • If the product on the source store has some options and no variants, and the number of possible options combinations is more than 300, then the variants will not be generated automatically, but the imported product will have options (remember the limit of 6 options). This is a limitation during data migration;
  • If there are options on the source, but no variants, and the number of possible options combinations is no more than 300, then the options will be imported, and variants will be generated during data migration;
  • If there are 6 or less options on the source store and 300 or less variants, then all the options and variants will be imported to Wix.

These limitations should be considered when planning your data migration to Wix.

Ready to migrate your store? Start your free demo now!

More info
How to install Cart2Cart Magento Passwords Migration Plugin?

How to Perform Magento Password Migration with Cart2Cart

Need to migrate customer passwords to your new Magento store? Cart2Cart offers a simple solution using a dedicated plugin to ensure a secure and accurate data migration, including customer passwords. This is crucial for a seamless customer experience, allowing them to log in to your new store with their existing credentials. Follow these steps to install the Cart2Cart Magento Password Migration Plugin:

Steps to Install the Cart2Cart Magento Password Migration Plugin

    1. Download the Cart2Cart Magento Password Migration Plugin.
    2. Using an FTP client (e.g., FileZilla), navigate to your Magento store's root directory and extract the downloaded .zip file.
    3. Refresh your Magento cache. Log in to your Magento Admin Panel and go to System -> Cache Management.
Magento Cache Management: List of Cache Types
  1. Check all Cache types, select "Refresh" in the Actions dropdown, and click "Submit".
Magento Cache Management: Refreshing Cache Types

Important: We highly recommend keeping the Cart2Cart: Password Migration to Magento module activated until all your customers have logged in at least once. After that, you can disable or delete it.

Ready to migrate your store to Magento? Start your free demo now or schedule a call with our migration expert to discuss your specific needs.

More info
How to turn off the email notifications on my Wix website?

How to Turn Off Order Confirmation Emails on Wix for Data Migration

If you're planning a data migration to or from your Wix store, you might want to temporarily disable automatic order confirmation emails to avoid confusing your customers with duplicate notifications during the migration process. Here's how to do it:

To disable automatic order confirmation and shipping confirmation emails sent to your customers on Wix, navigate to Settings -> eCommerce & Finance -> Order email notifications. Then, uncheck the boxes corresponding to Order confirmation and Shipping confirmation.

Wix Order Email Notifications Settings for Data Migration Disabling Order Confirmation and Shipping Confirmation Emails on Wix for Data Migration

By following these steps, you can prevent Wix from automatically sending order-related emails during your data migration. Remember to re-enable these notifications once your migration is complete to keep your customers informed about their orders.

Need help with your data migration? Start your free demo now or schedule a call with our migration expert!

More info
Can Cart2Cart create redirects after migration to Magento?

Can Cart2Cart Create Redirects After Migration to Magento?

Migrating your online store to a new platform like Magento is a significant step. A crucial aspect of this process is ensuring that your existing customers and search engine rankings aren't negatively impacted. This is where redirects come in. The good news is, Cart2Cart can help you create redirects during your migration to Magento.

Yes, our service creates 301 redirects for products and categories when migrating to or from Magento. To enable this feature, select the “Create 301 redirects on your target store after migration” option during the entity selection step in the Migration Wizard. This ensures that your old URLs seamlessly point to their new counterparts on your Magento store, preserving your SEO ranking.

After the data migration is complete, verify that the new product URLs (without the domain name) correctly redirect to the corresponding old URLs. If the redirects are functioning as expected, you can safely switch your domain to the new Magento store, and all your old URLs will redirect seamlessly, minimizing any disruption to your traffic and search engine ranking.

Using redirects is critical for maintaining your website's authority and preventing lost traffic. Without them, customers clicking on old links or search engines indexing outdated pages will encounter errors, leading to a negative user experience and potential SEO penalties.

Why are 301 redirects important for data migration?

301 redirects are permanent redirects. They tell search engines that a page has permanently moved to a new location. This is crucial for SEO because it passes the link equity (ranking power) from the old URL to the new URL. Without 301 redirects, you risk losing all the SEO value you've built up over time.

Ready to migrate to Magento and preserve your SEO? Start your free demo now or schedule a call with our migration expert to discuss your specific needs.

More info
There’s an issue when I’m trying to log in to the Wix admin. What should I do?

Troubleshooting Wix Admin Login Issues During Data Migration

When performing a data migration to or from Wix, accessing the Wix admin panel is crucial. However, users sometimes encounter issues logging in. This is usually related to the user role assigned within Wix.

Clients accessing the Wix admin should ensure they have either the Owner or Co-Owner role. These roles provide the necessary permissions to manage all aspects of the site, which is essential for Cart2Cart to perform the data migration successfully.

Wix admin access: user roles for data migration

To check or change your user role in Wix:

  1. Log in to your Wix account.
  2. Go to your site's dashboard.
  3. Navigate to Settings, then Roles & Permissions.
  4. Here, you can see your current role and, if you are the Owner, you can invite or change the roles of other users.

If you do not have the Owner or Co-Owner role, contact the site owner and request the necessary permissions. Without these permissions, Cart2Cart may not be able to properly access and migrate your store's data.

Need to migrate your store to or from Wix? Start your free demo now!

More info
Can Cart2Cart migrate invoices?

Can Cart2Cart migrate invoices during a data migration?

Yes, Cart2Cart can migrate invoices as part of your data migration from one e-commerce platform to another. The availability of invoice migration depends on the specific source and target platforms you are using.

Cart2Cart offers invoice migration specifically for Magento and PrestaShop as an additional option. For these platforms, you can also migrate credit memos and shipments. Note that credit memos and shipments migration is supported only for Magento stores.

Note for Magento users:

Cart2Cart can also migrate carriers along with shipments. However, if the carriers are not installed on your new store, they’ll be displayed as follows:

Carriers display after Magento data migration with Cart2Cart

For other platform pairs supported by Cart2Cart for data migration, the service primarily focuses on migrating orders. However, your new store might have a feature to generate invoices automatically based on the migrated order data. If not, you can manually generate invoices within your new store's admin panel after the migration is complete.

With Cart2Cart, you can ensure a seamless and comprehensive data migration experience, tailored to your specific platform needs.

Ready to migrate your store? Start your free demo now!

More info
Can I migrate payment methods and invoices?

Can I Migrate Payment Methods and Invoices with Cart2Cart?

Regarding invoices, credit memos, and shipments migration, Cart2Cart offers this as an additional option for certain platform combinations. Please contact our support team or check our list of supported carts to see if this option is available for your specific source and target platforms.

Currently, Cart2Cart doesn't support the direct migration of payment methods. However, you *can* migrate related payment information. This allows you to retain valuable transaction details when switching platforms.

Looking for Seamless Data Migration?

Cart2Cart simplifies the process of migrating your online store data, ensuring a smooth transition to your new platform. Start your free demo now to see how easy it is to migrate your products, customers, orders, and more!

Still have questions? Schedule a call with a Migration Expert or contact our support team via Live Chat.

More info
I get ‘Validation error’ when trying to migrate from Wix. What’s the problem?

Encountering a 'Validation error' when migrating from Wix to another platform using Cart2Cart? Let's troubleshoot the issue. Since Wix doesn't natively offer eCommerce capabilities, you need to integrate a third-party eCommerce app like ‘Wix Stores’, ‘Online Store’, ‘eCommerce’, or ‘Simple-e-Commerce’ to enable selling.

Wix to Another Platform Data Migration: Understanding the 'Validation Error'

Currently, Cart2Cart provides automated data migration specifically from the 'Wix Stores' app. This means that if you're using another Wix eCommerce app, you might encounter this validation error.

Wix Stores app for eCommerce data migration with Cart2Cart

If you're using a different Wix eCommerce plugin, data transfer can be facilitated through our Data Migration Package, which offers a customized approach to ensure a seamless transition.

Next Steps for Your Wix Data Migration

For personalized assistance and detailed information, please don't hesitate to contact our Support Team. They can help you determine the best approach for migrating your data from Wix, regardless of the eCommerce app you're using.

Ready to migrate? Start your free demo now and experience the ease of Cart2Cart data migration!

More info
The URLs on migrated products/categories are incorrect

My Product/Category URLs are Incorrect After Magento Ecommerce Data Migration. What Should I Do?

After completing your ecommerce data migration to Magento using Cart2Cart, you might find that the URLs for your products and categories aren't working as expected. This is often due to Magento's URL rewrite system needing a refresh after a large import of data. Here's how to resolve it:

Step-by-Step Guide to Rebuilding SEO Links After Ecommerce Data Migration to Magento

  1. Clear Magento Cache: Log in to your Magento admin panel.
  2. Navigate to System -> Cache Management.
  3. Select all cache types by checking the boxes next to them.
  4. Choose "Refresh" from the "Actions" dropdown menu.
  5. Click "Submit". This will clear the outdated cache.
  6. Reindex Data: Go to System -> Index Management.
  7. Select all indexes that are showing as "Reindex Required".
  8. Choose "Update on schedule" from the "Actions" dropdown menu.
  9. Click "Submit". Magento will now reindex the data.
  10. Rebuild URL Rewrites: Navigate to Marketing -> SEO & Search -> URL Rewrites.
  11. Click "Add URL Rewrite".
  12. In the "Create URL Rewrite" dropdown, select "For Category" or "For Product" depending on which URLs are incorrect.
  13. Choose the specific Category or Product that needs a rewrite.
  14. Ensure the "Request Path" and "Target Path" are correctly set. If not, manually adjust them.
  15. Save the URL Rewrite.
  16. Repeat steps 8-13 for any other incorrect URLs.

Important Considerations:

  • Magento Version: These steps apply to most Magento versions. Consult the official Magento documentation for your specific version if you encounter any discrepancies.
  • Large Catalogs: If you have a very large catalog, reindexing and rebuilding URL rewrites might take some time. Be patient and allow the process to complete.
  • Custom Extensions: If you are using any custom SEO extensions, they might interfere with the standard URL rewrite process. Consult the extension's documentation or contact the developer for assistance.

By following these steps, you should be able to correct any incorrect product or category URLs after your ecommerce data migration to Magento. If you continue to experience issues, don't hesitate to contact Cart2Cart support for further assistance.

Ready to migrate your store to Magento? Start your free demo now!

More info
SQLSTATE[23000]: Integrity constraint violation: 1062 Duplicate entry

Resolving Database Integrity Constraint Violations During eCommerce Data Migration

Encountering an error like "SQLSTATE[23000]: Integrity constraint violation: 1062 Duplicate entry" during an eCommerce data migration can be concerning. This usually indicates a conflict when inserting data into your new store's database.

This type of issue can occur with any platform, including Magento, and often arises from duplicate entries violating unique key constraints in the database.

Here's how to approach resolving this issue during your eCommerce data migration:

  1. Check Error Logs: Examine the detailed error message for clues about the specific table and field causing the conflict. This will help you narrow down the source of the problem.
  2. Identify Duplicate Data: Analyze the data being migrated to identify potential duplicate entries in your source platform.
  3. Clean Up Source Data (Recommended): The best approach is to resolve the data inconsistencies in your source platform before migrating. This ensures a cleaner and more stable migration.
  4. Consult Platform Documentation: Refer to the documentation for both your source and target platforms for information on database constraints and data import best practices.
  5. Contact Support: If you are using Cart2Cart for your eCommerce data migration, reach out to our support team. Provide them with the specific error message and details about your migration setup.

While it might be tempting to ignore the warning, it's crucial to address it to ensure data integrity in your new store. Ignoring such errors can lead to unexpected issues down the line.

If you're facing challenges with your eCommerce data migration, Cart2Cart can help. Our automated migration service supports a wide range of platforms, including Shopify, WooCommerce, BigCommerce, and many more. We handle the complexities of data transfer, allowing you to focus on growing your business.

Ready to migrate your store? Start your free demo now!

More info
How to add new language in Magento?

How to Add Multiple Languages to Your Online Store: A Guide to Store Views and eCommerce Data Migration

Store Views are the recommended way to display your online store in multiple languages. This is crucial for reaching a wider audience and increasing sales. This approach is especially important when considering an eCommerce data migration, as you'll want to ensure your multilingual setup is correctly transferred.

Creating a New Store View for Each Language

To create a new Store View for each language, follow these steps:

  1. Click **Create Store View** in the upper right corner of your store's admin panel.
  2. Select the **Store** to which this Store View will be associated. The **Code** and **Sort order** fields function similarly to those for Websites.
  3. Ensure the Store View is **Enabled** to be visible on the front-end. You can disable it without deleting it by selecting **Disabled**.

Setting Unique Locales for Each Store View

You can configure unique Locales for each Store View, allowing you to tailor the language and regional settings. Here's how:

  1. Navigate to **System > Configuration** (or similar, depending on your platform) and select the **General** tab from the left column.
  2. In the **Current Configuration Scope** drop-down above, select the desired Store View.
  3. Uncheck the **Use website** checkbox next to the Locale settings.
  4. Select the desired **Locale**. This Locale will only apply to this Store View.

Planning Your eCommerce Data Migration with Multiple Languages

Before initiating an eCommerce data migration, carefully plan how your multilingual content will be handled. Cart2Cart, a leading data migration service, can help you migrate your products, customers, and other data, including translations, between various platforms like Magento, Shopify, WooCommerce, OpenCart, and many more. Ensuring your Store Views and associated languages are correctly configured prior to migration will streamline the process and prevent data loss.

Consider these points:

  • **Platform Compatibility:** Verify that your target platform fully supports multiple languages and Store Views in a way that aligns with your current setup.
  • **Data Mapping:** Clearly define how your existing language data maps to the new platform's structure.
  • **Testing:** Thoroughly test the migrated store to ensure all translations are accurate and display correctly.

By following these steps and carefully planning your eCommerce data migration, you can successfully implement a multilingual store and expand your reach.

Ready to migrate your store? Start your free demo today! Need help planning your migration? Schedule a call with a Migration Expert.

More info
How Cart2Cart migrates the attributes, clients and orders for Magento?

Below is described how Cart2Cart facilitates the transfer of product attributes, customer data, and order information during the process of migrating your store.

Magento Data Migration: How Cart2Cart Handles Products, Customers, and Orders

When migrating from Magento, understanding how your data is handled is crucial. Cart2Cart ensures a seamless and secure transfer of your valuable information. Here's a breakdown of how Cart2Cart migrates products, customers, and orders from your Magento store:

Product Data Migration from Magento

Magento product attributes migration process with Cart2Cart

Key points regarding product migration:

  • Simple Products: All product details, including title, description, price, size, and weight, are migrated.
  • Configurable Products: The "Create Configurable" option on the Cart2Cart migration wizard page allows you to recreate configurable products in your new store.
  • Products and Variants: Products with variations (e.g., different sizes, styles, colors) are migrated, preserving the relationships between products and their variants. Cart2Cart supports attributes such as: Manufacturer, Categories, Model, SortOrder, Created Time, Modified Time, Name, Url, Short Description, Full Description, Meta-Title, Meta-Keywords, Meta-Description, Available for Sale, Available for View, Viewed Count, Ordered Count, Weight, Quantity, Default Price, Special Price, Tier Prices, Downloadable, Tax Class, Wholesale Price.
  • Extra Fields: For custom attributes not listed above, contact our support team to ensure proper migration.
  • Support Service Packages: Cart2Cart's Support Service Packages are designed to save you time, minimize risks, and ensure data safety during your migration.

Customer Data Migration from Magento

Customer data migration from Magento using Cart2Cart

Key points regarding customer migration:

  • Standard Customer Data: Cart2Cart migrates essential customer information, including: Email, Login, Password, First Name, LastName, Gender, Url, Company, Birthday, Phone, Fax, Active, Newsletter Subscription, Created Time, Modified Time.
  • Extra Fields: For any custom customer fields, contact our support team to ensure they are migrated correctly.
  • Support Service Packages: Cart2Cart's Support Service Packages provide extra assistance to save time, reduce risks, and guarantee data security.

Order Data Migration from Magento

Order data migration from Magento with Cart2Cart

Key points regarding order migration:

  • Standard Order Data: Cart2Cart migrates crucial order details, including: Customer, Customer Info, Billing Address, Shipping Address, Currency, Payment Method, Shipping Method, Status, Totals, Created Time, Modified Time, Finished Time.
  • Extra Fields: If your store uses custom order fields, contact our support team to ensure accurate data transfer.
  • Support Service Packages: Cart2Cart's Support Service Packages are available to offer guidance and ensure a smooth and secure migration process.

Ready to migrate your Magento store? Start your free demo now! Or, schedule a call with a migration expert to discuss your specific needs.

More info
Can I migrate my store from the older Magento version to a new one?

Can I migrate my store from an older Magento version to a new one?

Yes, Cart2Cart supports Magento-to-Magento eCommerce data migration. Whether you're upgrading from an older version like Magento 1 to Magento 2/Adobe Commerce, or migrating between different Magento 2 versions, Cart2Cart can seamlessly transfer your store data.

This includes products (Simple, Configurable, Virtual, Downloadable, Grouped, Bundled), customers, orders, categories, attributes, reviews, CMS pages, blogs, and more. You can even migrate related products, up-sell, and cross-sell items to enhance your new store's merchandising capabilities. Migrating your eCommerce data with Cart2Cart is an effective way to upgrade your Magento store without significant effort.

The cost for Magento eCommerce data migration starts from $29, with the final price depending on the number of entities you migrate. To get a precise estimate, use our migration estimator.

Ready to start your Magento eCommerce data migration? Try a free demo now!

More info
Why my order IDs look like #1000X after migration to Magento?

Why do my order IDs look like #1000X after data migration to Magento?

If you've migrated your store to Magento and notice that your order IDs have changed to a format like #1000X, this is due to Magento's specific order numbering system. This behavior is normal and ensures proper system functioning within the Magento platform.

Understanding Magento Order ID Structure After Data Migration

Magento's order ID structure is designed with flexibility in mind. The leading number (e.g., '1' in #100035) represents the Store ID, while the subsequent numbers (e.g., '35') are the incremented order ID. Therefore, all new orders created directly in your Magento store will follow this pattern.

When you choose the "Preserve Order IDs" option during your data migration with Cart2Cart, the tool attempts to retain your original order IDs. However, to ensure compatibility with Magento's system, Cart2Cart adjusts the migrated order IDs to fit the Magento pattern. This means that an original order ID of #X becomes #1000X after migration. This adjustment is crucial for Magento to correctly process and manage orders.

This adjustment is part of ensuring a seamless and functional ecommerce migration process. Cart2Cart takes care of these technical details so you can focus on growing your business on the Magento platform.

Thinking about migrating to Magento? Start your free demo with Cart2Cart today and experience a hassle-free data migration!

More info
Why my Lifetime sales are not correct after migration?

Troubleshooting Incorrect Lifetime Sales After Ecommerce Data Migration

As an ecommerce data migration service, Cart2Cart does not directly migrate lifetime sales data. This report is typically generated automatically on your new store after the migration process. Because each version of platforms like Magento uses a different algorithm to calculate lifetime sales, the figures may sometimes be incorrect after your ecommerce data migration.

Several factors can contribute to discrepancies in lifetime sales after an ecommerce data migration. The algorithm used by your previous platform may differ significantly from the one used by your new platform, resulting in differing calculations. Additionally, historical data may be incomplete or formatted differently, leading to inaccuracies during the generation of the lifetime sales report.

If your lifetime sales are not updating correctly on your new platform, refer to the official documentation for your platform (e.g., Adobe Commerce documentation) for instructions on how to refresh or recalculate these statistics.

Ready to experience seamless ecommerce data migration? Start your free demo with Cart2Cart today!

More info
Why is the prefix "c2c_" in front of the attributes after migration?

Why is the prefix "c2c_" in front of the attributes after migration to Magento?

Some attributes and all attribute sets may be marked with the "c2c_" prefix after migrating to Magento. This is due to the way Cart2Cart handles data migration to ensure compatibility and avoid conflicts with existing Magento attributes. While the prefix cannot be automatically removed, it's important to understand that it doesn't affect the functionality of your store. If you need to remove the prefix, you can hire a developer to do so. Cart2Cart can help you to find a developer to assist you.

Ready to migrate your store to Magento? Start your free demo now.

More info
How to make my products from sub-category display in root category at Magento shopping cart?

How do I display products from subcategories in the main category on Magento after a data migration?

After performing a Magento data migration, you might want to display products from subcategories within the main category page. This can improve user experience and product discoverability. Here's how to achieve this:

  1. Log in to your Magento Admin panel and navigate to Catalog -> Categories.
  2. Select the category you want to modify.
  3. Go to the Display Settings tab.
  4. Set Is Anchor to "Yes". This setting makes the category an anchor, displaying products from its subcategories.
  5. Navigate to System -> Index Management.
  6. Select all indexes, choose "Reindex Data" from the Actions dropdown, and click "Submit". This ensures the changes are reflected on the storefront.

By following these steps, you can ensure that products from your subcategories are displayed in the main category after your Magento store's data migration. If you're looking to migrate to Magento or from Magento to another platform like Shopify, WooCommerce, or BigCommerce, Cart2Cart can help.

Ready to migrate your store to Magento? Start your free demo now!

More info
Does migration influence the speed of my Magento store?

Will Magento Data Migration Slow Down My Store?

No, the Magento data migration itself doesn't directly slow down your store's server. Think of it this way: a brand new Magento store, fresh out of the box and empty, will naturally perform faster than an established store loaded with thousands of products, customers, and orders. The sheer volume of data affects performance.

After migrating your data to Magento, it's crucial to ensure your web hosting environment meets Magento's system requirements. Inadequate hosting resources can lead to sluggish performance, regardless of the data migration process. Consider optimizing your Magento store further by using a Content Delivery Network (CDN), enabling caching, and optimizing images. These steps will enhance your store's speed and improve user experience after the Magento data migration is complete.

Cart2Cart's Magento data migration service ensures a seamless transfer of your data, allowing you to focus on optimizing your store for peak performance. We support migrations to the latest stable versions of Magento. Learn more about Magento migration with Cart2Cart.

Optimizing Magento Performance After Data Migration

Here are a few tips to optimize your Magento store after the Magento data migration:

  • Optimize Images: Compress and optimize all images to reduce file sizes.
  • Enable Caching: Utilize Magento's built-in caching features or implement a Varnish cache.
  • Use a CDN: Distribute your store's content across a Content Delivery Network (CDN) for faster loading times.
  • Review Extensions: Disable or remove any unnecessary extensions that may be impacting performance.
  • Optimize Database: Regularly optimize your Magento database to remove unnecessary data and improve query performance.

Ready to migrate your data to Magento? Start your free demo today!

More info
Will Cart2Cart migrate my attribute sets?

Will Cart2Cart migrate my attribute sets?

Unfortunately, Cart2Cart can migrate your product attributes but not the attribute *sets* themselves. During the data migration process, your attributes will be moved to the new platform, and the attribute sets will be automatically created on the target store. This ensures that all your product information is transferred, even though the original attribute set structure isn't directly replicated.

Think of it this way: Cart2Cart focuses on moving the *data* within your attributes. The new platform will then organize that data into its own system of attribute sets. This is a common approach in data migration, ensuring compatibility across different e-commerce platforms.

For example, if you're migrating from Magento to Shopify, or any other platform combination, the attribute data will be migrated, and Shopify's product options will be set up automatically based on that data.

Next Steps:

  • Start your free demo to see how your product attributes will be migrated.
  • Contact our support team via Live Chat for any questions.
  • Schedule a call with a Migration Expert for personalized assistance.
More info
Is there a possibility to migrate review ratings to Magento?

Can I Migrate Product Reviews to Magento?

Yes, Cart2Cart provides a seamless solution to migrate product reviews to and from Magento. This includes migrating customer names, review dates, ratings, and review text, ensuring you retain valuable customer feedback during your platform transition.

Migrating reviews is crucial for maintaining customer trust, boosting SEO, and providing valuable social proof on your Magento store. With Cart2Cart, you can effortlessly transfer this data, preserving its integrity and relevance.

How to Migrate Reviews to Magento with Cart2Cart

  1. Set up your Source and Target Carts: Connect your current store (source cart) and your Magento store (target cart) to Cart2Cart.
  2. Select the "Reviews" Entity: During the migration setup, choose "Reviews" as one of the data entities you want to migrate.
  3. Map Customer Groups and Other Relevant Data: Map customer groups and other relevant data fields to ensure accurate data transfer.
  4. Start the Demo Migration: Run a demo migration to see how your reviews will look in your Magento store.
  5. Perform the Full Migration: Once you're satisfied with the demo, proceed with the full migration.

Note: Cart2Cart supports review migration for various Magento versions, ensuring compatibility and data integrity throughout the process. Check the list of supported platforms to confirm compatibility with your specific Magento version and your source cart.

Ready to migrate your product reviews to Magento? Start your free demo now or schedule a call with a migration expert for personalized assistance.

More info
After migration to Magento my lifetime sales and average order sum has been different. Why is it so?

Why Are My Lifetime Sales and Average Order Sum Different After Migrating to Magento?

The difference between lifetime sales and average order sum after a Magento migration can occur because Magento has its own accounting system, which may vary from your source store's one. This is a common observation and stems from the way different platforms calculate these metrics.

Here's a breakdown of potential reasons for the discrepancy:

  • Calculation Methods: Magento's sales calculation might include or exclude factors differently than your previous platform. For example, it could be related to the way refunds, shipping costs, taxes, or discounts are handled.
  • Data Interpretation: Even if the raw data is migrated correctly, Magento might interpret it differently. This is particularly true for historical data where the original context might not be perfectly translated.
  • Currency Conversions: If your store operates with multiple currencies, the conversion rates used by Magento might differ from those used by your previous platform, leading to discrepancies in the calculated sums.
  • Order Status: Magento may consider different order statuses (e.g., "Pending," "Processing," "Complete") when calculating lifetime sales, impacting the final number.

Troubleshooting Sales Data Discrepancies After Data Migration

To investigate further, consider the following:

  1. Review Magento's Configuration: Check Magento's configuration settings related to sales calculations, including tax settings, shipping cost calculations, and discount application.
  2. Compare Sample Orders: Select a few sample orders from your previous platform and compare the corresponding orders in Magento. Analyze how the total sales amount is calculated in each system.
  3. Analyze Historical Data: Examine historical sales data in both platforms for a specific period to identify any significant discrepancies and understand the underlying reasons.
  4. Consult with a Magento Expert: If you're unable to pinpoint the cause, consider consulting with a Magento expert or developer who can analyze your specific setup and identify any issues.

If you are migrating your store to Magento and need assistance with data migration, consider using Cart2Cart, a reliable data migration service. Cart2Cart supports migration to the latest Magento versions and ensures a smooth transition of your store data. You can even migrate from Shopify to Magento or from another platform.

Next Steps:

More info
Why the number of products after migration differs from one that has been shown on Magento?

Why Does the Number of Products Differ After Magento Data Migration?

Are you noticing a discrepancy in the number of products after migrating your data from Magento? This is a common concern when migrating to a different e-commerce platform, and here's why it happens.

Magento's Unique Product Accounting System

Magento employs a specific system for counting products, particularly when dealing with product variations. It counts each child product (e.g., a specific size or color variation of a shirt) as a separate, simple product, alongside its parent product. This means that a single configurable product with multiple variations will be counted multiple times in Magento's product count.

Product Count Differences After Data Migration

When you migrate your data using a data migration service like Cart2Cart to a platform that uses a different product accounting method (e.g., where variations are tracked differently), the total product count may differ. The target platform might only count the parent product and track variations within that single product record, leading to a lower overall product count.

For example, if you are migrating from Magento to Shopify, WooCommerce, or BigCommerce, you might see a difference in the number of products. This doesn't mean that any products are missing; it simply reflects the different way each platform manages product variations and counts.

If you have questions about migrating your store and want to know more about migration process, feel free to contact our Support Team for further assistance.

Ready to start your data migration? Start your free demo now!

More info
Can I migrate Downloadable Products to and from Magento?

Migrating Downloadable Products to Magento: A Comprehensive Guide

Yes, Cart2Cart supports the transfer of downloadable products and orders containing downloadable products to and from Magento. If you're planning a Magento data migration involving digital goods, here are some important considerations:

Peculiarities of Magento Downloadable Product Migration

Magento handles downloadable products differently than other platforms. Here's what you need to know for a successful Magento data migration:

  1. Unlike some platforms, Magento uses a distinct "Downloadable Product" type. Each downloadable product has a main title and can include multiple downloadable files. During a Magento data migration, the main product titles will be set to "Downloadable" on your target store, while the titles of the individual downloadable files will be preserved.
  2. Magento Downloadable Products Structure after Magento data migration
  3. Currently, Cart2Cart does not support the migration of samples for downloadable products during a Magento data migration.
  4. Orders with Downloadable Products after Magento data migration
  5. Orders containing downloadable products will be migrated without any complications during the Magento data migration process.

Ready to migrate your downloadable products to Magento? Start your free demo today and experience a seamless Magento data migration with Cart2Cart!

More info
Can I migrate manufacturer images to/from Magento?

Can I Migrate Manufacturer Images to/from Magento?

Yes, Cart2Cart supports the migration of manufacturer images to or from Magento. This feature is particularly useful for preserving all visual aspects of your product catalog during a data migration.

To enable manufacturer image migration, you'll need to install a free module from the Adobe Commerce Marketplace on your Magento store *before* initiating the migration process. This module ensures compatibility and proper transfer of the images.

Next Steps:

More info
Can I migrate CMS pages to and from Magento?

Can I Migrate CMS Pages to and from Magento?

Yes, Cart2Cart supports the migration of CMS pages to and from Magento stores. However, there are a few important points to consider regarding data migration:

Limitations When Migrating CMS Pages to Magento

When performing a Magento data migration, please note the following:

  1. Default CMS Pages: Cart2Cart does not migrate the default CMS pages that are pre-installed within Magento. These include:
    • 'no-route' (404 error page)
    • 'home'
    • 'about-magento-demo-store' (about us page)
    • 'customer-service'
    • 'enable-cookies'
    • 'privacy-policy-cookie-restriction-mode'
  2. Clearing Data Before Migration: If you choose the "Clear current data on Target Store before Migration" option during a Magento data migration, the default CMS pages on your Magento target store will not be erased. This ensures that essential pages remain accessible even after the migration process.

Ensuring a Smooth Magento CMS Page Migration

To ensure a successful Magento data migration of your CMS pages, we recommend:

  • Reviewing Existing Pages: Before initiating the migration, review your current CMS pages on both your source and target stores.
  • Testing the Migration: Perform a test migration with a limited number of CMS pages to verify the process and identify any potential issues.
  • Considering Customizations: If you have heavily customized default CMS pages, consider manually migrating the content or engaging a developer for assistance.

Ready to migrate your store to Magento? Start your free demo now or schedule a call with a migration expert to discuss your specific needs.

More info
How to install Cart2Cart Migration from OpenCart module on Magento 2?

Installing the Cart2Cart OpenCart to Magento Data Migration Module via Command Line

Note: This installation method is compatible with all Magento versions.

* = In production environments, please use the --keep-generated option.

Method 1: Installing the Magento Data Migration Module from a Zip File

Before you proceed, please download the Cart2Cart Magento Upgrade module.

Steps:

  1. Unzip the zip file into the app/code/Cart2Cart/MigrationFromOpencart directory.
  2. Enable the module by running: php bin/magento module:enable Cart2Cart_MigrationFromOpencart
  3. Enable the Cart2Cart Magento Data Migration module
  4. Apply database updates by running: php bin/magento setup:upgrade
  5. Apply database updates for the Magento Data Migration module
  6. Flush the cache by running: php bin/magento cache:flush
  7. Flush the cache after installing the Magento Data Migration module
  8. Run: php -f bin/magento setup:di:compile (this command may require increasing the memory_limit PHP directive).
  9. Run di:compile command for Magento Data Migration module

The installed module view in the Magento Admin Panel:

Cart2Cart Magento Data Migration module view in Admin Panel

Method 2: Installing the Magento Data Migration Module Using Composer

Note:

Please ensure you have access keys (My Profile - Access Keys). If you don’t have them yet, please generate them.

*For detailed instructions, see DevDocs.

Steps:

  1. Make the module available in a composer repository, for example:
    • private repository repo.magento.com
    • public repository packagist.org
    • public GitHub repository as VCS
  2. Add the composer repository to the configuration by running: composer config repositories.repo.magento.com composer https://repo.magento.com/
  3. Add Composer repository for Magento Data Migration module
  4. Install the module composer by running: composer require magneticone/cart2cart-migration-from-opencart (if you’re asked to provide a username, please use the info from here (My Profile - Access Keys) - public key is your user name, while private key is your password)
  5. Install Magento Data Migration module via Composer
  6. Enable the module by running: php bin/magento module:enable Cart2Cart_MigrationFromOpencart
  7. Enable the Cart2Cart Magento Data Migration module
  8. Apply database updates by running: php bin/magento setup:upgrade
  9. Apply database updates for the Magento Data Migration module
  10. Flush the cache by running: php bin/magento cache:flush
  11. Flush the cache after installing the Magento Data Migration module
  12. Run: php -f bin/magento setup:di:compile (this command may require increasing the memory_limit PHP directive)
  13. Run di:compile command for Magento Data Migration module

The installed module view in the Magento Admin Panel:

Cart2Cart Magento Data Migration module view in Admin Panel

Ready to migrate your data to Magento? Start your free demo now!

More info
How to install Cart2Cart Migration from PrestaShop module on Magento 2?

Installing the Cart2Cart PrestaShop to Magento Data Migration Module via Command Line

Note: You can use this installation method for all Magento versions.

* = in production, please use the --keep-generated option

Type 1: Zip file Installation for Magento Data Migration

Before you proceed, please download the Cart2Cart Magento Upgrade module on Magento:

1. Unzip the zip file in app/code/Cart2Cart/MigrationFromPrestashop

2. Enable the module by running php bin/magento module:enable Cart2Cart_MigrationFromPrestashop

Enable the Cart2Cart PrestaShop to Magento data migration module

3. Apply database updates by running php bin/magento setup:upgrade

Apply database updates for Magento data migration

4. Flush the cache by running php bin/magento cache:flush

Flush the cache for Magento data migration

5. php -f bin/magento setup:di:compile (this command may require increasing memory_limit php directive)

Magento data migration command

The view of the installed module in the Admin Panel:

View of the installed Magento data migration module in Admin Panel

Type 2: Composer Installation for Magento Data Migration

Note:

Please ensure you have access keys (My Profile - Access Keys) (if you don’t have them yet, please generate them).

*For detailed instructions, see DevDocs.

1. Make the module available in a composer repository, for example:

  • private repository repo.magento.com
  • public repository packagist.org
  • public GitHub repository as VCS

2. Add the composer repository to the configuration by running composer config repositories.repo.magento.com composer https://repo.magento.com/

composer config repositories for Magento data migration

3. Install the module composer by running composer require magneticone/cart2cart-migration-from-prestashop

(if you’re asked to provide a username, please use the info from here (My Profile - Access Keys) - public key is your user name, while private key is your password) Install the Magento data migration module

4. Enable the module by running php bin/magento module:enable Cart2Cart_MigrationFromPrestashop

Enable the Magento data migration module

5. Apply database updates by running php bin/magento setup:upgrade

Apply database updates for Magento data migration

6. Flush the cache by running php bin/magento cache:flush

Flush the cache after Magento data migration

7. php -f bin/magento setup:di:compile (this command may require increasing memory_limit php directive)

Magento data migration command

The view of the installed module in the Admin Panel:

View of the installed Magento data migration module in Admin Panel

Ready to migrate your data? Start your free demo now!

More info
How to install Cart2Cart Magento® Upgrade module on Magento 2?

Installing the Cart2Cart Magento Data Migration Module via Command Line Interface

Note: This installation method is applicable for all Magento versions.

* = In production environments, please use the --keep-generated option.

Method 1: Installing the Magento Data Migration Module from a Zip File

Before proceeding, please download the Cart2Cart Magento Data Migration module.

1. Unzip the file into the app/code/Cart2Cart/MigrationFromMagento directory.

2. Enable the module by running: php bin/magento module:enable Cart2Cart_MigrationFromMagento

3. Apply database updates by running: php bin/magento setup:upgrade

Apply database updates for Magento data migration

4. Flush the cache by running: php bin/magento cache:flush

Flush the cache after Magento data migration module installation

5. Run: php -f bin/magento setup:di:compile (This command may require increasing the memory_limit PHP directive).

Magento setup di compile command

View of the Installed Magento Data Migration Module in the Admin Panel:

Installed Magento data migration module in Admin Panel

Method 2: Installing the Magento Data Migration Module using Composer

Note:

Please ensure you have access keys. If you don’t have them yet, please generate them from your Adobe Commerce Marketplace account.

*For detailed instructions, see DevDocs.

1. Make the module available in a composer repository. For example:

  • private repository repo.magento.com
  • public repository packagist.org
  • public GitHub repository as VCS

2. Add the composer repository to the configuration by running: composer config repositories.repo.magento.com composer https://repo.magento.com/

Composer command for Magento data migration module

3. Install the module using Composer by running: composer require magneticone/cart2cart-migration-from-magento (If you’re asked to provide a username, please use the info from your Adobe Commerce Marketplace account - public key is your username, while the private key is your password).

Install Magento data migration module using Composer

4. Enable the module by running: php bin/magento module:enable Cart2Cart_MigrationFromMagento

Enable the Magento data migration module

5. Apply database updates by running: php bin/magento setup:upgrade

Apply database updates for Magento data migration

6. Flush the cache by running: php bin/magento cache:flush

Flush the cache after Magento data migration module installation

7. Run: php -f bin/magento setup:di:compile (This command may require increasing the memory_limit PHP directive).

Magento setup di compile command

View of the Installed Magento Data Migration Module in the Admin Panel:

Installed Magento data migration module in Admin Panel

Ready to migrate your data to Magento? Start your free demo now!

More info
Installing Cart2Cart Migration module from WooCommerce to Magento 2

Installing via the command line interface

Note: You can use this installation method for all Magento versions.

* = In production, please use the --keep-generated option.

Installing the Cart2Cart Migration Module for Magento 2 via Zip File

Before you proceed, please download the Cart2Cart Migration Module for Magento 2:

1. Unzip the zip file in app/code/Cart2Cart/MigrationFromWoocommerce

2. Enable the module by running php bin/magento module:enable Cart2Cart_MigrationFromWoocommerce

3. Apply database updates by running php bin/magento setup:upgrade

4. Flush the cache by running php bin/magento cache:flush

Flush the cache during Magento 2 data migration

5. php -f bin/magento setup:di:compile (this command may require increasing memory_limit php directive)

Increasing memory_limit during Magento 2 data migration

Installed Cart2Cart Migration Module View in the Magento Admin Panel:

View of the installed Cart2Cart Magento 2 data migration module

Installing the Cart2Cart Migration Module for Magento 2 via Composer

Note:

Please ensure you have access keys (My Profile - Access Keys) (if you don’t have them yet, please generate them).

*For detailed instructions, see DevDocs.

1. Make the module available in a composer repository, for example:

  • private repository repo.magento.com
  • public repository packagist.org
  • public GitHub repository as VCS

2. Add the composer repository to the configuration by running composer config repositories.repo.magento.com composer https://repo.magento.com/

Add the composer repository for Magento 2 data migration

3. Install the module composer by running composer require magneticone/cart2cart-migration-from-woocommerce (if you’re asked to provide a username, please use the info from here (My Profile - Access Keys) - public key is your user name, while private key is your password)

Install the module composer for Magento 2 data migration

4. Enable the module by running php bin/magento module:enable Cart2Cart_MigrationFromWoocommerce

Enable the module for Magento 2 data migration

5. Apply database updates by running php bin/magento setup:upgrade

Apply database updates for Magento 2 data migration

6. Flush the cache by running php bin/magento cache:flush

Flush the cache for Magento 2 data migration

7.php -f bin/magento setup:di:compile (this command may require increasing memory_limit php directive)

Increasing memory_limit for Magento 2 data migration

Installed Cart2Cart Migration Module View in the Magento Admin Panel:

View of the installed Cart2Cart Magento 2 data migration module

Ready to migrate your store to Magento 2? Start your free demo now! Need help? Schedule a call with a Migration Expert.

More info
How to reindex Magento 1.x?

How to Reindex Your Magento Store After Data Migration

After migrating your store's data to Magento, it's crucial to reindex your data. Reindexing ensures that all your products, categories, and other information are correctly displayed on the front end of your store. Without reindexing, you might encounter issues like missing products, incorrect prices, or broken category pages.

Reindexing essentially rebuilds Magento's indexes, which are used to efficiently retrieve and display data. This process is necessary after any significant data changes, including a full data migration.

Magento Reindexing Instructions

Here’s how to perform data reindexing in Magento:

  1. Log in to your Magento Admin panel.
  2. Navigate to System → Index Management.
  3. Select all indexes by checking the box in the header.
  4. Choose "Reindex Data" from the Actions dropdown menu and click Submit.
Magento Index Management

Clearing the Magento Cache

After reindexing, it's also important to clear your Magento cache to ensure the changes are reflected immediately. Here’s how:

  1. In your Admin panel, go to System → Cache Management.
  2. Select all cache types by checking the box in the header and click Submit.
  3. Click Flush Magento Cache to clear the cache storage.
Magento Cache Management

That’s it! After reindexing and clearing the cache, you can check your Magento store to ensure that all your data has been migrated correctly. If you still encounter issues, double-check your migration settings or contact our support team for assistance.

Ready to start your data migration to Magento? Start your free demo today and experience a seamless transition!

More info
How to reindex Magento 2.x?

How to Reindex Magento After Data Migration

After a data migration to Magento, particularly Magento 2 or later, it's crucial to reindex your data. This ensures that all your imported products, categories, and other entities are displayed correctly on the front end of your store. Here's how to perform Magento reindexing:

Magento Reindex Instructions

First, connect to your Magento store via SSH. Then, follow these instructions:

  1. In the command line, navigate to the root directory of your Magento store.
  2. Execute the following command to reindex your data: php bin/magento indexer:reindex
  3. (Optional) To resize product images to fit your Magento theme, run: php bin/magento catalog:images:resize

Clearing the Magento Cache

After reindexing, it's essential to clear your Magento cache. Use this command: php bin/magento cache:flush

Verifying Your Magento Data Migration

Once you've completed these steps, you can check your Magento store to verify the results of your data migration. If you haven't already, consider starting a free demo migration with Cart2Cart to see how easy it is to migrate your store data.

If you encounter any issues during the reindexing process or have further questions about migrating to Magento, don't hesitate to schedule a call with a migration expert or contact our support team.

Next Steps: Ready to migrate to Magento? Start your free demo now!

More info
What are the specifics of migrating full order IDs from/to Magento?

Can I Migrate Full Order IDs To/From Magento?

Yes, Cart2Cart enables you to transfer your full Order IDs when you select the additional option “Preserve order IDs on Target Store”. This option allows you to retain your Source Store IDs in your Target Store during the data migration process.

Magento Order ID Migration Specifics

However, preserving Order IDs when performing a Magento data migration has some platform-specific considerations due to Magento's architecture. Cart2Cart will migrate full Order IDs from and to Magento if they contain only numbers (no other symbols or letters) and the option “Preserve order IDs on Target Store” is selected.

Example: Source Store order #17 will be migrated as the Target Store order #17.

Note: If your Source Store Order IDs contain characters other than numbers, Cart2Cart will migrate only the numbers following the first zero.

Example: Source Store order #2-100000034 will be migrated as the Target Store order #34.

Ready to migrate your Magento store? Start your free demo now!

More info
How to install Migration from VirtueMart module on Magento 2?

Installing the VirtueMart to Magento 2 Data Migration Module via Command Line

Note: This installation method is applicable for all Magento versions.

* = In production, please use the --keep-generated option.

Method 1: Installing the VirtueMart to Magento 2 Data Migration Module via Zip File

Before proceeding, please download the Cart2Cart Magento Upgrade module for Magento 2.

1. Unzip the file into the app/code/Cart2Cart/MigrationFromVirtuemart directory.

2. Enable the module by running: php bin/magento module:enable Cart2Cart_MigrationFromVirtuemart

3. Apply database updates by running: php bin/magento setup:upgrade

Applying database updates for the VirtueMart to Magento 2 data migration

4. Flush the cache by running: php bin/magento cache:flush

5. Run: php -f bin/magento setup:di:compile (This command may require increasing the memory_limit PHP directive.)

Installed VirtueMart to Magento 2 Data Migration Module View in the Admin Panel:

VirtueMart to Magento 2 data migration module view in Magento Admin Panel

Method 2: Installing the VirtueMart to Magento 2 Data Migration Module via Composer

Note:

Please ensure you have access keys ( My Profile - Access Keys ) (if you don’t have them yet, please generate them).

*For detailed instructions, see DevDocs.

1. Make the module available in a composer repository. For example:

  • private repository repo.magento.com
  • public repository packagist.org
  • public GitHub repository as VCS

2. Add the composer repository to the configuration by running: composer config repositories.repo.magento.com composer https://repo.magento.com/

3. Install the module composer by running: composer require magneticone/cart2cart-migration-from-virtuemart (If you’re asked to provide a username, please use the info from here ( My Profile - Access Keys ) - public key is your username, while the private key is your password.)

4. Enable the module by running: php bin/magento module:enable Cart2Cart_MigrationFromVirtuemart

Enabling the VirtueMart to Magento 2 data migration module

5. Apply database updates by running: php bin/magento setup:upgrade

6. Flush the cache by running: php bin/magento cache:flush

Flushing the cache for the VirtueMart to Magento 2 data migration module

7. Run: php -f bin/magento setup:di:compile (This command may require increasing the memory_limit PHP directive.)

Increasing memory_limit for the VirtueMart to Magento 2 data migration module

Installed VirtueMart to Magento 2 Data Migration Module View in the Admin Panel:

VirtueMart to Magento 2 data migration module view in Magento Admin Panel

Ready to migrate your data from VirtueMart to Magento 2? Start your free demo now!

Having trouble? Contact our support team via live chat for assistance.

More info
I'm a shopping cart developer. Can I use your service for my work?

Are you a Shopping Cart Developer? Simplify Client Migrations with Cart2Cart

Yes, absolutely! If you're a shopping cart developer looking for a streamlined solution for client migrations, Cart2Cart's automated shopping cart migration service is designed to simplify your workflow. Instead of developing custom scripts, you can leverage Cart2Cart to efficiently and accurately migrate your clients' store data from one platform to another. This includes products, customers, orders, and other essential data, saving you valuable time and resources.

Boost your efficiency and profitability by joining our Reseller Program. You'll gain access to exclusive discounts on multiple migrations, allowing you to offer competitive pricing to your clients while maximizing your earnings.

Ready to experience the ease of automated migration? Start your free demo today and see how Cart2Cart can revolutionize your shopping cart migration process.

More info
Do you have a Reseller Program?

Yes. We encourage users to join our partner/reseller program and enjoy its advantages. We offer wide access to resources and rewards for our partners. With our innovative service, you’ll be able to grow and develop your business effectively. If you're looking to offer seamless shopping cart data migration solutions to your clients, our program provides the tools and support you need. Click here for more information.

Do you have a Reseller Program for Shopping Cart Data Migration?

Yes! We encourage users to join our partner/reseller program and enjoy its advantages. We offer wide access to resources and rewards for our partners. With our innovative service, you’ll be able to grow and develop your business effectively. If you're looking to offer seamless shopping cart data migration solutions to your clients, our program provides the tools and support you need. Click here for more information.

Next Steps:

More info
How to become Cart2Cart affiliate?

Interested in earning commissions by promoting seamless ecommerce data migration? Here's how to become a Cart2Cart affiliate:

How to Join the Cart2Cart Affiliate Program

To join our affiliate program and start earning, please follow these steps:

    1. Register for a Cart2Cart affiliate account here. The approval process typically takes 1-2 business days.

Cart2Cart affiliate account registration

    1. Once your registration request is approved, you’ll receive an email containing your login credentials and password.
    2. Log in to your newly created affiliate account.
    3. On the Home page, you'll find essential statistics and your unique affiliate link. Cart2Cart affiliate program homepage
    4. Copy the unique identifier at the end of your affiliate link, append it to the Cart2Cart website address, and integrate the complete link into your website.

Cart2Cart affiliate link example

  1. Your final affiliate link should resemble this: https://www.shopping-cart-migration.com/#a_aid=55a6465021cc3

Start promoting Cart2Cart's leading ecommerce data migration services and earn commissions today! Start your free demo or Schedule a Call with Migration Expert

More info
Is there an option to become your partner?

Interested in Partnering for eCommerce Data Migration?

Yes, you can leverage Cart2Cart's robust platform to facilitate seamless data migration for your clients from their existing shopping carts to a new, desirable one. In fact, completing at least one successful Cart2Cart migration is a prerequisite to becoming an official partner.

By partnering with Cart2Cart, you can offer your clients a comprehensive data migration solution, ensuring a smooth transition with minimal disruption. We provide the tools and support you need to deliver exceptional service and grow your business.

Explore our Partner Program for detailed information on available benefits and partnership levels. Alternatively, feel free to contact us directly to discuss your specific needs and learn how we can collaborate.

Ready to experience the power of Cart2Cart data migration firsthand? Start your free demo today!

More info
How much work can you bring my way?

How to Maximize Your Success on the Cart2Cart Partner Program

While we can't provide specific estimates on the amount of work you'll receive through the Cart2Cart Partner Program at this time, there are several key steps you can take to significantly increase your visibility and attract more clients seeking reliable data migration services. To get maximum results from your listing and boost your opportunities, we recommend the following:

  1. Add Complete and Detailed Information to the Proper Category: Ensure your profile is comprehensive and accurately reflects your expertise in specific platforms and data migration types. The more information you provide, the better potential clients can assess your capabilities.
  2. Upload a High-Quality Company Introduction: Showcase your company's strengths, experience, and unique selling points with a professional and engaging introduction. A compelling introduction builds trust and encourages clients to choose your data migration services.
  3. Respond Quickly to Customer Inquiries: Prompt and helpful responses to inquiries demonstrate your commitment to customer service and increase the likelihood of securing new projects. Aim to provide timely and informative answers to all questions related to data migration.

Optimize Your Cart2Cart Listing for More Data Migration Leads

By following these recommendations, you'll enhance your profile's visibility and attract more potential clients searching for data migration solutions on the Cart2Cart platform. Regular updates and proactive engagement will further solidify your presence and drive more business your way.

Become a Trusted Data Migration Partner

Cart2Cart aims to connect merchants with reliable experts who can handle their data migration needs. By optimizing your listing and providing exceptional service, you can establish yourself as a trusted partner and benefit from the growing demand for seamless ecommerce platform transitions. Start maximizing your Cart2Cart listing today!

Next Steps:

  • Ensure your profile is up-to-date with the latest information.
  • Actively monitor and respond to customer inquiries.
  • Explore opportunities to further enhance your expertise and offerings in the data migration space.

Ready to get started? Explore Cart2Cart's features and create your free demo to see how we can help you succeed.

More info
Why should I list my company on your web site?

Boost your business by becoming a Cart2Cart partner! Listing your company in the Cart2Cart Migration Partners section will connect you with a targeted audience actively seeking ecommerce data migration solutions, generating valuable leads and expanding your reach within the industry.

Interested in growing your business with us? Become a Cart2Cart partner today by submitting a partnership request now!

More info
How exactly does the Partner Program work ?

How Does the Cart2Cart Partner Program Work?

The Cart2Cart Partner Program is designed for agencies, developers, and consultants who offer data migration services and want to expand their reach. By listing your company on our website, you gain visibility to merchants actively seeking assistance with shopping cart migrations. This allows them to easily find you and access your services.

To register your company as a Cart2Cart partner, follow these steps:

  1. Identify the category that best represents your business specialization.
  2. Review the Service Provider Agreement.
  3. Submit your partnership request via the Partner Program Application Form, providing detailed information about your expertise in data migration services.

As a Cart2Cart Partner, you can expect:

  1. Direct inquiries from merchants via our inquiry form, seeking assistance with various aspects of data migration, including technical issues, post-migration customizations, and general design/development questions.
  2. Increased traffic to your website as merchants discover your company through your listing on Cart2Cart.
  3. Potential referrals from Cart2Cart at different stages of the migration process, allowing merchants to connect with you quickly and efficiently. We may recommend your services based on specific platform expertise, custom development needs, or geographic location.

Interested in expanding your reach and helping merchants with seamless data migration? List your company on the Cart2Cart website by submitting a partnership request today!

Ready to take the next step? Schedule a call with a Migration Expert to discuss how the Cart2Cart Partner Program can benefit your business.

More info
How do you provide the contact between company and merchants? Will you be a mediator?

Merchants seeking reliable data migration services will contact you directly for the services they need. Your company and its expertise will be recommended at various stages of the migration process, connecting you with potential clients actively looking to migrate their online stores.

While you can showcase your expertise by listing your services in the appropriate category on our platform, clients won't be assigned based on specific inquiry types. Instead, they will find you through our directory and recommendations.

This means you will establish direct relationships with customers, allowing you to build lasting partnerships and provide tailored data migration solutions.

How Does Cart2Cart Facilitate Connections Between Data Migration Experts and Merchants?

Cart2Cart acts as a bridge, connecting merchants in need of data migration services with skilled professionals like you. Here’s how we facilitate these connections:

  • Direct Contact: Merchants will contact you directly to discuss their specific migration needs and project requirements.
  • Platform Directory: Merchants can easily find experts specializing in their desired source and target platforms, such as Magento to WooCommerce, Shopify to WooCommerce, or any other supported eCommerce platform combination.
  • No Mediation: Cart2Cart does not act as a mediator. You will handle all communication, project management, and service delivery directly with the client.

Benefits of Partnering with Cart2Cart for Data Migration Services

  • Increased Visibility: Gain exposure to a large audience of merchants actively seeking data migration solutions.
  • Targeted Leads: Connect with clients who are specifically looking for your expertise in particular platforms or migration scenarios.
  • Direct Client Relationships: Build lasting partnerships by working directly with merchants and providing customized solutions.
  • Flexible Service Offerings: Offer a wide range of data migration services, from basic platform transfers to complex data transformations and customizations.

Ready to connect with merchants seeking expert data migration services?

Next Steps:

More info
How to get listed on your Cart2Cart Migration partners page?

How to Get Listed as a Cart2Cart Migration Partner

Want to become a Cart2Cart partner and help businesses with their ecommerce data migration needs? Here's how to get listed on our Migration Partners page:

  1. Read and accept the terms of the Service Provider Agreement.
  2. Submit the partnership request.
  3. Add your company's information to the appropriate category in the Migration Partners section on the Cart2Cart website.
You can list your company in more than one category, as long as your services are relevant.

Ready to streamline ecommerce data migration for your clients? Explore Cart2Cart's automated migration solutions and become a valuable partner.

More info
How much does it cost to list my company on your web site?

Free Listing for Data Migration Service Providers

Listing your company on our website is free for qualified service providers specializing in data migration services. Take advantage of this opportunity to reach a wider audience actively seeking assistance with their eCommerce platform migrations. To qualify, please review and ensure your company meets the requirements outlined in our Service Provider Agreement. While the terms of the agreement may be updated in the future, service providers who register now will retain their free listing status. Start connecting with potential clients today!

Ready to simplify your clients' data migration? Start your free demo with Cart2Cart now!

More info
What discount will I get as Cart2Cart partner?

Cart2Cart offers a Partner Discount Program where partners receive discounts based on the number of completed data migrations. The more migrations you perform, the greater the discount you unlock! Here’s how the loyalty program works:

Partner Discount Program for Data Migration
1 performed migration 5% discount
5 performed migrations 10% discount
10 performed migrations 15% discount
15 performed migrations 20% discount
20 performed migrations 25% discount
50 performed migrations 30% discount

Become a Cart2Cart partner and start saving on your data migration projects! Submit your partnership request now!

Note: The Reseller discount is not valid for Cart2Cart services that require additional customization, such as Data Migration Service Packages.

More info
Is multilanguage migration to/from PrestaShop possible?

Yes, multiple languages are supported when performing a PrestaShop data migration with Cart2Cart.

Migrating Multi-Language Data *to* PrestaShop

If PrestaShop is your target cart, you can migrate your e-shop and its multiple languages from the following shopping carts using our data migration service: Magento, OpenCart, osCommerce, ThirtyBees, VirtueMart, WooCommerce, WP eCommerce, X-Cart, xt:Commerce and Zen Cart.

Migrating Multi-Language Data *from* PrestaShop

You can also migrate multiple languages *from* PrestaShop to the following online shopping carts: WooCommerce, Magento, OpenCart, and Shopware.

For information on adding languages to your PrestaShop store, refer to the PrestaShop guide.

Explore the list of online stores that support multiple languages import with Cart2Cart here.

Ready to start your PrestaShop data migration? Start your free demo now!

More info
Migrating customer passwords during PrestaShop migration and upgrade
  1. Migrate to PrestaShop
  2. PrestaShop Upgrade

Migrate Customer Passwords to PrestaShop

Cart2Cart offers the ability to migrate customer passwords to PrestaShop from various shopping carts using the Cart2Cart PrestaShop Passwords Migration Plugin.

The following source carts are supported for password migration to PrestaShop:

For a complete list and more details, check out the password migration table.

To enable customer password migration, download and install the free plugin in your PrestaShop admin panel, either before or after the data migration. Here's how:

    1. Download the Cart2Cart PrestaShop Passwords Migration Plugin.
    2. Access your PrestaShop store via FTP, go to the Modules directory, and unzip the plugin files.

Install PrestaShop Password Migration Plugin

    1. Log in to your PrestaShop admin panel and navigate to the Modules and Services menu.

Access Modules and Services in PrestaShop

    1. Click Add New Module.

Add New Module in PrestaShop

    1. Upload the plugin in .zip format.

Upload PrestaShop Password Migration Plugin

    1. Update the modules list, find the Cart2Cart plugin, and click Install.

Install Cart2Cart Password Migration Plugin in PrestaShop

    1. Wait for the confirmation message: Module(s) installed successfully!

PrestaShop Password Migration Plugin Installed Successfully

Upgrade PrestaShop and Migrate Passwords

You can also transfer passwords when upgrading from one PrestaShop version to another. This process doesn't require module installation but involves post-migration steps.

After the data migration is complete:

      1. Go to the root folder of your Source cart.
      2. Open the “config” folder.
      3. Open the “settings.inc.php” file as a text document.
      4. Copy the COOKIE_KEY code.

PrestaShop COOKIE_KEY Location

After copying the COOKIE_KEY code, navigate to the same directory on your Target cart (/root folder/config/settings.inc.php) and replace the existing COOKIE_KEY with the one copied from the Source cart.

Note: For PrestaShop 1.7.x and later versions, the cookie key is located in /app/config/parameters.php.

At this point, customer password migration is complete. The final step is to recover your admin account password (required for admin accounts only).

PrestaShop Admin Password Recovery

Click “Lost password?”, enter your email address, and a new password will be sent to your admin account.

Note: If you're migrating to a Cart2Cart test store (Migration Preview), you won't have FTP access to the "config" folder. If you need to test password migration on the test store, contact us, and we'll assist with the necessary post-migration steps.

Ready to migrate your store to Presta

More info
How to clear cache after PrestaShop 1.6 migration?

After performing a data migration to PrestaShop, you might encounter issues with outdated information displayed on your storefront due to cached data. This is a common occurrence after migrating to any platform, including PrestaShop. To resolve this after migrating to PrestaShop, follow the steps below to clear the cache. This guide applies to PrestaShop 1.6 and later versions.

How to Clear the Cache After PrestaShop Data Migration

To clear the PrestaShop cache and ensure your storefront displays the most current data after the data migration, delete the contents of the following folders:

  1. cache/smarty/compile
  2. cache/smarty/cache
  3. img/tmp

Important: Clear all data within these folders, except the index.php file in each folder. Deleting the index.php file can cause issues with your website's directory structure and security.

Once you have cleared the cache, reload your website in your browser to view the updated data. If you still see old data, try clearing your browser's cache as well.

If you're migrating to PrestaShop and need assistance, Cart2Cart offers a seamless data migration solution. Start your free demo now!

More info
How to create 301 redirects on PrestaShop store after migration?

How to Create 301 Redirects on PrestaShop After Data Migration

When migrating your store to PrestaShop, maintaining your search engine rankings is crucial. Cart2Cart simplifies this with the "Create 301 redirects on your target store after migration" option, ensuring a seamless transition for both your customers and search engines.

Understanding 301 Redirects and Their Importance for SEO After Migration

301 redirects are permanent redirects that tell search engines that a page has permanently moved to a new location. This is vital for SEO because it passes the link juice (ranking power) from the old URL to the new one. Without 301 redirects, you risk losing your search engine rankings and traffic after migrating your store.

Cart2Cart’s data migration service allows you to create these crucial redirects automatically during the migration process to PrestaShop. By selecting the appropriate additional option during the Cart2Cart migration setup, you ensure that your old URLs seamlessly point to their new equivalents on your PrestaShop store.

How Cart2Cart Creates 301 Redirects in PrestaShop

Here's how the "Create 301 redirects" option works:

Cart2Cart identifies the URLs of your products and categories in your source store. It then creates redirects in your PrestaShop store, mapping the old URLs to the corresponding new product or category pages. The process involves using the URL path from your source store (without the domain name) as the Source URL in the redirect settings and setting the new product/category page on PrestaShop as the Target URL. This ensures that anyone who visits your old URLs is automatically redirected to the correct page on your new PrestaShop store.

By keeping your old domain name active, your customers and search engines won't even notice the switch!

Pre-requisites for Implementing 301 Redirects on PrestaShop with Cart2Cart

Before selecting this additional option within the Cart2Cart migration wizard, you need to purchase and install the "301, 302, 303 URL Redirects and 404 – SEO Module" from the PrestaShop Addons marketplace. This module provides the functionality needed to manage redirects within your PrestaShop environment.

Steps to Create 301 Redirects During Your PrestaShop Migration

  1. Install the "301, 302, 303 URL Redirects and 404 – SEO Module" in your PrestaShop store (refer to the module's documentation for detailed instructions).
  2. Navigate to the Cart2Cart Migration Wizard.
  3. Configure your source and target carts.
  4. During the migration options selection step, choose the "Create 301 redirects on your target store after migration" additional option.
  5. Launch the Full Migration.

By following these steps, you can ensure a smooth and SEO-friendly migration to PrestaShop using Cart2Cart. Don't lose valuable search engine ranking - make 301 redirects a part of your migration strategy!

Ready to migrate to PrestaShop? Start your free demo now and experience the ease of data migration with Cart2Cart!

More info
Can I migrate taxes to PrestaShop?

How to Migrate Taxes to PrestaShop with Cart2Cart

Yes, Cart2Cart supports the migration of taxes to PrestaShop as part of your eCommerce data migration process. However, after the migration, the tax function might be disabled in your PrestaShop admin panel by default. This is a common setting, and you can easily enable it.

Here's how to enable taxes in your PrestaShop store:

  1. Go to your PrestaShop store's Admin panel.
  2. Click Localization -> Taxes.
  3. Scroll down to the bottom of the page and set the Enable Tax option status to Yes.

Enabling Taxes in PrestaShop Admin Panel after eCommerce data migration

By following these steps, you'll ensure that taxes are correctly applied in your PrestaShop store after the migration. For more information about migrating specific data entities, or if you encounter any issues during the eCommerce data migration, please contact our support team via Live Chat or schedule a Call with Migration Expert.

Ready to migrate? Start your free demo now!

More info
How can I make my products searchable?

How to Re-index Products After Data Migration

After migrating your product catalog using a service like Cart2Cart, it's crucial to ensure your products are searchable on your new store. This often requires re-indexing your product data. Re-indexing rebuilds your store's search index, allowing customers to find your products after the data migration process.

If you've enabled the search function on your e-commerce platform, you'll need to re-index your products after updating your catalog via data migration. Here's how to do it, using PrestaShop as an example:

  1. Go to your store's Back Office -> Preferences -> Search.
  2. In the Indexation section, click either "Re-build entire index" or "Add missing products to index," depending on your needs. "Re-build entire index" is generally recommended after a full data migration.

The exact steps for re-indexing may vary depending on your specific e-commerce platform (e.g., Magento, Shopify, WooCommerce, OpenCart, PrestaShop). Consult your platform's documentation for specific instructions.

Ready to migrate your online store? Start your free demo with Cart2Cart today!

More info
Why order totals are changed after migration to PrestaShop store?

Why Order Totals Might Change After a PrestaShop Migration

If you've recently upgraded your PrestaShop store and migrated data from one version to another, you might notice discrepancies in order totals. This can occur because Cart2Cart doesn't directly migrate the tables containing order totals. The accounting systems for order totals can vary between different PrestaShop versions (e.g., migrating from an older version to the latest version), leading to differences in the final sums.

To ensure accurate order totals, consider the following:

  • Verify Tax Settings: Ensure your tax settings are correctly configured in your new PrestaShop store to match your previous setup.
  • Review Shipping Costs: Double-check that shipping costs and rules are accurately set up in your new store.
  • Examine Discount Codes: Confirm that all discount codes and promotions are properly configured.
  • Consider a Custom Migration: For complex scenarios or if precise order total migration is crucial, consider a custom migration solution. You can discuss this option with our Cart2Cart support team.

While Cart2Cart automates the migration of essential data like products, customers, and orders, the intricacies of order total calculations sometimes require manual adjustments or a customized approach to ensure complete accuracy after your shopping cart migration.

Ready to migrate to a new PrestaShop version? Start your free demo now and see how Cart2Cart can streamline your data migration!

More info
Can't find any products under categories menu from administrative panel of PrestaShop

PrestaShop: Products Not Visible Under Categories? Here's How to Find Them

Are you experiencing difficulty viewing products directly within the categories menu in your PrestaShop store? This is a common scenario due to the way PrestaShop is configured. Here's a simple workaround to locate your products using PrestaShop's built-in filtering options, especially useful if you're planning a data migration.

By default, PrestaShop's interface doesn't allow you to view products assigned to a specific category directly from the category menu. However, you can easily find them by navigating to the Products menu and utilizing the Filter by category option. This will display all products associated with your selected category.

Here's how to find your products:

  1. Go to the Products menu in your PrestaShop admin panel.
  2. Locate the Filter by category option.
  3. Select the category you want to view products for.

This method allows you to effectively manage and view your products within their respective categories. If you're considering migrating your PrestaShop store to another platform like Shopify or WooCommerce, understanding your product structure is crucial for a smooth data migration.

Finding products by category in PrestaShop for data migration planning

Need help migrating your PrestaShop store? Cart2Cart offers a seamless data migration solution. Start your free demo now or schedule a call with a migration expert.

More info
Can I migrate reward points to PrestaShop 1.6?

Can I migrate reward points to PrestaShop?

Looking to transfer your customer loyalty data? Yes, Cart2Cart can help you migrate reward points to PrestaShop. Our service supports the seamless transfer of reward points to PrestaShop, ensuring your customers retain their hard-earned benefits after the migration.

Shop owners can automatically migrate existing reward points to PrestaShop. To ensure proper functionality, you'll need to install the "Customer loyalty and rewards" module beforehand. This module is available free of charge within your PrestaShop admin panel.

Migrating Reward Points to PrestaShop with Cart2Cart

Here's what you need to know when migrating reward points as part of your eCommerce migration to PrestaShop:

  • Pre-Migration Setup: Ensure the "Customer loyalty and rewards" module is installed and activated in your PrestaShop store before initiating the migration.
  • Automated Transfer: Cart2Cart automates the transfer of reward points, linking them to the corresponding customer accounts in your new PrestaShop store.
  • Supported Versions: Cart2Cart supports reward point migration to the latest versions of PrestaShop.

Ready to migrate your online store to PrestaShop? Start your free demo with Cart2Cart today!

More info
Why is there no “Meta keywords” option on my PrestaShop 1.6.x?

By default, the Meta keywords option is not displayed in PrestaShop 1.6.x. versions.

Enabling Meta Keywords in PrestaShop 1.6.x for SEO

However, this functionality remains within the cart's codebase. To make the Meta keywords option visible and editable, follow these steps:

  • Access your FTP manager and navigate to your PrestaShop admin folder (typically named /admin + 4 random numbers).
  • Locate the file at this path: /themes/default/template/controllers/products/seo.tpl
  • Within the file, find the following code line:
    and remove the word hide.
  • Save the changes to the file.
More info
Can Cart2Cart migrate my reviews to and from PrestaShop?

Can Cart2Cart migrate my reviews to and from PrestaShop?

Yes, Cart2Cart offers comprehensive eCommerce data migration services, including the ability to migrate customer reviews to and from PrestaShop. This ensures you retain valuable customer feedback when switching platforms.

To display the migrated reviews in your PrestaShop admin panel, you might need to install a compatible module. A popular option is the free “Prestashop Free product reviews (comments)” plugin, readily available on the PrestaShop marketplace.

If you have any questions or require assistance with your eCommerce data migration , please don't hesitate to contact our Support Team for prompt and helpful guidance!

Ready to move your store? Start your Free Demo now!

More info
How to сlear сache in PrestaShop?

How to Clear Cache After PrestaShop Data Migration

Clearing Cache After PrestaShop Migration: Why It's Important

After a data migration to PrestaShop, clearing the cache is crucial to ensure all changes, including migrated products and settings, are visible on your storefront. Here's how to do it:

For PrestaShop 1.6 and 1.7

Follow these steps to clear the cache after your PrestaShop data migration:

  1. Log in to your PrestaShop Admin panel.
  2. Go to Advanced ParametersPerformance.
  3. Press the Clear cache button at the top-right corner of the screen. (For PrestaShop 1.7 and later, this is the recommended method).
Clear Cache Button in PrestaShop Admin Panel after PrestaShop data migration

That's it! Your PrestaShop store should now display the results of your demo or full migration correctly.

For PrestaShop 1.5 and Earlier

If you're using an older version of PrestaShop, follow these steps:

  1. Log in to your PrestaShop admin panel.
  2. Go to Advanced ParametersPerformance.
  3. Set Force compile to Yes and save changes.
  4. Go to your front-office and refresh the store page.

Ready to see your migrated data in action? Start your free demo now!

More info
What should I know about migration of product descriptions to PrestaShop?

PrestaShop Product Description Limits and Data Migration

PrestaShop has limitations on product description lengths, with default limits of 400 characters for short descriptions and 800 characters for full descriptions.

When performing a data migration to PrestaShop, it's crucial to understand how these limitations affect your product data. Cart2Cart will automatically truncate product descriptions to fit within these limits (400 characters for short descriptions and 800 characters for full descriptions) if they exceed the maximum allowed length. This ensures the integrity and functionality of your PrestaShop store. Attempting to migrate descriptions longer than these limits can cause issues with editing and saving product information within PrestaShop.

To overcome these limitations, you can customize your PrestaShop installation. Contact PrestaShop support for assistance with modifying the code to extend the character limits for product descriptions.

Once you've adjusted the description limits in PrestaShop, Cart2Cart can perform a remigration to transfer the complete, uncut product descriptions. This process involves clearing the existing data on your PrestaShop store to prevent duplication and then migrating the full descriptions.

Important Note: Due to PrestaShop's inherent limitations, category meta descriptions will also be truncated to 800 characters during the data migration process.

Next Steps:

  • Start your free demo to see how Cart2Cart handles data migration to PrestaShop.
  • Schedule a call with a Cart2Cart migration expert to discuss your specific needs.
  • Contact our support team via Live Chat for immediate assistance.
More info
Can I migrate Blogs and Blog Posts to/from PrestaShop?

Migrating Blogs and Blog Posts to/from PrestaShop using Cart2Cart

Yes, Cart2Cart supports the migration of Blogs and Blog Posts to and from PrestaShop with the following platforms:

To ensure successful shopping cart migration of blog content, please note that the additional paid PrestaBlog (Professional blog) module must be installed on your PrestaShop store before initiating the migration.

Here’s what you need to know about migrating blogs with PrestaShop:

  • When migrating to Shopify, WooCommerce, or BigCommerce, only blogs and posts created using the PrestaBlog module in PrestaShop will be migrated.
  • When migrating to PrestaShop, only Shopify, WooCommerce, or BigCommerce blogs and posts can be migrated to a PrestaShop store with the PrestaBlog module installed.

Important: Blog migration with the PrestaBlog module is supported for PrestaShop. If you are migrating data to multiple PrestaShop stores, your blogs and posts will be moved to the default store, regardless of mapping configurations in the Migration Wizard.

Ready to migrate your store? Start your free demo now and experience seamless shopping cart migration with Cart2Cart!

More info
How to enable Product Catalog?

Before you can migrate all of your product catalog data using an eCommerce data migration service like Cart2Cart, you must first ensure that both of the catalog export files (catalog.xml and objinfo.xml) are enabled.

How to Enable Product Catalog Export for eCommerce Data Migration

On the Store Manager front page, click "Search Engines" within the Promote section. This takes you to the Promote Your Site in Search Engines page, as shown in the image below.

Screenshot showing how to enable product catalog export for eCommerce data migration
The Promote Your Site on Search Engines page contains links to learning more about search engine optimization, and it contains the Export of Store Contents section, which includes catalog.xml.
  • Make sure that the catalog.xml and objinfo.xml fields have the "Enabled" radio button selected, as shown in the image above. If it isn't enabled, select it.
  • Click [Done].
    If you're curious about what this file looks like, you can view it by clicking the "Download" link.

Note: If catalog.xml and objinfo.xml are enabled, but not published (generated), the eCommerce data migration will only include data already in these files, without fresh changes. To ensure a complete migration, regenerate these files.

How to Publish Your Product Catalog for Accurate eCommerce Data Migration

To publish your product catalog and regenerate catalog.xml and objinfo.xml:

  • Go to Catalog Manager and click on the Publish tab.
  • In the Publish tab, press "Publish Catalog".

The "Publish Catalog" button won’t be active if there were no changes since the last publishing (generation).

Note: You have to install "Catalog Manager" to make the eCommerce data migration possible.

Ready to migrate your eCommerce data? Start your free demo now!

More info
What is Security Key and where can I get it for my Yahoo store?

What is the Yahoo Security Key and How Does it Relate to Data Migration?

The Yahoo Security Key is an additional security measure designed to protect sensitive information within your Yahoo store. It's created during the signup process for financial services like Yahoo! Wallet, Yahoo! Bill Pay, and Yahoo! Money Manager. This key acts as an extra layer of defense, safeguarding your store's data from unauthorized access.

Important Note: Your Security Key should be different from your Yahoo store password. This prevents a single compromised password from granting access to both your store and financial information.

When planning a data migration from your Yahoo store to another platform like Shopify, WooCommerce, or Magento, you might need this Security Key depending on the level of access required to extract your store's data. Cart2Cart, as a data migration service, may require it to securely access and transfer your products, customers, orders, and other essential data.

While Cart2Cart strives to make the migration process as seamless as possible, it's crucial to have your Yahoo Security Key readily available if requested. This will ensure a smooth and secure e-commerce migration process.

Next Steps: Ready to migrate your store? Start your free demo now! Or, schedule a call with a Migration Expert to discuss your specific needs.

More info
I have a problem with my category structure migration. What are the reasons?

Yahoo! Store allows you to manually create your category structure. As a result, the category structure at your target store can differ significantly from the one in your source shop. In such cases, discrepancies in category migration can occur. If you want to ensure the preservation of your current category structure during the data migration process, consider purchasing one of our Support Service Packages. Our experts can assist you in accurately transferring your categories and subcategories.

Troubleshooting Category Structure Migration Issues with Cart2Cart

Encountering problems with your category structure migration? Here's a breakdown of potential reasons and solutions when using Cart2Cart:

Manual Category Creation in Yahoo! Store

As mentioned earlier, Yahoo! Store's manual category creation can lead to inconsistencies. Before migrating to a new platform, it's crucial to assess and, if needed, standardize your category structure for a smoother transition.

Platform Differences and Category Structure Compatibility

Different e-commerce platforms handle categories in unique ways. For example, a simple category structure in one platform might not translate directly to a more complex structure in another (e.g., migrating from a very old platform to Shopify or WooCommerce). Cart2Cart attempts to map these differences, but manual adjustments might be necessary.

Data Mapping and Customizations

Incorrect data mapping during the migration setup can also cause category structure issues. Double-check your settings to ensure that source categories are correctly mapped to their corresponding target categories. If you've made customizations to your source or target store's category system, these might require additional attention and potentially custom migration solutions. Consider Cart2Cart's customization services for complex scenarios.

Limitations of the Migration Tool

While Cart2Cart strives to provide comprehensive data migration, certain platform-specific nuances or limitations might exist. Consult the list of supported carts and their specific migration options to understand any potential constraints. If you're unsure, contact our support team via Live Chat.

Resolving Category Migration Issues

If you're experiencing category structure problems after migration, here are some steps you can take:

  1. Verify Category Mapping: Double-check the category mapping settings in your Cart2Cart migration wizard.
  2. Review Target Store: Examine your target store's category structure to identify any discrepancies.
  3. Manual Adjustments: Manually adjust the category structure in your target store as needed.
  4. Contact Cart2Cart Support: Reach out to our support team for assistance with complex issues.
  5. Consider a Support Service Package: If the issue is complex or time-consuming, consider purchasing a Support Service Package for expert assistance.

Ready to migrate your store? Start your free demo now!

More info
Problems with quantity of goods after migration from the Yahoo! Store

Problems with Product Quantity After Yahoo! Store Data Migration

Due to technical limitations with the Yahoo! Store platform, the exact product quantity for each item cannot be directly exported during data migration. As a result, when migrating from Yahoo! Store using Cart2Cart, the quantity of all products in your target store will be set to 1000 by default.

This ensures that products are initially available for sale after the migration. You can then easily adjust the product quantities in your new store's admin panel to reflect your actual inventory levels. This is a necessary workaround due to the way Yahoo! Store handles inventory data and is a common practice when migrating from this platform.

Ready to migrate your store? Start your free demo now and experience a seamless data migration with Cart2Cart!

More info
Where can I get Shopify API Password?

Where can I get my Shopify API Token for Data Migration?

To perform a Shopify data migration using Cart2Cart, you'll need the Shopify API token. Here's how to obtain it:

Navigate to Settings -> Apps and sales channels -> Develop apps -> Allow custom app development (if needed) -> Create an app in your Shopify admin panel.

Shopify data migration: Creating an app to get the API token

Click the Configure Admin API scopes, and select the necessary permissions for data migration. It's generally recommended to tick all checkboxes to ensure full access for the migration process.

Shopify data migration: Configure Admin API scopes

Click the Save and then the Install App buttons.

Shopify data migration: Install the custom app

Install the App to generate the Admin API access token. This token will be used within the Cart2Cart migration wizard to connect to your Shopify store.

Shopify data migration: Getting the Admin API access token

If the Admin API access token has already been created, log in to your Shopify store admin interface. Go to Settings -> Apps and sales channels -> Develop apps -> Create an app for your store. Select your custom app and then click Manage credentials.

Shopify data migration: Manage credentials for existing app

Note: For security reasons, the Admin API token is only revealed once. If you need a new token, you'll have to uninstall and reinstall the app. Press the Uninstall app button -> Uninstall -> and get the new token.

Shopify data migration: Uninstall app to generate new API token

Watch our video tutorial for a visual guide on obtaining your Shopify API token:

Ready to migrate your store to or from Shopify? Start your free demo now!

More info
Will my old store SEO URLs remain working after Shopify migration?

Will my old store SEO URLs remain working after Shopify migration?

When performing an eCommerce data migration to Shopify, we strongly recommend selecting the additional option “Create 301 redirects on your target store after migration”. This is crucial to ensure that links to your old store are correctly redirected, preserving your SEO ranking and preventing lost traffic. Due to Shopify’s specific system of categories and subcategories, it's impossible to transfer URLs unchanged. Arranging redirects for your products and categories links is vital, especially those already indexed in search engine results. Keep reading to find out the details.

Understanding Shopify's URL Structure After eCommerce Data Migration

Shopify uses a specific system for organizing products. Products are arranged into collections instead of traditional categories and use tags for subcategories. This influences how products and categories URLs are formed. For example, a product URL on Shopify typically looks like this: www.dresses-store.myshopify.com/products/dress-red, instead of a more standard www.dresses-store.com/dress-red.html. Similarly, a category URL might be: www.dresses-store.myshopify.com/collections/women-clothes.

Preserving SEO Value During Shopify eCommerce Data Migration

Due to Shopify’s inherent URL structure, preserving your current store URLs after migration isn't possible without adjustments. When migrating to Shopify, your products and categories URLs will automatically include the /products/ and /collections/ sections. To maintain some resemblance to your old URLs, choose the additional option “Migrate categories and products SEO URLs” during your Shopify migration via Cart2Cart. This option transfers the part of the URL after the domain name and appends it to your Shopify products and collections URLs.

How Cart2Cart Handles URL Migration for Shopify

Here’s a practical example of how this works during Shopify eCommerce data migration. If your source cart has a product link like this: https://www.my-source-store.com/my-product, with the "Migrate categories and products SEO URLs” option selected, the corresponding link on Shopify will be: http://www.my-shopify-store.com/products/my-product. For categories, which become collections on Shopify, an old link like https://www.my-source-store.com/my-category-name will be transferred as http://www.my-shopify-store.com/collections/my-category-name.

For personalized guidance and assistance with your specific migration needs, please contact the Cart2Cart Support Team. Start your free demo now!

More info
Migrate Source Store categories/subcategories into Shopify Automated Collections

Migrate Categories to Shopify as Automated Collections for Seamless eCommerce Data Migration

Please note that Shopify has a specific system of categories and subcategories. The categories are called collections, and subcategories are organized according to product tags. Collections are of two kinds: manual and automated.

When performing an eCommerce data migration to Shopify using Cart2Cart, the additional option “Migrate Source Store categories into Shopify Automated Collections” ensures that your product categories and subcategories are transferred to automated (smart) collections of the 1st level. The products will receive tags and will be arranged into the corresponding collections, with all the relations between subcategories of the source store preserved.

It is strongly recommended to choose this additional option while migrating product categories and subcategories to Shopify using Cart2Cart's Shopify data migration service. This will save you significant time and effort by automating the arrangement of tags into collections. Without this option, the categories of the first level will migrate into collections, but the products will receive tags without being automatically organized according to the source store's structure. This is especially useful if you're migrating from platforms like Magento, WooCommerce, or OpenCart where category structures can be complex.

Ready to simplify your eCommerce data migration to Shopify? Start your free demo today!

More info
Why can't I set Migration Wizard to migrate store from Shopify?

Troubleshooting Shopify Migration: Why Can't I Migrate from Shopify?

Before initiating a Shopify migration using the Cart2Cart migration tool, it's crucial to ensure you have both a custom collection and a smart collection created within your Shopify admin panel. These collections are a technical requirement for the Cart2Cart Shopify migration process to function correctly.

Why is this necessary? Due to the way Shopify's API is structured, Cart2Cart relies on the presence of at least one of each type of collection to properly access and migrate your product data. Without these collections, the Cart2Cart migration tool may not be able to establish a connection and initiate the data transfer.

If you are experiencing issues setting up your data migration from Shopify, specifically during the Cart2Cart migration tool setup, verify that you have created at least one custom collection and one smart collection in your Shopify store. Once created, attempt the setup process again.

If you've confirmed the presence of both collection types and the issue persists during your data migration, please don't hesitate to contact our Support Team for further assistance. They can provide personalized guidance and troubleshooting to ensure a smooth migration process.

Ready to migrate your store? Start your free demo now!

More info
Why my product variants were not migrated to Shopify?

Shopify Product Variant Limits During Data Migration

Due to the specific way Shopify handles product configurations, there are limitations on the number of variants a product can have. Specifically, Shopify restricts products to a maximum of 100 variants and 3 option attributes. This means that during a data migration to Shopify using Cart2Cart, products exceeding these limits may not be migrated in their entirety.

Why does this limitation exist?

Shopify's architecture is designed to optimize performance and user experience, and these limits on product variants are a part of that design. While it might seem restrictive, it helps ensure that Shopify stores remain fast and efficient, even with large catalogs.

What happens if my products exceed these limits during migration?

If your products in your source store have more than 100 variants or use more than 3 option attributes, Cart2Cart will migrate as many variants as possible, up to the Shopify limit. Variants exceeding the limit will not be migrated automatically. You'll need to consider alternative solutions to handle these products.

Workarounds for Shopify Product Variant Limits During Data Migration:

While the Shopify limit is firm, there are several ways to address products with excessive variants during your Shopify data migration:

  • Consolidate Variants: Evaluate if you can consolidate similar variants into fewer options. For example, if you have multiple shades of a color that are very close, consider combining them.
  • Use Apps: Explore Shopify apps designed to handle complex product configurations and variants. These apps can often extend Shopify's capabilities.
  • Create Separate Products: Instead of having one product with hundreds of variants, break it down into multiple products, each with fewer variants.
  • Custom Development: For highly complex scenarios, consider custom development to tailor your Shopify store to handle your specific product configurations.

Cart2Cart is here to help!

Our team of migration experts can help you plan and execute your data migration to Shopify, even with complex product catalogs. We can advise on the best approach for handling products with many variants and ensure a smooth transition.

Next Steps:

More info
Can I migrate products options and attributes to Shopify?

Can I migrate product options and attributes to Shopify?

Yes, you can migrate product options and attributes to Shopify using a specialized data migration service like Cart2Cart.

Shopify Product Variant Limitations and Cart2Cart's Solution

Due to the Shopify platform's architecture, there are limitations on product variants. Specifically, Shopify allows a maximum of 100 variants per product, with each variant having up to 3 options. When migrating to Shopify, Cart2Cart addresses this by migrating product attributes to Shopify as product metafields, ensuring no data is lost during your data migration.

Displaying Metafields in Your Shopify Store

To make these metafields visible on your storefront, you'll need to adjust your Shopify theme. Refer to this guide for instructions on how to display metafields in your Shopify store after the data migration.

Start Your Data Migration Today

Ready to migrate your product options and attributes to Shopify? Start your free demo now!

More info
Can I migrate categories and subcategories of products to Shopify?

Migrating Categories and Subcategories to Shopify with Automated Data Migration

Yes, with Cart2Cart's automated data migration service, you can seamlessly transfer all the relationships between product categories and subcategories to your new Shopify store. This ensures your product organization remains intact during the migration process.

Shopify utilizes a unique system for organizing products. It uses collections to represent categories and tags to represent subcategories. When you migrate to Shopify, your source store's categories and subcategories need to be correctly mapped to Shopify's collections and tags to maintain your product structure.

Therefore, when you migrate to Shopify, your existing categories/subcategories will be transferred into Shopify collections, and products will be assigned tags corresponding to the subcategories in your original store. To guarantee the preservation of all relationships between product categories and subcategories, it's highly recommended to select the additional option “Migrate Source Store categories into Shopify Automated Collections”. Learn more about this option.

Ready to experience a seamless data migration? Start your free demo today and see how easy it is to transfer your store to Shopify with Cart2Cart!

More info
How can I migrate order statuses to Shopify?

How Can I Migrate Order Statuses to Shopify?

Yes, Cart2Cart allows you to map order statuses from your source store to corresponding default order statuses in Shopify. Due to Shopify's platform limitations, you cannot create custom order statuses. Instead, you'll need to map your existing statuses to the available Shopify options.

Cart2Cart simplifies the data migration process, allowing you to align your order management workflow in Shopify with your previous store. Correctly mapping order statuses ensures accurate reporting and a seamless customer experience after the migration.

Mapping Order Statuses During Shopify Data Migration

During the data migration setup, you'll be presented with a mapping interface. Here, you can select the corresponding Shopify order status for each status in your source store. This ensures that orders are correctly categorized in your new Shopify store, reflecting their actual state (e.g., "Processing," "Shipped," "Completed").

For more information on migrating fulfillment statuses, please refer to this article.

Next Steps After Shopify Data Migration

After completing the data migration, it's crucial to review the migrated orders and their statuses. Verify that the mapping was accurate and that all orders are correctly categorized in Shopify. This step is essential for maintaining data integrity and ensuring a smooth transition for your business.

Ready to migrate your store to Shopify? Start your free demo now or schedule a call with a migration expert to discuss your specific needs.

More info
Clear current data on a Target Store before migration on Shopify

Understanding the "Clear Target Store Data Before Migration" Option

Cart2Cart offers an additional option, "Clear current data on a Target Store before migration," to prevent mixing and duplication of data during your eCommerce data migration. This is especially useful when moving to a new platform and starting fresh. However, it's important to understand how this option functions, particularly for hosted shopping carts like Shopify.

How Clearing Target Store Data Works on Shopify

Due to the way Shopify's API works, enabling the "Clear current data on a Target Store before migration" option will remove the following data from your Shopify store:

  • Shopify collections
  • Shopify navigation links

If you want to keep this data after the migration, it’s best not to use this option.

Important Considerations Before Clearing Data

The "Clear current data on a Target Store before migration" action is irreversible. While the option primarily affects Shopify as described above, other platforms may also experience data loss. To ensure a safe eCommerce data migration, we strongly recommend backing up your target store before enabling this option. You can easily export your data to CSV files and save them to your computer.

Safeguarding Your Data During Migration

Protecting your data is paramount. Before initiating any eCommerce data migration, always create a comprehensive backup of your existing store. This precautionary measure ensures that you can restore your data in the event of unforeseen issues or if the "Clear current data on a Target Store before migration" option removes data you intended to keep.

Ready to start your secure and seamless eCommerce data migration? Start your free demo now!

More info
Why my products SKU didn’t migrate to Shopify?

Why are my product SKUs not migrating to Shopify?

Due to the way Shopify is structured, product SKUs are associated with variants rather than the main product itself. This means that during a Shopify data migration, Cart2Cart migrates SKUs to the variant level within Shopify.

Here's a breakdown of what happens during the Cart2Cart migration process regarding SKUs and Shopify:

  • SKUs Migrate to Variants: If your source store has SKUs assigned to individual product variations (e.g., size, color), Cart2Cart accurately transfers these SKUs to the corresponding variants in Shopify.
  • No Product-Level SKUs in Shopify: Shopify doesn't natively support SKUs directly on the product level. Therefore, SKUs that were only assigned to the main product in your source store will need to be handled differently.

How to Handle Product-Level SKUs:

If your original store system only used SKUs at the product level and didn't utilize product variants, you have a couple of options:

  1. Create a Default Variant: The simplest solution is to create a default variant for each product in Shopify (e.g., "Default"). Then, you can manually add the original product-level SKU to this default variant.
  2. Use a Shopify App: Several Shopify apps in the Shopify App Store allow for more customized SKU management, potentially enabling you to associate SKUs with products in a way that better aligns with your previous store's structure.

Need Help with Your Shopify Data Migration?

Migrating your store to Shopify can seem daunting, but Cart2Cart simplifies the process. Cart2Cart supports a wide range of e-commerce platforms for migration *to* Shopify.

Ready to migrate your store to Shopify? Start your free demo today to see how easy it is!

More info
Why the order dates haven't been migrated to Shopify?

Why are Order Dates Not Migrating Correctly to Shopify?

The successful transfer of order dates to Shopify during data migration depends on how Shopify's servers interpret the data. While Cart2Cart accurately transfers the date format, differences in server configurations can lead to inconsistencies.

Order Date Migration to Shopify: Considering Time Zones for Accurate Data Migration

When performing a data migration to Shopify, it's crucial to consider the time zone settings of your source shopping cart. Currently, this time zone consideration is specifically implemented when migrating from Magento and WooCommerce.

During the data migration process from Magento or WooCommerce to Shopify, Cart2Cart uses the source store's time zone configuration to accurately transfer the order dates to your Shopify store. To ensure the most accurate data migration and consistent data, we strongly recommend setting the same time zone (e.g., UTC) in both your source and target cart configurations before initiating the migration.

Note: This time zone consideration currently applies only to migrations from Magento and WooCommerce to Shopify. For data migrations involving other shopping carts, the process is performed without time zone adjustments.

Troubleshooting Order Date Issues After Data Migration

If you encounter issues with order dates after migrating to Shopify, verify the time zone settings in both your original store and your Shopify store. Contact our support team via Live Chat for assistance in diagnosing and resolving any discrepancies. Our Migration Experts can help you ensure the integrity of your data during the data migration process.

Next Steps:

More info
How to disable Shopify notifications about new orders?

After migrating your orders to Shopify using a service like Cart2Cart, Shopify might treat these migrated orders as new ones. Consequently, you, as the store owner, could receive email notifications for each imported order.

Note: These notifications are typically only sent to the store owner and not to your customers regarding their past orders.

Important! If you have any marketing plugins installed on your Shopify store (e.g., Shopify Flow, Conversion), and they utilize order triggers to automate tasks, it's crucial to disable them before initiating the data migration. Failing to do so could result in your customers receiving unwanted and potentially confusing notifications such as "Order Created," "Order Fulfilled," or "Order Paid" for orders they placed previously on your old platform.

How to Disable Shopify Order Notifications After Data Migration

If you prefer not to receive these email notifications after migrating your store to Shopify with Cart2Cart, follow these steps:

  1. From your Shopify admin, navigate to Settings -> Notifications.
  2. Click on Staff notifications.
  3. Adjust the notification settings for each recipient: To deactivate notifications, select Turn off.

Disable Shopify order notifications after data migration

After migrating your orders to Shopify using a service like Cart2Cart, every order moved to Target Cart (Shopify) is considered by the platform as a new one. As the result, Shopify notifies you via email about the creation of the number of new orders that, in fact, were moved from your Source Cart. This is a common occurrence when performing a data migration.

Note: notifications are received by store owner only. Customers won't get any emails concerning their past orders.

BUT! If you have any marketing Shopify plugin (e.g. Shopify Flow, Conversion, etc) installed and use order triggers to automate tasks, please disable it before the migration to prevent sending unwanted emails to your customers. Otherwise, they’ll be spammed with irrelevant notifications kind of Order created, Order fulfilled, Order paid, etc. To avoid this ensure to disable any relevant plugins before you start your Cart2Cart data migration.

Step-by-Step Guide: Disabling Shopify Order Notifications Post-Migration

If you do not want to receive emails with notifications about new orders after data migration with Cart2Cart, follow these steps:

  1. From your Shopify admin, go to Settings -> Notifications.
  2. Click Staff notifications.
  3. Adjust each recipient's notification settings: To deactivate the notifications, select Turn off.

Migrating to Shopify? Start your free demo with Cart2Cart today and experience a seamless data migration! Contact support via Live chat or Schedule a Call with a Migration Expert.

More info
How to set up Shopify Inventory Locations and configure Orders?

How to Set Up Shopify Inventory Locations for Seamless eCommerce Data Migration

To ensure a smooth eCommerce data migration to Shopify, properly configuring your inventory locations is essential. Here's how to set it up:

Creating Shopify Inventory Locations

If you want to create Locations, go to Settings > Locations > Add location.

Setting up Shopify Inventory Locations for eCommerce data migration

When done, provide a unique name and address for the location (apartment, suite, city, country, phone, etc.) and click the Save button. Once a location is created, you can find it at the bottom of your fulfillment priority list.

If you want the inventory at this location to be available for online purchases, then check Fulfill online orders from this location and click Save.

Configuring Orders for Accurate eCommerce Data Migration

However, if the shipping or billing addresses in orders on your source store include countries different from the ones selected on Shopify - such orders will not be migrated. To avoid this, you should make some minor configurations in Orders. To be more specific, go to Setting > Shipping > Manage Rates.

Configuring Orders for eCommerce data migration Managing Rates settings for eCommerce data migration Shipping To settings for eCommerce data migration

Once done, choose “Rest of World” option in the Shipping To section of Shopify settings.

Please note: due to restrictions of Shopify, a single customer can have no more than 65,000 orders. The number of orders exceeding this quantity won’t be migrated to Shopify. This is crucial to consider when planning your eCommerce data migration.

Ready to migrate your store to Shopify? Start your free demo today and experience a seamless transition with Cart2Cart!

More info
Will customers accounts be migrated to Shopify?

Will Customer Accounts Be Migrated During Shopify Data Migration?

Cart2Cart offers a comprehensive eCommerce data migration service to transfer your store's data to Shopify. While we migrate all your customer data, including names and addresses, customer *accounts* themselves are not directly migrated.

Why Aren't Customer Accounts Migrated to Shopify?

Shopify's platform has a unique security feature: each time a new customer account is created, an email notification is automatically sent to the customer. Migrating all your existing customer accounts would trigger a large number of these notifications, potentially overwhelming your customers. To avoid this, Cart2Cart doesn't automatically migrate customer accounts.

How Do Customers Access Their Accounts After the Shopify Data Migration?

After the Cart2Cart eCommerce data migration to Shopify is complete, you'll need to send your existing customers invitations to reactivate their accounts. Shopify provides a straightforward process for this. Refer to this detailed guide for easy instructions.

Ready to migrate your store to Shopify? Start your free demo now!

Need help with your eCommerce data migration? Schedule a Call with a Migration Expert or contact our support team via Live Chat

More info
Does Cart2Cart migrate tags to Shopify?

Does Cart2Cart Migrate Tags to Shopify?

Yes, Cart2Cart supports the migration of tags to Shopify. This feature allows you to preserve your product organization and filtering options when switching to the Shopify platform. During the data migration process, subcategories from your source store can also be transferred as tags within Shopify, further simplifying your product categorization.

Migrating tags to Shopify ensures that your customers can easily find the products they're looking for, maintaining a seamless shopping experience. This is especially beneficial for stores with large inventories and complex product classifications.

To learn more about migrating your online store to Shopify and how Cart2Cart can help, visit our Shopify migration page.

Ready to migrate your store to Shopify? Start your free demo now!

More info
Can Cart2Cart migrate my custom fields to Shopify?

Cart2Cart supports the migration of standard and some custom fields; however, Shopify has limitations regarding custom data storage. Shopify does not have a built-in custom fields feature like some platforms (e.g., WooCommerce’s Custom Fields or Magento’s Custom Attributes). Instead, Shopify relies on Metafields to store extra information.

Can Cart2Cart Migrate Custom Fields to Shopify?

Yes, Cart2Cart can migrate standard and certain custom fields during your shopping cart migration to Shopify. However, it's important to understand Shopify's approach to custom data. Unlike platforms like WooCommerce or Magento, Shopify doesn't offer native custom fields in the same way. Instead, it utilizes Metafields to store additional data associated with products, customers, orders, and other entities.

Therefore, when performing a data migration to Shopify, Cart2Cart will attempt to map your existing custom fields to the appropriate Metafields within Shopify. The success of this mapping depends on the nature of your custom fields and the structure of your source store. We support migration from various platforms, including WooCommerce and Magento.

Ensuring Accurate Custom Field Migration to Shopify

For crucial business data contained within custom fields, consider using Cart2Cart’s Assisted Migration Service. Our expert specialists will carefully analyze your data and ensure it's mapped correctly to Shopify’s available Metafield structures. This minimizes the risk of data loss or corruption during the data migration process.

To better understand how your specific custom fields will be handled during the data migration, we recommend running a free demo migration. This will allow you to preview the results and identify any potential issues before migrating your entire store.

Need help? Schedule a call with a migration expert or contact our support team via live chat for personalized assistance with your data migration!

More info
Will my customer passwords be migrated to Shopify?

Password Migration to Shopify: Understanding the Limitations

Cart2Cart, a leading eCommerce data migration service, understands the importance of a seamless transition when switching to Shopify. However, due to security protocols, Cart2Cart cannot directly migrate customer passwords from other platforms to Shopify.

The reason for this limitation lies in the unique password encryption methods employed by each shopping cart platform. For security reasons, these encryption methods are generally incompatible. Directly transferring encrypted passwords between systems could compromise data security.

Also, it's important to note that Cart2Cart migrates customer *data*, not customer accounts themselves. This means that while customer information like names, addresses, and order history are transferred, the actual account credentials (usernames and passwords) are not.

Therefore, the best practice after migrating to Shopify is to send account invite emails to your customers, prompting them to reactivate their accounts and reset their passwords. Learn more about sending account invite emails in bulk.

While direct password migration isn't possible, Cart2Cart ensures a smooth and comprehensive migration of all other essential customer data. This allows your customers to quickly regain access to their accounts and continue shopping on your new Shopify store with minimal disruption.

Ready to experience a seamless eCommerce data migration to Shopify? Start your free demo now!

More info
Will Cart2Cart migrate videos in descriptions to my Shopify store?

Will Cart2Cart Migrate Videos in Descriptions to My Shopify Store During eCommerce Data Migration?

If your source cart platform includes video tags directly within product descriptions, Cart2Cart can migrate these videos to your Shopify store during the eCommerce data migration process. This ensures that your product descriptions retain their visual appeal and informative content after the migration.

However, if the videos are embedded using methods other than direct video tags (e.g., custom code, third-party apps), they may not be automatically transferred. In such cases, you might need to consider alternative solutions, such as:

  • Manually embedding the videos in your Shopify product descriptions after the migration.
  • Using a Shopify app that supports video embedding from your chosen video hosting platform.
  • Contacting our Support Team for assistance with custom migration options.

For a seamless eCommerce data migration experience and to confirm how your specific video implementation will be handled, we recommend running a demo migration. Start your free demo today to see Cart2Cart in action!

More info
Do I need to upload Connection Bridge to perform Shopify migration?

Do I Need to Upload a Connection Bridge for Shopify Data Migration?

No, you do not need to upload a Connection Bridge to perform a data migration to Shopify. Because Shopify is an API (Hosted) shopping cart platform, Cart2Cart utilizes the Shopify API for a direct and secure data transfer, eliminating the need for a Connection Bridge.

To migrate your data to Shopify seamlessly, you'll need to specify your Shopify API password during the Cart2Cart setup process. Follow our simple Migration Scenario guide for API-hosted shopping carts to be guided through each step of the data migration process.

Ready to migrate your store to Shopify? Start your free demo now or schedule a call with one of our migration experts to discuss your specific needs.

More info
Can I migrate several languages to Shopify?

Can I migrate several languages to Shopify?

Unfortunately, direct language transfer to Shopify is not supported. Shopify's architecture handles multilingual storefronts differently.

However, there are effective workarounds to create a multilingual Shopify store after your data migration. You can use a Shopify app specifically designed for translating storefront content into multiple languages. These apps often integrate seamlessly with your store and provide tools for managing translations. Another option is to create separate Shopify stores for each language, although this requires more management overhead.

For stores requiring multilingual capabilities, consider exploring platforms that natively support multiple languages during data migration. Visit the Cart2Cart Multiple Languages Migration page to see a list of platforms compatible with multilingual imports. This can streamline your data migration process if you require a multilingual store.

Ready to migrate your store? Start your free demo with Cart2Cart today and see how easy data migration can be!

More info
How do I upload Connection Bridge to Shopify without FTP?

A transfer to Shopify doesn’t require FTP access since the platform is hosted. Shopify utilizes an API (Application Programming Interface) for data transfer, making the migration process secure and streamlined. To migrate your data effectively, follow the simple API Cart’s migration scenario. This approach simplifies the process and avoids any potential confusion. Using Cart2Cart's automated data migration service ensures a seamless and secure transition to Shopify.

Migrating to Shopify: No FTP Required

When migrating to Shopify, you won't need FTP access. Shopify is a hosted platform, meaning your store's files and database are stored on Shopify's servers. Instead, Cart2Cart uses Shopify's API to securely transfer your data. This method is much more efficient and user-friendly than traditional FTP transfers.

Understanding API-Based Migration for Shopify

API-based migration offers several advantages over FTP. It's more secure, reliable, and often faster. With Cart2Cart, the entire migration process is automated, minimizing the risk of errors and ensuring a smooth transition. Learn more about API Cart migration scenarios.

Next Steps for Your Shopify Migration

Ready to migrate to Shopify? Here's what to do next:

  1. Prepare Your Shopify Store: Ensure your Shopify store is set up and ready to receive your data.
  2. Connect Your Carts with Cart2Cart: Use the Cart2Cart migration tool to connect your source cart and your Shopify store.
  3. Configure Your Migration: Choose the data entities you want to migrate (products, customers, orders, etc.).
  4. Start Your Free Demo: Try a free demo migration to see how Cart2Cart works with your data. Start your free demo.
  5. Run the Full Migration: Once you're satisfied with the demo, run the full migration to transfer all your data to Shopify.

If you have any questions or need assistance, contact our support team via Live chat or schedule a call with a Migration Expert.

More info
Does Cart2Cart migrate сhargify data and purchase history to Shopify?

Can Cart2Cart Migrate Chargify Data and Purchase History to Shopify?

Unfortunately, direct migration of Chargify data and purchase history to Shopify is not possible. This limitation stems from the fact that Shopify lacks a publicly available API that would allow Cart2Cart to access and transfer this specific data.

While a direct automated migration isn't feasible, you might explore alternative solutions such as:

  • Manual Export/Import: Check if Chargify allows exporting data in a compatible format (e.g., CSV). If so, you might be able to manually import some data into Shopify, although purchase history is unlikely to be supported.
  • Custom Development: Consider engaging a Shopify developer to create a custom app or integration that could potentially extract data from Chargify and import it into Shopify. This is a more complex and costly option.
  • Third-Party Integrations: Investigate if any third-party apps or services exist that can bridge the gap between Chargify and Shopify for data synchronization.

If you're looking to migrate other data from your existing e-commerce platform to Shopify, Cart2Cart supports a wide range of entities like products, customers, orders, and more. Check the Cart2Cart website for a full list of supported platforms and data types.

Next Steps: Explore Cart2Cart's capabilities and see if it meets your other migration needs. Start your free demo today!

More info
How to send an account invite or bulk account invites from a Shopify store?

Cart2Cart is a leading data migration service that simplifies the process of moving your online store's data from one platform to another. While Cart2Cart provides a seamless solution to migrate your products, orders, and other essential data to Shopify, customer accounts, unfortunately, cannot be directly migrated due to security reasons and platform differences. Therefore, after migrating your store, you'll need to invite your customers to create new accounts on your Shopify store and reset their passwords. Shopify offers two convenient methods for sending these account invitations: individually or in bulk.

How to Send Customer Account Invites on Shopify After Data Migration

After performing data migration to Shopify, inviting your customers to activate their accounts is crucial. Here's how to send individual invitations:

Sending Individual Account Invites on Shopify

To send an individual invitation, follow these steps:

  1. From your Shopify admin, navigate to Settings and then Checkout. In the Customer accounts section, verify that customer accounts are set to either optional or required.
  2. If customer accounts are currently disabled, change the setting to either Accounts are optional or Accounts are required. You must enable customer accounts before you can send invitations.
  3. Go to the Customers page and select the customer you want to invite. On their information page, click the Send account invite button in the top right corner. This will generate a standard Customer Account Activation email notification template.
  4. Customize the email template as needed by modifying the sender, subject line, and body text.
  5. You can also add recipients to the "Bcc" field for blind copies.
  6. Once you are satisfied with the email, choose how you want to send it. Clicking Send email will send the message directly from Shopify, while clicking Contact customer with your default email app will open the email in your preferred email application.

Sending Bulk Account Invites on Shopify

For sending bulk invites, you'll need to use a Shopify app. Shopify offers a paid app called Bulk Account Invite Sender. The pricing of this app depends on the number of emails you need to send.

For more detailed instructions, refer to the Shopify manual.

Ready to migrate your store to Shopify? Cart2Cart makes the process simple and secure. Start your free demo now!

More info
Attribute names and options have changed since moving to Shopify

Resolving Attribute Name Issues During Shopify Data Migration

When performing a Shopify data migration with Cart2Cart, you might encounter an issue if your attribute or option names contain slashes (/). Shopify's system doesn't permit slashes in these fields, which can prevent the successful transfer of your data.

How Cart2Cart Handles Slashes in Attribute Names During Shopify Migration

To ensure a smooth and complete Shopify data migration, Cart2Cart automatically replaces any slashes (/) found in attribute and option names with hyphens (-) during the migration process. This prevents errors and ensures that all your product data is successfully transferred to your new Shopify store.

This automatic replacement ensures data integrity and prevents migration failures due to Shopify's naming restrictions.

Ready to migrate your store to Shopify? Start your free demo now and see how Cart2Cart can simplify the process.

For any further questions or assistance, please contact our support team.

More info
Can I migrate taxes to Shopify?

Can I Migrate Taxes to Shopify During Shopping Cart Migration?

Due to the unique structure of each e-commerce platform, Cart2Cart's automated shopping cart migration service has some limitations when it comes to migrating product taxes to Shopify. While the specific tax values themselves cannot be directly transferred, the information about whether a product is "taxable" or "untaxable" will be preserved during the shopping cart migration. This means that if a tax was applied to a product on your source cart, it will be migrated with the "Charge taxes on this product" box ticked in Shopify. You can find this setting in your Shopify admin dashboard, as shown below:

Charge taxes on this product box in Shopify dashboard - Shopping Cart Migration

After the shopping cart migration, Shopify's default tax settings will be applied to all products marked as taxable.

Complex Tax Migration Solutions

If you require a more complex tax migration, such as moving products with varying tax rates to Shopify, consider our Data Migration Service Package. Our experts can provide a customized shopping cart migration solution to meet your specific needs. Contact us to discuss your shopping cart migration requirements and get a personalized quote.

Next Steps

Ready to migrate your store to Shopify? Start your free demo now to see how Cart2Cart can simplify your shopping cart migration!

More info
Can I import reviews to Shopify?

Can I Import Reviews to Shopify?

Yes, Cart2Cart, the leading data migration service, supports the migration of reviews to your Shopify store. While there are several methods, here's a streamlined approach using the native Shopify Product Reviews app:

  1. Install the free Shopify Product Reviews app on your target Shopify store (either before or after the data migration).
  2. Navigate to the app within your Shopify admin.
  3. Follow the app's instructions to set up and configure product reviews on your store.
  4. Once your data migration to Shopify is complete with Cart2Cart, download the "Reviews" CSV file from the "Migration Details Information" page. This file contains the review data migrated from your previous platform.
  5. Download reviews CSV file for Shopify data migration
  6. Go to your Shopify admin, then Apps -> Product Reviews.
  7. Find the Import option within the Product Reviews app.
  8. Upload the CSV file you downloaded from Cart2Cart.
  9. Follow the app's instructions to complete the import process.

That's it! Your reviews should now be imported into your Shopify store. If you encounter any issues during the data migration or review import process, don't hesitate to contact our support team via Live Chat.

Ready to migrate your store to Shopify? Start your free demo now!

More info
My Sales Report is wrong after migrating to Shopify. Why is that?

Why is My Shopify Sales Report Wrong After Data Migration?

Migrating your store to a new platform like Shopify is a significant step. However, you might encounter discrepancies in your sales reports immediately following the data migration. Specifically, you might notice distorted sales reports for the current month, potentially showing negative values (e.g., -$453.7), while previous months show inflated figures. Let's explore why this happens and how it relates to data migration.

The Impact of Shopify's API on Refund Dates During Data Migration

This issue typically arises from the way the Shopify API handles refund transaction dates during data migration. Cart2Cart accurately migrates orders with a refunded status, preserving their original creation dates. For example, if you migrate to Shopify today, and a refund order was initially created three months ago, that order will be migrated with the correct original date.

Shopify Refund Transaction Date Restrictions and Data Migration

The core problem lies in Shopify's API limitations: refund transaction dates *cannot* be backdated during data migration. This means that if you migrate to Shopify today, all refund transactions will be recorded as occurring on the migration date, regardless of when they actually happened.

How This Affects Your Shopify Sales Reports After Data Migration

Consequently, refunds that occurred *before* the data migration will impact the sales report for the month in which you migrated. These refunds will decrease the sales total for the current month and artificially inflate the sales totals for previous months. All new refund transactions *after* the data migration to Shopify will be recorded correctly.

Understanding this limitation of Shopify's API during data migration is crucial for interpreting your sales data accurately. While Cart2Cart ensures the accurate transfer of order data, the refund date restriction is a Shopify platform-specific behavior.

Ready to migrate your store? Start your free demo now and experience a seamless data migration with Cart2Cart. If you have further questions, schedule a call with our migration expert.

More info
How will the order statuses of my current store be migrated to Shopify?

How will the order statuses of my current store be migrated during data migration to Shopify?

During data migration to Shopify with Cart2Cart, each order will migrate with an assigned fulfillment status. This status is determined by the original order status in your source store and the presence of a tracking number. Cart2Cart aims to accurately reflect the state of each order in your new Shopify store.

Here's how Cart2Cart maps order statuses during data migration to Shopify:

  1. If an order is migrated with a tracking number, Cart2Cart will set its fulfillment status to 'fulfilled'. This indicates that the order has been shipped and is trackable.
  2. If an order's status in your source store matches 'refunded' or 'paid', Cart2Cart will set the fulfillment status to 'fulfilled' in Shopify. This assumes that a refunded or fully paid order has been successfully processed.
  3. If an order's status matches 'partially_refunded' or 'partially_paid', Cart2Cart will set the order's fulfillment status to 'partially fulfilled'. This accurately represents the partial completion of the order.
  4. In all other cases, Cart2Cart will set the order's fulfillment status to 'not fulfilled'. This covers orders with statuses like 'pending', 'processing', or any other custom status, indicating that further action is required.

It's important to review the migrated order statuses in your Shopify store after the migration to ensure they accurately reflect the state of each order. Shopify's order management system allows you to easily update and manage fulfillment statuses as needed.

Need help with your data migration to Shopify? Schedule a call with a migration expert or contact our support team via Live Chat.

Ready to get started? Start your free demo now!

More info
Is it possible to migrate currencies to/from Shopify?

Is it Possible to Migrate Currencies To/From Shopify?

Due to platform’s technical peculiarities, migration of currency to Shopify is not possible while currency migration from Shopify is supported by the service.

To have the currency exported from your Shopify store - it is necessary to set the corresponding currencies on your Target store (e.g. products in the store currency, and orders - in the customer currency) and launch the eCommerce data migration. As a result, you'll have the products transferred in the store currency while orders - in the customer currency.

Understanding Currency Migration Limitations with Shopify

When planning your eCommerce data migration, it's crucial to understand the nuances of currency handling, especially when dealing with Shopify. While Cart2Cart can migrate currency *from* Shopify, migrating currency *to* Shopify directly isn't possible due to Shopify's platform architecture. This means you can bring your existing currency data from Shopify to another platform, but you'll need to configure currencies within Shopify itself when migrating *to* it.

Migrating Currency *From* Shopify: How It Works

Cart2Cart simplifies the process of migrating currency data *from* your Shopify store. To ensure a smooth transfer, make sure the corresponding currencies are properly configured in your target store *before* initiating the eCommerce data migration. This involves setting the desired currencies for products (e.g., your store's base currency) and orders (e.g., the currency used by the customer during checkout). Cart2Cart will then transfer product prices in the store currency and order amounts in the customer's currency.

Converting Currencies During Your eCommerce Data Migration

Need to convert currencies during your eCommerce data migration? Cart2Cart offers options for currency conversion as part of the migration process. This allows you to standardize your currency across platforms or adapt to different regional requirements. Contact our support team via Live Chat to discuss currency conversion options and ensure a seamless transition. You can also Schedule a Call with Migraion Expert - here.

Ready to migrate your data? Start your free demo now!

More info
Will Cart2Cart create redirects after migration from or to Shopify?

Does Cart2Cart Create Redirects for Shopify Migrations?

Yes, Cart2Cart automatically creates 301 redirects during migrations to and from Shopify. This ensures your customers and search engines are seamlessly directed to the new URLs on your Shopify store, preserving your SEO ranking and customer experience. To enable this feature, simply select the "Create 301 redirects on your target store after migration" option within the Migration Wizard.

How to Verify 301 Redirects After Shopify Data Migration

After the Shopify data migration, you can easily verify the newly created 301 redirects. In your Shopify admin panel, navigate to Online Store -> Navigation -> URL Redirects. Here, you'll find a list of all the redirects created during the migration process.

Shopify URL Redirects after data migration

By implementing 301 redirects during your eCommerce platform migration, Cart2Cart helps you maintain your search engine rankings and prevent lost sales. Don't lose valuable traffic!

If you have any further questions or need assistance, please don't hesitate to contact our Support Team. You can also schedule a call with migration expert here.

Ready to migrate? Start your free demo now.

More info
I migrated to Shopify with “Clear current data on Target Cart” option but some of orders weren’t deleted. Why?

Why Weren't All My Orders Deleted When Migrating to Shopify with the "Clear Current Data" Option?

Due to technical limitations within Shopify, orders where payment was processed through Shopify POS or the Shopify online checkout *cannot* be automatically deleted. Therefore, when migrating to Shopify with the "Clear current data on Target Store" option enabled through Cart2Cart, some of your existing Shopify orders might remain.

Specifically, this applies to orders created and processed *within* Shopify, not orders migrated from your previous platform. Cart2Cart *will* clear all other existing data in your Target Shopify store as expected during the data migration process. To ensure a clean slate for all your data, including orders, consider manually deleting them within your Shopify admin panel before initiating the migration.

Understanding Shopify Order Deletion Limitations During Data Migration

This limitation is not a bug in the Cart2Cart data migration service, but a technical constraint imposed by Shopify's platform architecture. Shopify's API restricts the deletion of certain order types for auditing and record-keeping purposes. Cart2Cart adheres to these limitations to ensure data integrity and compliance.

Next Steps After Your Shopify Data Migration

While Cart2Cart efficiently migrates the majority of your data, we recommend the following after your migration is complete:

  • Review Remaining Orders: Manually review the remaining orders in your Shopify admin panel to determine if any need to be archived or addressed.
  • Verify Data Integrity: Double-check all migrated data (products, customers, categories, etc.) to ensure accuracy and completeness.
  • Configure Shopify Settings: Configure your Shopify store settings, such as payment gateways, shipping options, and tax rates.

Need assistance with your Shopify data migration? Schedule a call with a Cart2Cart migration expert or start your free demo today!

More info
Will Cart2Cart migrate my description images to Shopify?

Will Cart2Cart migrate my description images during Shopify data migration?

Yes. Cart2Cart can efficiently migrate images embedded within your product descriptions and category descriptions to your Shopify store. To enable this, simply select the "Migrate images from products descriptions and categories descriptions" option during your Cart2Cart data migration setup. This feature ensures that all images are seamlessly transferred and properly linked in your new Shopify store.

Specifically, Cart2Cart will upload these images directly to Shopify’s Content > Files section. Once uploaded, the tool automatically updates all image links within your product and category descriptions to point to their new locations within Shopify. This ensures a smooth transition and prevents broken image links on your storefront after the migration.

This comprehensive approach to Shopify data migration ensures that your store's visual content remains intact and continues to enhance the customer experience.

Ready to experience seamless data migration? Start your free demo today!

More info
Transferring languages from the multilingual shopping cart in Shopify

How to Set the Default Language in Shopify for Accurate Data Migration

When performing a Cart2Cart-powered Shopify data migration, it's crucial to ensure your Shopify store's default language matches your source cart's language. This ensures a smooth and accurate transfer of your data.

Note: Due to Shopify platform limitations, Cart2Cart cannot directly migrate multiple languages *into* Shopify. However, you can migrate a single language to Shopify, and then use Shopify's built-in translation features or third-party apps to add additional languages.

Check if your source cart supports multiple language migration with Cart2Cart here.

You can find information on how to add multiple languages in Shopify after the migration is complete.

Here's how to set your default language in Shopify:

    1. Go to your Shopify admin panel and select 'Online Store' from the menu.
Shopify Online Store Theme Selection for Shopify data migration
    1. Select the 'Themes' panel.
Shopify Themes Panel for language settings
    1. In the top right corner, click the '...' button and choose 'Edit language' from the dropdown menu.
Shopify Edit Language Option
    1. This will take you to the Theme language page. Find the 'Change theme language' tab in the top right corner.
Shopify Change Theme Language Tab
    1. Clicking it will open a pop-up window with a language dropdown menu. Choose the same language as your source cart and click 'Save'.
Shopify Language Selection Dropdown Menu

Ready to start your Shopify data migration? Start your free demo now!

More info
Why "unknown" email addresses are created after migration to Shopify?

Why are "unknown" email addresses created after data migration to Shopify?

During customer data migration to Shopify using Cart2Cart, you might notice "unknown" email addresses in your Shopify customer list. This happens when the email address associated with a customer record in your source store is invalid or missing. Cart2Cart automatically generates a default email address in these cases to ensure the customer data is successfully migrated to Shopify.

This also applies to order data. If orders in your source store were placed by guest users (i.e., not registered customers) and are not linked to a valid customer account, Cart2Cart will create a default "unknown" email address for those orders during the data migration process.

Here's an example of how these automatically generated customer emails will appear in Shopify:

Example of "unknown" email addresses created during Shopify data migration

Understanding "Unknown" Email Addresses After Data Migration

These "unknown" email addresses serve as placeholders to maintain data integrity during the data migration. They ensure that all customer records and order information from your previous platform are transferred to Shopify, even if some data is incomplete or invalid.

Managing "Unknown" Email Addresses in Shopify

Once the data migration is complete, you can manage these "unknown" email addresses within your Shopify admin panel. You can choose to update them with correct email addresses if you have the information, or leave them as is. Remember to comply with all applicable data privacy regulations.

Ready to migrate your store to Shopify? Start your free demo now!

If you have any questions or need assistance with your data migration, contact our support team via live chat.

More info
How to export data from Volusion in CSV Based Format

Migrating your e-commerce data from Volusion? Due to Volusion's platform architecture, exporting your data to a CSV file is a necessary step when using Cart2Cart for your e-commerce data migration. This process allows Cart2Cart to accurately and efficiently transfer your products, categories, customers, and other essential data. Follow these steps to export your data from Volusion in CSV format:

1. Go to your Volusion admin area.

2. Choose the **Inventory** tab. From the drop-down menu, select **Import/Export**.

Volusion Admin Area - Inventory Import/Export

3. Proceed to the **Standard Export** tab.

4. Choose the **Export From** option and, from the drop-down menu, select the type of entities you need to export (products, categories, customers, etc.). Check the necessary columns in the list of items to ensure all relevant data fields are included in your export.

Volusion Standard Export Options

5. Choose the file format you want to export to. In this case, select **CSV**.

Volusion Export File Format - CSV

6. Click the **Export** button and then **Download** the file to your computer. Ensure you save the file in a location you can easily access.

Right after that, you have to upload the saved file in the corresponding field on Cart2Cart's migration tool.

Watch the video tutorial presented below to get a 360-degree view of the whole process:

Troubleshooting Volusion Data Export Issues

If, during exporting files from Volusion (excluding those marked as “optional”), you get an error message that states “There were no records returned for your export”, follow these steps:

1. Download blank file templates from here.

2. Upload these files in the appropriate fields.

3. Download the generated file to your local computer.

4. Upload the saved file in the corresponding field below.

Please note: If the size of the downloaded CSV file exceeds 600 MB, contact our Support Team to avoid any possible migration issues.

Ready to migrate your e-commerce data from Volusion? Start your free demo now! You can also explore other supported e-commerce platforms for migration with Cart2Cart.

More info
How to migrate images to Volusion?

Since Cart2Cart only generates the link to images on the source server but doesn’t actually move them, you will have to transfer images manually. During migration setup, it is recommended to pick the additional option “Preserve product image URLs” to generate image URLs. If this option is unchecked, images will be displayed from your Source store, and when it is down, images will no longer be shown on your Target store. When you’ve selected this option, after migration you have to copy the folder with images from the source shopping cart to Volusion. To do that, follow these steps:

1. Create a new site in FileZilla (File->Site Manager)

Create a new site in FileZilla for Volusion image migration

2. In the appeared window, select New Site. Name the item “Volusion”

Create and name a new site for Volusion image migration

3. Pick the site you’ve created and set up a new connection in the right side of the window.

4. Go to Menu “General”

  • Fill in host details.
  • Protocol -> FTP - File Transfer Protocol
  • Encryption -> Use plain FTP
  • Logon Type -> Normal
  • Specify user name and password

Set up a new connection for Volusion image migration

5. Enter Menu “Transfer Settings

Transfer mode -> Passive. Save changes

Choose Transfer mode for Volusion image migration

6. In the control panel, choose the site and connect to the server.

Choose the site to connect to the server for Volusion image migration

7. While connecting, you will be asked to confirm that the server is trusted. Press “Always trust certificate in future sessions” and press OK.

Confirm that the server is trusted for Volusion image migration

8. Go to the following path: /web/assets/images and upload here the folder with images from the source shopping cart.

Enter the path for Volusion image migration

More info
How to preserve product image URLs to Volusion?

How to Preserve Product Image URLs When Migrating to Volusion?

Cart2Cart, the leading provider of data migration services, handles image URLs in a specific way when migrating to Volusion. Instead of directly moving image URLs, Cart2Cart initially creates links from your Volusion store to the images hosted on your source store. This means the image URLs remain the same, but you won't see the images directly managed within the Volusion admin panel.

A crucial point to remember is that if your source store goes offline, the images will no longer be displayed on your Volusion storefront. To ensure your images remain accessible after the migration and regardless of your source store's status, you'll need to manually transfer the media folder from your source store to Volusion.

For detailed, step-by-step instructions on how to move your images and ensure they are displayed correctly after your Volusion migration, please refer to this guide: How to Migrate Images to Volusion.

Ready to migrate your store to Volusion? Start your free demo now and experience seamless data migration services with Cart2Cart!

More info
Can I export files from Volusion?

Can I Export Files from Volusion for Data Migration?

Due to recent changes in Volusion pricing plans, it is necessary to be subscribed to Professional, Business, or Prime plans if you want to get the opportunity to export files for data migration. Volusion's API access and data export capabilities are now restricted to these higher-tier plans. If you are on a Volusion plan lower than Professional, you will need to upgrade your plan to export your store data for migration.

If you meet this requirement, Cart2Cart can help you migrate your products, customers, orders, and other important data from Volusion to another platform quickly and securely. Learn more about Volusion data migration with Cart2Cart.

Next Steps:

More info
How to import data to Volusion store after migration is completed?

Due to Volusion platform peculiarities, you will need to upload migrated data to your new store manually. To facilitate this, you will receive CSV files that can be easily imported into your store from the admin area. Cart2Cart aims to make the data migration process as seamless as possible, even with platforms like Volusion that require a manual import step.

Here's a step-by-step guide on how to import your migrated data to your new Volusion store after completing your shopping cart migration with Cart2Cart:

How to Import Your Data to Volusion After Migration

1. First, log in to your Volusion store's admin panel and navigate to Inventory -> Import/Export.

Volusion Dashboard - Inventory Import/Export

2. Next, in the Import to field, select the type of data you are importing (e.g., Products, Categories, Orders) and choose the corresponding CSV file you downloaded from the Migration Wizard. These files contain the data migrated from your previous platform.

3. Configure the import settings. For most data types, set the overwrite option to “Clear entire table (delete all records), and replace with this import file”. Then, click the Import button to begin the import process.

Please Note: This "Clear entire table" option should be used for all tables except for Customers. When importing customer data, select the “No, do not change any records already in my database” option to avoid overwriting existing customer accounts.

Volusion Import Settings - Data Migration

Once all data is imported into your new Volusion store, refresh your store's template to ensure the changes are reflected. Then, thoroughly check both the back-end and front-end of your shop to verify the successful data migration.

If you encounter any issues or have further questions during this process, please don't hesitate to contact our Support Team for assistance.

Ready to migrate your store to Volusion? Start your free demo now!

More info
Do I have to pay for Assisted migration additionally?

Do I have to pay extra for Assisted eCommerce Data Migration?

Yes, the Cart2Cart Assisted Migration service is priced separately from the standard self-service data migration. The cost of your data migration is not included in the assisted migration service fee.

Here's a breakdown:

  • Self-Service Data Migration: You use the Cart2Cart migration tool to perform the migration yourself. The cost is based on the number of entities (products, customers, orders, etc.) you migrate. Calculate your price
  • Assisted Data Migration: Our migration experts handle the entire migration process for you, from setup to completion. This service includes a dedicated migration specialist, personalized support, and ensures a smooth and hassle-free transition. The price for assisted migration includes the cost of the data migration itself (based on the number of entities) *plus* the assisted migration service fee.

When you opt for Assisted Migration, you're paying for the expertise and time of our team to manage your eCommerce data migration. This can be particularly beneficial for complex migrations, large stores, or if you prefer a hands-off approach. For more information on assisted migration prices, please visit our Assisted Migration Page.

Ready to migrate? Start your free demo now!

More info
Do you provide refunds in case Assisted Migration fails?

Do you provide refunds in case Assisted Migration fails?

Our Assisted Migration service is non-refundable. However, rest assured that migration failure is highly unlikely. The entire process is meticulously executed by our team of expert technical engineers, ensuring a successful and seamless eCommerce data migration.

What Happens if Issues Arise During Assisted Migration?

While a complete failure is rare, if any issues arise during your Assisted Migration, our team is committed to resolving them promptly. We'll work diligently to address any discrepancies or problems to ensure your data is accurately and completely transferred to your new platform. Our goal is your complete satisfaction with the migration process.

Further Resources on Assisted Migration

For more detailed information about our Assisted Migration service, including the scope of the service and guarantees, please visit our dedicated Assisted Migration Page.

Ready to migrate? Start your free demo now! Or, Schedule a Call with a Migration Expert to discuss your specific needs.

More info
Can I migrate data in multiple languages to VirtueMart?

Can I Migrate Data in Multiple Languages to VirtueMart?

Yes, Cart2Cart supports the migration of multiple languages to VirtueMart. You can map your source store's languages to the corresponding languages in VirtueMart during the migration setup process, specifically after selecting the entities you wish to migrate.

Cart2Cart facilitates multi-language data migration, ensuring your international customers experience a seamless transition. This feature allows you to maintain your store's multilingual capabilities when switching to or upgrading your VirtueMart platform.

Migrating Multiple Languages to VirtueMart using Cart2Cart

Cart2Cart currently supports the migration of multiple languages to VirtueMart versions 2.x and 3.x. While older versions are explicitly mentioned, the service is continually updated to support the latest stable releases of both the source and target platforms.

For a comprehensive list of eCommerce platforms that support multiple language migration, visit the Cart2Cart Multiple Languages Migration page.

Benefits of Multilingual Data Migration with Cart2Cart

  • Preserve your store's international reach.
  • Maintain consistent customer experience across languages.
  • Reduce manual translation efforts.
  • Ensure accurate data transfer for all language versions.

Ready to migrate your multilingual store to VirtueMart? Start your free demo now or schedule a call with a migration expert to discuss your specific needs.

More info
Error in Preserve IDs option when migrating VirtueMart

Understanding the Preserve IDs Option During Data Migration to VirtueMart

Due to the peculiarities of VirtueMart version 2, it doesn't support IDs that contain letters; it only accepts numerical IDs. Therefore, when you perform a data migration to VirtueMart 2 from a shopping cart platform that utilizes letters in its ID structure, the 'Preserve IDs' option within Cart2Cart will not function correctly. VirtueMart will automatically generate new IDs for your products, customers, and orders during the migration process.

This limitation affects the ability to maintain consistent IDs across platforms when migrating to older versions of VirtueMart. If preserving IDs is critical, consider migrating to a more modern e-commerce platform or upgrading your VirtueMart installation if possible. Cart2Cart supports data migration to a wide array of platforms, including Shopify, WooCommerce, Magento, and many others, offering flexible solutions for your data migration needs.

How Cart2Cart Handles ID Migration

Cart2Cart strives to provide seamless data migration services, but platform-specific limitations can sometimes impact the process. Our team is dedicated to finding the best possible solutions for your migration needs. If you encounter issues with ID preservation, contact our support team for assistance. We can explore alternative strategies or workarounds to minimize disruption and ensure a smooth transition. You can also reach out via our Live Chat feature or schedule a call with a migration expert.

Next Steps:

More info
Can I migrate Joomla users and Virtuemart customers?

Can I Migrate Joomla Users and VirtueMart Customers?

Yes, Cart2Cart offers a seamless data migration solution to migrate your VirtueMart customers, as well as Joomla users and administrators, to a new eCommerce platform. To initiate the migration, simply specify "Customers" during the entity selection step of the migration setup process.

Please note: Joomla users and administrators will be migrated as standard customers to your Target Store. You can then adjust their roles and permissions within your new store's administrative panel after the data migration is complete.

How Does Cart2Cart Handle Joomla/VirtueMart Data Migration?

Cart2Cart's data migration service ensures a smooth and secure transfer of your customer data. Here's what you can expect:

  • Comprehensive Data Transfer: We migrate customer details, including names, addresses, contact information, order history, and more.
  • Preservation of Relationships: Customer relationships with orders are maintained, ensuring data integrity.
  • Secure Migration: Your data is protected throughout the migration process with industry-standard security measures.
  • Minimal Disruption: Cart2Cart performs the migration without disrupting your existing Joomla/VirtueMart store operations.

Consider exploring a VirtueMart to another platform migration, or a Joomla to another platform migration for a complete store transfer.

Ready to migrate your customer data? Start your free demo today and experience the ease of data migration with Cart2Cart!

More info
Will the orders history be fully migrated for customer/administrator consultation?

Will My Order History Be Migrated During Data Migration?

Yes, all previous orders will be migrated during your data migration. However, it's important to note that all orders will be migrated with their *current* status. Unfortunately, it is technically impossible to transfer the complete order status history from one platform to another.

This means that while you'll have a record of all past orders in your new store, the chronological progression of each order's status (e.g., "Pending," then "Processing," then "Shipped") will not be replicated. Instead, each migrated order will reflect the status it held in your previous store at the time of migration.

Why is this the case?

Order status histories are often deeply intertwined with the specific logic and workflows of the source platform. Replicating these complex workflows across different platforms is technically prohibitive.

What does this mean for you?

  • You'll retain a complete record of all past orders.
  • You won't lose any essential order information.
  • You'll need to be aware that order status histories will not be transferred.

Next Steps:

Ready to migrate your store? Start your free demo now! You can also schedule a call with a migration expert to discuss your specific needs.

More info
How is the SEO part handled in WordPress after product migration?

How is SEO handled after product migration?

Each shopping cart platform utilizes a unique method for constructing URLs for its pages, including products and categories. Due to the complexity and variability of these URL structures, Cart2Cart does not directly migrate URL structures during the data migration process. This means that after migrating your store, the URLs of your products and categories may be different from your previous store, potentially impacting your SEO.

SEO Implications of URL Changes After Data Migration

When you migrate your e-commerce data using Cart2Cart, your website's URL structure may change, which can temporarily affect your search engine rankings. Search engines rely on consistent URLs to index and rank your pages. When these URLs change, search engines need to re-crawl and re-index your site, which can take time and may initially lead to a drop in traffic.

Maintaining SEO After Migration:

  • Implement 301 Redirects: The most effective way to manage URL changes is by implementing 301 redirects from your old URLs to your new URLs. This tells search engines that the content has permanently moved and helps transfer the SEO value (link juice) from the old pages to the new ones.
  • Update Internal Links: Ensure all internal links within your website are updated to reflect the new URL structure. This helps search engines navigate your site more effectively and prevents users from encountering broken links.
  • Update Sitemaps: Submit an updated XML sitemap to search engines like Google through Google Search Console. This helps search engines quickly discover and index your new URLs.
  • Monitor Crawl Errors: Regularly monitor your Google Search Console account for crawl errors. This will help you identify any broken links or pages that search engines are having trouble accessing, allowing you to fix them promptly.
  • Consider SEO Migration Services: For a comprehensive approach, consider using specialized SEO migration services that can automate the process of mapping old URLs to new ones and implementing redirects.

Cart2Cart and SEO-Friendly Migration

While Cart2Cart does not migrate the URL structure, it provides options to migrate other SEO-relevant data, such as:

  • Product Meta Descriptions and Titles: Transfer essential meta information to help maintain or improve search engine visibility.
  • Image Alt Tags: Migrate image alt tags to ensure your images remain optimized for search.

By focusing on these elements and implementing the post-migration steps outlined above, you can minimize any negative impact on your SEO and ensure a smooth transition to your new e-commerce platform.

Ready to migrate your store and optimize it for SEO? Start your free demo today!

More info
My source cart is VirtueMart installed under Joomla. Normally, I access my Joomla admin panel, and from there, I select the VirtueMart component. So, I'm not sure where I have to put connection bridge.

Where to Upload the Connection Bridge for VirtueMart Migrations?

If your source cart is VirtueMart installed under Joomla, and you typically access VirtueMart through the Joomla admin panel, you might be wondering where to upload the connection bridge for your VirtueMart data migration.

The connection bridge facilitates secure data transfer between your VirtueMart store and the Cart2Cart service. Here's how to upload it:

  1. Locate your Joomla root directory. This is the main directory where your Joomla installation resides. It usually contains folders like "administrator," "components," "modules," etc. You can typically access this directory using an FTP client (like FileZilla) or through your hosting provider's file manager.
  2. Upload the connection bridge file (provided by Cart2Cart) to this Joomla root directory. Ensure the file is placed directly in the root, not inside any subfolders.

By placing the bridge in the Joomla root directory, Cart2Cart can establish a connection to your VirtueMart database through Joomla, enabling a seamless data migration process. For more information on how connection bridge works, please refer to this article.

Ready to migrate your VirtueMart store? Start your free demo now or schedule a call with our migration expert to discuss your specific needs.

More info
Demo Migration from VirtueMart 1x to VirtueMart 2x

Why Can't Alphabetical Order IDs Be Preserved During VirtueMart Migration?

Unfortunately, due to the inherent logic of the VirtueMart e-commerce platform, preserving alphabetical order IDs during a data migration is not possible. This limitation stems from how VirtueMart manages and assigns IDs internally.

While we strive to maintain data integrity and structure during the migration process, certain platform-specific constraints prevent us from perfectly replicating every aspect of the original store's data structure. In the case of VirtueMart, the ID assignment process is deeply embedded in the platform's core functionality and cannot be altered during migration without risking data corruption or system instability. Using Cart2Cart, you can migrate all of your important data from VirtueMart to another platform or between VirtueMart stores.

Next steps: To find out how to migrate your store data, contact our support team or schedule a call with one of our migration experts.

More info
Can Cart2Cart move all the downloadable goods to MijoShop?

Can Cart2Cart Migrate Downloadable Products to MijoShop?

Unfortunately, at this time, Cart2Cart doesn't directly support the migration of downloadable products from Virtuemart to MijoShop. This limitation is due to differences in how the two platforms handle digital product storage and delivery.

However, we are continuously working to expand our platform support and feature set. We recommend checking our list of supported carts and migration capabilities for the latest updates. You can also contact our support team to inquire about future support for Virtuemart to MijoShop downloadable product migration.

Next Steps:

  • Check our Supported Carts page for the most up-to-date list of platforms we support.
  • Contact our support team to discuss your specific migration needs.
  • Consider other migration options if downloadable product transfer is critical, or explore manual transfer solutions.
  • Start your free demo migration to see Cart2Cart in action: Start your free demo
More info
How can I configure VirtueMart language settings?

How to Configure VirtueMart Language Settings for Successful Data Migration

To ensure a smooth and accurate VirtueMart data migration using Cart2Cart, it's crucial to specify a default language within your VirtueMart store. This setting allows Cart2Cart to correctly extract and transfer your data. Without a defined default language, migration may be incomplete or inaccurate.

Setting the Default Language in VirtueMart

Here's how to configure the default language in your VirtueMart store:

  1. Log in to your Joomla! admin panel.
  2. Navigate to Components in the top menu.
  3. Select VirtueMart from the dropdown menu.
  4. Click on the Configuration menu option.
  5. Within the Configuration settings, locate the language settings and specify your desired default language.
VirtueMart Data Migration: Language Configuration in VirtueMart

Once you've set the default language in VirtueMart, you can proceed with your shopping cart migration using Cart2Cart. Make sure to select the correct source and target carts during the migration setup.

Ready to migrate your VirtueMart store? Start your free demo now!

More info
Can I migrate taxes to VirtueMart store?

Can I Migrate Taxes to VirtueMart with Cart2Cart?

Yes, Cart2Cart offers comprehensive data migration services, including the migration of taxes to and from VirtueMart. Accurately migrating tax settings is crucial for maintaining compliance and ensuring accurate pricing in your new store.

With Cart2Cart, you can migrate various tax-related data, including:

  • Tax rates
  • Tax zones
  • Tax rules
  • Product taxes

Our automated migration tool simplifies the process, allowing you to seamlessly transfer your tax configurations from your current platform to VirtueMart. This ensures that your customers are charged the correct taxes from day one.

Benefits of Migrating Taxes to VirtueMart with Cart2Cart

  • Accuracy: Ensures precise transfer of tax data, minimizing errors.
  • Efficiency: Automates the migration process, saving you time and effort.
  • Compliance: Helps maintain tax compliance in your new VirtueMart store.
  • Comprehensive: Migrates all relevant tax-related information.

Ready to migrate your taxes to VirtueMart? Start your free demo today and experience the ease of automated data migration with Cart2Cart.

Need assistance? Contact our support team via live chat or schedule a call with a migration expert.

More info
Can I create product variants based on combinations of their attribute values for VirtueMart?

Can I Migrate Product Variants (Attributes) with Cart2Cart?

Yes! Cart2Cart offers a robust solution to migrate product variants, also known as attributes or options, when migrating your store data. This feature allows you to transfer all your product variations based on attribute combinations, ensuring a seamless transition to your new platform.

Cart2Cart provides the option to migrate product variants based on combinations of their attribute values. You can select this as an additional option during your migration setup. The service will migrate these attribute combinations as individual child products, reflecting variations in size, color, material, quality, memory, and other relevant characteristics. This ensures that your customers can easily find and purchase the specific product variation they need on your new store.

Keyword Optimization: The primary keyword for SEO is "product variants migration", as it directly addresses the user's intent when searching for solutions to transfer product attributes during a shopping cart migration. Other relevant keywords include "attribute migration", "product options migration", "shopping cart migration with variants", and "migrate product variations".

Benefits of Migrating Product Variants with Cart2Cart:

  • Preserve Product Data Integrity: Ensures all product variations and their associated data are accurately transferred to the new platform.
  • Improved Customer Experience: Allows customers to easily find and purchase the desired product variation, leading to increased sales.
  • Reduced Manual Effort: Automates the process of recreating product variations, saving time and resources.
  • Support for Multiple Platforms: Cart2Cart supports product variant migration for a wide range of e-commerce platforms, including Magento, Shopify, WooCommerce, OpenCart, PrestaShop, and many more.

How to Migrate Product Variants with Cart2Cart:

  1. Set up your Source and Target carts: Specify the current and new e-commerce platforms you are using.
  2. Select the "Product Variants" option: During the migration setup, ensure you select the option to migrate product variants or attributes.
  3. Run a Free Demo: Test the migration process with a limited number of products and variants to ensure everything is transferred correctly.
  4. Start the Full Migration: Once you are satisfied with the demo, initiate the full migration to transfer all your product data, including variants.

Ready to migrate your product variants?

More info
Will my customer passwords be migrated after VirtueMart migration?

Will my customer passwords be migrated after VirtueMart migration?

Yes, Cart2Cart supports customer password migration to and from VirtueMart. We offer comprehensive eCommerce data migration services, including password transfer. For more detailed information, check our dedicated password migration option page.

VirtueMart Password Migration Capabilities

When migrating from VirtueMart 2.x-3.x, customer passwords can be migrated to the following platforms:

When performing an eCommerce data migration to VirtueMart 2.x-3.x, you can import customer passwords from these platforms:

For eCommerce data migration from VirtueMart 1.x, customer password migration is available to these target platforms:

Note: If your VirtueMart installation was not downloaded from the official VirtueMart website or has custom modifications to its password settings, we cannot guarantee accurate password migration during the eCommerce data migration process.

Ready to migrate your store? Start your free demo now!

More info
How to migrate 301 SEO URLs from/to VirtueMart?

Cart2Cart supports the migration of 301 SEO URLs from or to VirtueMart as an additional option during your data migration. However, you'll first need to install the free “ReDJ” plugin.

How to Migrate 301 SEO URLs during VirtueMart Data Migration

Follow these steps to migrate your 301 SEO URLs:

  1. Install the “ReDJ” plugin (refer to the plugin page for detailed instructions).
  2. Create the 301 SEO redirects you want to transfer during the automated migration.
  3. Go to the Cart2Cart Migration Wizard.
  4. Choose the “Migrate 301 SEO URLs of categories and products” additional option.
  5. Launch the Full Migration.

Ready to migrate your store? Start your free demo now!

More info
Does Cart2Cart supports CubeCart version 3 manufacturer migration?

CubeCart Version 3 Manufacturer Migration: Is It Possible?

No, due to the CubeCart Version 3 peculiarities, the Cart2Cart service does not support the migration of Manufacturers (brands) or any other corresponding data, neither from nor to the platform. This limitation is due to the outdated architecture of CubeCart V3 and its incompatibility with modern data migration techniques.

Why Can't I Migrate Manufacturers with CubeCart v3?

The underlying structure of CubeCart version 3 presents significant challenges for automated data transfer. Specifically, the way manufacturers and related information are stored and linked within the database is not compatible with Cart2Cart's automated migration process. Attempting to migrate this data could lead to data corruption or incomplete transfers.

What Data Can I Migrate from CubeCart v3?

While manufacturer data migration is not possible, Cart2Cart can still assist with migrating other essential data from your CubeCart v3 store. This typically includes:

  • Products
  • Categories
  • Customers
  • Orders

Considering a CubeCart to Another Platform Migration?

If manufacturer data is critical for your business, migrating to a more modern e-commerce platform might be a viable solution. Cart2Cart supports migrations to and from a wide variety of platforms, including Shopify, WooCommerce, Magento, and many more. You can explore all supported carts here.

Migrating to a newer platform offers numerous benefits, including improved security, enhanced features, and better scalability for your online store.

Next Steps

Start your free demo today to see how Cart2Cart can help you migrate your e-commerce data (excluding manufacturers from CubeCart v3). Or, schedule a call with one of our migration experts to discuss your specific needs.

More info
Glossary

A B C D E F G H I J K L M N O P Q R S T U V W X Y Z

A

Access Information - the information required to get access to store. It may refer to:

  1. FTP access information - hostname or IP address, username, password
  2. Store admin panel access - hostname or IP address, username, password
  3. API access information - API Key, admin Panel URL, admin login, admin password

Account - personal profile used to register user and determine access permission.

Add-on - software which enhances functionality of another application and usually cannot be run independently.

Administrative Panel (admin panel, admin area, back end) - control center which allows you to manage all aspects of your store - product catalog, customers, orders, content, and other store configurations.

API (application programming interface) - a set of programming instructions, protocols, standards used by software components to communicate with each other.

API Key - a form of secret token submitted alongside web service (or similar) requests in order to identify the origin of the request.

B

Backup - the process of copying and archiving computer data so that it may be preserved and reconstructed in case of equipment failure or data loss.

C

Category - group of products in catalog organized by certain parameter (type, model, etc.)

Connection Bridge - the access gateway that allows to establish connection and implement data exchange between Source Store, Target Store and Cart2Cart. The use of the migration service requires proper Connection Bridge installation. Read more.

Credit - virtual currency used by Cart2Cart to receive payment for the service. 100 Cart2Cart Credits equal to 1 USD. Read more.

CSV (Comma Separated Values) - a file format for data storage. The information is organized with one record on each line and each field is separated by comma. Read more.

Customized Migration Service - the service provided when source shopping cart has non-standard configuration settings (modified code, additional non-standard fields, etc.). Cart2Cart tech engineers apply certain customizations to the service to ensure correct migration performance. Read more.

D

Data - pieces of information, stored and transmitted in the form of electrical signs and used by applications to accomplish tasks.

Database - a collection of data that is organized so that its contents can be easily accessed, managed, and updated.

Data migration/transfer - the process of moving data from one system (database) to another. Cart2Cart performs data transfer by copying items from source store catalog and migrating them to a target store database.

Demo Migration - migration of a limited number of items performed to demonstrate basic service functionality. Read more.

Domain Name - a unique name that identifies an Internet site and functions as the online "address" of a website to be found by visitors.

Dump - the act of copying internally stored data from one place to another with little or no formatting for readability. Typically, dumping occurs after system failure. Read more.

E

eCommerce (e-commerce, e-business) - the type of commerce where buying and selling of product or service is conducted over the Internet or other computer networks.

Encryption - the act of encoding information for the purpose of making it unreadable and preventing others from gaining access to it.

Entity - the conditional term for store items, such as products, categories, orders, customers, which can be added, managed, and edited in the catalog and transferred to another database.

F

FAQ (Frequently Asked Questions) - a list of questions that are frequently asked by customers and the answers to them.

Front end - the part of a web application that people see when visiting the site in a browser.

FTP (File Transfer Protocol) - a standard for file exchange between different computers and systems over the Internet. FTP is used to install connection bridge and exchange files between the store and Cart2Cart server.

FTP client - is software that assists users in uploading files to their sites using FTP.

Full migration - migration of all store items that the customer wants to transfer to a new database. Unlike Demo migration, Full migration indicates the complete cycle of migration including steps of migration setup, funding account balance, performing Demo and completing data transfer to the Target store.

H

Host - domain name that has an IP address record associated with it. This would be any computer system connected to the Internet.

Host name - the first part (before the first dot)

More info
Where can I get BigCommerce API Path and API Token?

Where can I get BigCommerce API Credentials for Data Migration?

Follow the steps below to get the API Client ID and Access Token of your BigCommerce store for your eCommerce data migration:

1. Once you've logged into your BigCommerce store's control panel, go to Settings.

BigCommerce settings for eCommerce data migration

2. Navigate to API accounts section (previously "Store-level API accounts").

BigCommerce API accounts for eCommerce data migration

3. Click the Create API Account button.

Create BigCommerce API account for eCommerce data migration

4. Enter a Name for the app/integration corresponding to your account. The API Path is no longer required with the latest BigCommerce API. You will need the Client ID and Access Token.

BigCommerce token type for eCommerce data migration

5. Under OAuth Scopes, specify the API resources and permissions to which your app/integration requires access. Choose Modify for all items to ensure full data access for your eCommerce data migration.

BigCommerce OAuth scopes for eCommerce data migration

BigCommerce OAuth scopes configuration for eCommerce data migration

6. After making changes, activate the Save button.

7. Copy your API Credentials from the pop-up shown below and paste them into appropriate fields on the Migration Wizard. You need only the Client ID and Access Token for eCommerce data migration with Cart2Cart.

BigCommerce API credentials for eCommerce data migration

Ready to migrate your data to or from BigCommerce? Start your free demo now!

More info
The cart type is invalid or you entered invalid auth data

Troubleshooting: "The cart type is invalid or you entered invalid auth data" Error During Data Migration

Encountering the error message "The cart type is invalid or you entered invalid auth data" during your data migration process with Cart2Cart? This usually indicates a problem with the connection details you've provided for either your source or target store. Here's a comprehensive guide to troubleshoot and resolve this issue:

1. Verify Your Shopping Cart Type and Store URL

Double-check that you have selected the correct shopping cart platform from the dropdown menu. An incorrect selection here will prevent Cart2Cart from establishing a connection. Also, ensure that the store URL you entered is accurate and accessible.

2. Validate Your API Credentials

The most common cause of this error is incorrect API credentials. Each e-commerce platform uses a different method for authentication, such as API keys, usernames, passwords, or specific API paths. Carefully review the API documentation for your specific platform (e.g., BigCommerce, Shopify, Magento, and other platforms) and confirm you've entered all the required information correctly.

For example, if you are migrating to or from BigCommerce, you'll need to verify your Account, API Path, and API Token. Consult our detailed guide on how to obtain your BigCommerce API Path and API Token.

3. Check Permissions and Access Rights

Ensure that the user account associated with the API credentials has the necessary permissions to access and retrieve data from your store. Insufficient permissions can lead to authentication failures.

4. Firewall and Security Settings

Your store's firewall or security settings might be blocking Cart2Cart's access. Whitelisting Cart2Cart's IP addresses in your firewall settings might be necessary. Contact your hosting provider or system administrator for assistance with this.

5. Platform-Specific Requirements

Some platforms require specific modules or extensions to be installed and enabled for data migration to work correctly. Refer to Cart2Cart's documentation or the platform's documentation for any platform-specific requirements.

6. Contact Support

If you've checked all of the above and are still encountering the error, don't hesitate to contact Cart2Cart's support team via Live Chat. Provide them with details about your source and target carts, the steps you've taken, and any relevant error messages. They can assist you in diagnosing and resolving the issue.

Cart2Cart simplifies the data migration process, but ensuring correct credentials and configurations is crucial for a successful transfer.

Ready to start your seamless shopping cart data migration? Start your free demo now!

More info
Can I migrate 301 redirects to BigCommerce?

A 301 redirect is a permanent redirect, a crucial aspect of eCommerce data migration, that permanently forwards one URL to another.

BigCommerce 301 redirects configuration for eCommerce data migration

Can I Migrate 301 Redirects to BigCommerce?

Yes, Cart2Cart offers the ability to migrate 301 redirects to BigCommerce. However, this is only possible if your Source Cart supports the migration of categories and products SEO URLs. Supported Source Carts include:

Furthermore, the migration of 301 redirects to BigCommerce is only available if you select the option to migrate categories and products SEO URLs during your eCommerce data migration setup.

Note: If you choose the "Clear current data on Target Store before Migration" option, all existing 301 redirects on your BigCommerce store will be cleared.

Ready to migrate your store to BigCommerce and preserve your SEO? Start your free demo now or schedule a call with a migration expert to discuss your specific needs.

More info
Will my SKU be migrated to BigCommerce store?

Will my SKUs be migrated during BigCommerce data migration?

Yes, Cart2Cart provides the capability to migrate SKUs (Stock Keeping Units) to your BigCommerce store during the data migration process. This ensures that your product identification and inventory management remain consistent after the transfer.

SKU Handling for BigCommerce Data Migration with Cart2Cart

While Cart2Cart migrates SKUs to BigCommerce, it's important to be aware of how duplicate SKUs are handled. If the same SKU exists in both your source store and your BigCommerce target store, BigCommerce will not allow duplicate SKUs. To resolve this conflict, Cart2Cart automatically modifies the SKUs during migration to ensure uniqueness.

For example, if you have a product with SKU "#153" in both your source and target stores, the migrated SKU in BigCommerce will be adjusted to something like "#153-1" to avoid conflicts. This ensures all your products are migrated without data loss, although you might need to review and adjust these modified SKUs in BigCommerce after the migration is complete.

This approach ensures a seamless BigCommerce data migration without losing any of your valuable product data.

Ready to migrate your store to BigCommerce? Start your free demo now to see how Cart2Cart can simplify your migration process.

Need personalized assistance? Schedule a call with our migration expert to discuss your specific requirements.

More info
Moving product and customer IDs when migrating to X-Cart

Moving Product and Customer IDs when migrating to X-Cart

Yes, Cart2Cart supports the migration of Product and Customer IDs to and from X-Cart. Preserving these IDs is crucial for maintaining SEO rankings and ensuring a seamless transition for your customers.

To enable this functionality, select the "Preserve Product IDs on Target Cart" and "Preserve Customer IDs on Target Cart" additional options during your data migration setup. These options ensure that your existing product and customer relationships are maintained within your new X-Cart store.

Ready to migrate your data to X-Cart? Start your free demo today!

More info
How can I clear the cache on my X-Cart store after migration?

How to Clear X-Cart Cache After Data Migration

Once your automated data migration is completed, you can check the transferred entities in your new X-Cart store. Sometimes, products might not be immediately visible on the storefront due to caching. To ensure all your products display correctly after the migration, you need to clear the cache in your X-Cart store.

Here's how to clear the cache:

  1. Log in to your X-Cart admin panel.
  2. Navigate to System Settings -> Cache management.
  3. Click Clear Cache (or Re-deploy the store, depending on your X-Cart version) located on the top right of the page.

Clear Cache in X-Cart

After clearing the cache, go to your store's storefront and refresh the page. Your products should now be visible. If you still encounter issues, try clearing your browser cache as well.

For further assistance, feel free to contact our Support Team or via Live Chat.

Ready to migrate your store to X-Cart? Start your free demo now!

More info
Will my reward points be moved to X-Cart 5?

Can I migrate reward points to X-Cart using Cart2Cart?

Yes, Cart2Cart supports the migration of reward points to X-Cart, ensuring a comprehensive data migration. Specifically, when migrating to X-Cart, you can transfer:

  1. Reward points awarded to customers after a purchase.
  2. Existing reward points that customers already have accumulated.
  3. Reward points included within order details.

To enable the migration of reward points, you'll need to install and activate the "Loyalty Program Module" in your X-Cart store before initiating the migration. This module is available for purchase and download from the X-Cart Marketplace.

Using a reliable data migration service like Cart2Cart ensures a seamless and accurate transfer of your valuable customer data, including reward points.

Ready to migrate your store to X-Cart? Start your free demo now and experience the ease of automated data migration!

More info
How to upload the Connection Bridge to X-Cart 5?

Migrate to X-Cart: A Step-by-Step Guide to eCommerce Data Migration

The Cart2Cart Migration Module offers a simple and efficient solution for your eCommerce data migration to X-Cart. Seamlessly migrate your products, categories, customers, orders, and other related data. Learn more about X-Cart migration with Cart2Cart.

Please note: Before initiating your eCommerce data migration, ensure your source store platform is listed among our supported shopping carts.

Installing the Cart2Cart Migration Module for X-Cart

To begin your migration to X-Cart 5, follow these steps:

1. Log in to your X-Cart 5 Admin Panel.

2. Navigate to the Home menu and select “Modules”.

Navigate to Modules in X-Cart Admin Panel

3. In the top right corner, select the option “View more addons in Marketplace”.

View more addons in Marketplace option

4. Find the Cart2Cart module and tick the “install box”.

Install Cart2Cart Module

5. Navigate to the bottom of the page and press the “Install modules” button.

Install modules button

6. Go to the Home menu and choose Modules -> Cart2Cart module you have installed.

Cart2Cart Module in X-Cart

7. You will be directed to the Cart2Cart tab where you have to enter your email and password to log in.

Cart2Cart Login Tab

8. If you are new to Cart2Cart, simply register a fresh account.

Cart2Cart Registration

Connecting Your Stores for eCommerce Data Migration

9. Now you need to download the Connection Bridge to your current store. It will enable data interaction between two platforms. You can read more info about Connection Bridge and how to use it here.

Connection Bridge Download

Please note: If your shopping cart is hosted and you don’t have access to your FTP, start your migration directly at Cart2Cart website. To enable interaction between platforms, you will have to provide API Key, Token, Path, etc. However, you will have to proceed to the next step and set up the Connection Bridge for X-Cart since it can be only done via Cart2Cart Migration Module.

10. Now install the Connection Bridge for X-Cart 5 and proceed to the next step.

X-Cart Connection Bridge

Initiating the eCommerce Data Migration Wizard

11. At this step, you will be redirected to the Cart2Cart Migration Wizard, which will guide you through the rest of the eCommerce data migration process.

Cart2Cart Migration Wizard Interface

12. Choose your cart type from the drop-down menu and enter your source store URL.

Select Source Cart Type

13. Select X-Cart 5 from the drop-down menu and provide your store link.

Select X-Cart as Target Cart

After following these steps, you are 100% ready to switch to X-Cart 5.

Start your free demo now:

More info
Can I use “Preserve customer IDs” option during X-Cart migration?

Due to platform-specific limitations, the "Preserve customer IDs" additional option may not function correctly in certain scenarios during your eCommerce data migration.

Preserving Customer IDs During X-Cart Data Migration: Important Considerations

Here's a breakdown of how this option behaves when migrating to or from X-Cart:

X-Cart Versions and Customer ID Preservation

  • X-Cart 4.3.x and earlier:

While the "Preserve customer IDs" option is available, customer IDs will not be preserved during data migration to or from these older X-Cart versions. If X-Cart is the source cart, customer emails will be used instead of customer IDs.

Reason: X-Cart versions 4.3.x and earlier lack a dedicated "customer ID field," making preservation impossible.

  • X-Cart 4.4.x and later:

If customer IDs in the source cart contain any non-numeric characters, the IDs will not be preserved in X-Cart (4.4.x and later). Otherwise, customer ID preservation will function correctly.

Example: A customer ID of "2337" will be preserved, but "user2337" will not.

Ensuring Successful Customer ID Preservation During Data Migration

To maximize the chances of successfully preserving customer IDs during your eCommerce data migration with Cart2Cart, ensure that your source cart and target cart meet the necessary requirements. For X-Cart, this means using version 4.4.x or later and having numeric customer IDs.

If you have any questions or concerns about preserving customer IDs during your data migration, please contact our support team via live chat for assistance.

Ready to migrate your store? Start your Free Demo now!

More info
Can Cart2Cart migrate related products to and from X-Cart?

Can Cart2Cart migrate related products to and from X-Cart during data migration?

Yes, Cart2Cart can migrate related products to and from X-Cart. To ensure successful migration of related products, the free Related Products module must be installed and active on your X-Cart store.

Cart2Cart simplifies the e-commerce data migration process, allowing you to seamlessly transfer your products, including their related product associations, between different platforms. This ensures that your customers continue to see relevant product suggestions, enhancing their shopping experience after the migration.

It's necessary to have the module installed prior to the data migration procedure.

Migrating related products to and from X-Cart with Cart2Cart

Ready to migrate your store to or from X-Cart? Start your free demo now and experience the ease of automated data migration with Cart2Cart!

More info
How can I transfer images to 3DCart?

How to Migrate Images to 3DCart After Data Migration?

When performing an eCommerce data migration to 3DCart using Cart2Cart, it's important to understand how images are handled. Cart2Cart doesn't physically move image files during the automated migration process. Instead, it generates links to the images on your source store. To ensure your images remain accessible on your 3DCart store after you shut down your source store, you'll need to manually transfer them to your 3DCart server.

During the migration setup with Cart2Cart, you can select the option to generate image URLs. If you've already completed your migration, follow these steps to copy the image folder from your source shopping cart to 3DCart using an FTP client like FileZilla.

Step-by-Step Guide: Transferring Images to 3DCart via FTP

This detailed instruction outlines how to connect to your 3DCart server and move your images using FileZilla.

1. Create a New Site in FileZilla

Open FileZilla and navigate to File -> Site Manager.

Create a new site in FileZilla for eCommerce data migration

2. Name Your New Site

In the Site Manager window, click the New Site button. Give your site a descriptive name, such as "3DCart."

Create and name a new site in FileZilla for 3DCart data migration

3. Configure the Connection Settings

Select the newly created site and configure the connection details on the right side of the window.

4. General Settings

Go to the General menu and fill in the following details:

  • Host: Your 3DCart store's FTP host address (provided by 3DCart)
  • Protocol: FTP - File Transfer Protocol
  • Encryption: Require implicit FTP over TLS
  • Logon Type: Normal
  • User: Your 3DCart FTP username (provided by 3DCart)
  • Password: Your 3DCart FTP password (provided by 3DCart)
  • Port: 990

Set up a new FTP connection in FileZilla for eCommerce data migration to 3DCart

5. Transfer Settings

Navigate to the Transfer Settings menu and set the Transfer mode to Passive.

Choose Passive Transfer mode in FileZilla for 3DCart data migration

6. Save and Connect

Click OK to save the changes.

7. Connect to the Server

In the FileZilla control panel, select your newly created site and click Connect to connect to the 3DCart server.

Choose the site to connect to the server for eCommerce data migration

8. Trust the Certificate

During the connection process, you may be prompted to confirm that the server is trusted. Check the box labeled Always trust certificate in future sessions and click OK.

Confirm that the server is trusted during eCommerce data migration

9. Navigate to the Images Directory

In the right pane of FileZilla, you'll see the folder structure of your 3DCart server.

Check the structure of folders on the 3DCart server after eCommerce data migration

10. Upload Your Images

Navigate to the following path: /web/assets/images. Upload the folder containing your images from your source shopping cart to this directory. For example, in Magento, this folder is typically called "media."

Enter the path for image upload during eCommerce data migration

By following these steps, you can ensure that all your product and other images are properly transferred to your 3DCart store, maintaining a seamless customer experience after your eCommerce data migration.

Ready to migrate your store to 3DCart? Start your free demo now! or Schedule a call with our migration expert.

More info
How can I enable Advanced API?

How to Enable the REST API for Shift4Shop Data Migration

Planning a Shift4Shop data migration? To ensure a seamless transfer of your store's data using Cart2Cart, you'll need to enable the REST API in your Shift4Shop admin panel. This API allows Cart2Cart to securely access and migrate your products, customers, orders, and other essential data.

Here's a step-by-step guide on enabling the REST API for your Shift4Shop store:

1. Navigate to Modules from the Admin panel of your Shift4Shop store.

2. Locate the REST API module and click the Enable button to expand its settings.

3. Click on Settings.

Shift4Shop Admin Panel - Modules Section

4. Click Add and paste the following key: c4c058b5bcd65352cf6c79d9931fcfdb into the Public Key field.

5. Click Save.

Shift4Shop REST API Settings - Adding Public Key

6. When the Cart2Cart application is found, click “Authorize”.

Shift4Shop REST API Authorization for Cart2Cart

7. Proceed to the Migration Wizard to continue your eCommerce migration setup with Cart2Cart.

Ready to migrate your store? Start your free demo now and experience the ease of migrating your data with Cart2Cart! If you have any questions, contact our support team via Live Chat.

More info
What to do if product thumbnails were not resized after migration

Troubleshooting Image Resizing After Shift4Shop Data Migration

If your store images haven't been automatically resized during the Shift4Shop data migration (due to platform-specific configurations), follow these steps to manually adjust them:

How to Resize Product Thumbnails in Shift4Shop After Data Migration

Navigate to the Template Editor by choosing “Design” -> “Edit Template” within your Shift4Shop admin panel. This section allows you to modify the visual presentation of your online store.

Shift4Shop Template Editor Navigation

Select the listing_0.html file to edit. This file controls the display of product listings on your storefront. Editing this file will allow you to adjust the image sizes.

Selecting listing_0.html for editing in Shift4Shop

Within the HTML code, locate the image size definitions that need adjustment. Specify the desired width and height attributes for the product thumbnails. This will ensure your images display correctly after the data migration.

Finding image size in Shift4Shop HTML code Specifying width and height for image resizing in Shift4Shop

By following these steps, you can effectively manage and resize product thumbnails after your eCommerce data migration to Shift4Shop, ensuring a visually appealing and consistent storefront.

Need help with your data migration? Start your free demo now!

More info
What are the peculiarities of migration to/from 3dcart?

Please, ensure there's at least one customer created in your 3dcart store. If not, you won't be able to set up the data migration properly.

Peculiarities of 3dcart Data Migration via Cart2Cart

Due to technical restrictions of the REST API used by 3dcart and the platform itself, data migration to and from 3dcart via Cart2Cart has certain peculiarities you should be aware of:

  • Customer groups won’t be migrated to 3dcart.
  • Reviews won’t be migrated either to or from 3dcart.
  • All order statuses will be imported to 3dcart as “New”.
  • Migration of Shipping info (e.g., tracking number and weight) to 3dcart is possible from Magento only.
  • Migration of invoices to 3dcart is possible from Magento and PrestaShop only (they’ll be migrated to the “Transactions” section under the Type “Sale” and Methods “Manual”).
3dcart data migration limitations

Also, to avoid duplication of orders during the data transfer via REST API, you should clear them manually after the Demo migration. To do this, log in to your 3dcart admin panel, go to “Orders”, enter C2C in the search field, and delete the results. Then, you may proceed to the Migration Wizard and launch the Full migration.

Clearing 3dcart orders after data migration demo

Have any questions? Feel free to contact us: [email protected]

Ready to migrate? Start your free demo now!

More info
I have an issue with Shopp image migration. What is the problem?

Troubleshooting Shopp Image Migration Issues During Data Migration

Shopp offers two methods for storing images: File System and Database. When performing a data migration with Cart2Cart, image storage settings can impact the process.

  1. Target Cart is Shopp: Ensure that the Image Storage setting is configured to "File System." You can verify this by navigating to Setup -> System -> Image Storage in your Shopp admin panel.
  2. Source Cart is Shopp and Image Storage is Database: If your source Shopp store stores images in the Database, a standard data migration will not transfer these images. To address this, please contact our Support Team to request a custom data migration solution.

Need help with your data migration? Schedule a call with a Migration Expert or start your free demo today!

More info
Is it possible to transfer the product variants to the Shop Cart?

Can I Migrate Product Variants to Shopp?

Unfortunately, Cart2Cart does not currently support the direct migration of product variants to Shopp.

While a direct transfer isn't possible, we recommend exploring workarounds such as:

  • Representing product variants as individual products in Shopp.
  • Utilizing Shopp's built-in attributes and options to manually recreate the variants.
  • Consulting with a Shopp developer to explore custom solutions or extensions for variant import.

Cart2Cart supports the migration of a wide range of data, including products, customers, orders, and categories, from various e-commerce platforms to numerous target carts. To see a full list of supported carts, please visit our supported carts page.

Next Steps:

More info
Will my customer passwords be migrated after OpenCart Migration?

Will my customer passwords be migrated during OpenCart data migration?

Yes, Cart2Cart offers the possibility to migrate customer passwords to and from OpenCart. To ensure successful password migration during your OpenCart data migration, your OpenCart store should have default settings and no custom code modifications related to password encryption.

Important: Password migration for OpenCart is supported for version 3.0 and above. If you are using an OpenCart version lower than 3.0, this option won't be available.

To verify if password migration is supported for your specific source and target carts, please visit our Cart2Cart Password Migration page.

How to Migrate Customer Passwords to OpenCart?

For migrating passwords to OpenCart, Cart2Cart recommends installing a free plugin. Learn how to install the Cart2Cart OpenCart Passwords Migration Plugin.

Important: If your OpenCart installation wasn't downloaded from the official OpenCart website or has custom modifications affecting password settings, we cannot guarantee accurate password transfer during your data migration.

Next Steps for Your Data Migration

Ready to migrate your data? Start your free demo now or schedule a call with a migration expert to discuss your specific needs.

More info
How to install Cart2Cart OpenCart Passwords Migration Plugin?

How to Install the Cart2Cart OpenCart Password Migration Plugin

Migrating your online store to OpenCart and need to bring your customer passwords along? Once you've decided to migrate customer passwords to your new OpenCart store (version 3.0 and higher), install the Cart2Cart OpenCart Password Migration Plugin to guarantee swift and accurate data transfer. This plugin ensures a seamless data migration, keeping your customers' accounts secure and accessible. Follow the steps below to get the job done:

Step-by-Step Guide to Installing the OpenCart Password Migration Plugin

    1. Download the Cart2Cart: Universal OpenCart Migration Module from the OpenCart marketplace.
    2. Log in to your OpenCart admin panel. Go to "Extensions" - "Installer". Click on the "Upload" button and select the "cart2cart_opencart_universal_migration.ocmod.zip" file you've just downloaded.
OpenCart Extension Installer Upload


    1. After the extension has been successfully installed, you’ll get a “Success: You have modified extensions” notice.
OpenCart Success Message for Extension Installation


    1. From the list of extensions, choose "Cart2cart: OpenCart Universal Migration Module" and click on the green "Install" button.
Install Cart2Cart OpenCart Universal Migration Module


    1. Once you’ve completed the task successfully, you’ll get the notification: “Success: You have modified modules”. Now you can proceed with the Full Migration settings.
OpenCart Success Message for Module Modification

Ready to migrate your data to OpenCart? Start your free demo now or schedule a call with a migration expert to discuss your specific needs.

More info
Is multilanguage migration to/from OpenCart possible?

Multilingual Data Migration: Can Cart2Cart Migrate Multiple Languages To/From OpenCart?

Yes! Whatever number of languages your OpenCart store has or will have, Cart2Cart will migrate all of them smoothly and accurately. We understand the importance of preserving your multilingual content during the migration process.

Importing Multiple Languages *to* OpenCart

Cart2Cart supports the import of multiple languages *to* OpenCart from a wide range of shopping carts, ensuring your international customers have a seamless experience. Currently, multilingual data migration to OpenCart is available from platforms such as Magento, osCommerce, ThirtyBees, VirtueMart, WooCommerce, WP eCommerce, X-Cart, xt:Commerce, and Zen Cart, as well as during OpenCart upgrades. This ensures a comprehensive data migration for your store.

Exporting Multiple Languages *from* OpenCart

If you're looking to migrate your multilingual store *from* OpenCart, Cart2Cart supports transferring your data, including all language versions, to platforms like WooCommerce, Magento, PrestaShop, and Shopware. We make switching platforms easy, even with complex multilingual setups.

Find More Shopping Carts

Explore the complete list of shopping carts that support multilingual data migration on the Cart2Cart Multilanguages Migration page. You can filter and search to find the perfect solution for your specific needs.

Cart2Cart simplifies the migration process, ensuring your multilingual data is transferred accurately and efficiently. Start your Free Demo today and experience the ease of migrating your online store with Cart2Cart.

Need help with your multilingual data migration? Schedule a call with a Migration Expert or contact our support team via Live Chat.

More info
Does Cart2Cart migrate product ratings and reviews from/to OpenCart?

Can I Migrate Product Ratings and Reviews to or from OpenCart?

Yes, if you're planning a store migration to or from OpenCart, you can easily migrate your product ratings and reviews along with other crucial data like products, categories, customers, and order history using a data migration service like Cart2Cart.

Cart2Cart simplifies the process of transferring data between different e-commerce platforms. When migrating to or from OpenCart, ensure that you select the option to include product ratings and reviews during the migration setup. This ensures a complete and seamless transfer of your valuable customer feedback, preserving your store's credibility and social proof. Leverage the power of Cart2Cart to migrate your store data and keep your business running smoothly.

How to Migrate Product Reviews with Cart2Cart

Cart2Cart offers a straightforward solution for migrating your store data, including product reviews. Here's a simplified overview of the process:

  1. Connect Your Source and Target Stores: Provide the necessary access details for both your current (source) and new (target) OpenCart stores.
  2. Select Data for Migration: Choose the entities you want to migrate, including products, customers, orders, and, most importantly, product ratings and reviews.
  3. Configure Additional Options: Cart2Cart offers various customization options to tailor the migration to your specific needs.
  4. Start the Migration: Launch a free Demo migration to test the process and verify the results. Then, proceed with the Full migration to transfer all your data.

With Cart2Cart, you can efficiently migrate product reviews to or from OpenCart, ensuring a smooth transition and preserving your valuable customer feedback.

Next Steps:

OpenCart data migration with Cart2Cart
More info
I would like to migrate to OpenCart. However, there is one obstacle. My store has two languages, will they be migrated?

Will Cart2Cart Migrate My Multi-Language Store?

Yes, absolutely! If you're planning an eCommerce migration to OpenCart and your current store has multiple languages, Cart2Cart can seamlessly migrate them all. Whether you have two languages or twenty, our service ensures a smooth and accurate transfer of your multilingual content.

Cart2Cart understands the importance of maintaining your store's language options for your international customers. We preserve language associations for products, categories, descriptions, and other relevant data during the eCommerce migration process. To see which specific shopping carts fully support multi-language migration, please visit our Cart2Cart Multiple Languages Migration page. We support a wide range of platforms, including Magento, Shopify, WooCommerce, and many more.

Ready to migrate your multi-language store to OpenCart? Start your free demo now or schedule a call with our migration expert to discuss your specific needs.

More info
Does Migrate categories and products SEO URLs for OpenCart work?

Can I Migrate SEO URLs to OpenCart Using Cart2Cart?

Yes, Cart2Cart offers the ability to migrate SEO URLs to OpenCart. This helps maintain your search engine rankings after your data migration.

Currently, due to technical limitations, the automated SEO URL migration to OpenCart is supported from the following platforms:

We are continuously working to expand the number of supported platforms for SEO URL migration. If your current platform isn't listed, please contact our support team to discuss potential workarounds or custom solutions for your ecommerce migration.

Next Steps:

More info
Lately I’ve migrated from OpenCart, but size and length were not preserved. Why is it so?

Why Aren't Product Dimensions Migrated During My Shopping Cart Migration?

During a standard shopping cart migration with Cart2Cart, certain units of measurement like "length," "height," "width," "cm," "m," "inch," "gr," and "kg" are, by default, excluded from the data transfer. This is a common configuration designed to prevent potential inconsistencies or errors arising from differing measurement systems or data structures between shopping cart platforms.

How to Migrate Product Dimensions with Cart2Cart

If migrating product dimensions is crucial for your online store, there are a couple of options:

  1. Custom Migration: Contact Cart2Cart's support team or your personal migration expert. They can assess your specific needs and configure a custom migration to include these units of measurement. Keep in mind that custom configurations may require additional time and resources. You can Schedule a Call with Migraion Expert - here.
  2. Manual Adjustment Post-Migration: Alternatively, you can complete the standard migration and then manually adjust the product dimensions within your new shopping cart platform. This option gives you full control over the data and allows you to make any necessary adjustments to ensure accuracy.

Before initiating your migration, carefully consider whether migrating product dimensions is essential for your business. If it is, reach out to Cart2Cart to discuss your options and ensure a smooth and successful data transfer. Start your free demo - here.

Contact support via Live chat.

Cart2Cart data migration process
More info
Can I perform SEO migration to OpenCart?

Yes, you can migrate SEO URLs to OpenCart by selecting the “Migrate categories and products SEO URLs” additional option during your data migration setup. You can find a list of shopping carts that support this option here.

What else needs to be done to preserve SEO after OpenCart migration?

To ensure your SEO URLs function correctly after migrating to OpenCart, follow these steps:

  1. Log in to your OpenCart Admin area.
  2. Navigate to System -> Settings -> Edit Store.
  3. Go to the Server tab.
  4. Find the "Use SEO URLs" option and select "Yes".
Enable SEO URLs in OpenCart settings for successful data migration

Additionally, you need a properly configured .htaccess file in the root directory of your OpenCart installation (the same directory that contains the admin and catalog folders). Refer to the official OpenCart documentation to verify that your .htaccess file contains the necessary code (specifically, the code highlighted in red in the documentation). If the file is missing or contains incorrect content, create a new text file, paste the correct code into it, and save the file as ".htaccess".

How will the migrated SEO URLs look in OpenCart after data migration?

The images below illustrate how product and category SEO keywords will appear in OpenCart after migration:

SEO Keyword of a product:

Product SEO Keyword in OpenCart after data migration with Cart2Cart

SEO Keyword of a category:

Category SEO Keyword in OpenCart after online store data migration with Cart2Cart

Ready to migrate your store to OpenCart and preserve your SEO? Start your free demo now!

More info
Is it possible to move my store from Summer Cart 4.0?

Migrate from Summer Cart 4.0: Is It Possible?

Yes, Summer Cart 4.0 is a supported platform for migration with Cart2Cart. You can seamlessly transfer your products, customers, orders, and other essential data to a more modern and robust e-commerce solution using our automated migration tool.

Cart2Cart supports migration *from* Summer Cart 4.0 to a wide variety of platforms, including but not limited to Magento, WooCommerce, Shopify, OpenCart, and PrestaShop. This allows you to upgrade your online store to a platform that better suits your current and future business needs.

Benefits of Using Cart2Cart for Summer Cart 4.0 Migration

  • Automated Migration: Our tool simplifies the entire data migration process, saving you time and effort.
  • Data Security: We prioritize the security of your data during the migration process.
  • Free Demo Migration: Test the migration process with a limited amount of data before committing to a full migration. Start your free demo.
  • Wide Range of Supported Platforms: Migrate to virtually any leading e-commerce platform.
  • Dedicated Support: Our support team is available to assist you throughout the migration process. Contact support via Live chat

Ready to Migrate?

Don't let an outdated platform hold you back. Migrate your store from Summer Cart 4.0 to a more powerful and scalable solution today. Start your free demo or Schedule a Call with a Migration Expert to discuss your specific needs.

More info
I would like to perform migration from Summer Cart to Magento. Will my old URLs will be transferred to a target cart without losing my positions on Google?

SEO URL Migration: Summer Cart to Magento with Cart2Cart

Unfortunately, direct SEO URL migration from Summer Cart to Magento isn't currently supported by Cart2Cart's automated migration.

However, Cart2Cart facilitates the migration of SEO URLs for numerous other platforms, including: OpenCart, CS-Cart, PrestaShop, PrestaShop Cloud, WooCommerce, Virtuemart, Shopify, WP eCommerce, Bigcommerce, AceShop, MijoShop, X-Cart, osCommerce, Jigoshop, and ePages.

While a direct SEO URL migration for your specific Summer Cart to Magento scenario is unavailable at this time, you can still configure your SEO URLs on Magento after the data migration is complete. This ensures you regain and maintain your search engine rankings.

To minimize SEO impact during your platform migration, refer to our comprehensive eCommerce migration checklist for valuable tips on preserving your SEO during a store replatforming. This guide provides insights into planning your migration, managing redirects, and monitoring your search engine rankings post-migration.

Ready to migrate your store? Start your free demo with Cart2Cart today! If you have any questions, contact our support team via live chat or schedule a call with a migration expert for personalized assistance with your data migration needs.

More info
Do I need to generate any API Key for my Summer Cart migration?

Do I Need an API Key for Summer Cart Data Migration?

No, you don't need an API Key for Summer Cart migrations when using Cart2Cart. The process involves uploading a bridge to your Summer Cart root directory. This method facilitates a direct connection for transferring your store data. For more in-depth information, please refer to our Non-API carts migration scenario.

With Cart2Cart, migrating your Summer Cart data is streamlined and efficient. This approach simplifies the data migration process, allowing you to move your products, customers, and other essential data without the complexities of API keys.

Ready to migrate your online store? Start your free demo now!

More info
Can you migrate passwords for my Summer Cart users?

Can I Migrate Passwords During Shopping Cart Data Migration?

Unfortunately, Cart2Cart does not offer direct password migration due to security reasons and the technical complexities involved. We can only migrate password hashes.

Why Password Migration Is Complicated

Password hashing is a one-way, irreversible process. This means the original password cannot be recovered from its hash. Furthermore, each shopping cart platform uses different "salt" values and hashing algorithms to encrypt passwords. This incompatibility prevents the transfer of usable passwords between platforms.

What This Means for Your Customers

After the migration, your customers will need to reset their passwords on the new store. This is a standard security practice when migrating between platforms with different password encryption methods.

How to Inform Your Customers

We recommend informing your customers about the password reset requirement before, during, and after the migration process. Clear communication will help ensure a smooth transition for your customers.

Alternative Solutions

While direct password migration isn't possible, consider these alternatives:

  • Offer a one-time discount: Provide a small discount code to customers upon their first login to encourage them to reset their passwords and explore the new store.
  • Send a welcome email: Include clear instructions on how to reset their password in a welcome email after the migration.

Start Your Data Migration Today!

Ready to migrate your store? Start your free demo and experience the ease of Cart2Cart's automated migration service.

If you have any questions, please contact our support team via Live Chat or Schedule a Call with a Migration Expert.

More info
Is there any requirements for Summer Cart migration?

Summer Cart Migration Requirements

What are the server requirements for migrating to or from Summer Cart using Cart2Cart?

To ensure a successful Summer Cart data migration, your server must meet the following requirements:

  • PHP 5.1 or newer
  • Apache 1.2 web server or newer
  • MySQL 4.1 or newer
  • Free IonCube loaders installed

These requirements ensure compatibility and optimal performance during the data transfer process. If you're unsure whether your server meets these requirements, consult with your hosting provider.

Ready to migrate your data? Start your free demo now!

More info
Can I migrate orders from ChannelAdvisor?

Can I Migrate Orders from ChannelAdvisor?

Unfortunately, Cart2Cart does not directly migrate orders from ChannelAdvisor. ChannelAdvisor is primarily a marketplace management platform, not a shopping cart. Therefore, order data resides within the individual marketplaces connected to ChannelAdvisor, such as eBay or Amazon.

To migrate order data, you would typically need to migrate directly from the source marketplace or, if orders are also being processed through a connected shopping cart, migrate from that shopping cart. If you're looking for a **shopping cart data migration** solution, Cart2Cart can help you move data between various e-commerce platforms.

We recommend checking this link for more details about ChannelAdvisor and potential migration scenarios.

Next Steps for Your Shopping Cart Data Migration

Ready to start your **shopping cart data migration**? Here are your next steps:

More info
Do you migrate data from custom fields at ChannelAdvisor?

Does Cart2Cart Migrate Data from ChannelAdvisor Custom Fields?

We are sorry to inform you that Cart2Cart doesn’t currently support the migration of data from custom fields within ChannelAdvisor. While our service facilitates comprehensive data migration for a wide range of platforms and data types, the unique structure of custom fields in ChannelAdvisor presents a technical limitation at this time. We continuously evaluate our platform connectors and data migration capabilities to expand our service offerings and provide the most comprehensive data migration solutions possible.

If you're looking to migrate from ChannelAdvisor, we can still transfer core data like products, customers, and orders. Check the full list of supported entities for ChannelAdvisor migration on our website.

Next Steps:

More info
Why were the UPC and MPN codes not moved to the target garbage can?

Why weren't UPC and MPN codes migrated to my target store?

By default, Cart2Cart's automated data migration service does not automatically transfer UPC (Universal Product Code) and MPN (Manufacturer Part Number) from all source platforms to all target platforms. For example, a standard migration from osCommerce to Pinnacle Cart might not include these fields in the default migration scope.

However, you can still migrate this data! To ensure UPC and MPN codes are transferred during your eCommerce data migration, you can request a custom migration. Our technical team can configure the migration to include these specific fields, ensuring a complete transfer of your product data. Contact our support team via Live Chat to discuss your requirements and get a quote for a custom migration.

To get started with your data migration, try our Free Demo Migration today!

More info
Estimate the cost of migration from osCommerce 2.2 to PrestaShop 1.6

You can estimate the cost of your shopping cart migration using the Migration Estimator. This tool provides an approximate cost based on the platforms you're migrating from and to, as well as the volume of data involved. Please note that while Cart2Cart strives to migrate all essential data, the migration of highly customized attributes may present challenges depending on the specific platforms involved. Contact our support team via Live Chat to confirm if your custom attributes can be migrated.

Need a Seamless Shopping Cart Migration?

Start your free demo now: https://newapp.shopping-cart-migration.com/

More info
Attribute values for the product have not come across correctly

Troubleshooting Product Attribute Migration with Cart2Cart

Why Aren't My osCommerce Text Field Attributes Migrating Correctly?

Unfortunately, due to limitations in the osCommerce platform, Cart2Cart cannot directly transfer text field attributes as text fields. By default, attribute values are transferred as dropdown options. This is because osCommerce handles text field attributes differently than other platforms.

If you require text field attributes to be transferred, a custom migration solution may be necessary. Consider reaching out to our support team via Live Chat to discuss potential workarounds or custom migration options. Contact support via Live chat to check if a custom migration is possible.

For optimal data migration, consider these alternatives:

  • Restructure Attributes: If possible, modify your osCommerce store to use dropdown attributes instead of text fields.
  • Custom Migration: Explore custom migration options with Cart2Cart's support team to address the specific needs of your data.

Need help planning your data migration? Schedule a Call with a Migration Expert to discuss your specific requirements and ensure a smooth transition.

Ready to get started? Start your free demo and see how Cart2Cart can simplify your platform migration!

More info
Transfer customers from xt:Commerce 1.0 SP 2.1 to Magento

xt:Commerce to Magento Data Migration

Unfortunately, we only support xt:Commerce 3.x versions for data migration to Magento. If you're running an older version like xt:Commerce 1.0 SP 2.1, you'll need to upgrade your xt:Commerce installation before initiating a data migration. Consider upgrading to a supported version or exploring alternative solutions. If upgrading is not an option, you might want to consider a custom data export and import solution.

Looking for a seamless shopping cart migration from xt:Commerce to Magento? Cart2Cart is here to help! While direct migration from xt:Commerce 1.0 SP 2.1 isn't supported, we offer a robust solution for xt:Commerce 3.x users looking to upgrade to Magento.

Next Steps for Your Data Migration

  • Upgrade xt:Commerce: If possible, upgrade your xt:Commerce installation to version 3.x.
  • Explore xt:Commerce to Magento Migration with Cart2Cart: Once you're on a supported version, use our automated migration tool for a hassle-free transfer.
  • Consider Custom Solutions: If upgrading isn't feasible, explore custom data export and import options.

Ready to migrate your store? Start your free demo now or schedule a call with our migration expert to discuss your specific needs.

More info
What kind of entries should I use to pick up correct Support Package?

Choosing the Right Support Package for Your Data Migration

To choose the proper Support Service Package, you need to estimate the number of entities (products, customers, and orders) on your current store. Compare this estimate to the entity limits included in each package. Selecting the right support package ensures a smooth and successful data migration process.

How Many Entities Do I Have?

Most e-commerce platforms provide a dashboard or reporting feature that displays the total number of products, customers, and orders in your store. Refer to your platform's documentation or support resources if you need assistance locating this information.

Understanding Cart2Cart Support Packages

Cart2Cart offers various support packages tailored to different store sizes and migration needs. These packages define the level of assistance you'll receive during your data migration. Consider the following when choosing a package:

  • Number of Entities: The most important factor. Ensure the package supports the total number of products, customers, and orders you plan to migrate.
  • Support Hours: The amount of dedicated support time included. Larger migrations or those with complex configurations may require more support hours.
  • Priority Support: Some packages offer prioritized support, ensuring faster response times.

Example Scenario

Let's say your current store has 5,000 products, 1,000 customers, and 500 orders. Your total entity count is 6,500. You would need to select a Cart2Cart support package that supports at least 6,500 entities.

Why is Choosing the Right Package Important?

Selecting an inadequate support package can lead to delays or complications during your data migration. It's always better to overestimate your needs slightly to ensure you have sufficient support resources.

Still Unsure?

If you're unsure which package is right for you, don't hesitate to contact Cart2Cart support via Live chat. Our migration experts can help you assess your needs and recommend the most appropriate package.

Ready to start your data migration? Start your free demo now!

More info
I have ordered Data Migration Service Package. What's next?

After ordering the Data Migration Service Package, our Support Team will promptly review your order details to ensure accuracy. You'll receive a confirmation email shortly after. Next, we'll set up a Demo Migration to showcase the results in your Target Store. Following your approval of the demo, we'll proceed with the Full Migration, meticulously checking your store database to guarantee all data has been transferred correctly. This ensures a seamless and accurate shopping cart data migration.

Please note that the Data Migration Service Package covers a single, complete migration. If you require multiple migrations, please contact our support team to discuss available options and pricing.

What Happens After I Order a Data Migration Service Package?

Here's a detailed breakdown of the process after you order a Data Migration Service Package from Cart2Cart:

  1. Order Verification: Our Support Team will meticulously review your order details to ensure all information is accurate and complete.
  2. Confirmation Email: You'll receive a confirmation email summarizing your order and outlining the next steps.
  3. Demo Migration Setup: We'll configure a Demo Migration, transferring a limited amount of data to your Target Store. This allows you to preview the results and ensure everything looks as expected.
  4. Demo Review: We'll present the Demo Migration results for your review. You can examine the data in your Target Store and provide feedback.
  5. Full Migration Execution: Upon your approval of the Demo Migration, we'll initiate the Full Migration, transferring all your data to the new platform.
  6. Post-Migration Verification: After the Full Migration, we'll thoroughly check your store database to confirm that all data has been transferred accurately and completely. Our goal is a perfect shopping cart data migration.

Remember, the Data Migration Service Package is designed for a single migration. If you need to migrate data multiple times (e.g., from a development store to a live store), please reach out to our support team to explore available options.

Next Steps:

More info
How soon my Data Migration Package will be completed?

How Long Does a Data Migration Take with Cart2Cart?

The duration of your data migration with Cart2Cart varies depending on several factors. While we strive to make the process as efficient as possible, the exact timeline is influenced by:

  • Data Volume: The more products, customers, orders, and other data you have, the longer the migration will take.
  • Customization Complexity: Highly customized online stores require more time for migration due to the need to adapt the data to the new platform's structure.
  • Server Performance: The speed and stability of both your source and target store servers can impact the migration speed.

Typically, we complete a Demo Migration in 5 business days and a Full Migration in 14 business days after receiving your request. However, for a more precise estimate, consider these points:

Factors Affecting Data Migration Time

  • Number of Entities: The sheer volume of data to be moved (products, customers, orders, etc.) is a primary driver of migration time.
  • Custom Fields and Attributes: Complex data structures with numerous custom fields can increase the migration time.
  • Image Migration: Migrating large numbers of images can be time-consuming.
  • Connection Speed: Stable and fast connections between the source and target platforms are crucial for efficient data transfer.

To get a clearer understanding of the estimated time for your specific data migration, we recommend the following:

  • Start a Demo Migration: This allows you to migrate a limited amount of data and get a feel for the process and estimated timeframe.
  • Contact Support: Our support team can analyze your specific needs and provide a more accurate estimate based on your store's configuration.

Ready to begin your data migration? Start your free demo today!

More info
Get a recent data migration after completing a data migration package

Need a Recent eCommerce Data Migration After Your Initial Migration?

Yes, you can! Cart2Cart offers the possibility to perform a recent eCommerce data migration to migrate all the products, customers, and orders (or only the specific entities you select) that appeared on your source store *after* your initial Data Migration Package was completed.

There are several reasons why you might need a recent eCommerce data migration:

  • Ongoing Sales: Your original store continues to operate while the initial migration is underway, generating new sales and customer data.
  • Content Updates: You might be adding new products, updating descriptions, or modifying customer information on your source store.
  • Ensuring Data Accuracy: A recent migration guarantees that your new store reflects the most up-to-date information.

Since such a recent eCommerce data migration requires additional customizations, it will be calculated differently:

Migration Cost = Assistance price ($99) + Price of entities which have to be migrated (depending on their volume).

If you are interested in a recent eCommerce data migration, please contact our Support Team for a personalized quote.

Ready to ensure your new store has the latest data? Start your free demo now!

More info
Can I order Data Migration Service Package for a trial store?

Can I Order a Data Migration Service for a Trial Store?

Many hosted e-commerce platforms offer trial stores to allow you to explore their features and functionality. However, these trial periods are typically limited and the stores automatically expire.

Therefore, we strongly advise against ordering a Data Migration Service for a trial store. Our standard data migration process involves a Demo Migration and a subsequent Full Migration, which can take a total of up to 19 business days (5 days for Demo and 14 days for Full Migration) after access details are verified. Due to this timeframe, your trial store will likely expire before the data migration is complete, rendering the process impossible.

To ensure a successful data migration, we recommend using a fully active, paid store for both the source and target platforms. This will provide sufficient time for the data to be transferred without interruption. Learn more about our data migration service.

Ready to migrate your store? Start your free demo now!

More info
How to create product variants based on combinations of their options?

Migrating Product Variants: How Cart2Cart Handles Product Options During Data Migration

If your target shopping cart supports advanced product options and combinations, Cart2Cart's data migration service can transform simple products from your source store into configurable product variants on your target store. This enables you to specify separate quantities, stock levels, and SKUs (or EAN, model, etc.) for each unique product combination. This ensures a seamless and accurate data migration of your product catalog, preserving the complexity and detail of your product offerings.

Supported Platforms for Product Variant Data Migration

This option to create product variants during data migration is available for the following target shopping carts:

Magento (products will be configurable), VirtueMart (option combinations become product items), X-Cart (option combinations will be product variants), Zen Cart (only if "Stock quantities by attributes" contribution is installed), BigCommerce (product variants will be created from variant options like size and color), CoreCommerce, GoldenPlanet, Kickstart, Mystore.no, Palundu, PrestaShop Cloud Api, Shop-Script, Storeden, Visualsoft, Zoey.

Understanding Product Variant Creation During Data Migration

With the "Create Product Variants" Option

The following illustrates how product variants appear in the Magento admin panel after data migration when the "create product variants" option is selected.

Magento admin panel showing configurable products after data migration with product variants

On the Manage Products page, you'll find a Configurable Product (Apple Cinema 30”) and individual Simple Products differentiated by color (green, red, yellow, etc.). Up to 1000 Simple Products can be created. For example, "Blue Apple cinema 30”:

Magento admin panel showing simple products with color variations after data migration

On the Associated Products page, you'll see Apple Cinema 30” in various colors. A key advantage is the ability to add specific descriptions, such as adjusting weight, SKU, manufacturer, and status. This allows customers to find exactly what they need with comprehensive information.

Magento associated products page after data migration showcasing product descriptions for each variant

Without the "Create Product Variants" Option

If you don't select the "Create Product Variants" option during data migration, the Manage Products page will only display a single Simple Product (Apple Cinema 30”) without any options.

Magento manage products page after data migration without product variants enabled

On the Custom options page, you'll only be able to modify the price, price type, SKU, and sort order, as shown below:

Magento custom options page after data migration showing limited customization options

Steps to Migrate Product Variants with Cart2Cart

To utilize the "create product variants" option during your data migration, follow these steps:

  1. Register an account with Cart2Cart.
  2. Start a new migration project.
  3. Provide the necessary information for your source and target stores.
  4. Proceed to the Entities Selection step and choose the option to "Create product variants based on the combination of options."
  5. Perform the data migration.

Please note that this is an additional option and will affect the final data migration price. Be sure to factor the cost of this option into your overall budget. For further details, refer to our article: Create Product Variants with Cart2Cart.

Ready to migrate your store? Start your free demo now!

More info
What is the option of Preserving order IDs on Target store?

Preserve Order IDs During Shopping Cart Migration

Preserving Order IDs is an optional feature offered by Cart2Cart that allows you to match your source store's order IDs with those on your target store during shopping cart migration. This ensures a seamless transition and maintains consistency in your order tracking.

How to Enable Order ID Preservation

You can choose the "Preserve Order IDs" option during the Migration Setup process, specifically in the Entities Selection step.

Screenshot of Cart2Cart's Entities Selection screen highlighting the Preserve Order IDs option during shopping cart migration

What Happens When You Preserve Order IDs?

When enabled, the order IDs will be migrated to the target store without changes. For example, if an order has ID #19 in your source store, it will also have ID #19 in your target store after the shopping cart migration.

Important Considerations for Preserving Order IDs

Note: To avoid duplication and potential data conflicts, enabling this option typically requires the deletion of existing order data on your target store. Therefore, it is best used when migrating to a new or empty store.

When Should You Use This Feature?

Preserving Order IDs is particularly useful in the following scenarios:

  • You are migrating to a brand new store and want to maintain the original order numbering.
  • You have integrated your store with third-party systems that rely on specific order IDs.
  • You want to simplify order tracking and reporting across both your old and new stores during a transition period.

Ready to Migrate?

Start your free demo now and experience the ease of shopping cart migration with Cart2Cart: Start your free demo - https://newapp.shopping-cart-migration.com/

Have questions? Contact support via Live chat or Schedule a Call with a Migration Expert.

More info
Does Cart2Cart strip HTML from category and product name?

Does Cart2Cart Strip HTML from Category and Product Names During eCommerce Data Migration?

Yes, during your eCommerce data migration with Cart2Cart, HTML tags within product and category names are automatically stripped. For instance, if a product name in your source store is formatted as "Some product name," it will appear as "Some product name" in your target store after the migration.

Why is HTML Stripped During Data Migration?

This process ensures data integrity and prevents potential display issues in your new eCommerce platform. HTML is stripped to ensure the new platform's styling and formatting are applied consistently. This approach maintains a clean and standardized presentation of your product and category information.

If you need to preserve specific formatting, consider using custom fields or descriptions within your product data and then migrating those fields using Cart2Cart's custom fields mapping option. See more about additional migration options

Ready to seamlessly migrate your eCommerce data? Start your free demo now and experience the ease of Cart2Cart eCommerce data migration!

More info
Why do I see duplicated data on my target after migration completed?

Why am I seeing duplicate data on my target store after eCommerce data migration?

Data duplication on your target store after an eCommerce data migration is most often caused by running the migration process multiple times without first clearing the existing data on the target platform.

How to Prevent Data Duplication During eCommerce Data Migration

To avoid duplicated data during your eCommerce data migration, always use the "Clear current data on Target Store before Migration" option in the Cart2Cart migration wizard. This ensures a clean slate before each migration attempt.

Here's how to find the option during configuration:

Clear Data Option in Cart2Cart for eCommerce Data Migration

Remember that multiple transfers to the same target store without clearing data beforehand will inevitably lead to duplicates. This is especially important if you're testing the migration or running multiple iterations.

Cart2Cart supports migration between a wide array of platforms, including Magento, Shopify, WooCommerce, OpenCart and many more. Ensure you configure your migration correctly to avoid data issues.

Next Steps:

  • Start a free demo here.
  • If you're still experiencing issues, contact our support team via Live Chat or Schedule a Call with a Migration Expert.
More info
I have chosen the option Migrate images from products descriptions and categories descriptions

Why Can't I Strip HTML When Migrating Images with My Data Migration?

Question: I've selected the option to "Migrate images from product and category descriptions" during my data migration. Why can't I also select the "Strip HTML from categories and product names and descriptions" option?

The images within product descriptions are typically embedded using HTML code. If you choose to strip HTML during your data migration, all HTML elements, including image tags, will be removed. This means the images will be removed from the descriptions as well.

The "Strip HTML" option is generally used when the HTML code on your source store is improperly formatted or if you don't want to preserve any HTML formatting on your target store after the data migration. This might be useful if you are encountering display issues due to inconsistent HTML.

Therefore, if your goal is to migrate images embedded in product and category descriptions to your new store, you must select the "Migrate images in products and categories descriptions" option. These two options are mutually exclusive and cannot be enabled simultaneously during your data migration with Cart2Cart.

Need help with your data migration options? Schedule a call with a Migration Expert to discuss your specific needs.

More info
What does the option Migrate images from products descriptions and categories descriptions do?

Migrate Product Images During Shopping Cart Data Migration

When performing a shopping cart data migration, product descriptions often contain embedded images that are crucial to the customer experience. Ensuring these images are correctly transferred is vital for maintaining the visual appeal and informative content of your online store.

Understanding the "Migrate Images from Products Descriptions and Categories Descriptions" Option

Watch this short video to understand how the "Migrate images from products descriptions and categories descriptions" option works during your data migration with Cart2Cart.

Product descriptions may contain images that are required to be moved while migrating store to another shopping cart.

Example of product description with images for data migration

If you don’t choose the "Migrate Images from Products Descriptions and Categories Descriptions" option during your data migration, your products will be displayed without the images integrated into their descriptions on your new store. This can negatively impact the presentation and potentially reduce sales.

Note: If you intend to migrate images, avoid selecting the "Strip HTML from categories and product names and description" option. These options in combination can prevent the images from being transferred correctly during the data migration process. Consider using additional options, such as Preserve order IDs or Create the 301 redirects on the target store after migration to improve your store SEO.

Ready to seamlessly migrate your product images and other data? Start your free demo now and experience the ease of shopping cart data migration with Cart2Cart!

More info
How can the option Preserve Customer IDs be used?

Preserving Customer IDs During eCommerce Data Migration

During your eCommerce data migration with Cart2Cart, you have the option to preserve customer IDs. This feature is available during the Entities Selection step of the Migration Wizard.

Customer IDs selection during eCommerce data migration with Cart2Cart

How Preserving Customer IDs Works in eCommerce Data Migration

When you choose to preserve customer IDs, the IDs from your source store will be migrated to your target store without changes. For example, if a customer has ID #12 in your original store, they will retain the same ID (#12) after the eCommerce data migration to the new platform.

Important Considerations for Preserving Customer IDs during Data Migration

Note: This option requires that you clear the data on your target store *before* the migration. Preserving Customer IDs is offered as an additional option and is charged separately from the base migration price.

Ready to migrate your store? Start your free demo today! Or, schedule a call with our migration expert.

More info
What does the option Preserve Product IDs mean?

Preserve Product IDs During eCommerce Platform Migration with Cart2Cart

Preserving product IDs during an eCommerce platform migration is crucial for maintaining your store's SEO rankings, customer experience, and integrations. The "Preserve Product IDs" option in Cart2Cart ensures that your product URLs and internal data structures remain consistent, preventing broken links and data discrepancies after the migration. This is especially important if you have existing SEO strategies or integrations that rely on these IDs. When you migrate with Cart2Cart, you can maintain your source store's product #19 as product #19 in your target store.

The "Preserve Product IDs" option is an additional feature available upon request during the "Entities Selection" step of the Migration Wizard. If you need help with your eCommerce platform migration, schedule a call with our migration expert.

Preserve Product IDs option in Cart2Cart for eCommerce platform migration

Cart2Cart currently supports preserving product IDs when migrating:

eCommerce Platforms You Can Migrate From

eCommerce Platforms You Can Migrate To

Ensure a seamless eCommerce platform migration by using the "Preserve Product IDs" option. This will help you avoid any disruption to your store's functionality or SEO.

Ready to migrate your store? Start your free demo now!

More info
My product images were duplicated after migration. What should I do?

Duplicate Product Images After Shopping Cart Migration: Why and How to Fix

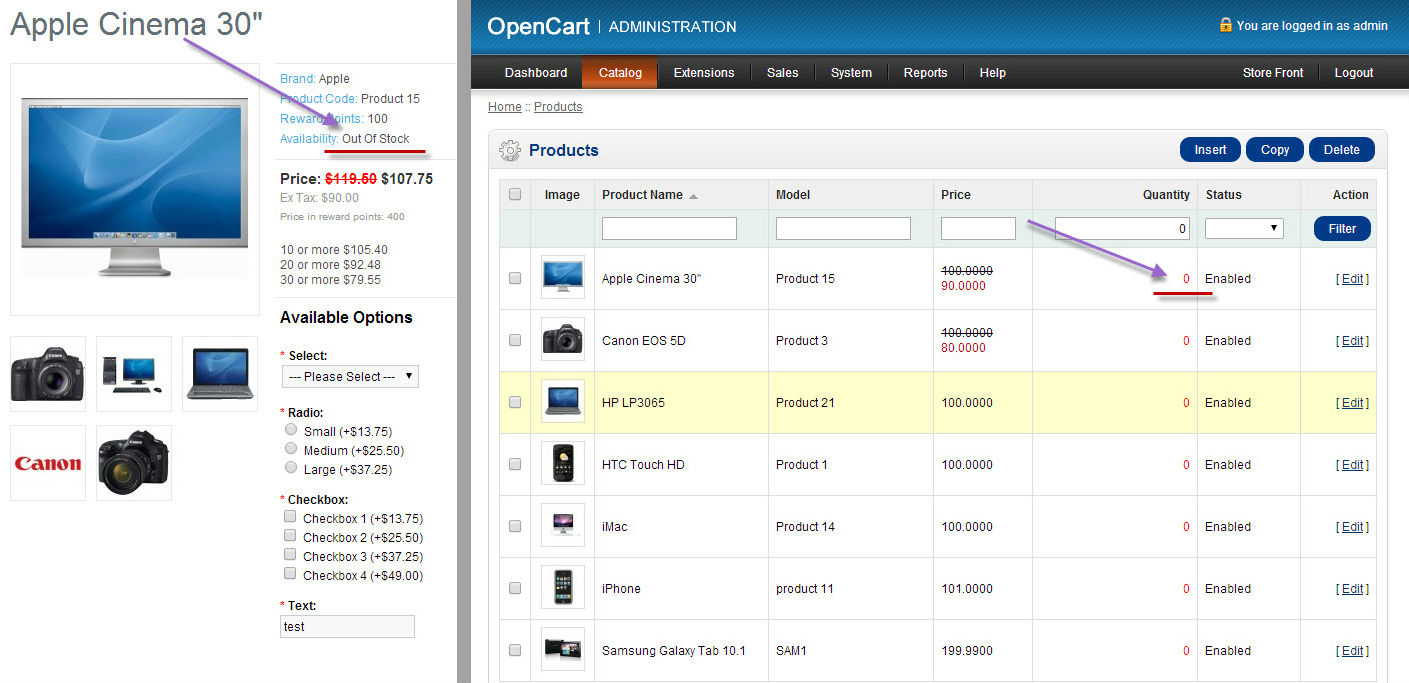
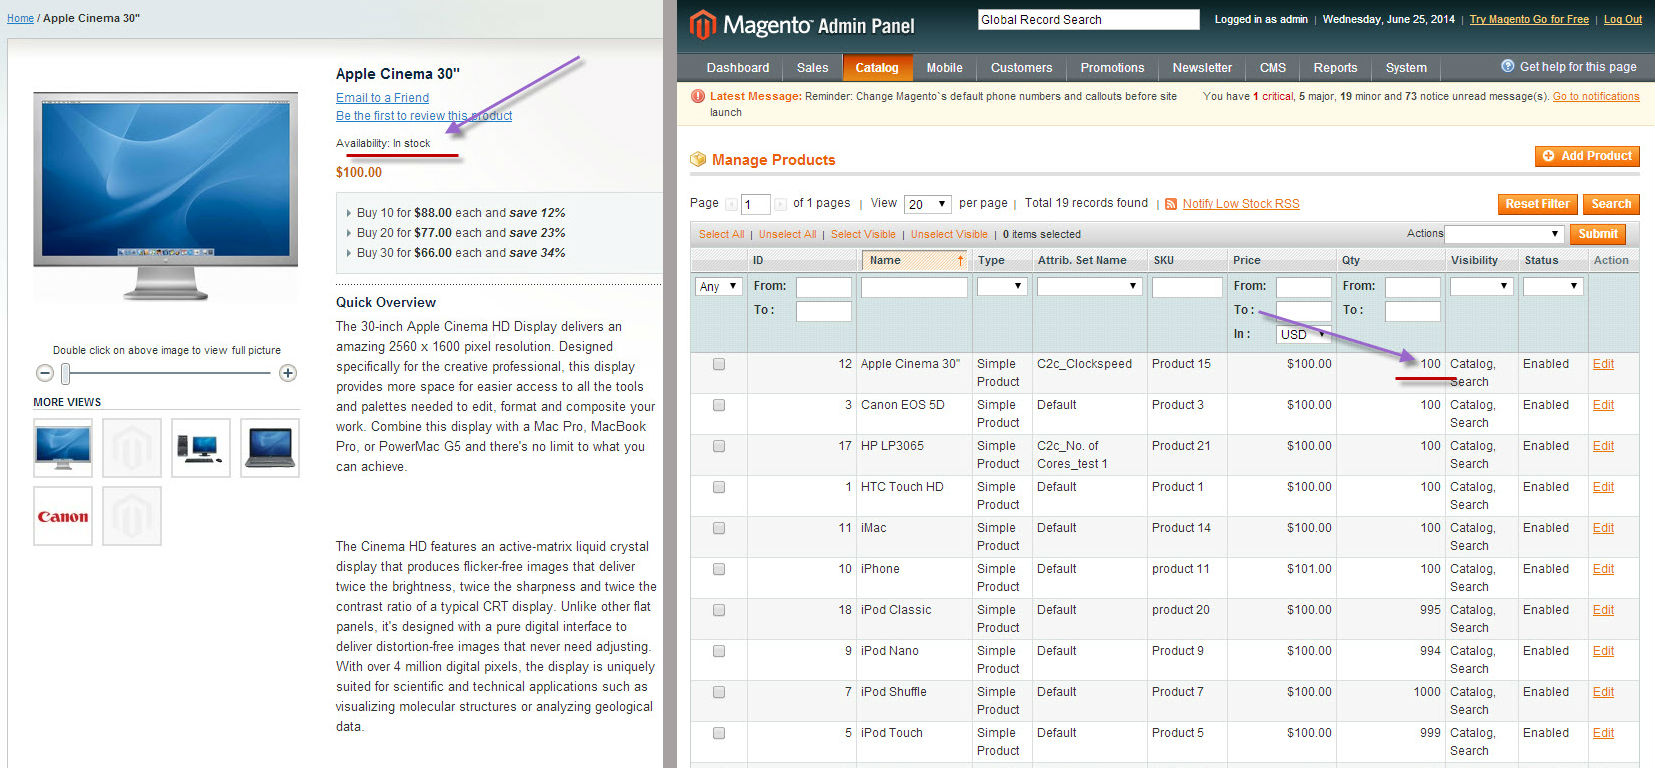
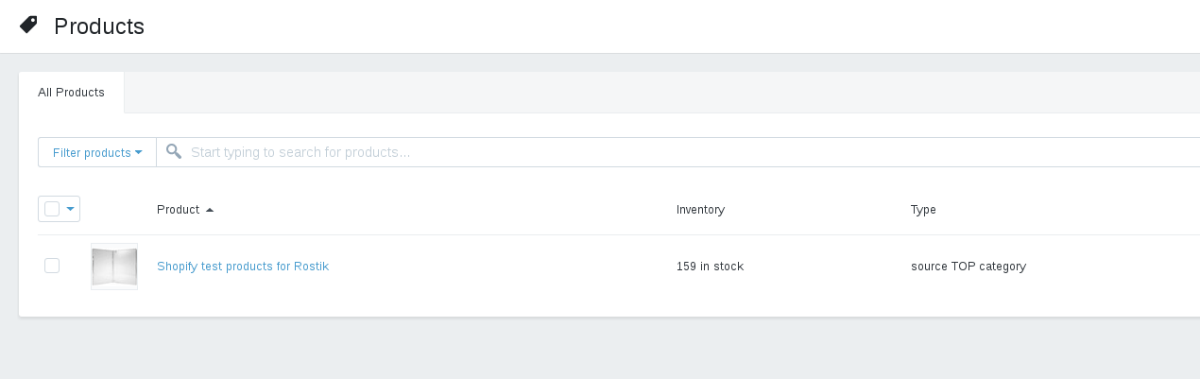
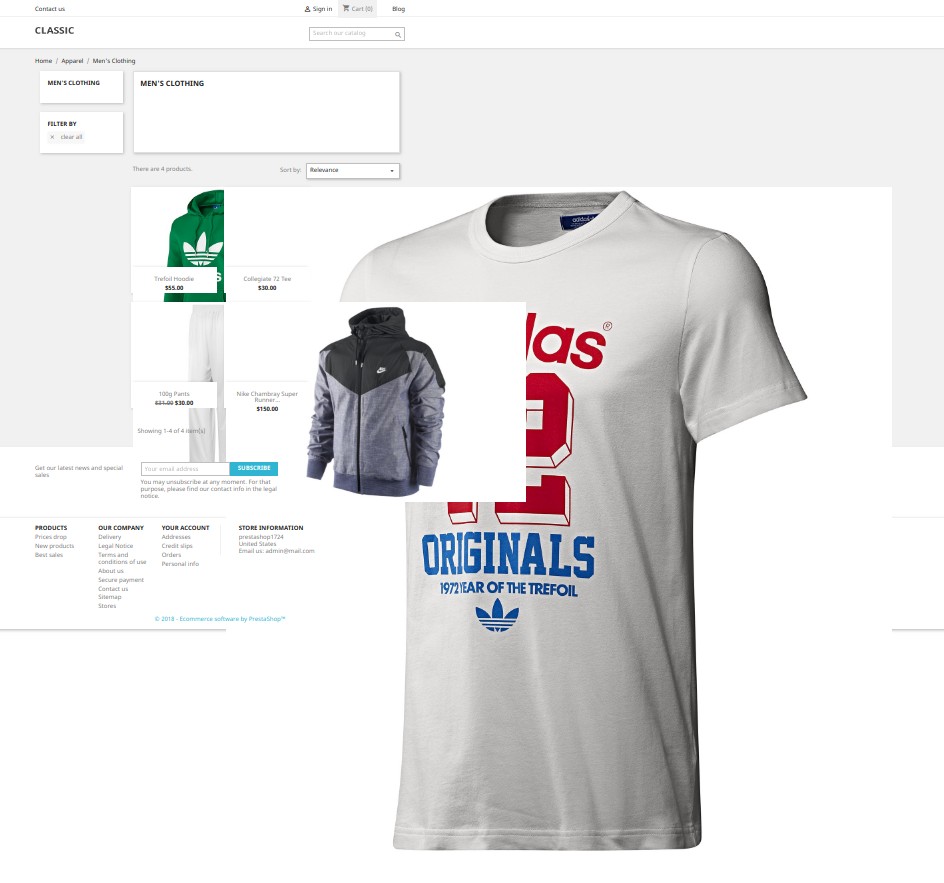
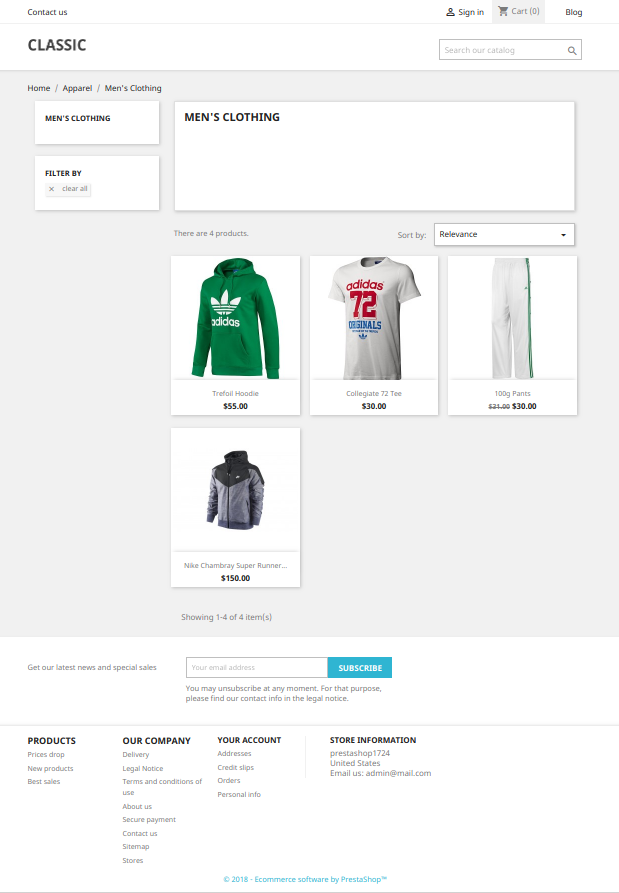
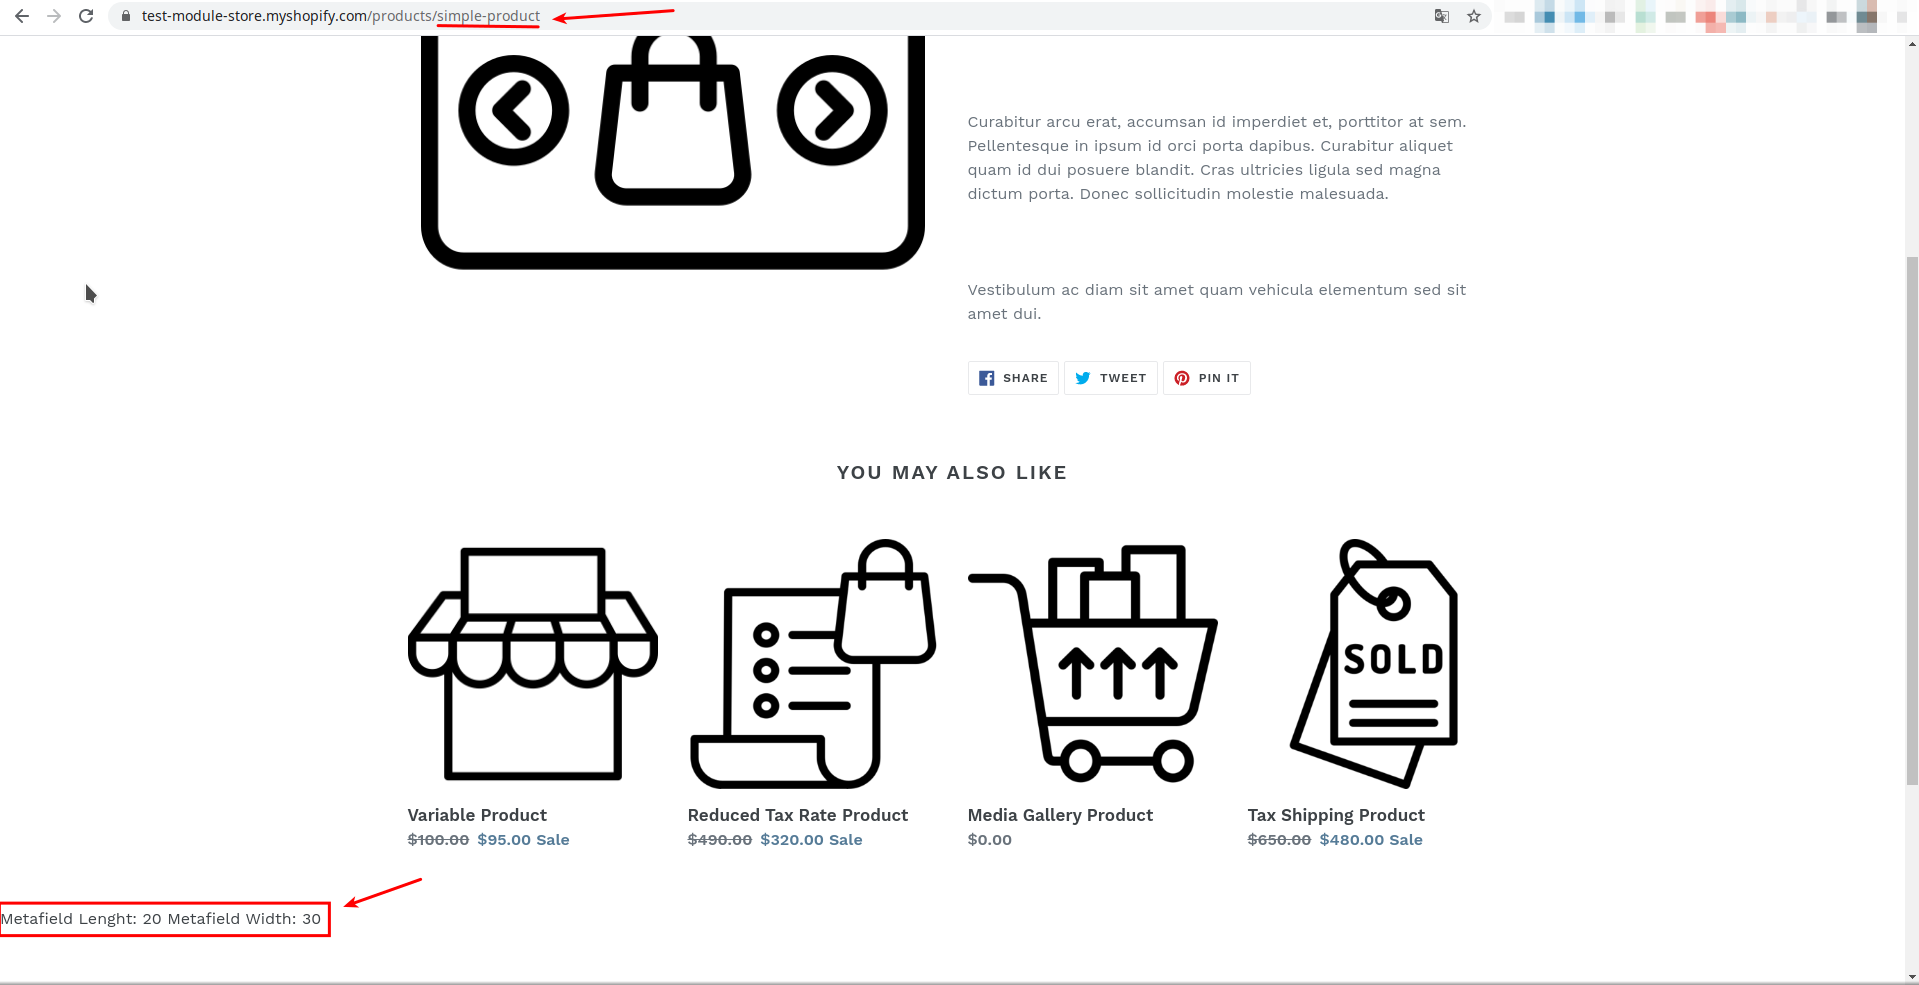
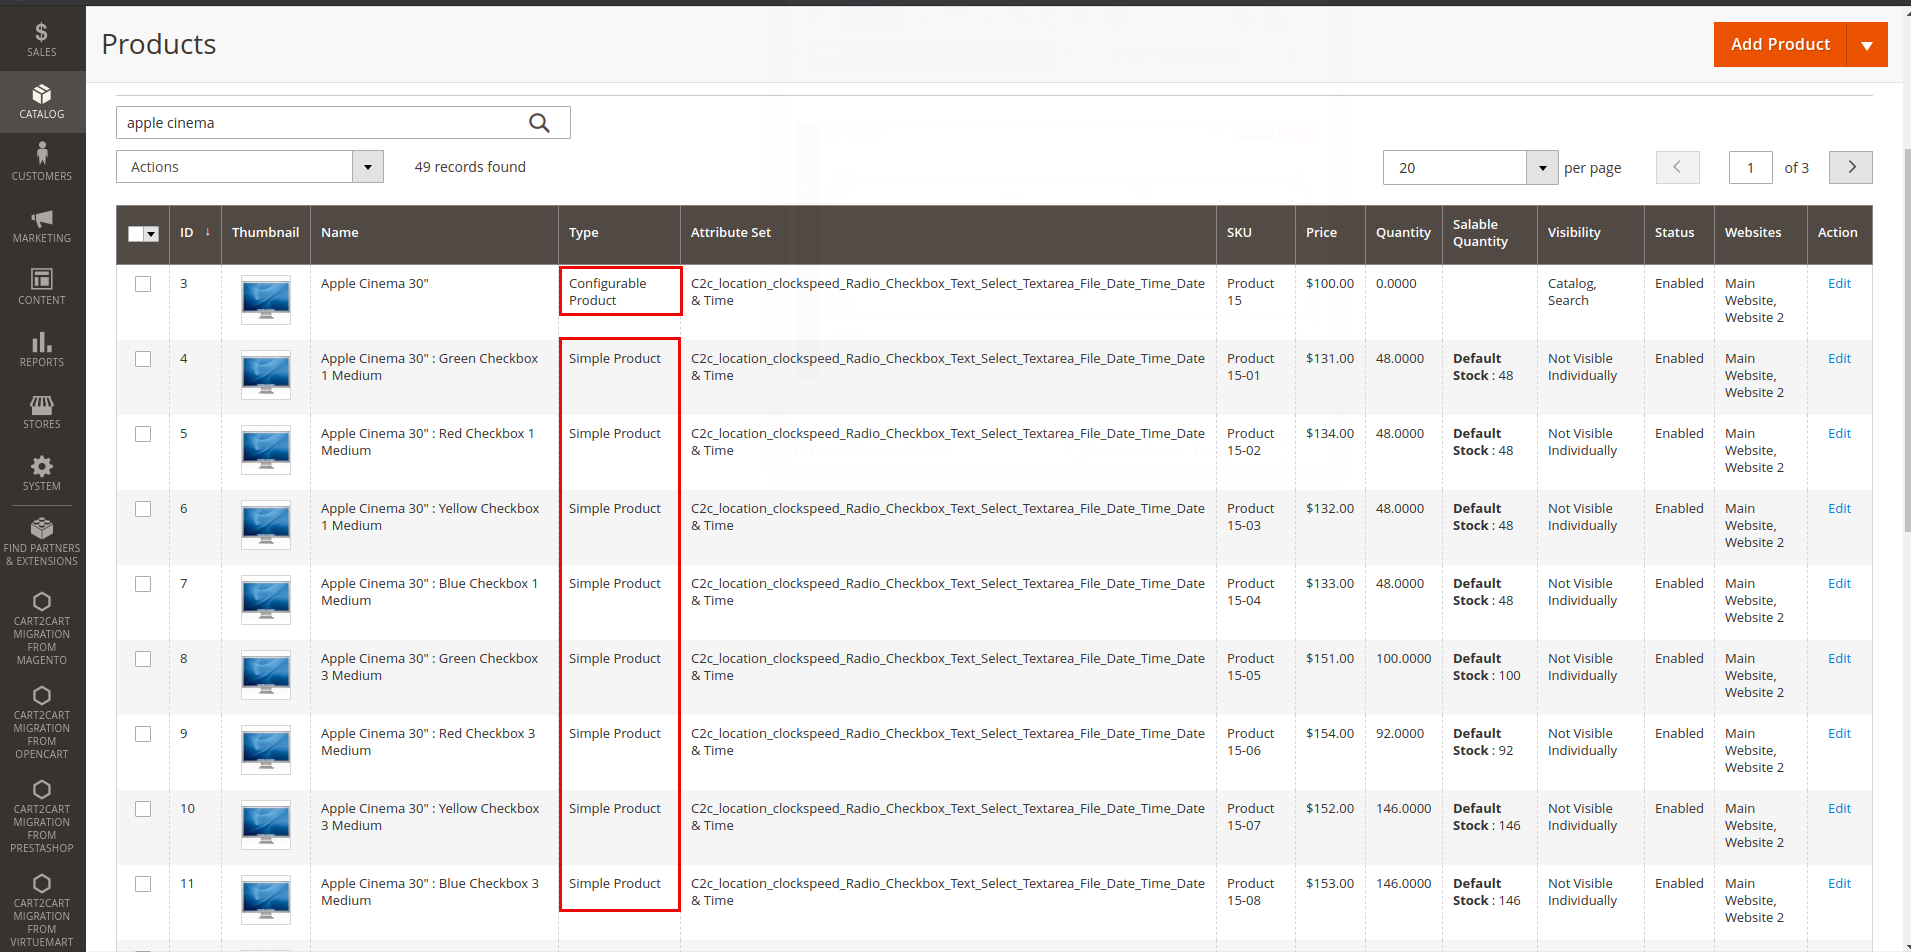
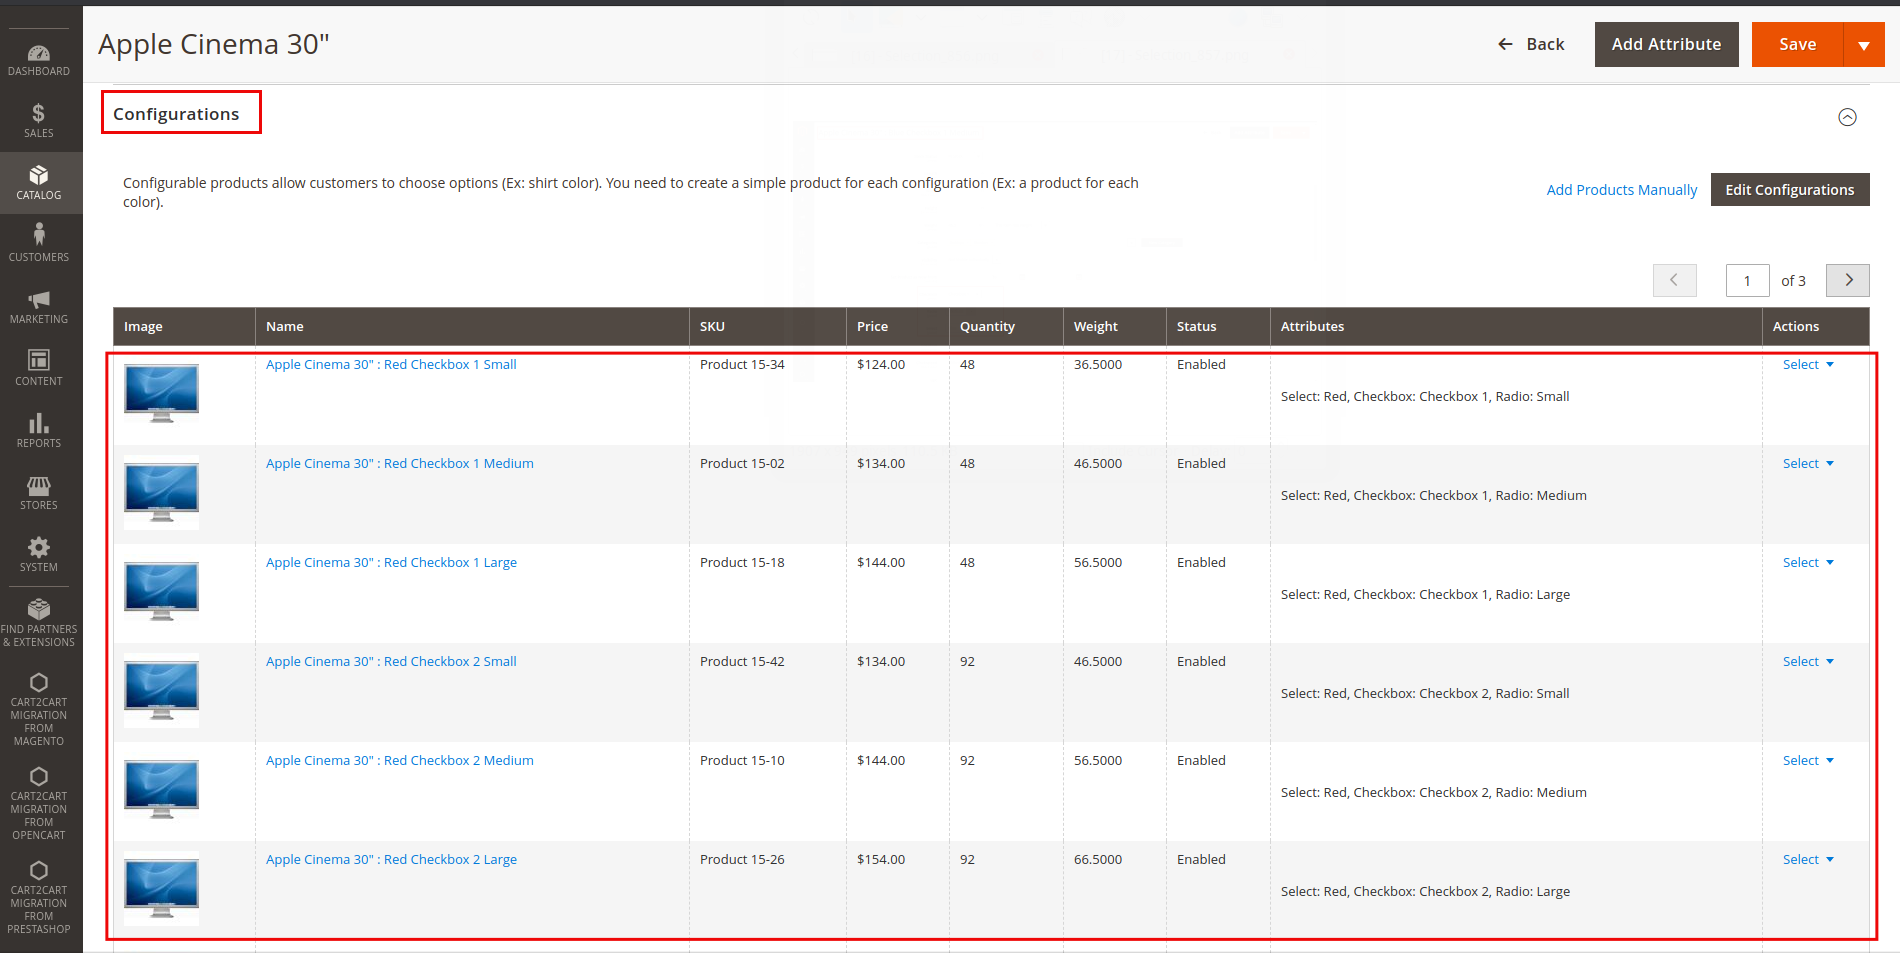
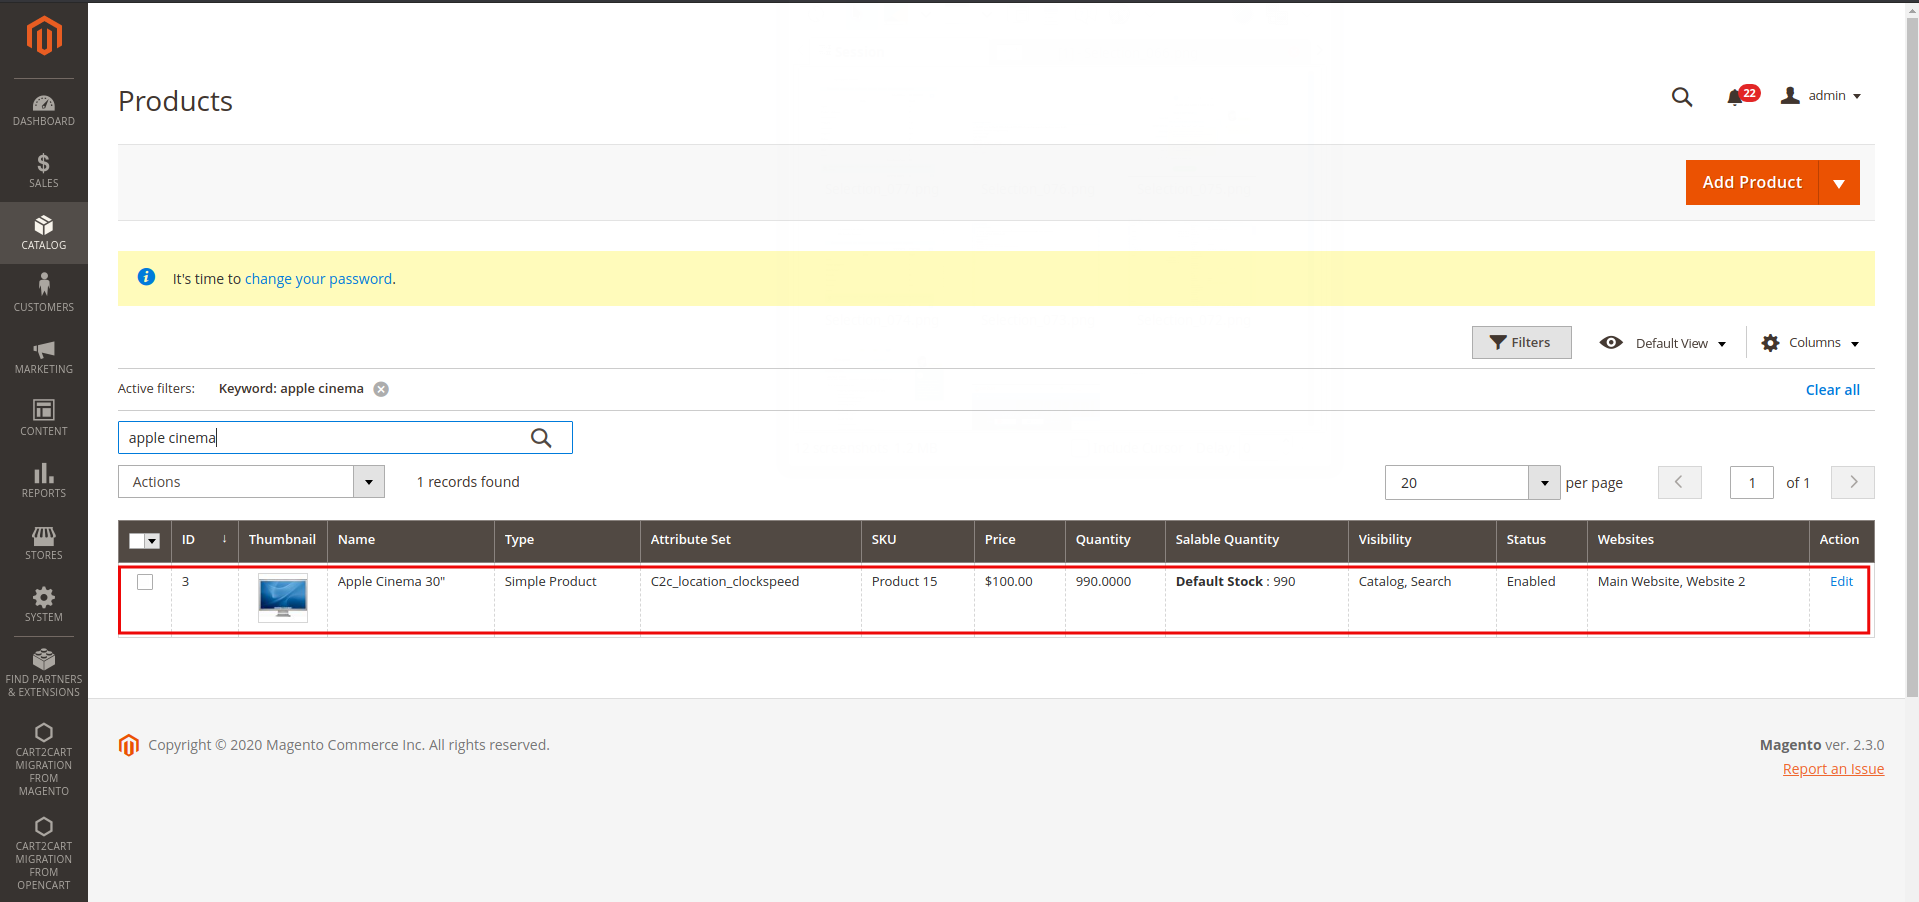
During shopping cart migration, you might notice duplicate product images on your new store. This often happens because many e-commerce platforms use both large product images and smaller thumbnails. In most cases, these thumbnails are identical to the main images. However, if your target platform doesn't fully support or handle thumbnails in the same way as your source platform, these thumbnails can appear as duplicates after the migration process.

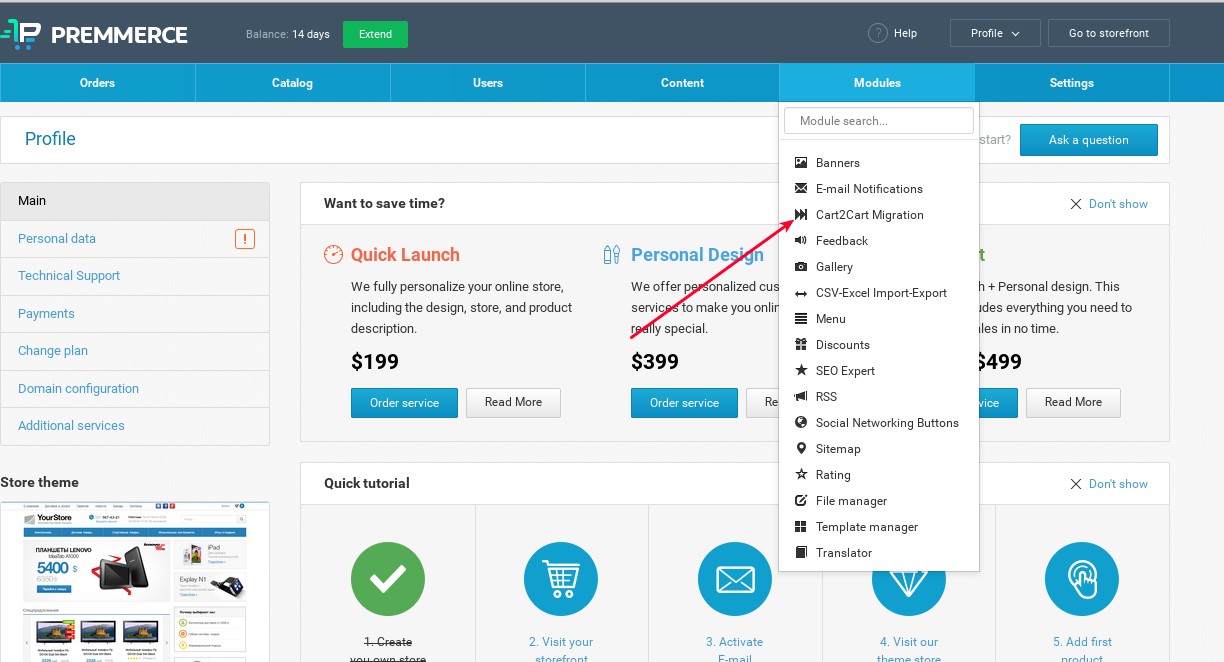
Preventing Duplicate Images During Migration

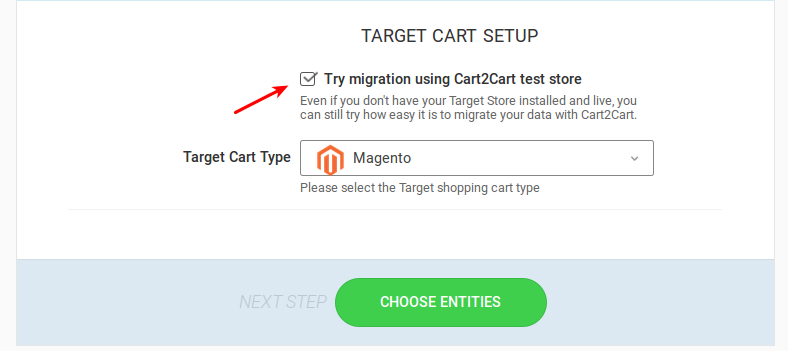
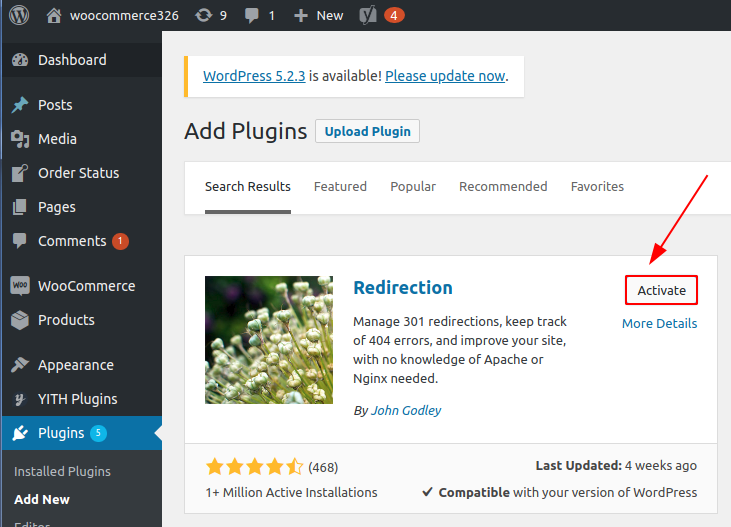
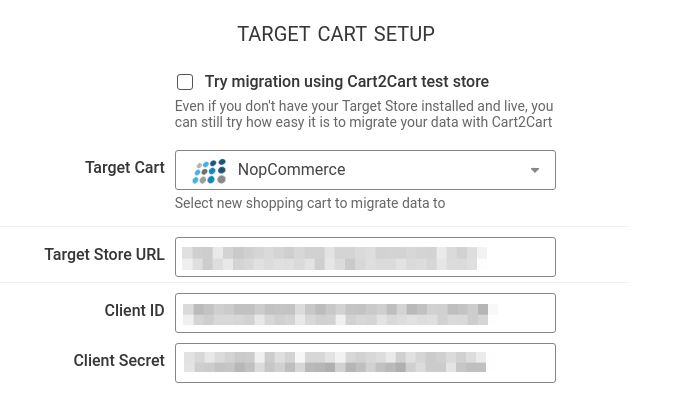
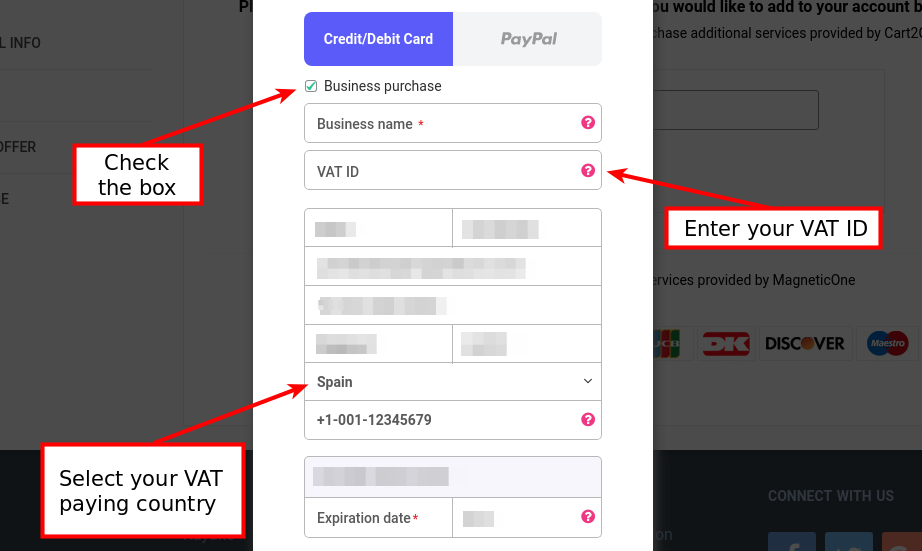
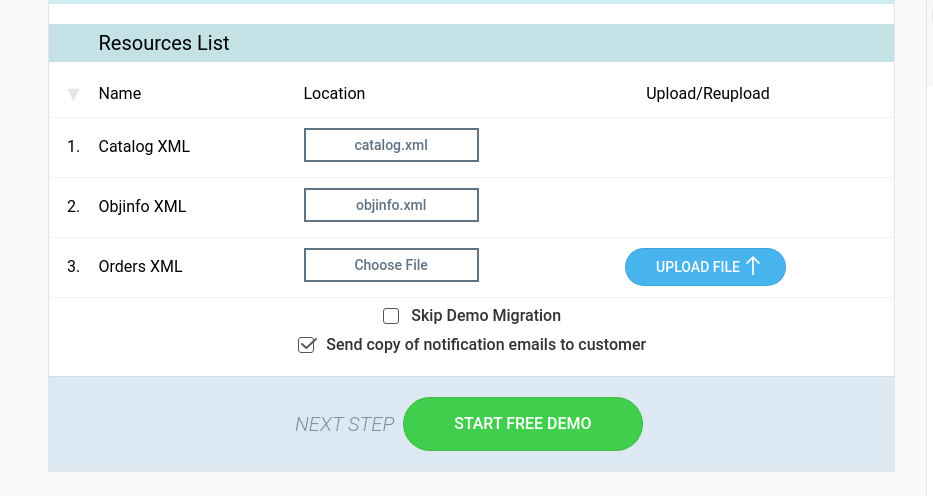
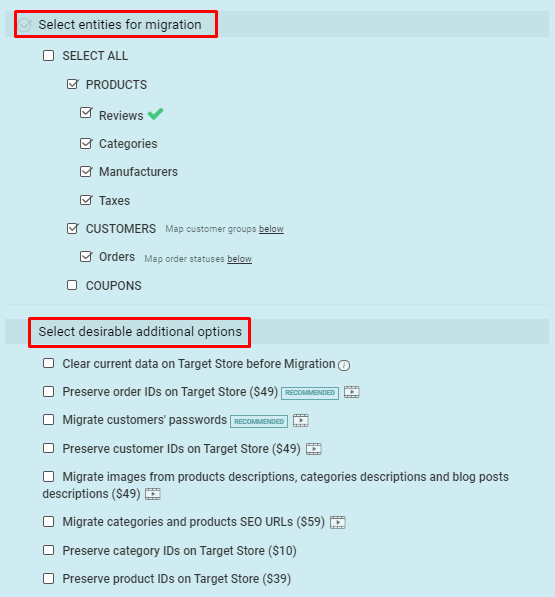
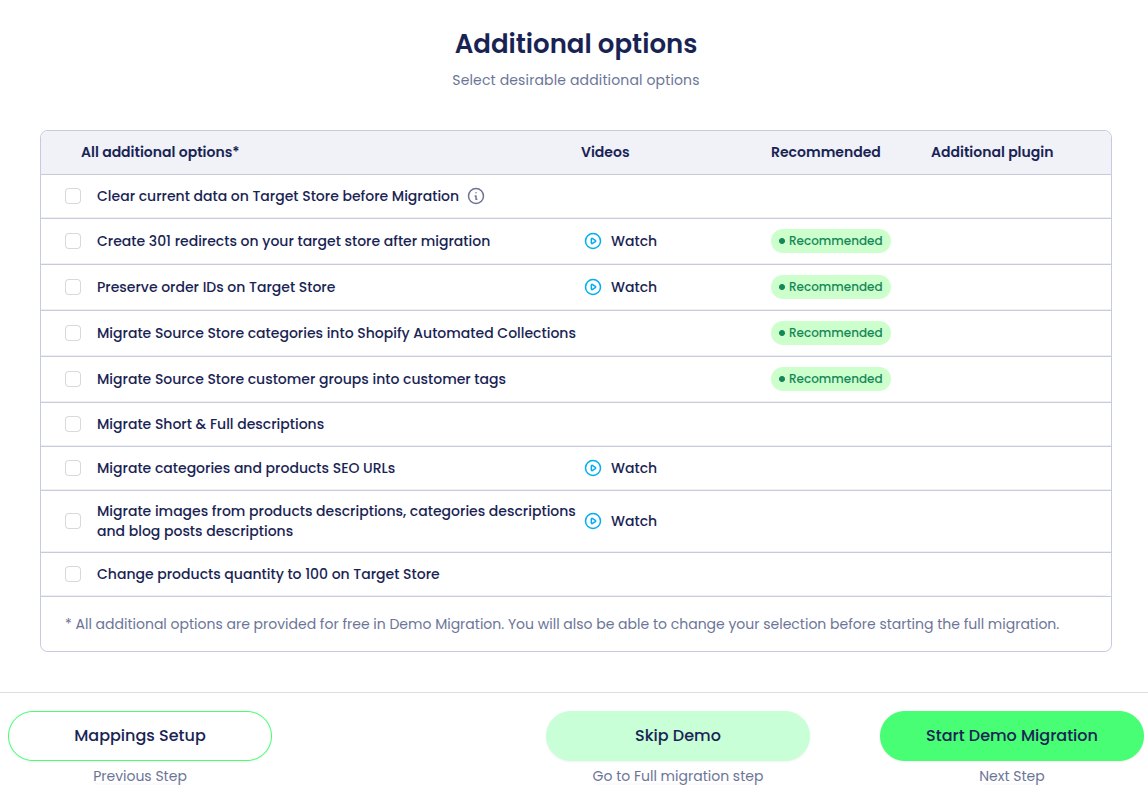
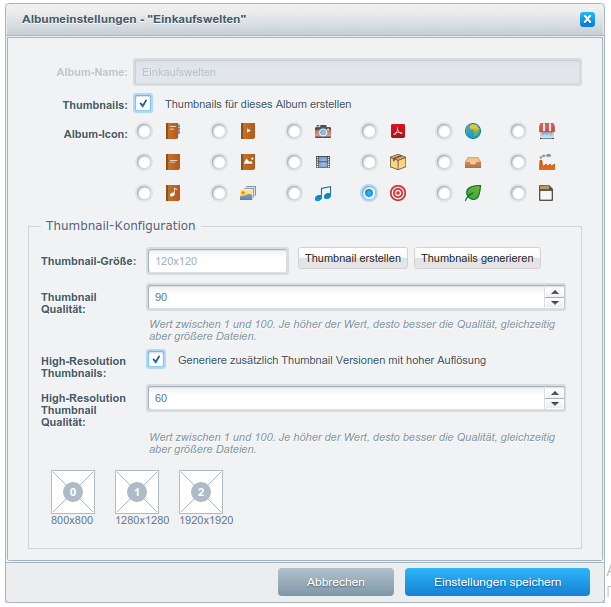
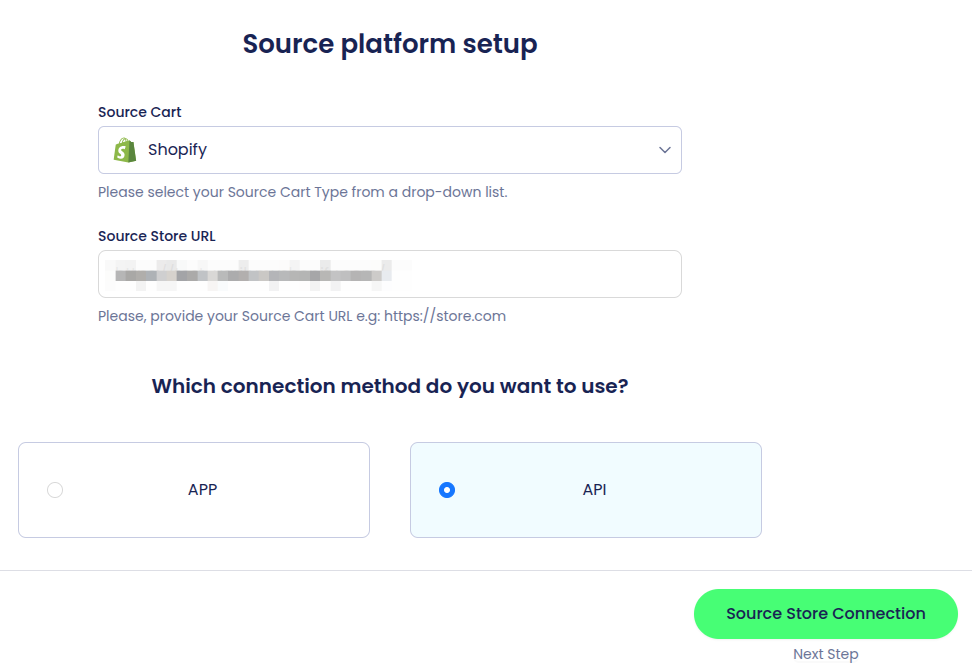
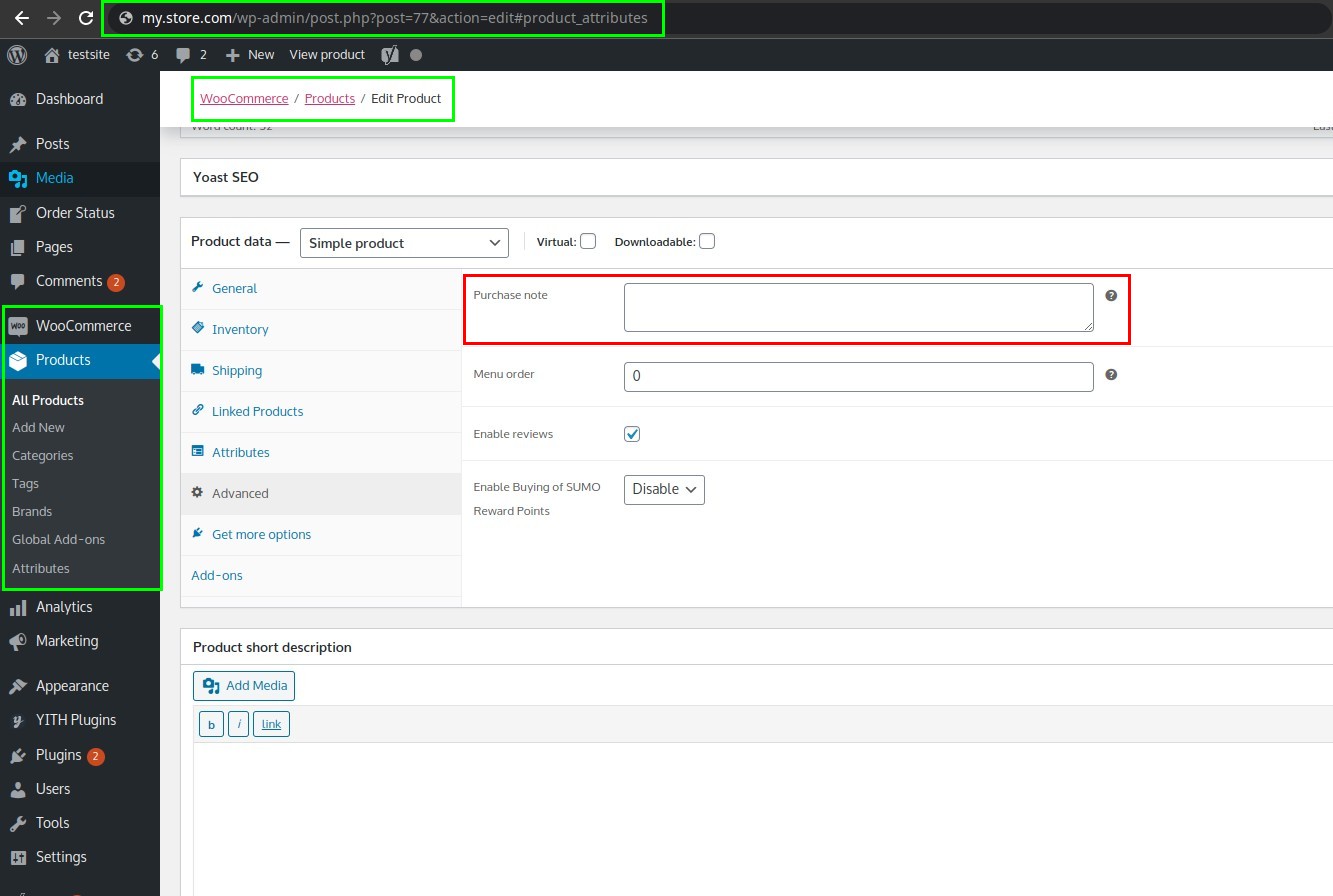
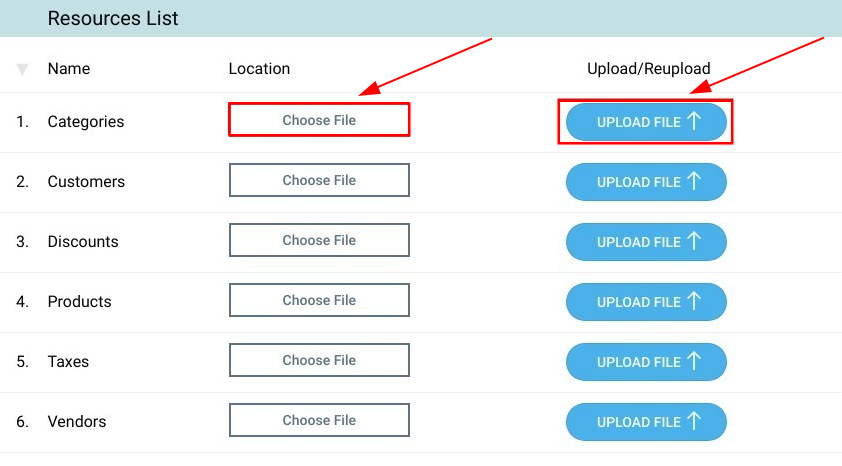
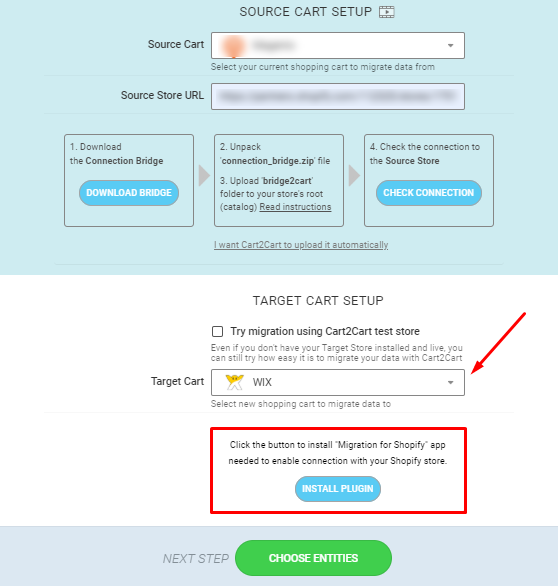
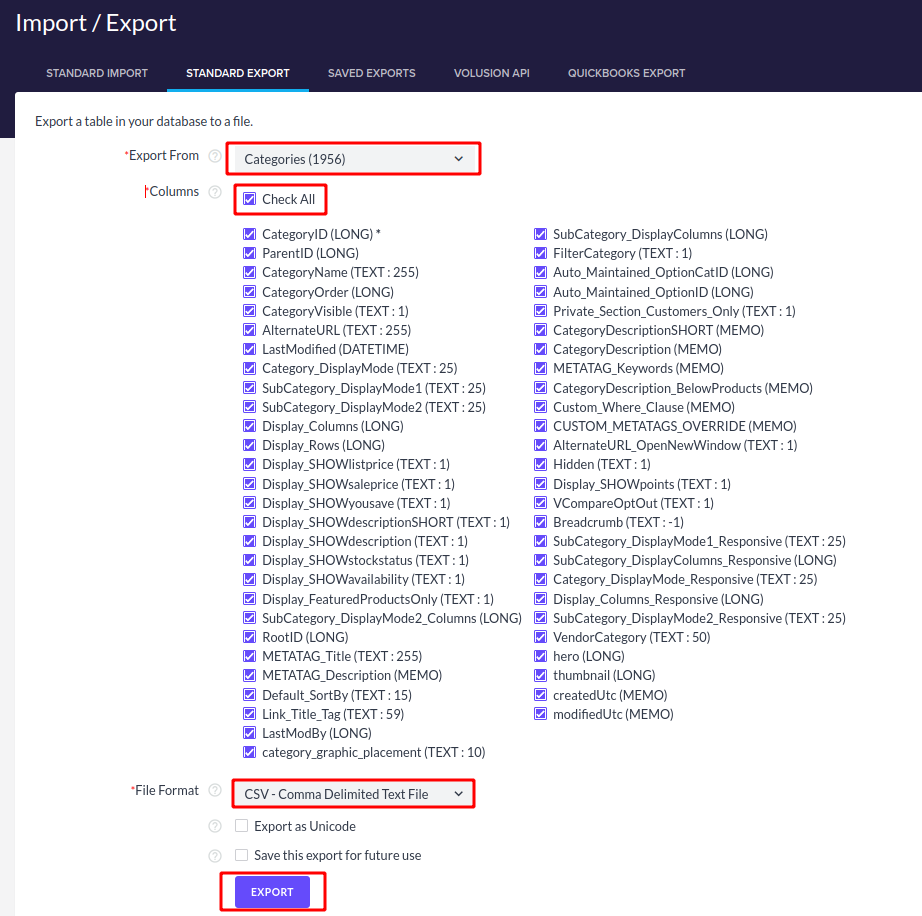
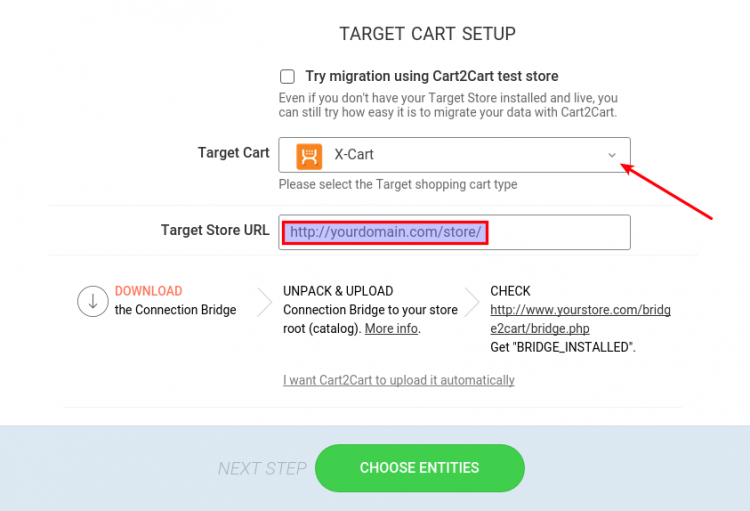
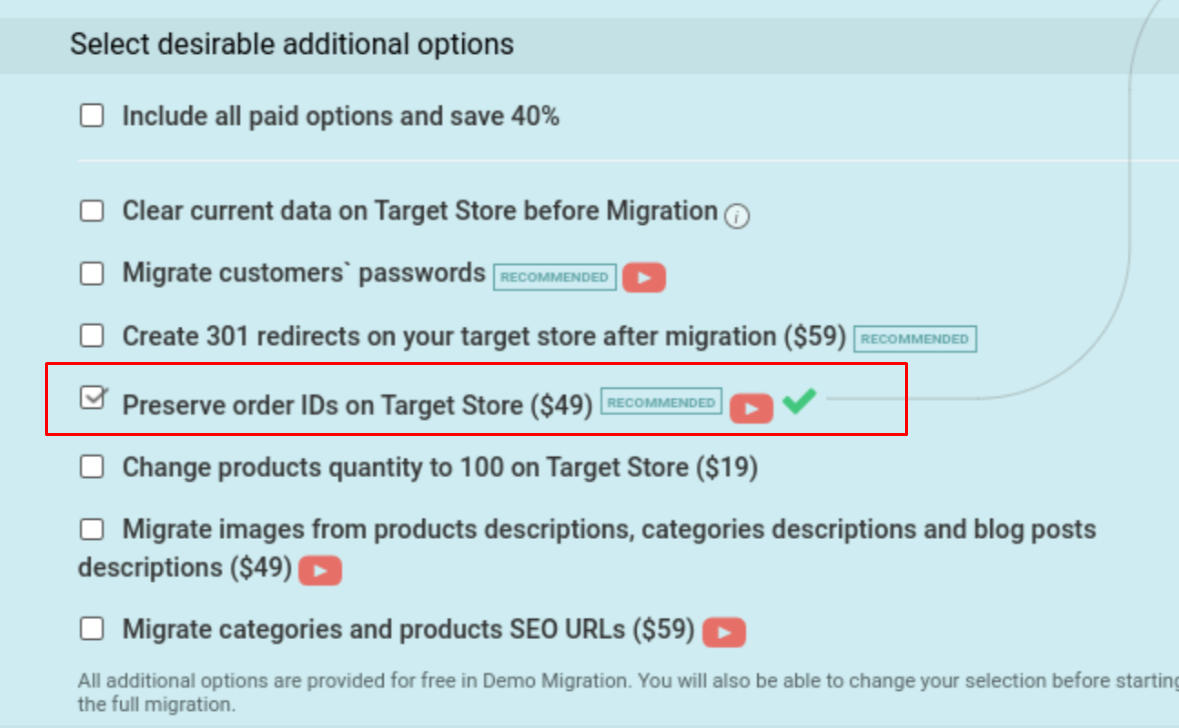
To avoid this issue, Cart2Cart offers a free additional option: "Skip product thumbnail images migration". Enabling this option prevents the migration of thumbnail images, especially when they are the same as the larger product images. This helps ensure a cleaner and more organized product display on your new store.

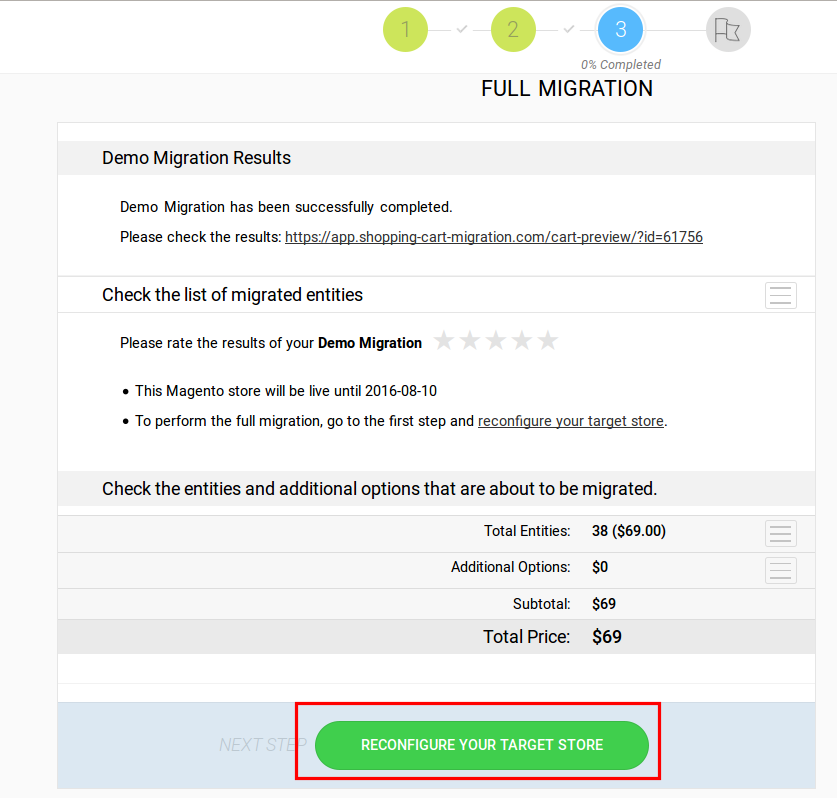
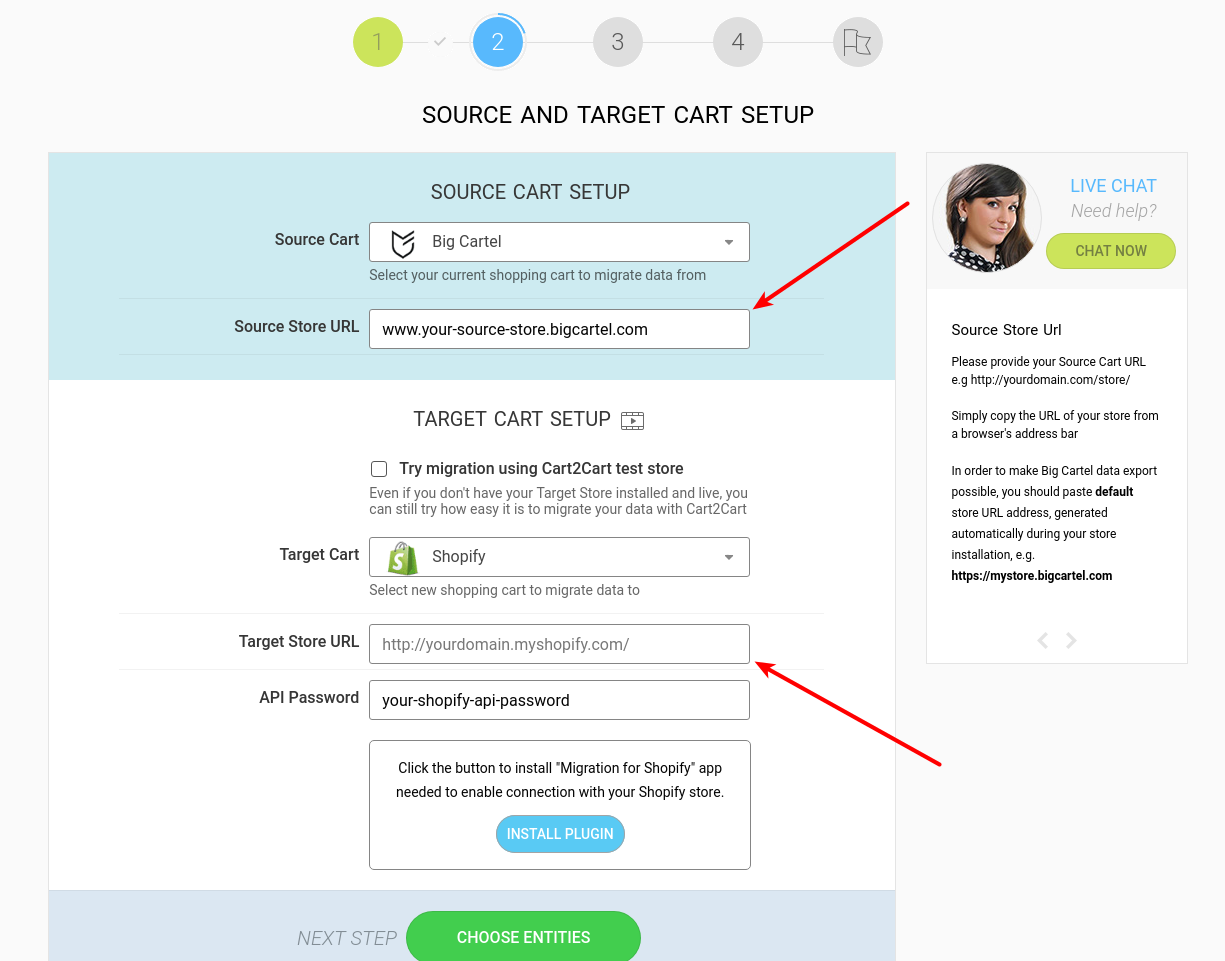
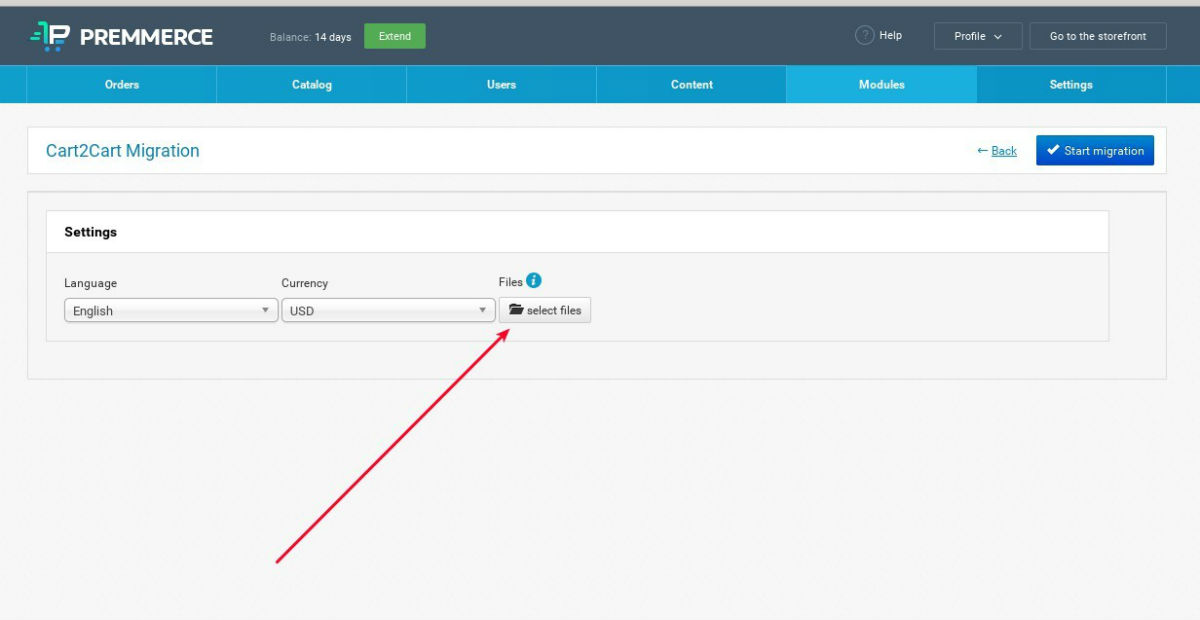
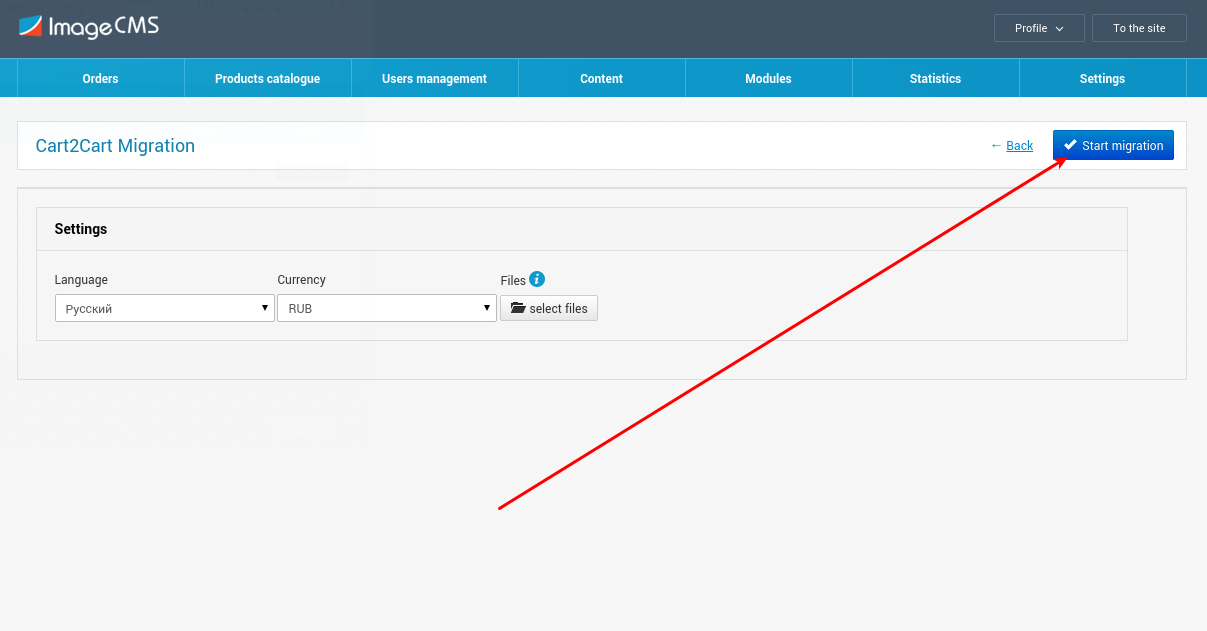
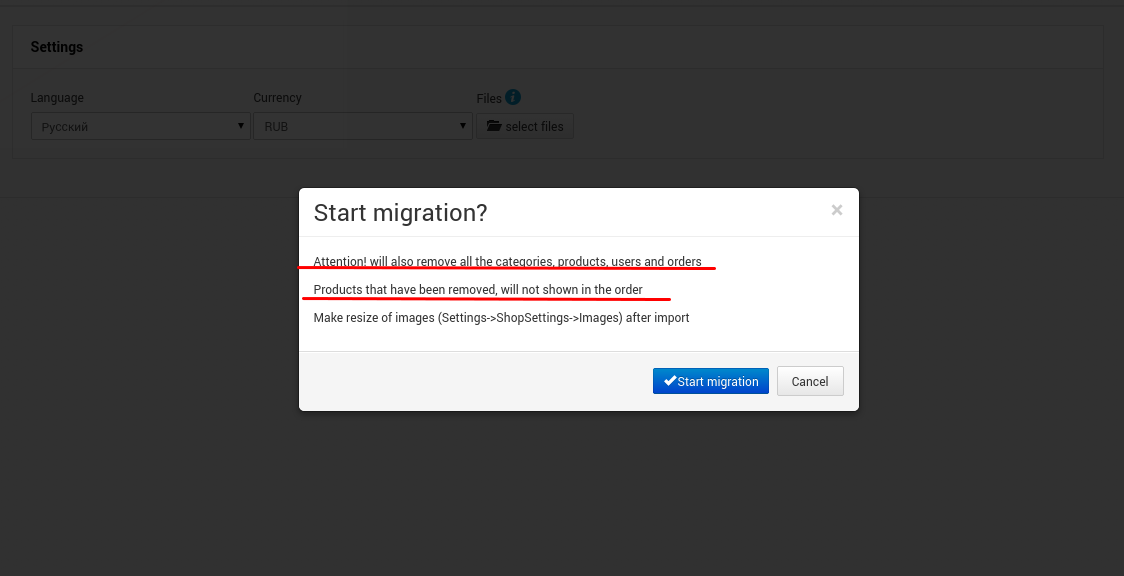
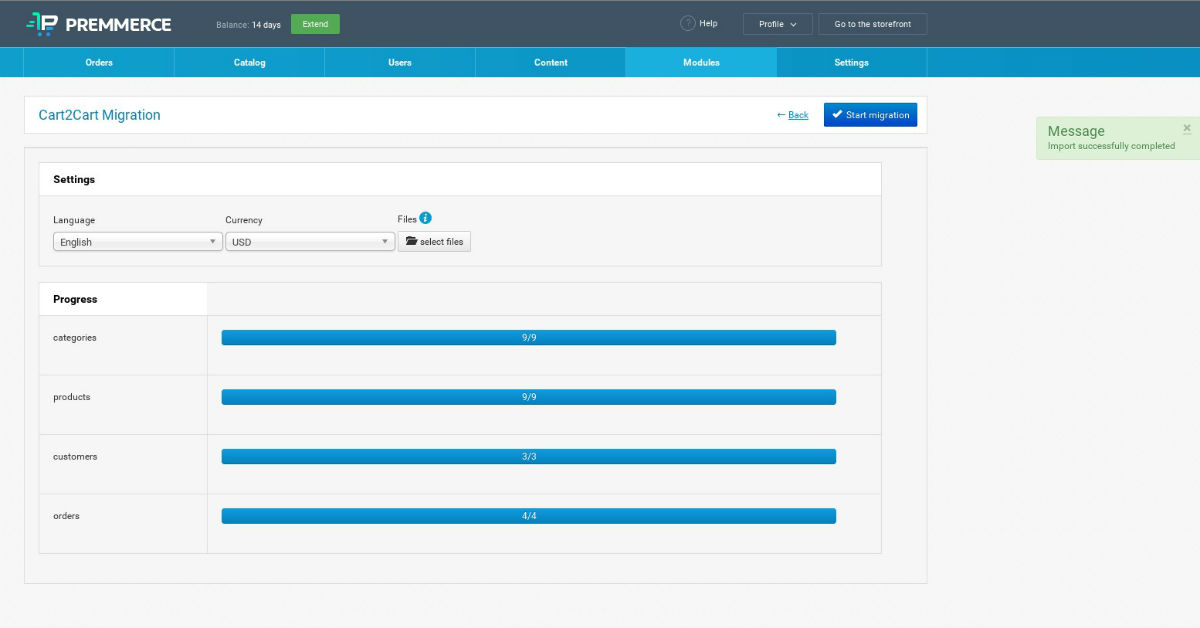
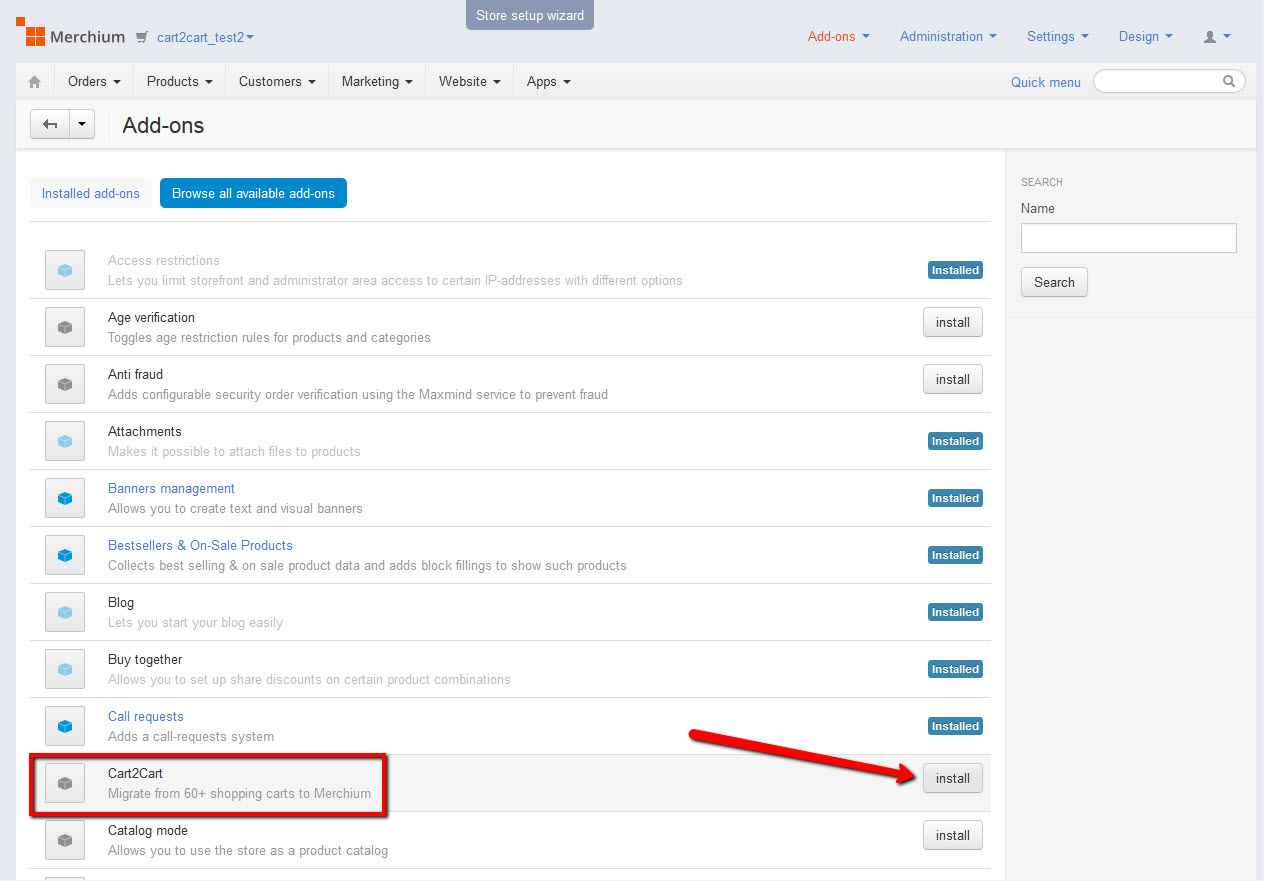
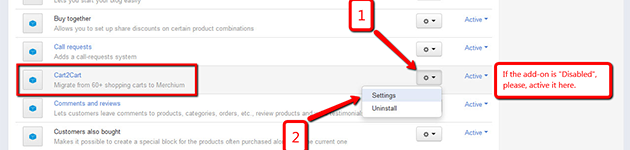
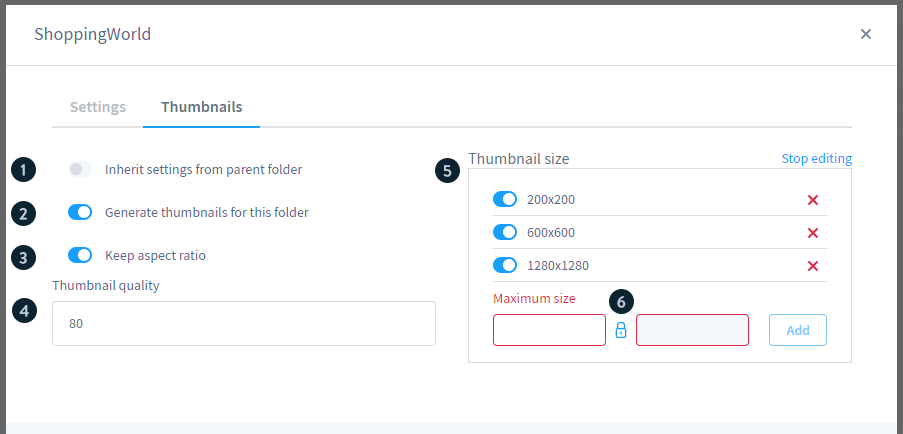
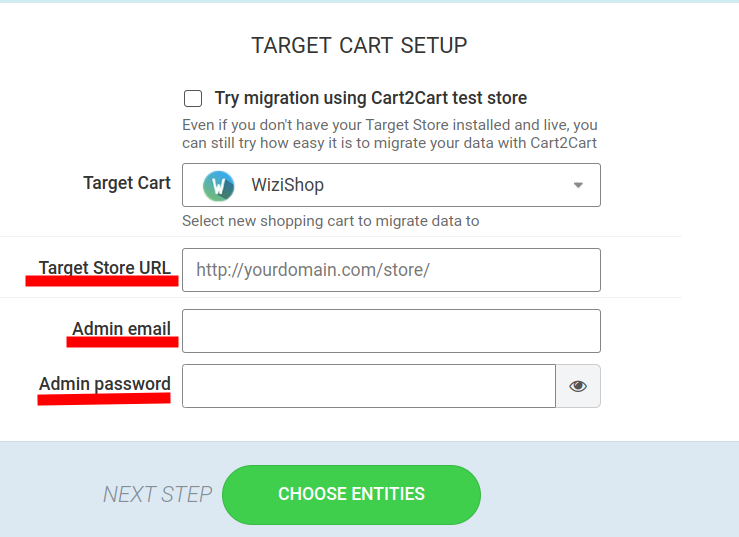
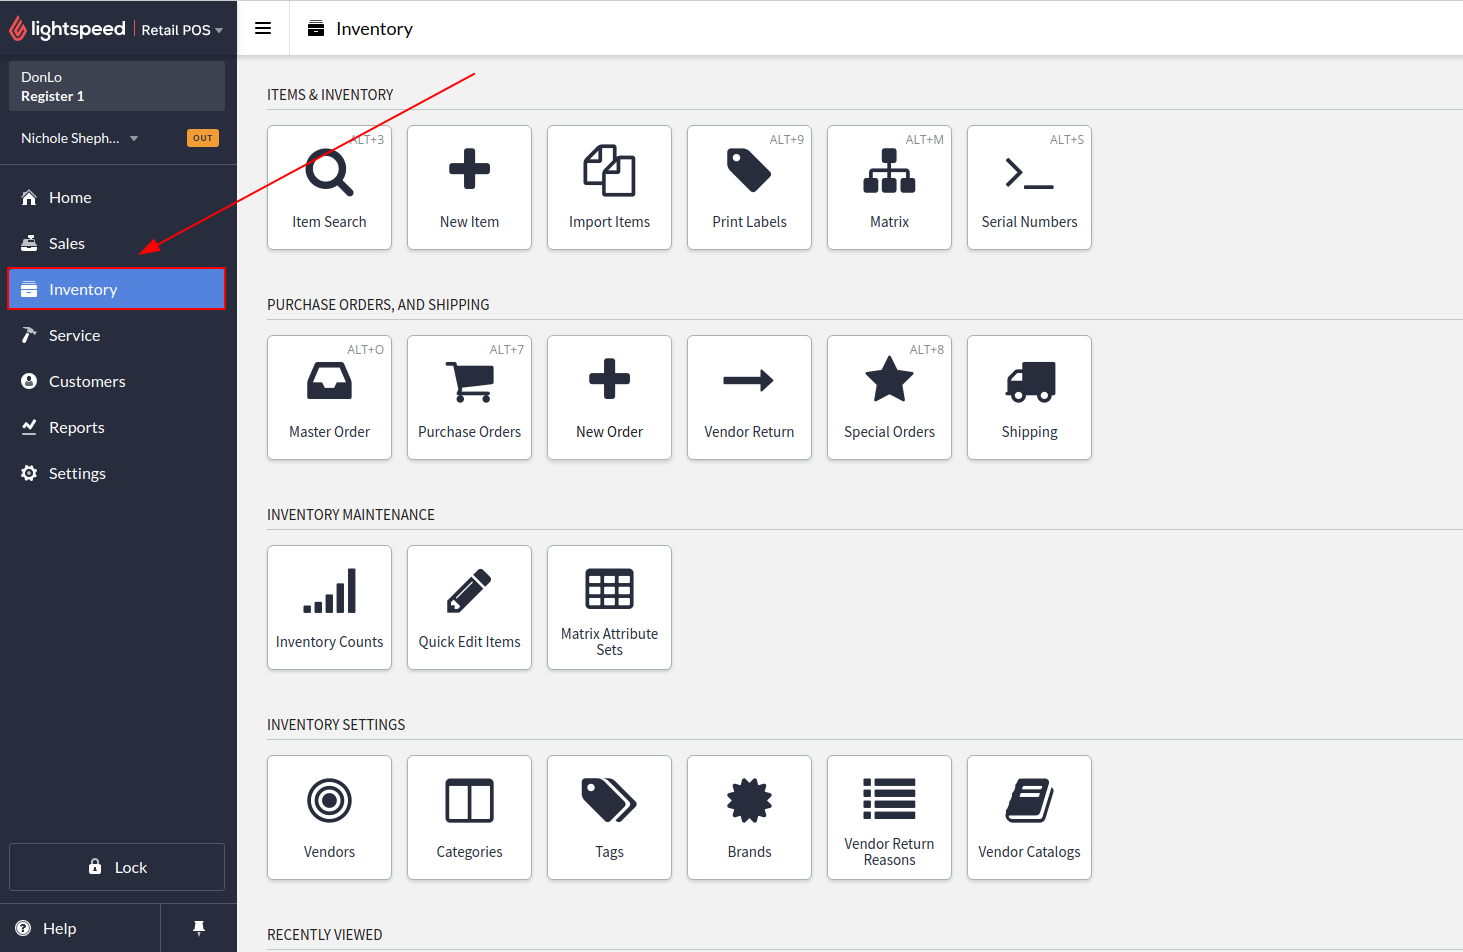
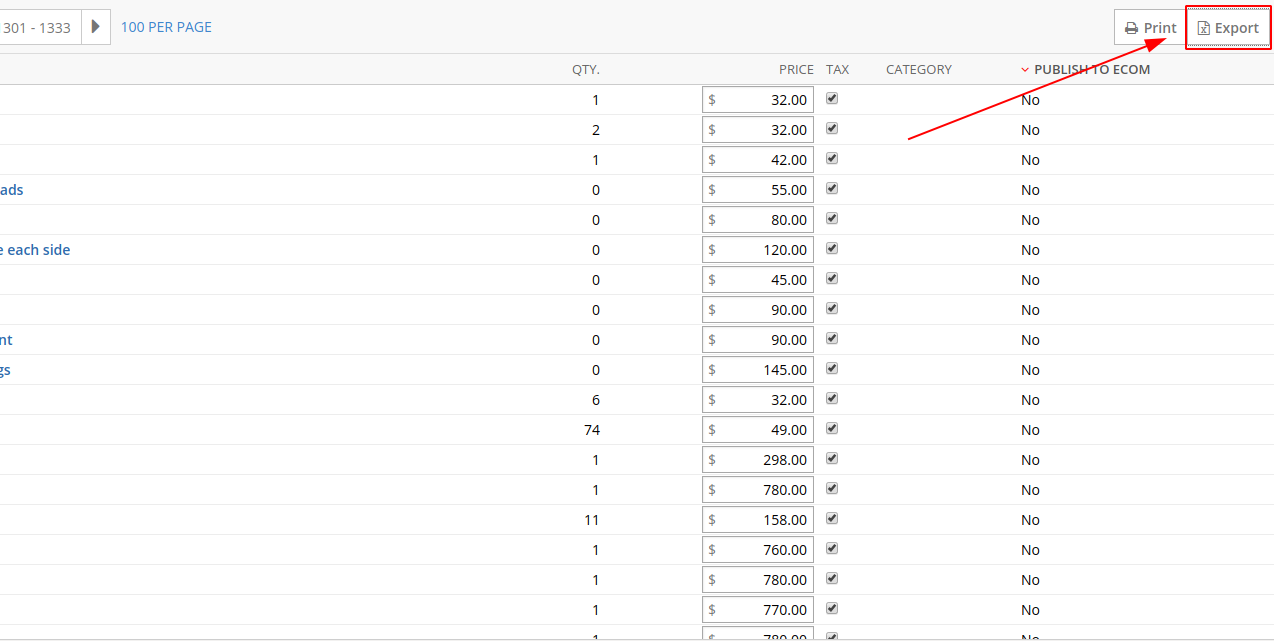
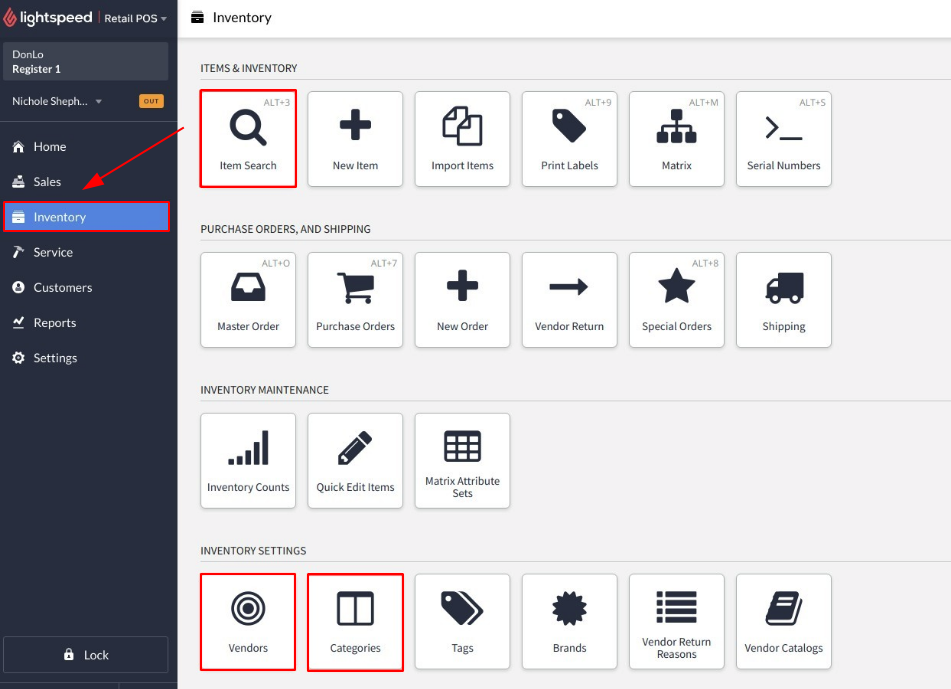
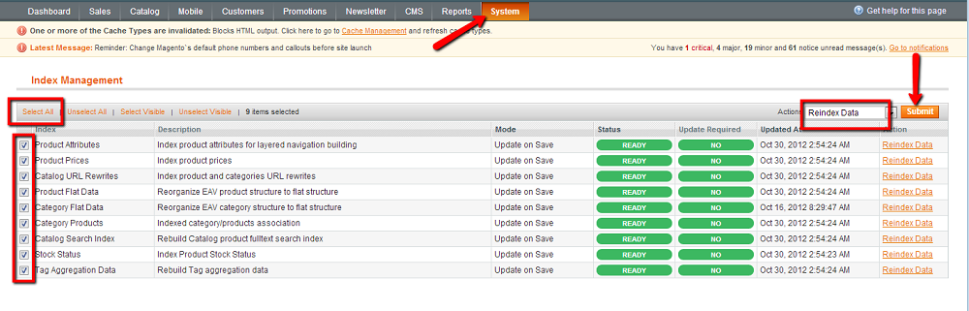
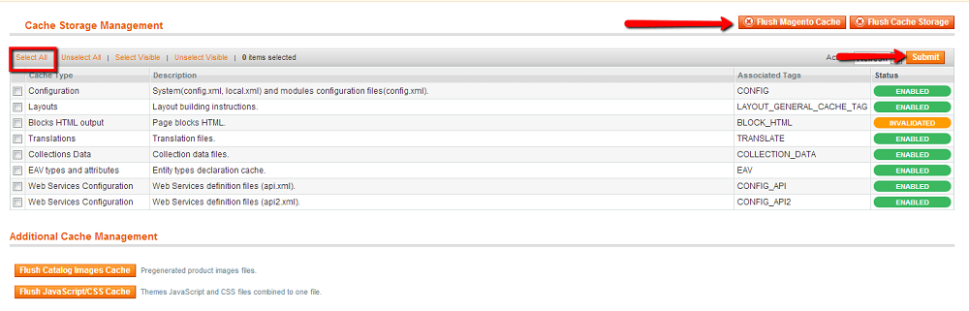
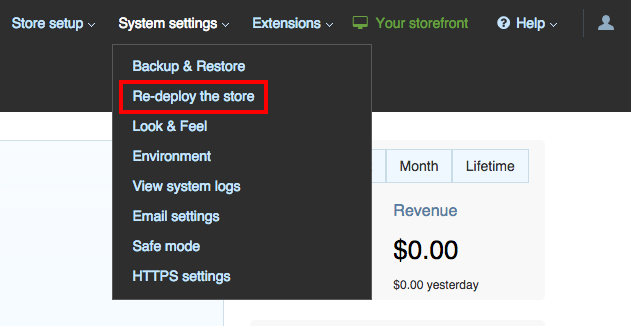
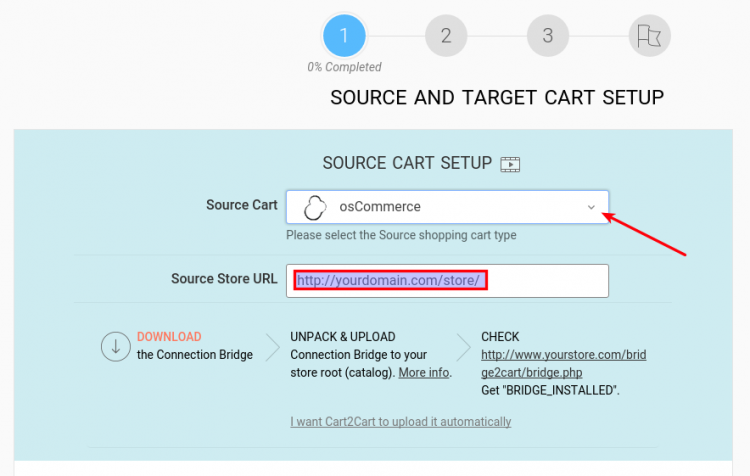
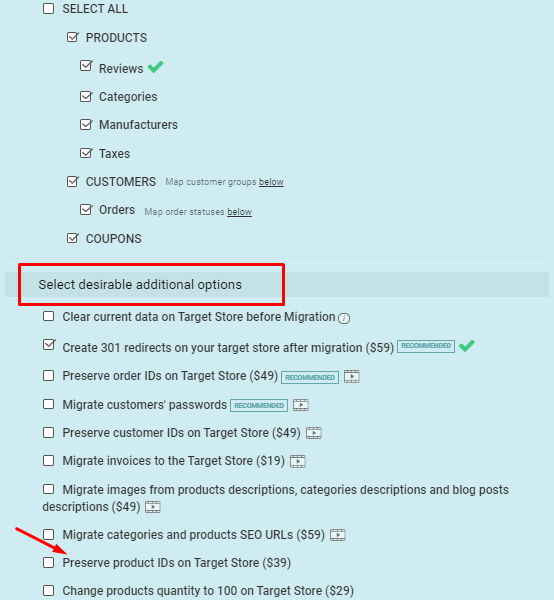
Before running migration check this option:

Skip product thumbnail images migration option in Cart2Cart

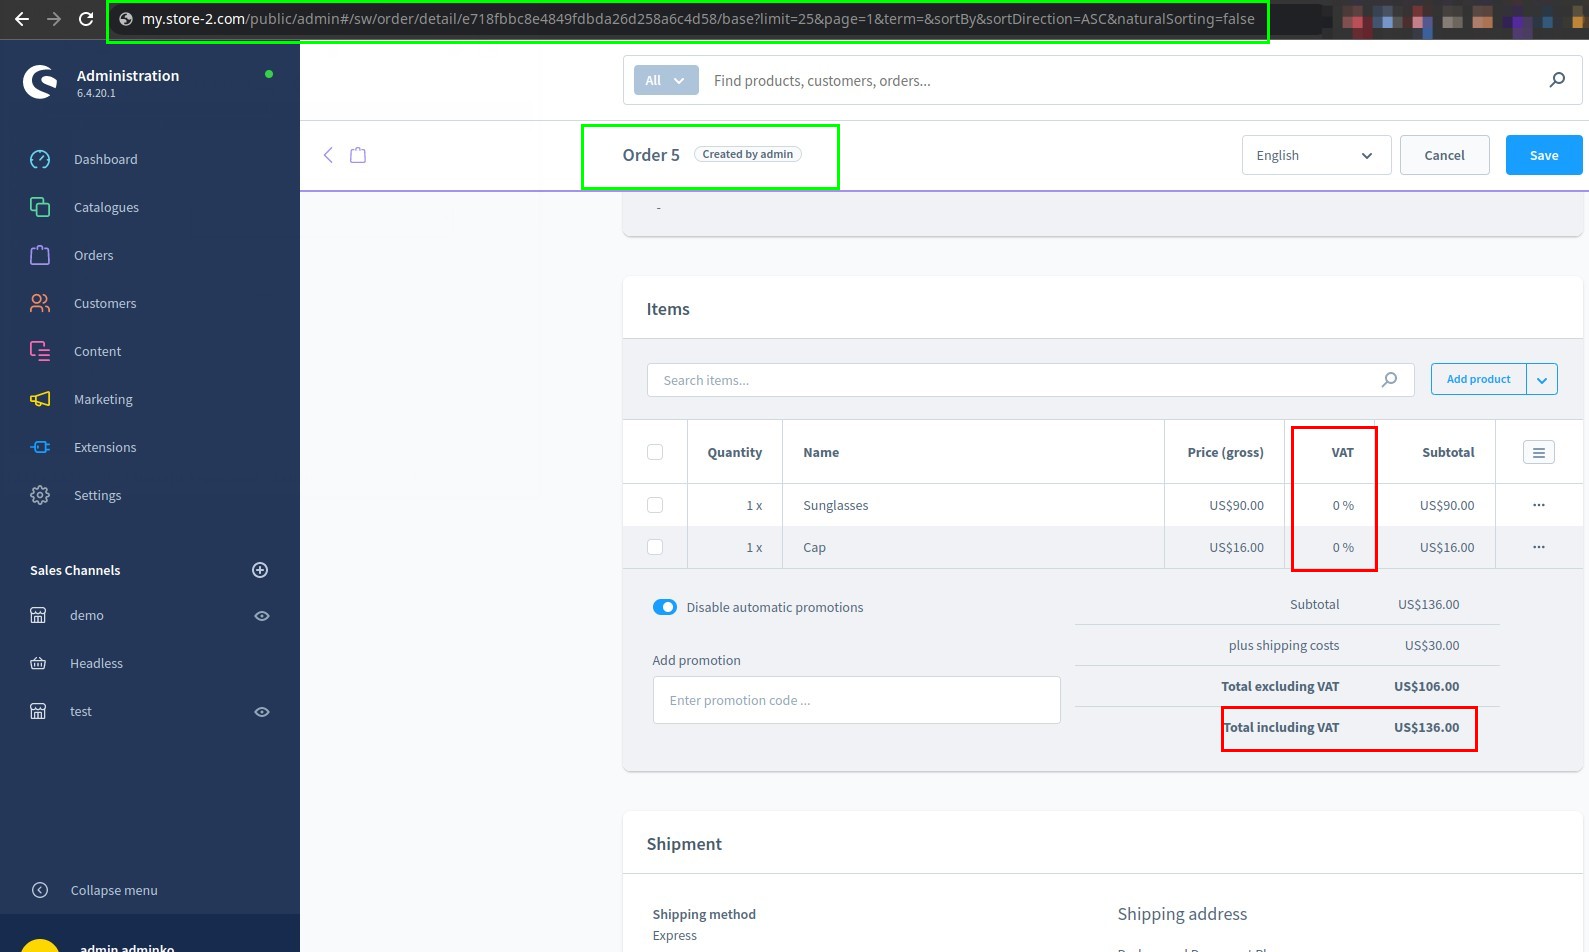
What if I already migrated and have duplicates?

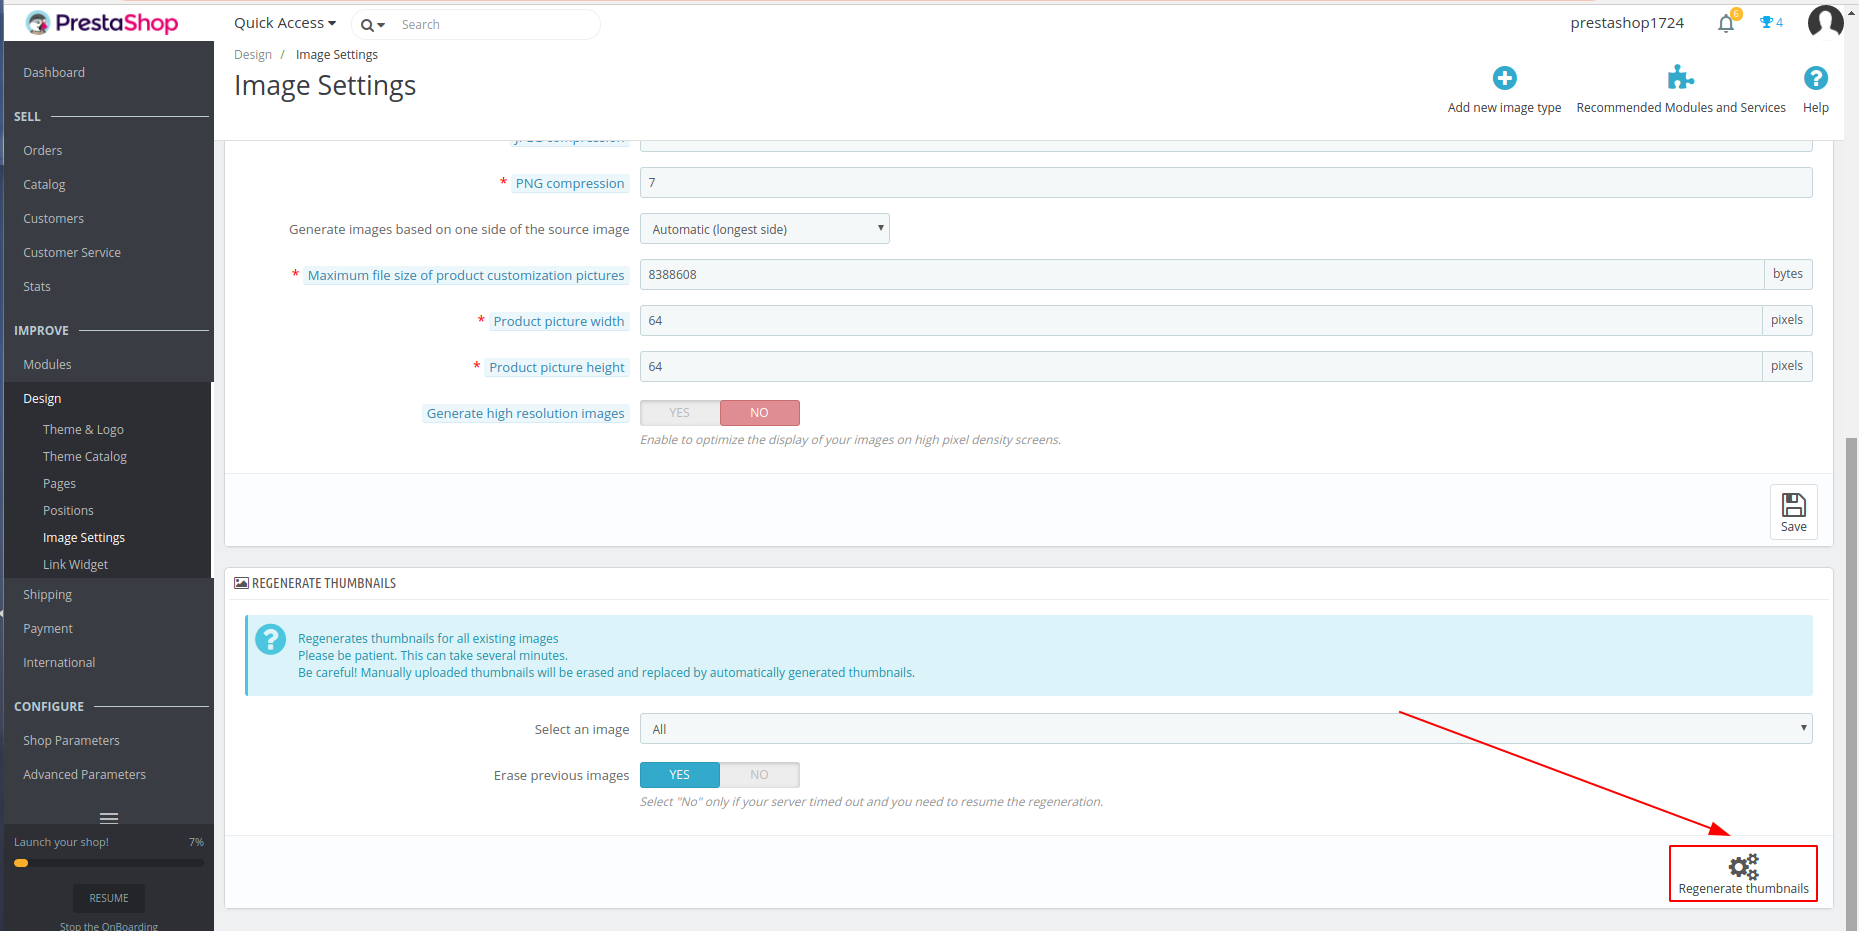
If you've already completed the migration and are seeing duplicate images, you'll need to manually remove the duplicates from your new store's backend. Consult your new platform's documentation or support for instructions on how to manage and delete product images.

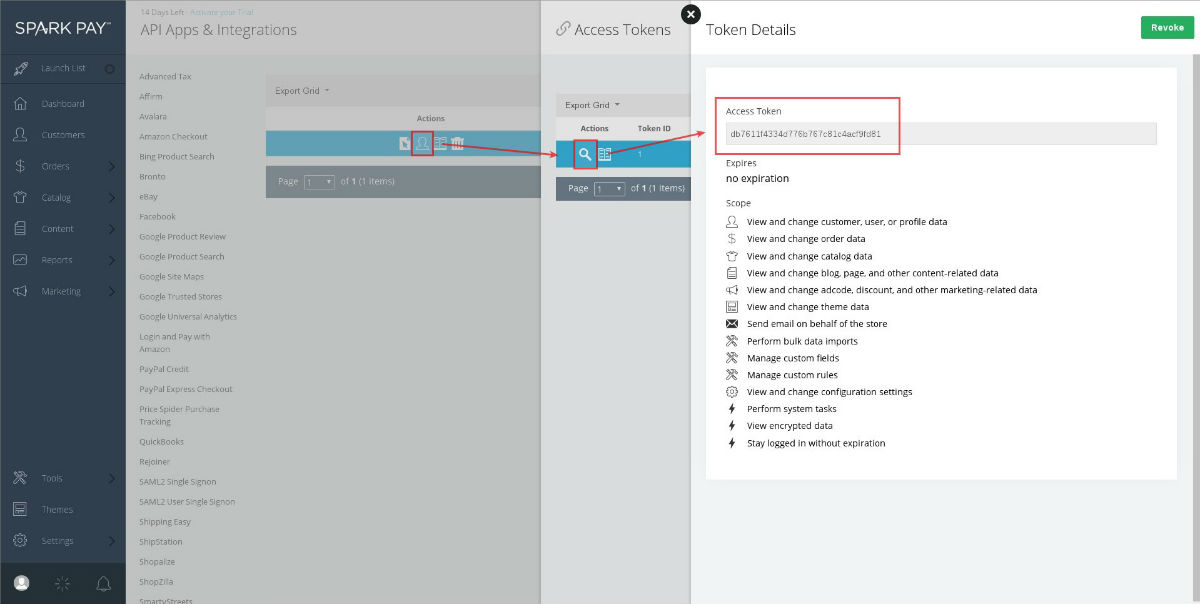
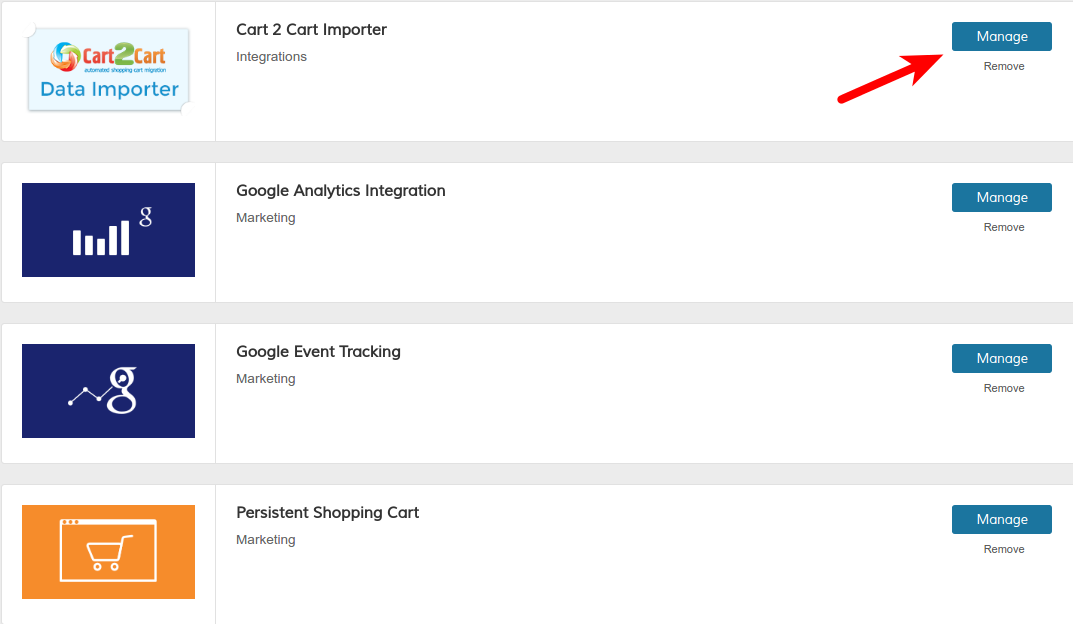
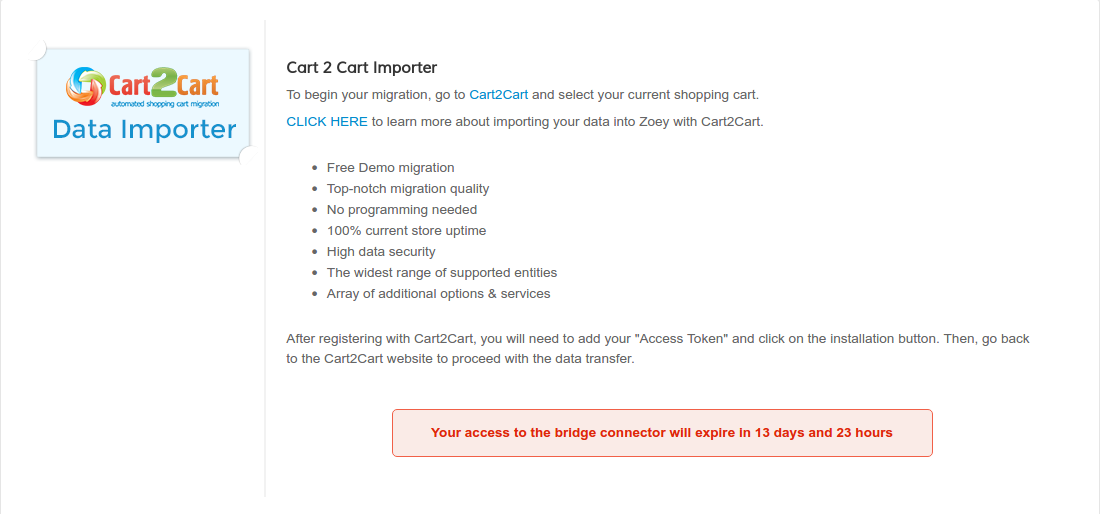
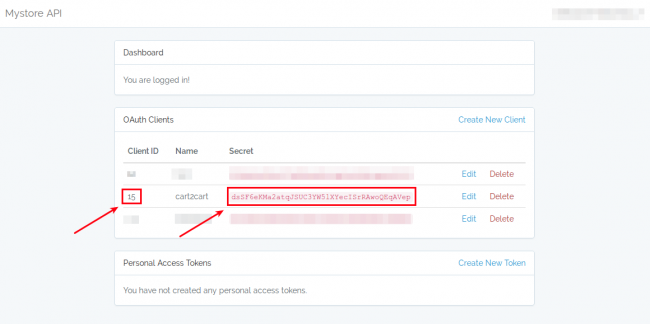
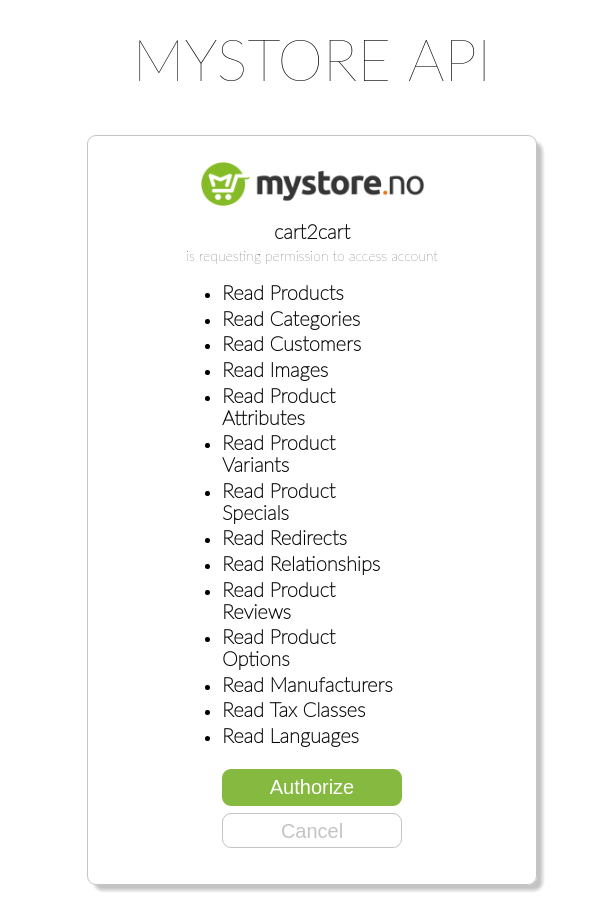
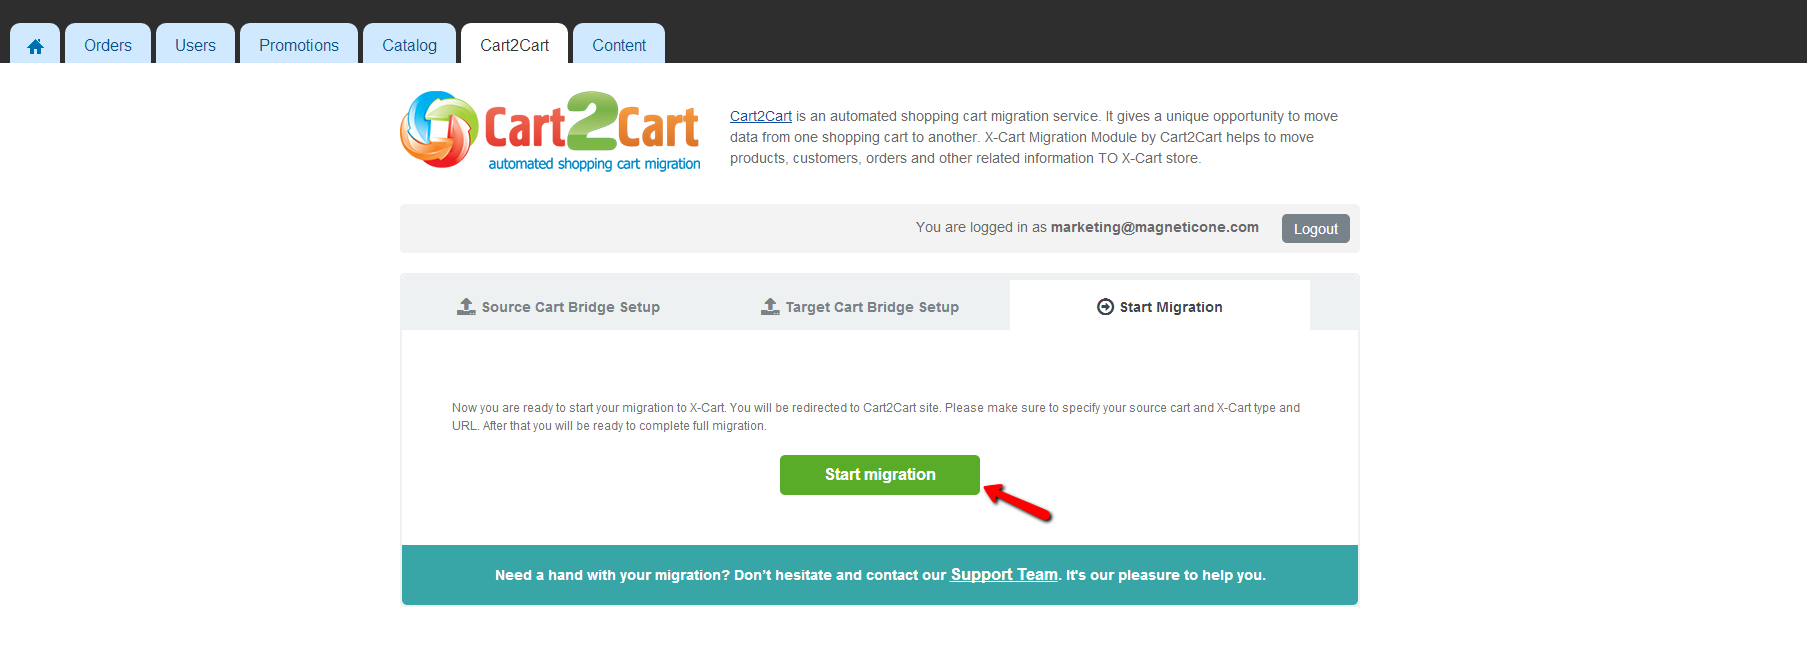
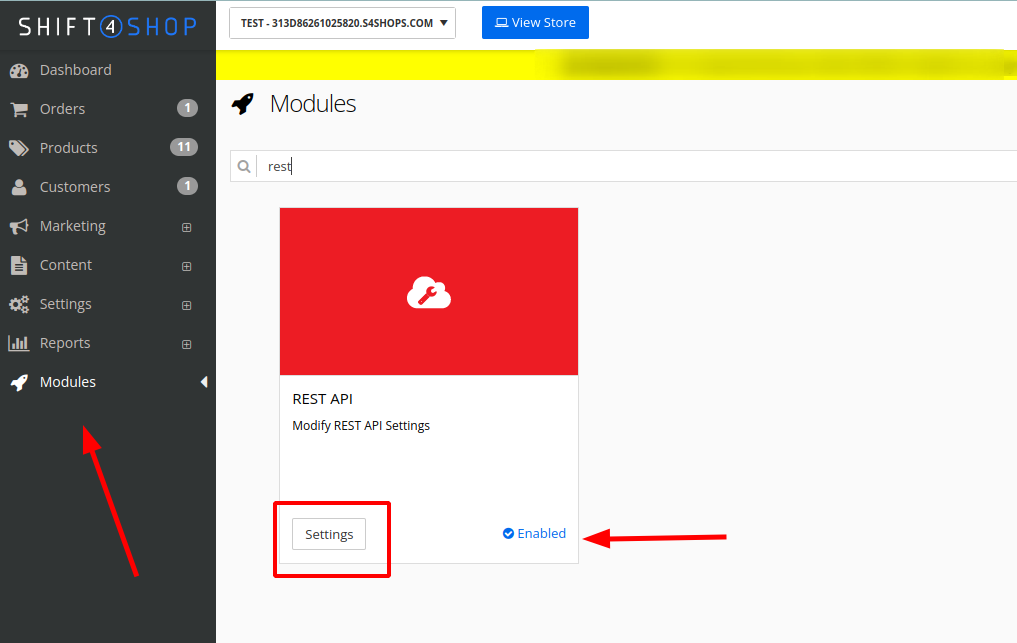
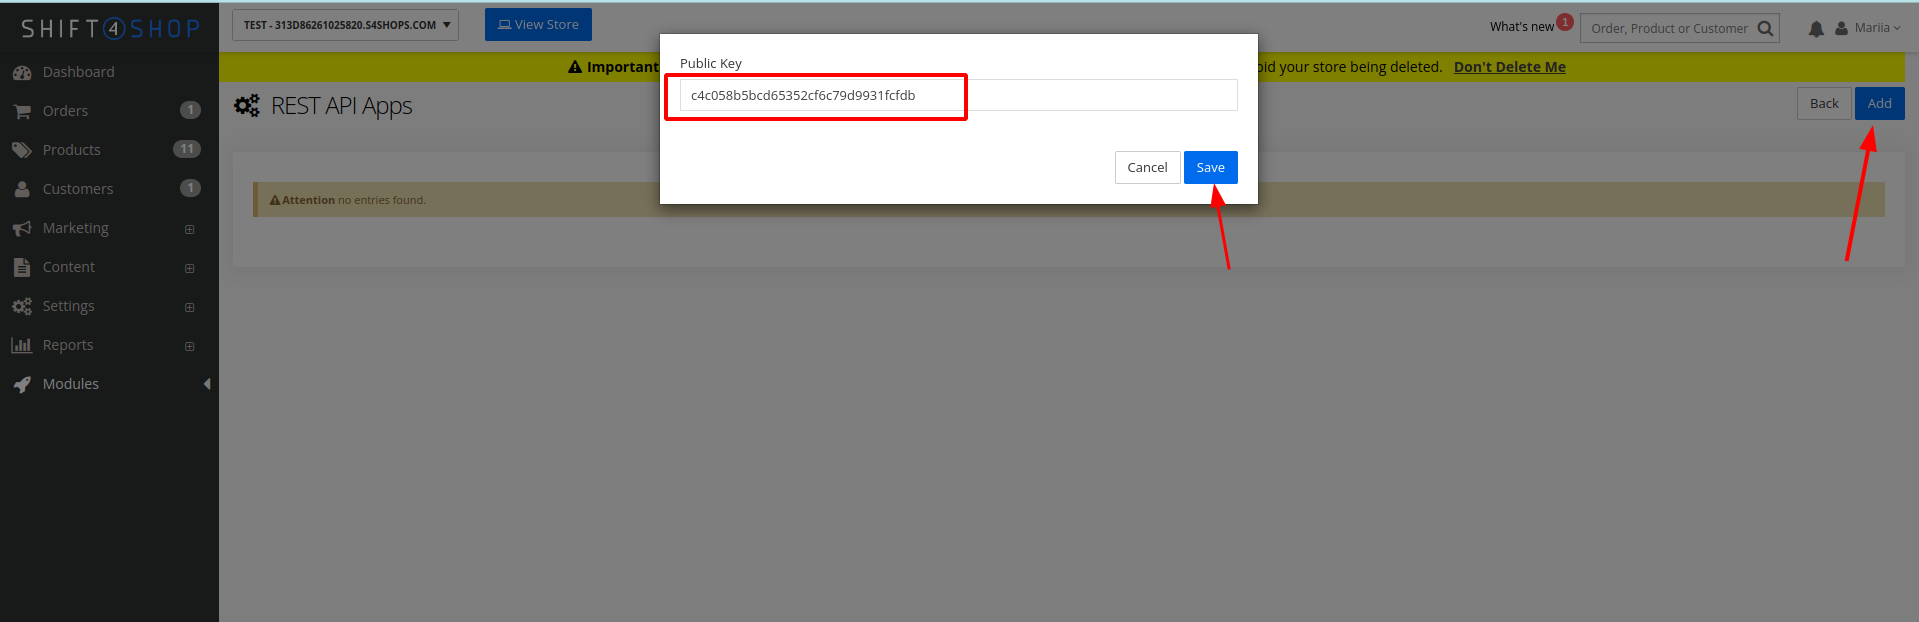
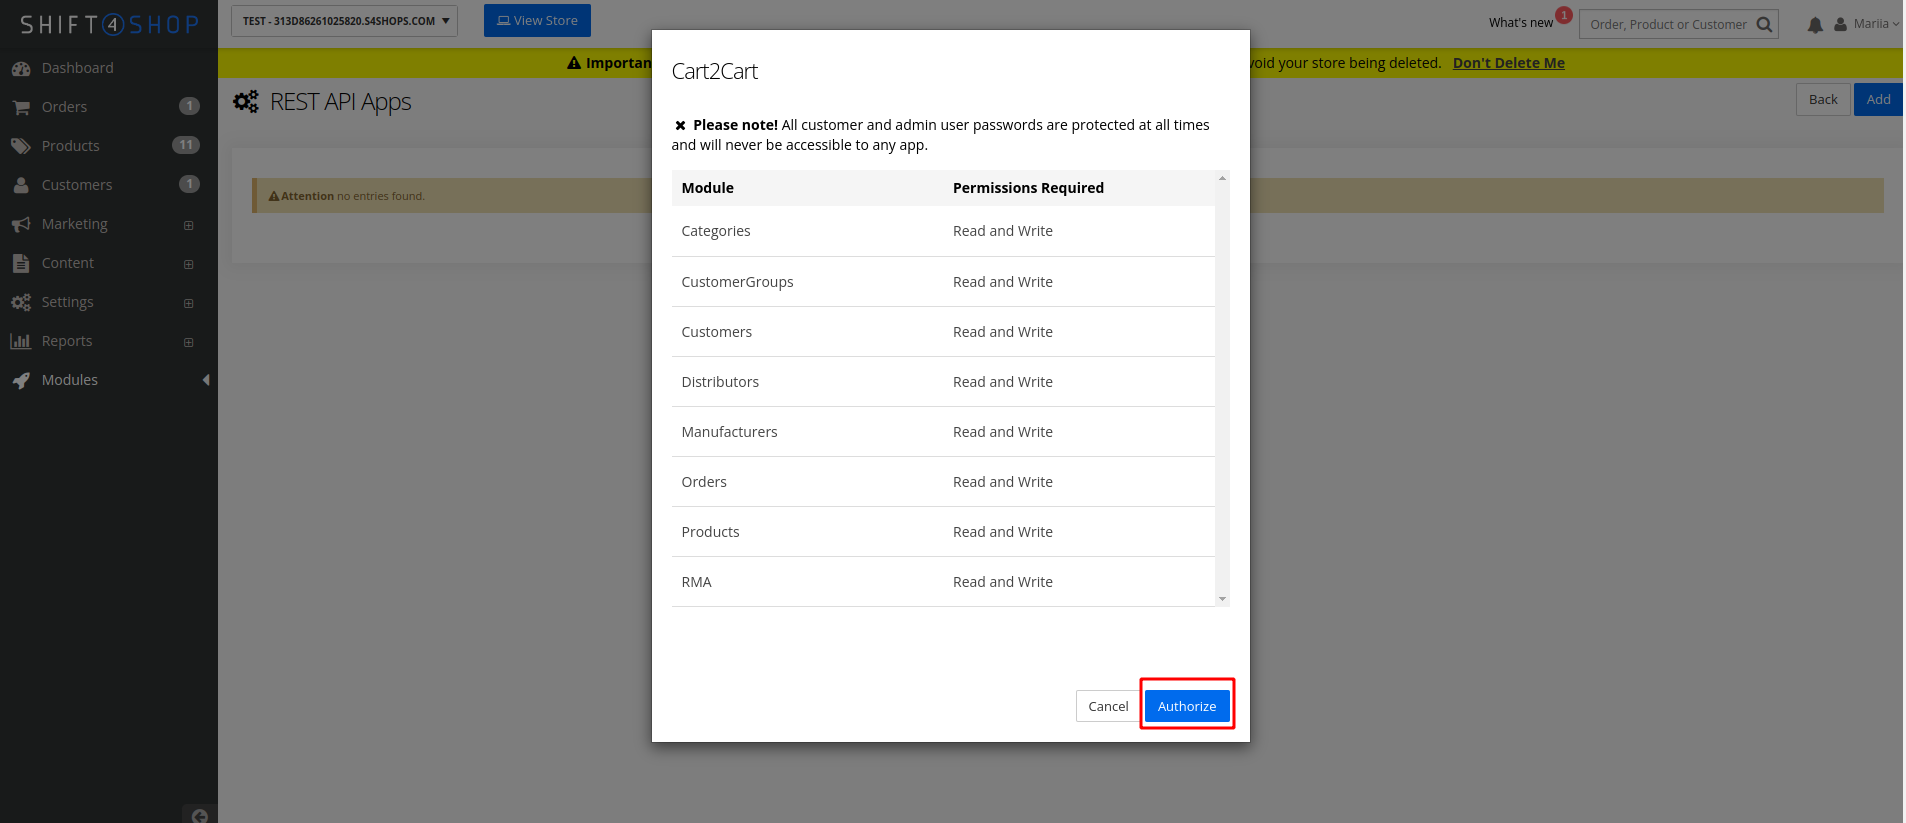
Need Help with Your Shopping Cart Migration?

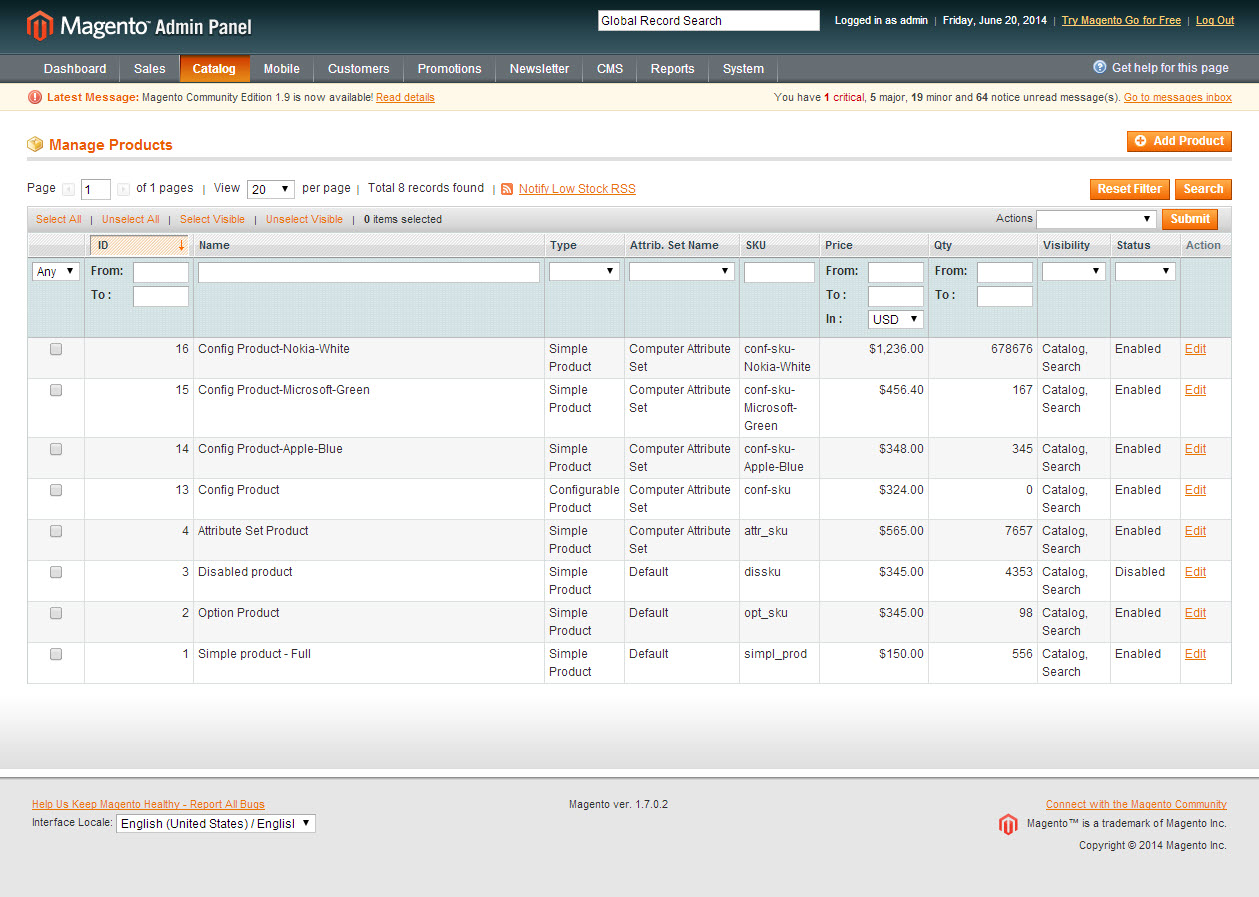
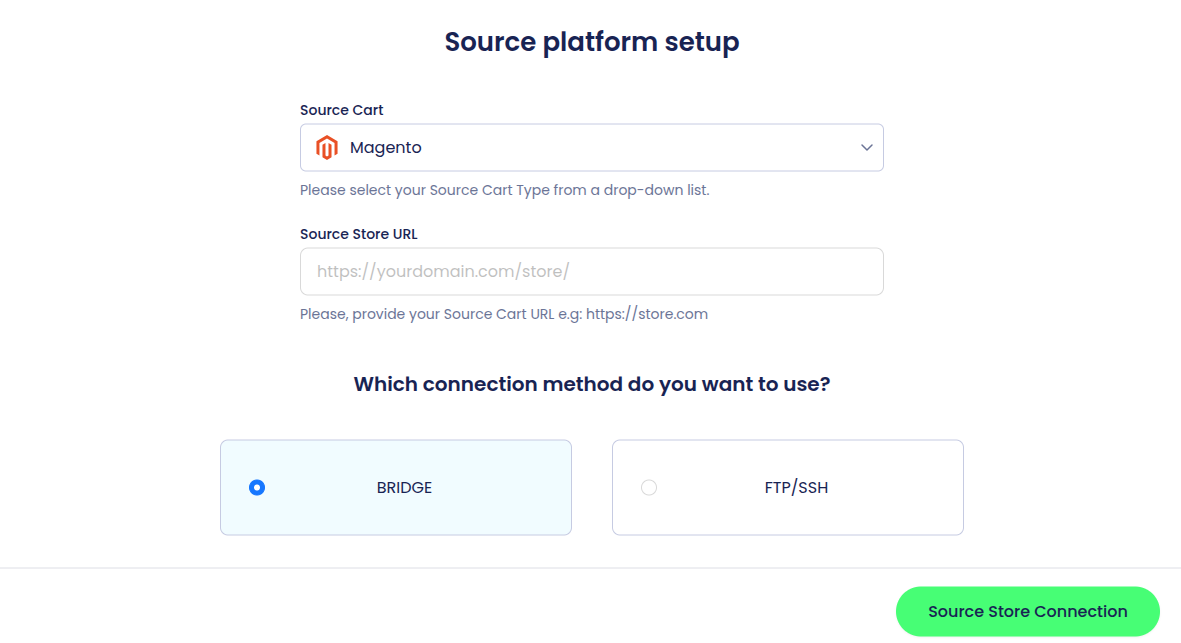
Cart2Cart supports migrations to and from a wide variety of platforms, including Magento, Shopify, WooCommerce, OpenCart, and many more. We offer a seamless and reliable shopping cart migration experience.

Ready to migrate your store? Start your free demo now! Or Schedule a Call with Migration Expert to discuss your migration needs.

More info
Can I migrate product and category SEO URLs?

Can I Migrate SEO URLs During a Shopping Cart Migration?

Yes, you can migrate product and category SEO URLs using Cart2Cart. However, due to technical specifications and platform differences, the number of shopping carts that fully support this option is currently limited.

Currently, Cart2Cart supports SEO URL migration between the following platforms:

Due to the unique characteristics of each shopping cart platform, your SEO URLs might not be perfectly identical after the migration. Check the corresponding platform pages for more detailed information.

Ready to migrate your store? Start your free demo now or schedule a call with our migration expert to discuss your specific needs.

More info
How Preserve IDs options can be used?

Preserving IDs During Your Data Migration

Cart2Cart offers a variety of options to customize your eCommerce data migration. One powerful feature is the ability to preserve IDs from your source store on your target store. This is particularly useful for maintaining SEO rankings, ensuring consistent order tracking, and simplifying internal processes that rely on these IDs.

What Data Can You Preserve During Migration?

Among many different data migration options, Cart2Cart allows you to:

  • Preserve product IDs on the Target Store
  • Preserve order IDs on the Target Store
  • Preserve customer IDs on the Target Store
  • Preserve category IDs on the Target Store

These options are available for different shopping carts. You may check the supported carts page to ensure that you can migrate such data.

Limitations of ID Preservation During Data Migration

Please note that there are cases when ID preservation has limitations:

  • You can only preserve IDs if you choose the Delete current data from the Target Store before the migration option during your data migration. This ensures there are no conflicts with existing IDs.
  • You cannot preserve IDs or use the Delete current data from the Target Store before the migration option if you use Recent Data Migration. Recent Data Migration is designed to transfer only the newest data, and these options would interfere with that process.
  • If there are no entities on your Target platform, or if your Target cart is Shopify or WooCommerce, the Delete current data option isn't necessary. These platforms handle ID assignment differently.
  • You cannot choose the Delete current data option within a Recent Data migration. However, the Preserve IDs option for certain entities *is* available within your Recent Data migration if no new entities have been added to your Target store after the Full migration.

Note: If the Target is Shopify or WooCommerce, the Preserve Orders IDs option is available.

Ready to start your data migration? Start your free demo today!

More info
Can I preserve my IDs in a case of multi-store migration?

Can I Preserve IDs During a Multi-Store Data Migration?

Cart2Cart offers the capability to preserve your orders, products, and customers IDs during a multi-store data migration, but only under specific circumstances. This is possible when the number of your source stores is equal to the number of your target stores. For example, if you're migrating from three separate stores on one platform to three separate stores on another, Cart2Cart can maintain the original IDs.

However, it's crucial to note that if you're migrating from multiple stores to a single target store, or conversely, from a single store to multiple target stores, Cart2Cart will not be able to preserve your IDs. This is due to the potential for ID conflicts and the way data is structured within the target platform.

To successfully preserve IDs during your data migration, ensure that the number of source and target stores matches. This will help maintain data integrity and consistency across platforms.

Example:

  • Scenario 1 (IDs Can Be Preserved): Migrating from two X-Cart stores to two Magento stores.
  • Scenario 2 (IDs Cannot Be Preserved): Migrating from three Shopify stores to a single WooCommerce store.

If you have a complex multi-store migration scenario, we recommend contacting our support team via Live Chat or scheduling a call with our Migration Expert to discuss your specific needs and ensure a smooth data migration process. Schedule a Call with a Migration Expert

Ready to start your data migration? Start your free demo today!

More info
Clear current data on Target store before migration option

Understanding the "Clear Current Data on Target Store" Option for eCommerce Data Migration

The "Clear current data on a Target store before Migration" additional option allows you to delete existing data on your target store, specifically for the entities you've selected for automated eCommerce data migration. For instance, if you're migrating "Products" and "Taxes" from your source to your target cart, enabling this option will wipe out the existing products and tax data on your target store before the transfer begins.

This is especially useful when performing a multi-store migration, as it ensures the data is cleared only from the specific store you are migrating *to*, preventing accidental data loss elsewhere.

Important Note! This action is irreversible. Before proceeding with your eCommerce data migration, we strongly recommend creating a full backup of your target store to safeguard your data.

Why Use This Option During eCommerce Data Migration?

Using the "Clear Current Data" option during eCommerce data migration provides a clean slate on your target store. This is beneficial in several scenarios:

  • Avoiding Duplicates: Prevents duplicate entries of products, customers, or other entities.
  • Ensuring Data Consistency: Guarantees that the data on your target store accurately reflects the data from your source store.
  • Streamlining the Migration Process: Simplifies the migration by removing potentially conflicting data.

Ready to Migrate Your eCommerce Data?

Ensure a smooth and efficient transition. Start your free demo now and experience the Cart2Cart difference! Contact support via Live chat.

More info
Do you support “Preserve order IDs” option for Recent Data Migration?

Do you support “Preserve order IDs” option for Recent Data Migration?

Yes, Cart2Cart supports the “Preserve order IDs” option during Recent Data Migration under specific conditions. This feature helps maintain continuity by keeping the original order IDs from your source store in your new target store.

When Can I Preserve Order IDs During Recent Data Migration?

The availability of the "Preserve Order IDs" option depends on whether new orders have been created in your target store after the full migration. Here's a breakdown:

  • General Case: If no new orders have been created in your target store after the full migration, you can select the "Preserve order IDs on Target Store" option during Recent Data Migration.
  • Shopify and WooCommerce Exception: Even if new orders have been created in your Shopify or WooCommerce target store after the full migration, you can still use the "Preserve order IDs on Target Store" option during Recent Data Migration.

Important Note About Preserving Order IDs

For all platforms, the "Preserve order IDs on Target Store" option is available within Recent Data Migration only if it was initially selected before the Full Migration. This ensures the system is prepared to handle the preservation of order IDs during subsequent migrations.

Why is Preserving Order IDs Important for Data Migration?

Preserving order IDs is particularly beneficial for accounting, customer service, and order tracking purposes. When migrating your online store, maintaining these IDs ensures a seamless transition and avoids confusion for both you and your customers.

Ready to Start Your Data Migration?

Ensure a smooth transition to your new platform with Cart2Cart's data migration services. Take advantage of features like preserving order IDs to minimize disruption and maintain data integrity.

Start your free demo now: https://newapp.shopping-cart-migration.com/.

Need assistance? Contact support via Live chat or schedule a call with a migration expert.

More info
What does additional option Change products quantity to 100 on Target Store mean?

It sometimes happens that products which are out of stock don’t display on the front end of the Target store after migration. To prevent this, Cart2Cart offers the option to automatically change the quantity of products that are zero or less in the Source store to 100 in the Target store during the data migration process.

Understanding the "Change Products Quantity to 100" Option During Data Migration

This option is particularly useful when migrating to platforms that hide out-of-stock products by default. By setting the quantity to 100, you ensure that all your products are visible and available for purchase immediately after the migration.

Example: OpenCart to Magento Data Migration

We've performed an OpenCart to Magento migration using this option. As you can see, the product in OpenCart was “Out of Stock”.

OpenCart product out of stock before data migration

After the data migration, the same product is “In Stock” with a quantity of 100 in Magento.

Magento product in stock after data migration

This ensures that customers can immediately see and purchase the product on your new e-commerce platform. This option can be applied to other platform migrations as well, such as WooCommerce, Shopify, and more.

Benefits of Using This Option

  • Ensures all products are visible after migration.
  • Prevents loss of potential sales due to hidden products.
  • Saves time manually updating product quantities.

Ready to migrate your store? Start your free demo now or schedule a call with a migration expert to discuss your specific needs.

More info
Simple Products with attributes vs Product Variants

Understanding Product Attributes and Variants in eCommerce Data Migration

When migrating your eCommerce store using a service like Cart2Cart, it's crucial to understand how product attributes and variants are handled. These elements significantly impact the customer experience and how products are displayed.

Simple Products with Attributes: A Detailed Look

Simple Products with attributes offer customers various product options. These options are presented through fields for color, size, weight, and more. Customers must select values for all required attributes before seeing the price and adding the item to their cart. This process can involve multiple steps before a purchase can be made.

Here is an example of a simple product with attribute sets for length, color, and weft:

Simple Product with Attributes - eCommerce Data Migration

For some eCommerce platforms, Cart2Cart offers the option to Create product variants based on their attribute values. This feature is especially useful when dealing with platforms that have complex product structures.

Product Variants: Streamlining the Customer Experience

Product Variants simplify the shopping experience and potentially increase conversion rates. Instead of navigating multiple attribute selections, customers can view available options (size, color, etc.) and prices directly on the product page. This streamlined approach reduces the number of actions needed to find and purchase the desired item.

Here is an example of product variants displaying color, size, and price together:

Product Variants Example - eCommerce Data Migration

Product variants can also be created based on a single attribute, such as memory size. The price dynamically adjusts based on the chosen variant:

Product Variants by Attribute - eCommerce Data Migration

How Different Platforms Handle Product Variants

Different shopping carts manage product variants in slightly different ways. For example, platforms like Magento often use a parent product with associated simple products, which function as configurable product variants on the storefront.

The following screenshot illustrates the Magento product management page:

Magento Product Management - eCommerce Data Migration

During eCommerce data migration, Cart2Cart carefully considers these platform-specific nuances to ensure a seamless transition of your product data.

Ready to Migrate Your Products?

Ensure a smooth transition of your product data, including attributes and variants, with Cart2Cart's expert data migration services. Start your free demo today!

More info
Can Cart2Cart create 301 redirects after migration?

Can Cart2Cart Migrate 301 SEO URLs During Ecommerce Data Migration?

Yes, Cart2Cart supports the migration of 301 SEO URLs as an additional option during your ecommerce data migration. This ensures that your website's SEO ranking is preserved when you switch platforms. However, this feature is available for a limited number of shopping carts and may require the installation of additional plugins for some platforms. Please consult our FAQs or contact support for detailed information about your specific source and target carts.

Migrate 301 SEO URLs to:

How Does 301 Redirect Migration Work with Cart2Cart?

Let's illustrate with a migration to WooCommerce. If you have the necessary redirection plugin installed, your 301 SEO URLs in your source store's admin panel might look like this:

301 SEO URLs in OpenCart before ecommerce data migration

After the transfer to WooCommerce, your redirects will look like this:

(Assuming you have installed the Redirection plugin in WooCommerce beforehand)

301 SEO URLs in WooCommerce after ecommerce data migration

In most cases, 301 redirects are set up using relative URLs. Therefore, after you switch your domain name to match your source store, all redirects will remain functional.

For instance, if your source store has a redirection like this:

(Old URL) www.mystore.com/category/page1.html

redirected to

(New URL) www.mystore.com/category/page2.html

It will remain the same after the migration and domain switch.

However, if you change the domain name on the target store to something different from the source store, your redirection will still lead users to www.mystore.com/category/page2.htm.

Please note: This additional option migrates redirects that already exist on your source cart.

Ready to migrate your store and preserve your SEO? Start your free demo now or schedule a call with a migration expert to discuss your specific needs.

More info
SEO URLs of products and categories changed after moving to Magento.

Due to the platform’s peculiarities, URLs on Magento may contain only small letters. If URLs on the Source Cart include capital letters, they’ll be altered to small ones after transferring to Magento. For example, “I” will be changed to “i”, “F” - “f”, etc.

Magento URL Structure and Data Migration

When performing a data migration to Magento, it's crucial to understand how Magento handles URLs. Magento, by default, converts all URLs to lowercase. This means that if your source cart has URLs with uppercase letters, Cart2Cart will automatically convert them to lowercase during the migration process. This ensures compatibility with Magento's URL structure and prevents potential errors or broken links on your new store.

For instance, if a product URL on your previous platform was "ExampleProductURL", it will become "exampleproducturl" after the migration to Magento. While this automatic conversion maintains functionality, it's important to be aware of this change, especially if you have existing SEO strategies based on the original URLs.

This URL conversion is a standard behavior for Magento and isn't a limitation of the Cart2Cart migration service. It's a platform-specific characteristic that needs to be considered when planning your migration.

SEO Considerations for Magento URL Migrations

Consider SEO URLs of products and categories changed after moving to Magento. While Cart2Cart handles the URL conversion, you might want to implement 301 redirects from your old URLs (if significantly different and indexed by search engines) to the new Magento URLs to preserve SEO equity. Consult with an SEO expert for best practices.

To ensure a smooth transition and maintain your search engine rankings, it's recommended to:

* Plan and implement 301 redirects from old URLs to new URLs. * Update your sitemap and submit it to search engines. * Monitor your website's performance after the migration to identify and fix any potential issues.

By understanding Magento's URL structure and taking proactive steps to manage URL changes, you can ensure a successful data migration with minimal impact on your SEO.

Ready to migrate to Magento? Start your free demo now!

More info
Will search engines index my data on your test store?

Will Search Engines Index My Data During the Data Migration Process?

Cart2Cart temporary stores, used during your data migration process, are located on our local servers and are fully closed to search engines. This means search engine crawlers like Googlebot cannot access these temporary stores.

Therefore, you don't have to worry that Google or any other search engine will find and index your unique content (products, descriptions, customer data, etc.) in another directory or domain during the migration. Your data's privacy and SEO integrity are maintained throughout the entire data migration process. We ensure that no duplicate content is inadvertently indexed, which could negatively impact your search engine rankings.

Ready to migrate your store? Start your free demo now!

More info
How long my test store will be available after migration?

How Long is My Cart2Cart Demo Store Available After Migration?

By default, your Cart2Cart temporary store remains active for 3 days following the Demo Migration. During this period, you'll receive administrator access credentials, allowing you to thoroughly evaluate the migration results on both the front-end and back-end of the store. This trial period gives you the opportunity to reconfigure your Target Cart information and proceed with a Full Migration to your live store.

Important: All data within the temporary store will be automatically cleared 3 days after the Demo Migration is completed. Ensure you review and confirm the migration's accuracy within this timeframe.

Maximizing Your Demo Migration Period for Data Migration

To make the most of your 3-day demo store access after your data migration preview, we recommend the following:

*

Immediately Review the Front-end: Check your product listings, categories, and overall store appearance to ensure everything looks as expected.

*

Log into the Back-end: Explore the administrative panel to confirm that your customer data, order history, and other essential information have been migrated correctly.

*

Test Key Functionalities: Place test orders, browse the catalog, and interact with the store as a customer would. This helps identify any potential issues early on.

*

Reconfigure Target Cart Settings (if needed): If you notice any discrepancies during the demo migration, you can easily adjust your target cart settings and run another demo before committing to the full migration.

Cart2Cart supports data migration for a wide variety of platforms, including Magento, Shopify, WooCommerce, OpenCart, PrestaShop, BigCommerce and many more. No matter which platforms you're migrating between, the demo store provides a valuable opportunity to validate your data migration process.

Need help with your data migration? Contact our support team via Live Chat or Schedule a Call with a Migration Expert.

Ready to begin? Start your free demo now and experience the ease of automated data migration with Cart2Cart!

More info
Can I try data migration if I don’t have a new store installed yet?

Can I try shopping cart data migration without a new store?

Yes! With Cart2Cart, you can easily test drive your shopping cart data migration even if you haven't fully set up your new store yet. Our Migration Preview service lets you perform a free data transfer to a Cart2Cart test store, allowing you to see exactly how your data will look on a new platform before committing to a full migration. This is a risk-free way to ensure a smooth and successful transition for your online business.

The Migration Preview service supports the following platforms for free:

How to Use the Cart2Cart Migration Preview for Shopping Cart Data Migration

Here's how to try the Migration Preview:

1. In the Migration Wizard, provide your Source cart details, click Next and select “Try migration using Cart2Cart test store” option. The following steps will be absolutely the same as in the regular migration setup. Selecting Cart2Cart test store for shopping cart data migration preview

2. After the Demo Migration is completed, you will receive the URL and administrator access credentials for the test shop and be able to check the results of data transfer on the front and back end. The Administrator login details will be displayed on a toolbar at the top of your store info page.

Cart2Cart migration preview test store

Note: The test store is closed to Google and other search engines, so you don’t need to worry about your current web store rankings.

3. The Cart2Cart test store will be live for 3 days after the Demo Migration.

4. To perform a Full migration, click “RECONFIGURE YOUR TARGET STORE” on the Demo Migration results page. You’ll be redirected to the first migration step where you should reconfigure your Target Cart info in accordance with an actual store and launch the Full migration.

Reconfiguring Target store for full shopping cart data migration

Ready to see how easy shopping cart data migration can be? Start your free demo now!

More info
How much Migration Preview option costs?

How Much Does Cart2Cart's Migration Preview Cost?

Cart2Cart offers a completely free Migration Preview as part of the Demo migration process. This allows you to thoroughly evaluate the migration results before committing to a full transfer. After the demo, you'll receive administrator access credentials to a temporary store, enabling you to review both the storefront and admin panel.

If you're satisfied with the results of the demo migration, you can proceed with the full migration by reconfiguring your target cart details. This will transfer all of your source cart data to your live store using our comprehensive data migration services.

Please Note: The Cart2Cart demo store remains active for 3 days after the demo migration.

Ready to experience seamless data migration? Start your free demo now!

More info
Do you support migration of product attributes from nopCommerce?

Migrating Product Attributes from nopCommerce: A Comprehensive Guide

Yes, Cart2Cart supports the migration of product attributes from nopCommerce. This allows you to transfer essential product details to your new eCommerce platform during the data migration process.

However, it's important to note that while Cart2Cart migrates the values of product attributes, the attribute *names* themselves are not automatically transferred. This means that in your target store, these attributes may initially appear as generic labels like "Attribute #1," "Attribute #2," and so on.

Resolving Missing Attribute Names After nopCommerce Migration

After the migration, you'll need to manually rename these attributes within your new platform's admin panel to accurately reflect their original names from nopCommerce. This ensures that your product information is displayed correctly to your customers.

Alternative Solutions: While manual renaming is the standard approach, you might consider exploring custom migration options for more complex scenarios. Cart2Cart's custom solutions can sometimes be tailored to address specific data migration requirements, including the transfer of attribute names. Contact our support team via live chat or schedule a call with a migration expert to discuss your options.

Why this happens? The difference in data structure between platforms is the usual reason for such data migration behavior.

Next Steps for Your nopCommerce Data Migration

Ready to migrate your nopCommerce store? Start your free demo today and see how easy it is to transfer your products, customers, and other data with Cart2Cart. Explore Cart2Cart's data migration services and discover how we can help you streamline your replatforming process.

More info
What does migration of products include for switch from nopCommerce?

What Product Data Does Cart2Cart Migrate During a nopCommerce Data Migration?

Cart2Cart provides comprehensive data migration services, ensuring a seamless transfer of your product data when switching from nopCommerce. Our data migration process includes:

  • Product Images: All your product images are safely migrated to the new platform.
  • Product Attributes: Cart2Cart migrates your product attributes and their names to ensure a consistent product representation on your new store.
  • Specials: Special prices and promotions are migrated to maintain your current sales strategies.
  • Tier Prices: Tiered pricing structures are also migrated, allowing you to offer volume discounts.
  • Product Categories: Your existing product categories and their structure will be migrated to your new store, preserving your product organization.

Ready to experience a hassle-free nopCommerce data migration? Start your free demo now and see how Cart2Cart can simplify your store migration!

More info
Do you transfer category images from nopCommerce?

Do You Transfer Category Images During nopCommerce Migration?

Yes, category images can be transferred during your eCommerce platform migration to nopCommerce, but only if they are visible on the front end of your source store. This means the images must be publicly accessible and displayed on your website's category pages for the Cart2Cart migration tool to detect and transfer them successfully.

To ensure your category images are migrated, verify that they are correctly configured within your source platform's admin panel and are set to be displayed on the storefront. If images are hidden or not properly linked to the categories, they will not be included in the migration process.

If you're planning a migration to nopCommerce and need assistance with transferring category images or any other data, Cart2Cart can help. We provide a seamless and automated migration service that handles all aspects of data transfer, including images, products, customers, and more. Learn more about migrating to nopCommerce here.

Next Steps:

More info
How to export files from nopCommerce?

In order to perform a migration from nopCommerce, you’ll need to export your data in XML format. Then, upload these XML files to the Migration Wizard to initiate the data transfer.

How to Export Data from nopCommerce for Migration

Here's a step-by-step guide on how to export your data from nopCommerce:

First, log in to your nopCommerce admin account.

Exporting Products from nopCommerce

To export your products, navigate to Catalog->Products->Manage Products and click Export to XML (all found).

Export Products from nopCommerce for Data Migration

Exporting Categories from nopCommerce

To export your categories, go to Catalog->Categories->List and click Export to XML.

Export Categories from nopCommerce for Data Migration

Exporting Orders from nopCommerce

To export your orders, navigate to Sales->Orders and click on Export to XML (all found).

Export Orders from nopCommerce for Data Migration

Exporting Customers from nopCommerce

To export your customers, go to Customers->Customers, and click on Export to XML (all found).

Export Customers from nopCommerce for Data Migration

Exporting Manufacturers from nopCommerce

To export your manufacturers, navigate to Catalog->Manufacturers, and click Export to XML.

Export Manufacturers from nopCommerce for Data Migration

After exporting all the necessary data, upload the XML files to the Migration Wizard to complete your eCommerce data migration.

Next Steps: Ready to migrate your data from nopCommerce? Start your free demo now, or schedule a call with our migration expert for personalized assistance.

More info
What URL address should I use for Migration Wizard?

When using the Cart2Cart Migration Wizard, you'll be prompted to enter your store's URL. It's crucial to provide the front-end URL, not the administrative panel URL.

Why Use Your Default Big Cartel URL for Data Migration?

Big Cartel, like many hosted e-commerce platforms, allows you to customize your store's domain name. However, for a seamless automated data migration using Cart2Cart, you must use the default Big Cartel URL. This URL typically follows the format: www.your-source-store.bigcartel.com. This is the only required URL data for your Big Cartel store during the migration setup.

Example of a default Big Cartel URL for data migration

Providing the correct URL ensures that Cart2Cart can accurately access and transfer your store's data to your new platform. Using a custom domain during this step will prevent Cart2Cart from properly connecting to your Big Cartel store for data extraction.

Ready to migrate your Big Cartel store? Start your free demo now!

More info
How to export orders from Big Cartel in a CSV file?

If you wish to move your order history from Big Cartel to another store, you will need to perform a few simple steps. Due to API platform peculiarities, Cart2Cart is not able to collect this data automatically.

Here's how to export your orders from Big Cartel for import during your store migration:

  1. Log into your Big Cartel Admin panel.
  2. Go to your Orders Tab.
  3. Press the Export CSV button on the right bottom.
  4. Export CSV button in Big Cartel for order data migration
  5. Save the file on your computer.
  6. Proceed to the Import Data step of the Migration Wizard.
  7. Upload the Orders.csv file.
  8. Proceed to the next step of your migration.

Source: Big Cartel help

More info
Is it possible to migrate data to Big Cartel shopping cart?

Is It Possible to Migrate Data to Big Cartel?

Unfortunately, Cart2Cart does not currently support data migration to Big Cartel. This is because Big Cartel is a hosted e-commerce platform that does not offer a native data import function. This limitation prevents automated migration solutions like Cart2Cart from transferring your store data.

Looking for alternatives? Cart2Cart supports migration to a wide range of other popular e-commerce platforms, including Shopify, WooCommerce, Magento, and many more. You can explore our full list of supported platforms on the Cart2Cart website.

Why Can't Cart2Cart Migrate to Big Cartel?

Big Cartel's closed ecosystem and lack of import functionality are the primary reasons migration isn't possible. Cart2Cart relies on access to a platform's database or API to facilitate data transfer. Without this access, a seamless and automated migration process cannot be established.

Considering Alternatives?

If you're set on migrating your store data and Big Cartel is not a hard requirement, consider migrating to a platform that offers more flexibility and import capabilities. Platforms like Shopify or WooCommerce, which can be easily migrated to using Cart2Cart's automated data migration service, are excellent choices.

Ready to Explore Data Migration Options?

While a direct migration to Big Cartel isn't possible, we encourage you to explore other platforms that align with your business needs. Use Cart2Cart to migrate your products, customers, orders, and other essential data to a new, more flexible platform.

Next Steps:

More info
Why did my item count change after I migrated from Big Cartel?

Why did my item count change after I migrated from Big Cartel?

After migrating from Big Cartel, the quantity of each product might be set to 1000. This is due to the way Big Cartel handles inventory data and how it's interpreted during the data migration process. Cart2Cart's data migration service automatically adjusts for this, ensuring a smooth transition to your new platform.

Understanding Quantity Settings After Big Cartel Data Migration

The reason for this adjustment is that Big Cartel doesn't explicitly define a "quantity" field in the same way many other e-commerce platforms do. To ensure your products are properly represented on your new store, Cart2Cart sets the initial quantity to 1000. This allows you to easily manage and adjust your inventory within your new platform, such as Shopify, WooCommerce, or Magento, according to your specific needs. If you need to migrate from Big Cartel to another platform, Cart2Cart can help.

Next Steps After Your Big Cartel Migration

After the data migration is complete, we highly recommend reviewing your product inventory within your new store. This will allow you to fine-tune the quantity settings according to your actual stock levels. You can easily adjust the quantities for individual products or use bulk editing tools available in your new platform's admin panel.

Ready to migrate your store? Start your free demo today!

If you have any further questions or need assistance, please contact our support team or schedule a call with a migration expert.

More info
Transfer credit card information along with other data from Jigoshop

Can I Migrate Credit Card Information Using Cart2Cart?

Currently, Cart2Cart does not support the direct transfer of sensitive credit card information due to security and compliance regulations. However, a wealth of other crucial data, including customer billing addresses, shipping addresses, order history, product details, and customer accounts, can be seamlessly and securely migrated using our service.

Why Can't Credit Card Data Be Migrated?

The transfer of credit card data is restricted by Payment Card Industry Data Security Standard (PCI DSS) regulations and other security protocols. These rules are in place to protect sensitive financial information and prevent fraud. Cart2Cart adheres to these standards to ensure the safety and security of all data handled during the migration process.

What Data *Can* Be Migrated with Cart2Cart?

Cart2Cart facilitates the migration of a wide range of data, including:

  • Products (names, descriptions, images, prices, categories, etc.)
  • Customers (names, addresses, contact information, order history)
  • Orders (order details, status, payment information – *excluding* credit card numbers)
  • Categories
  • Manufacturers
  • Reviews
  • Blog posts
  • CMS pages
  • Coupons

Alternatives for Handling Payment Information After Migration

After migrating your store, you'll need to configure a new payment gateway. Here are the common options:

  • Integrate with a PCI Compliant Payment Gateway: Choose a secure payment gateway that integrates with your new platform (e.g., PayPal, Stripe, Authorize.net). This is the most secure and recommended approach.
  • Tokenization (if available on both platforms): If your source and target platforms support tokenization, you might be able to migrate payment tokens (instead of actual credit card numbers). Consult with your payment gateway provider for compatibility and security considerations.

Ready to Migrate Your E-commerce Store?

While credit card data migration isn't possible, Cart2Cart offers a secure and reliable solution for transferring all other essential data to your new e-commerce platform. Migrate your products, customers, orders, and more with ease.

Next Steps:

More info
How product images are migrated from AbleCommerce?

Due to differences in store templates, Cart2Cart typically migrates only the main product images during an automated shopping cart migration. If you require the migration of both main and additional images from your existing AbleCommerce store to another platform, such as Shopify, WooCommerce, or Magento, we recommend requesting a customized data migration. Please contact our Support Team to discuss your specific needs and receive a tailored solution for your data migration project.

More info
How to export files from AbleCommerce?

As AbleCommerce has some peculiarities, you will need to upload source data during migration. Therefore, exporting data from your store's back end is necessary. This guide outlines how to export your data for a smooth shopping cart migration with Cart2Cart.

Exporting Data from AbleCommerce Gold for Migration

If you are using AbleCommerce Gold, follow these steps to export your data in CSV format for your data migration:

  1. Go to your AbleCommerce admin panel and log in.
  2. Proceed to Data -> Export.

AbleCommerce Admin Panel Export Section

  1. To export products and variants, choose "Products/Variants" from the dropdown menu. Then, click the download icon next to the appropriate field to export the data.

Exporting Products and Variants from AbleCommerce

  1. To export orders from your AbleCommerce store, click "Orders." Export the CSV file by selecting the icon in front of the required field.

Exporting Orders from AbleCommerce

  1. To export your users list as a CSV file, go to "Users" and click the download icon.

Exporting Users from AbleCommerce

Exporting Data from AbleCommerce 7.x for Migration

If you are using AbleCommerce 7.x, you'll need to install AbleCommerce DataPort from the official AbleCommerce website. Then, follow these steps to export the necessary data in CSV format for your data migration.

  1. Connect to your store's admin panel via the DataPort software.
AbleCommerce DataPort Utility
  1. Paste your store's URL address and press "Next."
Connecting to AbleCommerce with DataPort
  1. Name your current connection, provide your store's User Name and Password, and press "Finish."
DataPort Access Details
  1. Once connected to your store's data, download the required files and save them to a easily accessible folder.
    Note: Ensure you select CSV format when downloading the source files.

AbleCommerce DataPort Window

  1. Return to the Migration Wizard and upload all required data to the corresponding fields.

If you encounter any difficulties during your data migration, please don't hesitate to contact our Support Team for assistance.

Ready to migrate? Get started with a free demo today!

More info
How can I export my data from AbleCommerce 7.x?

If you're using AbleCommerce 7.x and planning a shopping cart migration, you'll need to install AbleCommerce DataPort from the official website to export your data. Follow these steps to export the required data in CSV files for a smooth migration process with Cart2Cart.

1. Connect to your store's admin panel using the AbleCommerce DataPort software.

Connecting to AbleCommerce DataPort for data migration

2. Paste your store URL address and press "Next."

Entering store URL in AbleCommerce DataPort for data migration

3. Name your current connection, provide your store's User Name and Password, and press "Finish."

Providing access details to AbleCommerce DataPort for data migration

4. Once connected to your store's data, download the required files and save them to a readily accessible folder.
Note: Ensure you select CSV format when downloading the source files.

Selecting CSV format in AbleCommerce DataPort for data migration

5. Return to the Cart2Cart Migration Wizard and upload all the required data to the corresponding fields.

If you encounter any difficulties during your data migration, feel free to contact our Support Team.

Ready to migrate? Start your Free Demo now

More info
How to export Actinic store data to CSV file?

To export your Actinic store data for shopping cart migration, proceed with the following steps for the required data tables:

  1. Log in to your Actinic admin panel.
  2. To export products, go to Marketing -> Smartfeeds -> [Add an export] -> Oxatis DataPlug -> [Add] -> [Save] -> [Export] -> [Confirm]. After the export is done, proceed to View Properties -> Download Export File.
  3. To export customers, choose Marketing -> Users -> [Export] -> [Add] -> [Continue]. Select all the fields and the file format CSV - Semicolon (;). Then click [Save] -> [Export] -> [Confirm]. When the procedure is completed, push View Properties -> Download Export File.
  4. To export orders, download the plugin from the admin panel. Go to Help -> DataPlug (Import Data) and install it. Afterwards, run this plugin and click Orders -> Download. Here you need to choose all entities and proceed to the next step. Then you need to push Export -> Excel or CSV file. In the new window, click Browse, insert the file name, and choose CSV from the list. Then push Next -> Finish.
  5. Upload the saved files to the corresponding fields during your data migration setup.

Please note that if the size of the downloaded CSV file exceeds 128 MB, contact our Support Team to avoid any possible migration issues during your shopping cart migration.

More info
How can I get data out of SellerDeck?

Migrating from SellerDeck: A Guide to eCommerce Data Migration

Please note: To migrate from SellerDeck, you need to export a CSV file and import it into your desired shopping cart using CSV File migration. This is a common method for eCommerce data migration. Alternatively, you can delegate the entire migration process to the Cart2Cart team by purchasing one of our Data Migration Service Packages. This allows for a hands-off approach to your eCommerce data migration.

In some cases, to complete a migration from SellerDeck (formerly Actinic), you may need to extract data from your SellerDeck client beforehand. Here's a detailed instruction on how to export your data for eCommerce data migration:

Exporting Your SellerDeck Data for Migration

Before exporting data from SellerDeck, ensure you have a designated TXT file to store the exported information. Follow these steps:

  1. Open the “File” menu.
    SellerDeck File Menu - eCommerce data migration
  2. Choose “Export” and click “Next”.
    SellerDeck Export Option - eCommerce data migration
  3. Select the specific entities you want to export for your eCommerce data migration.
    SellerDeck Select Entities - eCommerce data migration
  4. In the “File Name” field, specify the TXT file you created and press “Ready”.
    SellerDeck Select File - eCommerce data migration

Once these steps are completed, all selected data will be exported to the specified TXT file, which can then be used for your eCommerce data migration. You can then use the CSV File migration option to continue your data migration.

Ready to migrate your store? Start your free demo now!

More info
Can I migrate Categories from Actinic?

Can I Migrate Categories from Actinic to Another Platform?

Yes, Cart2Cart supports category migration from Actinic (Sellerdeck). Due to the specific way Sellerdeck structures its files, the category structure (referred to as "Sections" in Sellerdeck) might appear slightly different in your target store after the migration.

Here's what you should know:

  • Preservation of Structure: Cart2Cart's data migration service strives to preserve as much of your original category structure as possible. However, minor adjustments might be necessary on the target platform to ensure optimal display.
  • Pre-Migration Planning: Before initiating the migration, carefully plan your desired category structure on the target platform. This will help you quickly make any necessary adjustments post-migration.
  • Review After Migration: After the migration is complete, thoroughly review your category structure on the target store. Ensure that all categories are correctly displayed and that products are assigned to the appropriate categories.

To ensure a smooth category migration process, we recommend performing a demo migration with a limited number of categories. This allows you to preview the results and identify any potential issues before migrating your entire store.

Need help migrating from Actinic? Schedule a call with our migration expert or start your free demo to see Cart2Cart in action.

More info
How to export data from my ePages store?

Due to ePages platform peculiarities, you'll need to import your store data into the Migration Wizard using CSV files. This guide illustrates how to export your categories as an example of the data migration process.

1. Log in to your ePages admin area and navigate to the Products -> Import and export tab.

2. Within the Export form, you'll need to configure the parameters for your export file:

- Select Content / Categories / Pages in the Object Type field.
Note: To export Product Categories, select Category Product Assignment. The Products and Products types fields are displayed identically.

- Set the Encoding field to UTF-8*.
- Choose comma (,)* as the delimiter and click the Export button.
Note: (*) It's crucial that these settings are precisely matched during the data export.

Exporting ePages Categories for Data Migration

3. Save the file to an easily accessible location on your computer. Then, return to the Migration Wizard and upload the file to the corresponding field.

Note: Orders can only be exported from ePages in XML format.

To export orders, follow these steps:

  • Log in to your ePages admin panel.
  • Go to the Orders Menu.
  • Select the orders you wish to export, or select all of them by checking the box in the top left corner.
  • Click Export.
Exporting ePages Orders for Data Migration

4. Click the Import Data button at the bottom of the page to proceed.

More info
How to perform a migration to Premmerce?

How to Perform an eCommerce Data Migration to Premmerce

To migrate your eCommerce data to Premmerce, you'll need to install the Cart2Cart Migration Module. Here’s a step-by-step guide:

Steps to Migrate to Premmerce using Cart2Cart:

1. Log in to your Premmerce admin account.

2. Navigate to the “Modules” menu and select the “Cart2Cart Migration” module.

Selecting the Cart2Cart Migration module in Premmerce

3. In the next window, click “select files” and upload all the necessary migration files at once.

Uploading migration files for Premmerce eCommerce data migration

4. Click “Start Migration”. To ensure a clean transfer, use the “Delete current data from the Target Store before the migration” option.

Starting the eCommerce data migration to Premmerce Deleting current data before the eCommerce data migration to Premmerce eCommerce Data Migration in Progress to Premmerce

5. Once the migration is complete, go to Settings->shop settings->Images and perform a Resize with “including additional images” selected. This ensures all migrated images are correctly displayed in your Premmerce store.

Resizing images after eCommerce data migration to Premmerce

Ready to simplify your eCommerce data migration? Start your free demo today!

More info
Can I migrate images to my AmeriCommerce store?

Migrating Images to AmeriCommerce via Data Migration Services

When performing data migration to AmeriCommerce, especially if the source cart is no longer active, you'll need to ensure your images are correctly transferred. Cart2Cart's data migration services do not directly move image files; instead, they create links to the images on the source server. To ensure your images are displayed correctly in your AmeriCommerce store, you'll need to physically move them to your AmeriCommerce server and select the "Preserve product image URLs" option during the migration setup.

Step-by-Step Guide to Manually Migrating Images

Here’s how to manually transfer your images to your AmeriCommerce store:

  1. Connect to your AmeriCommerce FTP server:
    • Select SFTP as the connection type in your FTP client.
    • If using QuickConnect, enter sftp://ftp.americommerce.com in the Host field. Avoid using ftp.americommerce.com.
    • Manually specify port 22 to ensure a valid connection, even if your FTP client configures it automatically.
    • Connect to your store's FTP, then navigate to the "My Store" directory, and then to the "www" directory. This is the root folder for your AmeriCommerce website.
    • Selecting SFTP for AmeriCommerce data migration
  2. Locate and Transfer Your Images:
    • Within the "www" directory, you should find the folders containing your store's images.
    • If you intend to share images across multiple AmeriCommerce stores, place them in the Shared Folder.
  3. AmeriCommerce www directory for image data migration

By following these steps, you can ensure that your product images are correctly displayed after migrating to AmeriCommerce using Cart2Cart's data migration services.

Ready to migrate your store to AmeriCommerce? Start your free demo now!

More info
Can I migrate all my multiple AmeriCommerce stores at once?

Can Cart2Cart Migrate Multiple AmeriCommerce Stores Simultaneously?

Yes, Cart2Cart can efficiently perform AmeriCommerce multistore migration. To ensure a smooth process, verify that each of your stores is displayed on the “Multi-store Configuration” step of the Migration Wizard. If a store is missing, it likely indicates that the Access Token you've entered lacks the necessary permissions to access that specific store.

To resolve this, you'll need to adjust your Access Token settings within AmeriCommerce. Navigate to Tools > Apps & Addons > API Apps & Integrations and enable the “Tokens Access All Stores” option by checking the corresponding box. This will grant the token the required permissions for accessing all your AmeriCommerce stores for the data migration process.

AmeriCommerce Access Token Settings for Multistore Migration

Ready to migrate your multiple AmeriCommerce stores? Start your free demo now!

More info
Can I migrate product variants to LiteCart?

Migrating Product Variants to LiteCart with Cart2Cart: A Comprehensive Guide

Yes, Cart2Cart supports the migration of product variants to LiteCart. However, due to the way LiteCart handles product variations, it's important to understand how Cart2Cart manages this process. LiteCart uses product variants primarily to specify the quantity of products available for a specific combination of attributes. Therefore, when migrating product variants to LiteCart using Cart2Cart, the system ensures that your product options and their corresponding stock levels are accurately transferred.

To ensure a smooth and accurate product data migration, Cart2Cart maps the variant data from your source platform to LiteCart's structure, focusing on maintaining the correct association between attributes (e.g., color, size) and the number of items available for each combination. This allows you to effectively manage your inventory within LiteCart, providing a seamless shopping experience for your customers.

Here's what you need to know about migrating product variants to LiteCart with Cart2Cart:

  • Variant Quantity: Cart2Cart focuses on migrating the quantity associated with each product variant to ensure accurate stock levels in your LiteCart store.
  • Attribute Mapping: Cart2Cart maps attributes from your source store to LiteCart to ensure that product options (e.g., color, size) are correctly displayed.
  • Considerations: Be aware of the differences in how your source cart and LiteCart handle product variants to anticipate any necessary adjustments after migration.

Ready to migrate your store to LiteCart? Start your free demo today and see how Cart2Cart can simplify your data migration process. If you have any questions or need assistance, contact our support team via Live Chat.

More info
Can I migrate currencies to LiteCart?

Can I Migrate Currencies to LiteCart with Cart2Cart?

Yes, Cart2Cart supports the migration of currencies to LiteCart as part of your comprehensive data migration process. This ensures a seamless transition of your financial data.

However, for optimal results, it’s highly recommended to set up identical currencies and units of measurement on your LiteCart store to match the settings on your current platform *before* initiating the migration. This proactive step helps prevent any discrepancies during and after the data transfer.

If the currencies are not configured identically beforehand, LiteCart will default to its base currency settings after the migration. This could lead to incorrect pricing and order calculations. Using Cart2Cart's data migration ensures the correct transfer, provided the setup is aligned.

Preparing for Currency Migration to LiteCart

Before you begin your data migration to LiteCart, take these steps to ensure a smooth currency migration:

  1. Review Your Current Platform's Currency Settings: Make a list of all active currencies and their corresponding exchange rates.
  2. Configure LiteCart: In your LiteCart admin panel, add and configure each currency to match your source platform exactly. Ensure the currency codes (e.g., USD, EUR, GBP) are identical.
  3. Verify Units of Measurement: Check that the units of measurement (e.g., weight, dimensions) are consistent between both platforms.

By following these steps, you can leverage Cart2Cart's data migration service to accurately transfer your currency settings to LiteCart and maintain the integrity of your financial data.

Ready to migrate to LiteCart? Start your free demo now!

Need assistance? Contact our support team via live chat.

More info
How to export files from Drupal Commerce?

To export products and categories from Drupal Commerce for your data migration, you'll need to activate the free Views data export plugin. Beforehand, ensure you've installed the free Views and Ctools modules to guarantee the Views data export plugin functions correctly.

Alternatively, you can follow the instructions below or watch this video guide.

Once all three modules are downloaded, installed, and activated, follow these steps separately to export your Drupal Commerce products and categories:

1. Log in to your Drupal Commerce admin panel, navigate to Structure-> Views, and click Add new view.

Add new view in Drupal Commerce for data export

Drupal Commerce Structure Views for data export

2. Fill in the View name field. Use "export_product" for products and "export_category" for categories as examples.

3. From the “Show” dropdown menu, select Commerce Products (for products) or Taxonomy Terms (for categories). In the “of type” dropdown, choose All.

4. Click Continue and Edit.

Continue and Edit Drupal Commerce data export

5. In the Fields section, click Add and check the boxes next to:

Adding fields for Drupal Commerce data export

- For products: “Commerce Product: Product ID”, “Commerce Product: SKU”, “Commerce Product: Status”, and “Commerce Product: Title”.

Commerce Product fields for Drupal Commerce data export

- For categories: “Taxonomy term: Name”, “Taxonomy term: Term description”, and “Taxonomy term: Term ID”.

Taxonomy term fields for Drupal Commerce data export

6. Click Apply (All Displays) repeatedly until all necessary fields are configured.

Apply all displays for Drupal Commerce data export

7. Click Save.

Save Drupal Commerce data export settings

8. Under the Displays heading, click Add, then select Data Export.

Add data export display in Drupal Commerce

9. In the Format field, choose CSV file. Within its settings, select Provide as a file and apply the changes.

Provide as a file for Drupal Commerce data export

10. Go to Data Export Settings. In the Path field, enter "export-product" (for products) or "export-categories" (for categories). Choose Page in the Attach to field, and then click Apply.

Data export settings for Drupal Commerce

11. Open the Display a specified number of entities menu, choose Display all items, and click Apply.

Display all items for Drupal Commerce data export

12. Finally, save the changes and click view Data export.

Final Drupal Commerce data export view

Once you've completed these steps, upload the generated CSV files to the appropriate fields in the Migration Wizard to begin your data migration.

More info
How to retrieve API details from Ecwid admin panel?

To perform an Ecwid data migration using Cart2Cart, you'll need your store's API details. These details allow Cart2Cart to securely access and transfer your data.

Important: Access to the Ecwid APIs requires a paid Ecwid plan (Venture, Business, or Unlimited). Merchants on the Free plan cannot use the Ecwid API.

Here's how to find your Ecwid API details in your store's backend:

  1. Log in to your Ecwid admin panel.
  2. Method 1: Using the API Playground (Recommended)

    Tap on this Ecwid API Playground link to access the data you need.

    Click the Connect with Ecwid button.

    Copy the URL to your personal Postman collection. This URL contains your Store ID and access token, crucial for the migration wizard.

    Ecwid API details location for data migration

    Go to the Cart2Cart migration wizard and paste the URL into the Personal collection URL field.

    Personal collection URL field in Cart2Cart for Ecwid data migration
  3. Method 2: Using Ecwid App Market

    Alternatively, you can find your Store ID and secret key via Ecwid App Market.

    1. Go to My Apps.
    2. Click Develop Apps.
    3. Fill in App name, short description, scopes and click Create App.
    4. Find Store ID and Secret key on the app page.

Note: If you encounter problems accessing the API details page from your admin panel, contact Ecwid Support for assistance.

Ready to migrate your Ecwid store? Start your free demo now!

More info
Why do categories not move after a demo migration in Miva Merchant?

Why Categories Might Not Migrate During a Miva Merchant Demo Migration

Unfortunately, due to Miva Merchant's unique structure, Cart2Cart currently does not fully support automated migration of categories to this platform. This is due to underlying differences in how Miva Merchant handles category data compared to other e-commerce platforms.

While a demo migration might show some aspects of your data being transferred, category migration requires custom solutions and is not included in the standard automated process. If category migration is critical for your store, contact our support team to discuss custom migration options.

Alternative Solutions for Migrating Categories to Miva Merchant

Although direct automated category migration isn't available, there are alternative approaches you can consider:

  • Manual Category Creation: Recreate your categories manually within your Miva Merchant store. This gives you full control over the structure and ensures it aligns perfectly with your business needs.
  • CSV Import: Miva Merchant may offer a CSV import functionality for categories. You might be able to export your categories from your source store and format them to be compatible with Miva Merchant's import requirements. Check Miva Merchant's official documentation for more details.
  • Custom Data Migration: Cart2Cart offers custom data migration services. Our team can develop a tailored solution to migrate your categories to Miva Merchant, taking into account the platform's specific requirements. Schedule a call with a migration expert to discuss your options.

We understand that category migration is often essential, and we are continuously working to improve our service and platform compatibility. We recommend contacting our support team for the most up-to-date information and personalized guidance.

Next Steps:

More info
Will customer usernames migrate to Miva Merchant?

Will Customer Usernames Migrate to Miva Merchant?

Unfortunately, Cart2Cart doesn't support the direct migration of customer usernames to Miva Merchant. Due to differences in platform architecture and data structures, transferring customer usernames requires custom solutions beyond the scope of a standard migration.

Why is username migration not supported?

  • Platform Differences: Miva Merchant employs a unique system for managing customer accounts and usernames, which may not directly align with the structure of the source platform.
  • Data Security: Usernames often have security implications, and direct transfer could pose risks if not handled carefully.
  • Potential Conflicts: Existing usernames in Miva Merchant could conflict with imported usernames, leading to account access issues.

Alternative Solutions:

While direct username migration isn't possible, here are some alternative approaches:

  • Customer Notification: Inform your customers that they will need to create new accounts on your Miva Merchant store. Provide clear instructions on how to do so.
  • Simplified Registration: Streamline the registration process on Miva Merchant to make it as easy as possible for customers to create new accounts.
  • Incentives: Offer incentives (e.g., discounts, free shipping) to encourage customers to re-register on your new store.

Migrating Other Customer Data:

Cart2Cart seamlessly migrates other crucial customer data to Miva Merchant, including:

  • Customer names
  • Billing and shipping addresses
  • Order history
  • Contact information

Ensure a smooth transition to your new Miva Merchant store by leveraging Cart2Cart's comprehensive data migration services. While username migration presents a unique challenge, the rest of your customer data can be transferred accurately and securely.

Next Steps:

  • Start your free demo to see how Cart2Cart works.
  • Schedule a call with a Migration Expert to discuss your specific needs.
  • Contact support via Live chat for any questions.
More info
Do you migrate order statuses from Miva Merchant 9?

Miva Merchant Data Migration: Migrating Order Statuses

Yes, Cart2Cart supports the migration of order statuses from Miva Merchant 9. However, due to the inherent differences in how shopping cart platforms handle order statuses, all your orders on the Target Cart will initially have a single, unified order status. This status is selectable during the data migration setup process.

Understanding Order Status Migration Limitations

It's important to understand why a one-to-one order status migration isn't always possible. Each e-commerce platform has its own unique set of order statuses (e.g., "Pending," "Processing," "Shipped," "Completed," "Canceled"). While we strive to map these statuses as accurately as possible, discrepancies can exist.

Choosing the Initial Order Status After Migration

During your data migration setup with Cart2Cart, you'll be prompted to select the order status that will be assigned to all migrated orders. Consider these options:

  • "Completed" or "Processed": This is a good choice if you want to indicate that these orders have already been fulfilled in your Miva Merchant store.
  • "Pending" or "Processing": Use this if you want to review the orders on your new platform and potentially take further action.

Once the data migration is complete, you can manually update the order statuses within your new shopping cart platform to reflect their true state. This allows for a more granular and accurate representation of your order history.

Miva Merchant data migration

Need Help with Your Miva Merchant Data Migration?

Cart2Cart simplifies the process of migrating your data from Miva Merchant to a new e-commerce platform. Get started with a free demo today to see how easy it is!

Next Steps:

More info
How to download files from Amazon Webstore?

How to Download Your Data from Amazon Marketplace for Data Migration

Need to migrate your data away from Amazon Marketplace? Here's how to download your inventory and order information, which is crucial for a smooth data migration using a service like Cart2Cart.

Downloading Inventory Data from Amazon Marketplace

To download your inventory files from Amazon Marketplace, follow these steps:

1. Enter your Admin panel in Amazon Seller Central.

2. Navigate to Inventory -> Inventory Reports.

Amazon Marketplace Inventory Reports location for data migration

3. Choose Inventory Reports from the list.

4. Click the Request Report button.

Requesting an Amazon Marketplace Inventory Report for data migration

5. Once the report is generated, click the Download button.

Downloading Amazon Marketplace Inventory Report for data migration

Downloading Order Data from Amazon Marketplace

To download your order history from Amazon Marketplace:

1. Go to Orders in your Amazon Seller Central admin panel.

2. Choose Order Reports.

3. In the Select Date Range menu, specify the desired date range for your order data. Note that the maximum date range you can select at one time may be limited.

4. Click Request Report.

5. Download the report once it's generated.

Downloading Amazon Marketplace Order Reports for data migration

Once you have downloaded your data, you can use it to migrate your products, customers, and orders to a new platform using Cart2Cart. Cart2Cart supports migration to and from a wide variety of platforms.

Ready to start your data migration? Start your free demo now!

Need help with your Amazon Marketplace data migration? Schedule a call with a Migration Expert.

More info
Where do I need to enter the Token in my Merchium store?

Where do I enter the Cart2Cart Token in my Merchium store for data migration?

To enable the data migration process, follow these steps to locate and enter the Cart2Cart token within your Merchium store:

  1. Copy the Token from the Cart2Cart Migration Wizard.
  2. Access the admin panel of your Merchium store.
  3. Navigate to Add-ons > Manage add-ons.
Merchium admin panel - Add-ons
  1. Click the “Browse all available add-ons” button.
Merchium Browse all available add-ons
  1. Locate the Cart2Cart add-on in the list and click “Install”.
Install Cart2Cart add-on in Merchium
  1. After installation, find Cart2Cart in the “Installed add-ons” list. Click the gear icon and select Settings. Ensure the add-on is active; activate it if necessary.
Merchium Cart2Cart add-on settings
  1. Paste the Token into the designated field and click Save.
Paste Cart2Cart token in Merchium

Congratulations! You can now proceed with your data migration using Cart2Cart.

Ready to migrate your store? Start your free demo now!

More info
Are customers and orders also migrated?

Are Customers and Orders Migrated During Etsy Data Migration?

When performing an eCommerce data migration from Etsy, it's important to understand how customer and order information is handled. Cart2Cart can migrate your order data from Etsy to your new platform.

Customer Data Limitations During Etsy Data Migration

The only source of customer data available for retrieval from Etsy is the orders file. Critically, this file lacks customer email addresses. To address this limitation during your eCommerce data migration, Cart2Cart will create placeholder email addresses in the format "[email protected]" on your target store for each customer.

Note: Only customers associated with completed orders will be migrated to your target store. Shoppers without any order history on Etsy cannot be transferred due to data limitations.

Ready to migrate your Etsy data? Start your free demo today!

More info
Can Cart2Cart import my categories from Etsy?

Can Cart2Cart Migrate Categories from Etsy?

Due to Etsy's unique structure, its categories function more like tags than traditional hierarchical categories. Therefore, when performing a data migration from Etsy using Cart2Cart, all Etsy categories, with the exception of the top category, will be migrated as tags to your target store. This is because Etsy's system doesn't fully align with the category structures of most other e-commerce platforms.

This approach ensures that all the descriptive information associated with your products on Etsy is preserved during the data migration. While they won't be organized in the same hierarchical category structure, the tags will allow customers to easily find products based on the keywords and categories they were previously associated with on Etsy.

Cart2Cart offers flexible migration options to customize how your data is transferred. You can further refine your store's organization after the migration is complete. Cart2Cart supports a wide variety of e-commerce platforms for your target store.

Ready to migrate your data? Start your free demo today!

More info
Will I save the connections between customers and products during migration from Etsy?

Will I Save Customer-Product Connections When Migrating from Etsy?

Unfortunately, no. Etsy's product data export doesn't include unique ID information that links customers to specific products they've purchased. Therefore, these customer-product connections cannot be preserved or recreated on your new store after the migration.

During an eCommerce data migration, Cart2Cart focuses on transferring product details, customer information, order history, and other key data points. However, without the necessary ID links in the source data (Etsy, in this case), migrating customer-product relationships is technically impossible. Cart2Cart does its best to migrate all available data accurately, but the limitations of the source platform's data structure influence the migration outcome. If you want to migrate to another platform, consider supported platforms by Cart2Cart.

Why Unique Product IDs Are Important for Data Migration

Unique product IDs serve as the crucial link between customers and their orders. They allow you to track customer preferences, personalize marketing efforts, and provide targeted product recommendations. Without these IDs, that level of detail cannot be transferred. Cart2Cart provides data migration services that migrate all the data available on the source platform.

What Data *Can* Be Migrated from Etsy?

Even though customer-product connections can't be moved, you can still migrate essential data from Etsy to your new platform, including:

  • Products (names, descriptions, images, prices, variations)
  • Customers (names, addresses, contact information)
  • Orders (order details, dates, statuses)
  • Categories

Cart2Cart ensures a secure and reliable data migration process for all these data entities.

Next Steps for Your Etsy Migration

Ready to migrate your Etsy store to a new platform? Here's how Cart2Cart can help:

  1. Start a Free Demo: Test the migration process with a limited amount of data to see how Cart2Cart works. Start your free demo
  2. Choose Your Target Platform: Select the eCommerce platform you want to migrate to. Cart2Cart supports a wide range of platforms, including Shopify, WooCommerce, Magento, and many more.
  3. Run a Full Migration: Once you're satisfied with the demo, run a full migration to transfer all your data to your new store.
  4. Contact Support: If you have any questions or need assistance, contact our support team via live chat.
  5. Schedule a Call: If you want personal assistance, Schedule a Call with Migration Expert
More info
How do I export files from Etsy?

How to Export Your Etsy Data for Migration

Etsy permits exporting items from your store in CSV format. This is a crucial first step if you're considering an Etsy data migration to another platform. Migrating your Etsy data might be necessary if you're looking for more control over your online store, wish to expand your reach on a different platform, or require more advanced e-commerce features. Cart2Cart supports seamless data migration from Etsy to various popular platforms like Shopify, WooCommerce, and more. Here's how to export your data from Etsy:

Steps to Export Your Etsy Data:

  1. Log in to your Etsy admin panel.
  2. Navigate to Your Shop -> Shop settings.
  3. Choose Options and open the Download data tab.
  4. Finally, press Download CSV.

Once you have your CSV file, you can use Cart2Cart to migrate your products, customers, and other essential data to your new e-commerce platform. Start your free demo today and experience the ease of automated data migration!

More info
How to retrieve Access Token from Spark Pay (AmeriCommerce)?

How to Retrieve Your AmeriCommerce Access Token for eCommerce Data Migration

To perform an eCommerce data migration to or from AmeriCommerce using Cart2Cart, you'll need to provide your store's Access Token in the Migration Wizard.

Here's how to locate it in your AmeriCommerce admin panel:

  1. Log in to your AmeriCommerce Admin Panel.
  2. Navigate to Tools -> Apps and Addons.
  3. Choose API Apps & Integrations.

AmeriCommerce API Apps and Addons

  1. If you already have apps created, click the Access Tokens icon for the desired app, then click View and copy the API Token from the window that appears. AmeriCommerce API Access Token

If you don't have an app created yet, click New to create one. Enter an app name and description (optional). On the next step, select Single Token Flow. Finally, check the View and change boxes in each Permissions section. Save your changes.

AmeriCommerce Create New App

Now that you have your AmeriCommerce Access Token, you're ready to begin your eCommerce data migration with Cart2Cart! Start your free demo now to experience the ease and efficiency of automated store migration.

More info
How do I Migrate to Zoey Shopping Cart?

How to Perform a Zoey Data Migration with Cart2Cart

Yes, Cart2Cart supports migrations to Zoey, a leading B2B eCommerce platform built on the Magento framework. Zoey offers powerful features for wholesale and B2B businesses. Migrating your data to Zoey allows you to leverage these features and grow your business. However, due to Zoey's unique architecture, you'll need to use the special "Cart2Cart: Zoey Data Importer" module during the migration process. This ensures a seamless and accurate transfer of your products, customers, orders, and other critical data. This guide provides step-by-step instructions on how to perform a Zoey data migration using Cart2Cart's automated migration tool. Start your free demo today!

Step-by-Step Guide to Zoey Data Migration

Here's a step-by-step instruction on how to perform a Zoey data migration:

  1. Start a Cart2Cart migration as usual. Log in to your Cart2Cart account, navigate to My Migrations List -> Create New Migration.
  2. Log in to your Zoey admin panel.
  3. Go to Apps, find the “Cart2Cart: Zoey Data Importer” module, add it to your apps, and press Manage.
Zoey Apps Cart2Cart Data Importer Module
  1. Copy the security token from the Migration Wizard. You'll find it on the Source / Target Setup Page. Alternatively, you can copy the security token from the Edit Personal Info page.
Cart2Cart Security Token Location
  1. Insert the security token into the appropriate field in the Cart2Cart: Zoey Data Importer module and press Install Connector. If everything is done correctly, you’ll see how much time is left until your bridge expires.
  2. Return to the Migration Wizard, paste the URL of your Zoey store, and complete the migration.
  3. When the migration is finished, go back to your Zoey Apps section, find the “Cart2Cart: Zoey Data Importer” module, press Manage, and click the "Synchronize Images" button. This crucial step ensures all your product images are correctly transferred.
Zoey Images Synchronization

Check this video tutorial for a visual guide. Please note that the Images Synchronization step, mentioned in step 7 above, is not explicitly shown in this video, so ensure you complete that step.

Need personalized assistance with your Zoey data migration? Schedule a call with our migration expert or contact support via Live Chat.

More info
Can Cart2Cart migrate my CS-Cart Multi-Vendor Marketplace?

Can Cart2Cart Migrate My CS-Cart Multi-Vendor Marketplace?

Yes, Cart2Cart supports the migration of CS-Cart Multi-Vendor marketplaces. However, it's important to understand that the multi-vendor edition will be migrated as a standard CS-Cart store. This means that during the data migration process, individual vendors, their specific settings, and vendor-product mappings will not be transferred separately or preserved.

All CS-Cart data, including products, categories, orders, and customer information from each vendor, will be consolidated and moved to a single location within your target store. This effectively merges all vendor data into a single, unified storefront. If you require a solution that preserves vendor separation and mapping, you might consider exploring custom data migration options or alternative marketplace platforms.

To explore your data migration options and discuss the specifics of your CS-Cart Multi-Vendor migration, please contact our support team via Live Chat or schedule a call with a Migration Expert: Schedule a Call.

Ready to start your data migration? Try our free Demo.

More info
I keep get the "Internal Error Occurred" message, what do I do?

Encountering "Internal Error Occurred" During Data Migration? Here's What To Do

Even with extensive testing and solutions in place for common issues, rare errors can sometimes occur during your data migration. These can stem from unique file types, specific coding structures, or the presence/absence of certain extensions in your source or target platforms.

If you encounter an "Internal Error Occurred" message while using Cart2Cart for your data migration, the best course of action is to immediately contact our Support Team. By providing them with access to both your source and target stores, they can quickly diagnose and resolve the problem.

Our team is experienced in troubleshooting a wide range of data migration issues and will work diligently to find a solution. We are committed to ensuring a smooth and successful migration process for you.

We guarantee that once a solution is implemented, the issue will be permanently resolved for your data migration.

Possible Causes of Internal Errors During Data Migration

Internal errors during data migration can arise from various factors, including:

  • Incompatible data formats
  • Corrupted data within the source store
  • Conflicts with existing extensions or plugins on the target store
  • Server configuration issues
  • Limitations of the source or target platform's API

If you are performing a migration to a platform like Shopify, Magento, WooCommerce, or OpenCart, ensure all platform and plugin requirements are met.

Happy Migration!

Next Steps:

More info
Is multilanguage migration to/from WooCommerce possible?

Yes, Cart2Cart supports the migration of multiple languages to or from WooCommerce. This requires the purchase and installation of the paid WPML module on your WordPress site before initiating the data transfer (Multilingual CMS). After installing WPML, you'll also need these WooCommerce modules, which should install automatically:

  1. WooCommerce Multilingual
  2. WPML Translation Management
  3. WPML String Translation
  4. WPML Media Translation

Key Considerations for WooCommerce Multilingual Migrations

Here are a few important things to keep in mind when migrating multilingual data to or from WooCommerce:

  1. Language Copies: When migrating to WooCommerce with WPML installed, the plugin creates translated "copies" of products and categories for each supported language. For example, if you have English (EN) and German (DE), each product will have two localized versions.
  2. Supported Entities: WPML facilitates the translation of the following data entities:
    • Product Categories (Description, Name)
    • Products (Title, Slug, Description, Custom Product Attribute (Name, Value(s)))
    • Product Variations (Variation description)
    • Image Texts
    • URLs
  3. Third-Party Responsibility: WPML is a paid plugin developed and supported by a third-party company. Cart2Cart is not responsible for its performance or functionality.

When performing a data migration to or from WooCommerce with Cart2Cart, ensure that the WPML module is installed and properly configured *before* initiating the migration. If a language isn't added within the WPML module, its corresponding data will not be migrated.

Refer to the official WPML documentation for guidance on installing the WPML plugin and adding/editing multiple languages.

Explore the complete list of eCommerce platforms that support multilingual data migration on our Multilingual Migration page.

Ready to migrate your online store? Start your free demo now!

More info
How to export users with passwords during WooCommerce migration?

Yes, with Cart2Cart, you can migrate users *with* their passwords to WooCommerce. This is possible if your source store has default settings and doesn't include custom code modifications related to password encryption.

Note: If your shopping cart has any modifications in password settings, we can not guarantee its accurate transfer.

For certain shopping cart combinations, you'll need to install the Cart2Cart WooCommerce Passwords Migration Plugin.

What is the Cart2Cart WooCommerce Passwords Migration Plugin?

The Cart2Cart WooCommerce Passwords Migration Plugin enables the migration of customer passwords from PrestaShop, Magento, and OpenCart to WooCommerce. It’s a free download and can be easily activated before or after the data migration process.

How to Install the WooCommerce Passwords Migration Plugin via WordPress Admin Panel

    1. Download the Cart2Cart WooCommerce Passwords Migration Plugin.
    2. Access your WordPress admin panel.
    3. Navigate to Plugins » Add New and click the Upload Plugin button.

Installing Cart2Cart WooCommerce Passwords Migration Plugin - Step 1

    1. Click Choose File to locate the plugin file (the .zip file) on your computer and upload it. You'll then be directed to the plugin activation page, as shown below.

Installing Cart2Cart WooCommerce Passwords Migration Plugin - Step 2

  1. Once the plugin is installed, click Activate Plugin.

Alternative Installation: Installing the Plugin via FTP

  1. Download the Cart2Cart WooCommerce Passwords Migration Plugin.
  2. Using an FTP client, go to your store’s directory (/wp-content/plugins/) and extract the plugin folder there.
  3. Access your WordPress admin panel and go to Plugins.
  4. Locate the Cart2Cart: Passwords Migration plugin in the list.
  5. Click Activate.

Activating Cart2Cart WooCommerce Passwords Migration Plugin

Important: We strongly advise keeping the Cart2Cart WooCommerce Passwords Migration Plugin active until all your customers have logged in successfully at least once. After that, you can deactivate or remove it.

However, Cart2Cart typically *cannot* migrate passwords from or to hosted platforms like 3dcart, BigCommerce, Volusion, or Shopify. In these cases, customers will need to use the "Password Recovery" feature on your new WooCommerce store. Learn more about password recovery in this article.

If you have any questions, please don't hesitate to contact our Support Team.

Also, see our dedicated landing page for a comprehensive table outlining which platform pairs support password transfer.

Next Steps: Ready to migrate your store to WooCommerce? Start your free demo now!

More info
How will SEO URLs be migrated to WooCommerce?

Migrate SEO URLs to WooCommerce: Preserving SEO During Data Migration

When performing a data migration to WooCommerce, it's crucial to preserve your existing SEO URLs to maintain search engine rankings. Cart2Cart helps you migrate your SEO URLs, but it's important to understand how WooCommerce handles them.

Why Migrate SEO URLs During Your Data Migration?

Migrating your SEO URLs ensures that your website retains its search engine visibility. Without migrating these URLs, you risk losing valuable organic traffic and search engine rankings. Cart2Cart's data migration service includes an option to migrate SEO URLs to minimize disruption during your switch to WooCommerce.

How Cart2Cart Migrates SEO URLs to WooCommerce

During migration to WooCommerce when you select the "Migrate SEO URLs" option, Cart2Cart transfers your SEO keywords. However, due to WooCommerce's default permalink structure, the resulting URLs may differ slightly. WordPress has its own built-in URL building conventions.

For example, in your previous store (e.g., Magento):

http://your-store.com/macbook-silver-13

After the migration to WooCommerce, it might look like this:

http://your-store.com/product/macbook-silver-13

The /product/ is added by default by WooCommerce. You can customize this by logging into your WordPress admin panel and navigating to Settings -> Permalinks.

For example, you can set a custom base like /shop/, resulting in URLs like:

http://your-store.com/shop/macbook-silver-13

WooCommerce SEO URL Migration Options

If an SEO URL already exists in your WooCommerce store, a prefix or index number might be added to ensure uniqueness.

For example, if the SEO URL macbook-silver-13 already exists, it might be altered to macbook-silver-13-2, and so on, until a unique URL is generated.

Ready to migrate your store to WooCommerce and preserve your SEO? Start your free demo now!

More info
Can I migrate product options to WooCommerce?

Can I migrate product options to WooCommerce?

Yes, with Cart2Cart, you can migrate product options to WooCommerce. Due to WooCommerce's inherent structure, product options are typically migrated as product variants. However, you can streamline this process by installing the paid Product Add-Ons plugin on your WooCommerce store *before* initiating your WooCommerce data migration. This allows Cart2Cart to directly migrate your product options into the plugin, avoiding the creation of numerous product variants.

We strongly recommend using the Product Add-Ons plugin to optimize your WooCommerce data migration, especially if you have a large number of product options. This prevents the creation of an excessive number of product variants within WooCommerce, which can impact performance and usability.

Important: When migrating to the Product Add-Ons plugin, your products will display *only* options in the WooCommerce admin section, not variants. It's technically impossible to migrate both product variants *and* options simultaneously to WooCommerce. You must choose between migrating either the options or the variants during your WooCommerce data migration.

Note: Cart2Cart is not responsible for the performance of the Product Add-Ons plugin, nor are we affiliated with its developers.

Optimize Your WooCommerce Data Migration: Choosing Between Variants and Options

Understanding how Cart2Cart handles product options and variants is crucial for a smooth WooCommerce data migration. By default, product options are migrated as variants. However, utilizing the Product Add-Ons plugin offers a more efficient solution for managing product options directly within WooCommerce.

Benefits of Using Product Add-Ons for WooCommerce Data Migration

  • Avoid excessive product variants.
  • Streamline product management.
  • Maintain a clean and organized WooCommerce store.

Ready to Migrate Your Data to WooCommerce?

Start your free demo of our supported carts today and experience a seamless WooCommerce data migration with Cart2Cart! Start your free demo.

Need help with your WooCommerce data migration? Schedule a call with a migration expert.

More info
How to create product redirects after migration from/to WooCommerce?

How to Create Product Redirects After Data Migration from/to WooCommerce

During WooCommerce data migration, Cart2Cart offers the option to create product redirects to ensure a seamless transition for your customers. This helps maintain your SEO ranking by automatically redirecting customers and search engines to the new URLs. To enable this feature, you'll need to install the free "Redirection” plugin before starting your data transfer.

Installing the Redirection Plugin for WooCommerce Data Migration

  1. Install the plugin:
    • Enter your WooCommerce Admin Panel
    • Hold the mouse over Plugins in the Left Nav menu and choose Add New
    • Enter "Redirection" in the search field

    Searching for the Redirection plugin in WooCommerce for data migration

    • Click on the Install Now button

    Installing the Redirection plugin for WooCommerce data migration

    • Once the installation is finished, click on Activate

    Activating the Redirection plugin for WooCommerce data migration

    • Choose Installed Plugins from the Plugins tab
    • Find "Redirection" and click on Settings

    Accessing Redirection plugin settings for WooCommerce data migration

    • Press Start Setup button

    Starting the Redirection plugin setup for WooCommerce data migration

    • Check "Monitor permalink changes in WordPress posts and pages" and "Keep a log of all redirects and 404 errors". Click on Continue Setup

    Configuring Redirection plugin settings for WooCommerce data migration

    • Click on Finish Setup

    Finishing the Redirection plugin setup for WooCommerce data migration

    • Click on Finished, and your plugin is ready to use!
  2. Go to Cart2Cart Migration Wizard
  3. Choose “Create the 301 redirects on your target store after migration” additional option during your data migration setup.
  4. Launch Full migration

Additionally, we suggest implementing such settings in Permalinks menu in your WooCommerce admin panel:

- go to Settings->Permalinks, choose Post Name in the Common Settings section and Default in the Product Permalinks.

WooCommerce permalink settings for product redirects after data migration

Ready to migrate your store to WooCommerce? Start your free demo now!

More info
Can I map custom Order Status when migrating to/from WooCommerce?

Yes, with Cart2Cart, you can seamlessly migrate your store data, including the ability to map custom Order Statuses when migrating to or from WooCommerce. This allows you to maintain your unique order workflows. To achieve this, you'll need to create your custom order statuses in WooCommerce before initiating the data transfer, often with the help of a plugin like YITH WooCommerce Custom Order Status.

How to Map Custom Order Statuses During Your WooCommerce Data Migration

To create custom order statuses in your Target or Source WooCommerce store before your eCommerce migration, follow these steps:

  1. Purchase, download and unzip the plugin file.
  2. Upload the plugin folder into the directory wp-content/plugins/ in your WordPress site (with WooCommerce installed).
  3. Activate YITH WooCommerce Custom Order Status from the Plugins page.

After activation, you can create custom order statuses in the Order Status tab that appears after installing the plugin:

Creating custom order statuses for WooCommerce data migration

The created custom order statuses will then be visible in the WooCommerce -> Orders tab:

WooCommerce orders tab showing custom order statuses after data migration

Once you've created your custom order statuses, you’ll be able to map them within the Cart2Cart Migration Wizard during your shopping cart migration process.

Mapping custom order statuses in the Cart2Cart Migration Wizard

Please note: The YITH WooCommerce Custom Order Status plugin is a paid plugin. The pricing varies depending on the subscription plan, typically ranging from $59.99 to $139.99 per year. A subscription license provides you with one year of updates and support. Each installation of the plugin requires a license key.

Alternative Plugins: While YITH is a popular choice, other plugins are available for creating custom order statuses in WooCommerce. Explore the WordPress plugin repository to find a solution that best fits your needs.

Next Steps: Ready to migrate your store to or from WooCommerce? Start your free demo today or schedule a call with a migration expert for personalized assistance.

More info
What should I know about migration of product variants to WooCommerce?

Limitations of Product Variant Migration to WooCommerce

Migrating product variants to WooCommerce using data migration services has certain limitations due to the platform's architecture. Specifically, if a variable product has more than 1000 combinations during the WooCommerce import process, Cart2Cart will migrate the product as a simple product and skip all related options. This is to ensure the stability and performance of your WooCommerce store after the data migration.

Alternative: Migrate Product Options to WooCommerce Using Add-Ons

As an alternative to migrating product variants directly, you can migrate your product options to WooCommerce Add-Ons plugin. To set up this type of data migration, simply install and activate the plugin within your WooCommerce environment. Cart2Cart's data migration services can then transfer your product options to this plugin.

Important: When migrating to the Add-Ons plugin, your products will only have options in your admin section, and not variants. Due to technical constraints, it's not possible to migrate both product variants and options to WooCommerce simultaneously. You must choose between migrating WooCommerce product options or variants when using data migration services, but not both.

Need More Flexibility for Your WooCommerce Data Migration?

To extend the possibilities for migrating variable products to WooCommerce and to discuss your specific requirements for data migration services, contact the Cart2Cart Team. We offer customizations within our Support Packages to meet your unique needs.

Ready to migrate? Start your free demo now! Or Schedule a Call with Migration Expert to discuss your data migration needs.

More info
How to delete Cart2Cart migration module from the WooCommerce admin panel?

How to Remove the Cart2Cart Data Migration Module from WooCommerce

Need to remove the Cart2Cart data migration module from your WooCommerce store after completing your eCommerce data migration? Here's how:

Steps to Uninstall the Cart2Cart Module from WooCommerce:

Follow these simple steps to completely remove the Cart2Cart data migration module from your WooCommerce admin panel:

  1. Log in to your WooCommerce Admin Panel: Access your store's backend using your administrator credentials.
  2. Navigate to the Plugins Menu: In the left-hand navigation menu, find and click on "Plugins" and then select "Installed Plugins."
  3. Deactivate the Cart2Cart Module: Locate the Cart2Cart migration module in the list of installed plugins. Click the "Deactivate" link next to it. This will temporarily disable the module.
  4. Delete the Cart2Cart Module: After deactivation, the "Deactivate" link will be replaced with a "Delete" link. Click "Delete" to remove the module from your WooCommerce installation.
  5. Confirm Module Removal: WooCommerce will display a confirmation prompt. Confirm that you want to delete the module.

Step-by-step guide with images:

1. Log in to your WooCommerce admin panel.

2. Go to the Plugins menu and choose Installed Plugins.

3. Find the Cart2Cart module in the list and click on Deactivate.

Deactivating the Cart2Cart data migration module in WooCommerce

4. After deactivation, find the module again and click Delete.

Deleting the Cart2Cart data migration module in WooCommerce

5. Confirm the module removal.

Important Notes:

  • Deleting the module will remove all Cart2Cart-related files from your WooCommerce installation.
  • This process does not affect your migrated data. Your products, customers, and other data will remain in your new WooCommerce store.

Need help with your eCommerce data migration?

Cart2Cart supports migration to and from a wide variety of platforms, including Shopify, Magento, OpenCart, PrestaShop, and many more. See the full list of supported platforms here.

Ready to get started? Start your free demo now! Or, schedule a call with a migration expert to discuss your specific needs.

More info
Can I preserve order IDs whilst migrating to WooCommerce?

Can I preserve order IDs whilst migrating to WooCommerce?

Yes, Cart2Cart, a leading data migration service, allows merchants to preserve order IDs when performing a migration to or from WooCommerce. This ensures continuity and simplifies order tracking within your new or existing WooCommerce store. To enable this feature, select the Preserve order IDs on the Target Store option during the Migration Wizard setup. This option is only available if the free WooCommerce Sequential Order Number plugin is installed on your target WooCommerce store.

After the migration, each of your order IDs will receive an additional unique order number to prevent conflicts with existing post IDs in WooCommerce. This additional number will be visible in your WooCommerce admin panel but will not affect your original system order ID, which is included in the order's URL.

If you forget to install the plugin before starting the data migration but have already selected the "Preserve order IDs" option, you can still install the plugin afterward. The order IDs will be preserved during the migration process.

Ready to migrate your store to WooCommerce and preserve your valuable order data? Start your free demo now or schedule a call with our migration expert to discuss your specific needs.

More info
How to migrate 301 SEO URLs from/to WooCommerce?

Migrating 301 SEO URLs during WooCommerce Data Migration

Cart2Cart supports the migration of 301 SEO URLs to or from WooCommerce as an additional option, facilitating a seamless eCommerce data migration. To enable this, you'll need to install the free "Redirection" plugin.

  1. Install the "Redirection" plugin (refer to the plugin page for detailed instructions).
  2. Go to the Cart2Cart Migration Wizard.
  3. Choose the "Migrate 301 SEO URLs of categories and products" additional option.
  4. Launch the Full Migration.

Please note: To migrate redirects from WooCommerce, the "Redirection" plugin must be installed and configured on your Source Cart (WooCommerce) before initiating the data transfer.

This process also applies to migrations to/from other platforms like Shopify.

Ensuring SEO During Your WooCommerce Data Migration

Migrating your online store can be daunting, especially when considering the impact on your SEO. Cart2Cart’s option to migrate 301 SEO URLs ensures that your hard-earned search engine rankings are preserved during the eCommerce data migration process. By migrating these redirects, you prevent broken links and maintain a seamless user experience, which is crucial for SEO.

Ready to migrate your store to or from WooCommerce? Start your free demo today!

More info
Can I migrate Reward points to WooCommerce?

Can I Migrate Reward Points to WooCommerce?

Yes, there is an opportunity to migrate reward points to WooCommerce using Cart2Cart, the #1 shopping cart migration service.

How to Migrate Reward Points to WooCommerce?

To ensure the accurate transfer of reward points during your data migration, you'll need to purchase and install the "SUMO Reward Points" plugin *before* initiating the migration. This plugin provides the necessary functionality within WooCommerce to handle the imported reward point data.

What Types of Reward Points Can Be Migrated?

Cart2Cart's data migration service supports the migration of the following types of reward points:

  1. Reward points customers can use to make a purchase.
  2. Reward points that are awarded to customers after a purchase.
  3. Reward points that customers already possess in their accounts.

By migrating these reward points, you can ensure a seamless transition for your customers and maintain their loyalty in your new WooCommerce store.

Ready to migrate your store to WooCommerce? Start your free demo now! Or, schedule a call with a migration expert to discuss your specific needs.

More info
How to Add Variable Products to WooCommerce?

Among all the WooCommerce offered features, the Product Variation utility is one of the most important. For instance, if a T-shirt is a variable product, it’s available in a certain number of alternating colors and sizes. In this tutorial, we’ll guide you through the steps of its implementation and take a precise look at some interesting details of this feature, helping you understand how to effectively manage product variations for your products.

Steps

WooCommerce Product Data settings for variable products

Step 1 - Set a product type to 'Variable' for the target product. Go to your WordPress admin dashboard -> Products -> Add a Product and select 'Variable product' from the Product Data dropdown. Once you're done, you'll notice a change in the user interface as shown in the screenshot above.

WooCommerce Attributes tab for variable products

Step 2 - Navigate to the Attributes Tab. Define the attributes of the variable product by going to WP admin dashboard-> Products-> Attributes tab. Clicking the 'Add' button will redirect you to a new page.

Defining attributes for WooCommerce variable products

Step 3 - Define Attributes for the Variable Products. The values assigned to attributes will appear as options for the respective variable product. When you're finished defining attributes, select the 'Used for variations' checkbox for each attribute. This informs WordPress that the attributes belong to the variable product.

Adding variations to WooCommerce variable products

Step 4 - Start Adding Variations. After saving the variable product, continue by adding variations. Go to WP admin dashboard-> Products-> Variations tab and click on 'Add Variation' button. Specify the values for each variation and click 'Save changes'. With that, you're finished displaying variations for the variable product.

Mastering product variations is crucial for showcasing your WooCommerce products effectively. Need to migrate your products to WooCommerce? Check out Cart2Cart's WooCommerce migration service and start your free demo today!

More info
Some of my posts are deleted from WooCommerce after migration. What happened?

Why are some of my WordPress posts deleted after eCommerce Data Migration?

WordPress organizes all content within the "Posts" table, categorizing them into various post types. If standard WordPress posts are mistakenly assigned to post types like "Product," "Customer," or "Order," these posts may be inadvertently removed during an eCommerce data migration to another platform. This occurs because the migration process is designed to transfer specific eCommerce data types, and it might interpret these incorrectly categorized posts as belonging to those types.

Note: This issue is more likely to occur when the "Clear current data on Target Store before Migration" option is selected during the migration process. This option removes all existing data on the target store to ensure a clean migration.

How to prevent losing WordPress posts during eCommerce Data Migration?

Before initiating the eCommerce data migration, carefully review your WordPress posts and ensure they are correctly assigned to the appropriate post type ("Post"). If you find any posts incorrectly categorized as "Product," "Customer," or "Order," reassign them to the "Post" type. This will prevent them from being inadvertently deleted during the migration process.

If you've already completed the migration and lost posts, check your WordPress database to see if they are still present but miscategorized. You may be able to restore them manually or by using a database management tool.

To avoid this, consider using the migration options to migrate only the needed data.

Need help with your eCommerce data migration? Schedule a call with a migration expert or start your free demo today!

More info
Can I migrate metadata to WooCommerce?

Can I Migrate Metadata to WooCommerce?

Yes, Cart2Cart supports metadata migration as part of its eCommerce data migration service. Store owners can seamlessly transfer meta titles, meta descriptions, and meta keywords to and from WooCommerce. Metadata is crucial for SEO, influencing how search engines understand and rank your products and categories. Migrating it ensures your WooCommerce store retains its search engine visibility.

How to Migrate Metadata to WooCommerce Using Cart2Cart

To ensure a smooth metadata migration to WooCommerce, you'll need to install a free SEO plugin, such as Yoast SEO or All in One SEO Pack, before initiating the eCommerce data migration. These plugins provide the necessary fields for storing and displaying the imported metadata within WooCommerce.

With Cart2Cart, you can migrate a wide range of data, including:

  • Products (including names, descriptions, images, and variants)
  • Categories
  • Customers
  • Orders
  • Blog posts
  • CMS Pages
  • And of course, Metadata!

Why is Metadata Migration Important for WooCommerce?

Migrating metadata along with your other store data is essential for maintaining your website's SEO performance. Without it, you risk losing valuable search engine rankings and organic traffic. By transferring meta titles, descriptions, and keywords, you ensure that your WooCommerce store remains optimized for search engines from day one.

Ready to Migrate Your Store to WooCommerce?

Start your free demo of eCommerce data migration to WooCommerce today and experience a seamless transition! Start your free demo now.

Need help with your migration? Schedule a call with a Cart2Cart migration expert for personalized assistance.

More info
How to migrate manufacturers from and to WooCommerce?

Cart2Cart supports migration of manufacturers to and from WooCommerce shopping cart. However, to enable the migration of manufacturers on your store, you should install either Perfect Brands for WooCommerce plugin (it's free) or the WooCommerce Brands plugin (it's paid).

So, if you wish to migrate manufacturers to/from WooCommerce, follow the steps below:

  1. Download and install the module.
  2. Activate installed plugin in your WordPress admin panel.
  3. Choose manufacturers on the step of entities selection on Migration Wizard.
  4. Proceed through the Full Migration.

Note. If you didn’t manage to install the module before the migration but have chosen the category “Manufacturers” during the migration to WooCommerce, you can activate the module afterward and get the required entities on your new store.

If there are any questions, please feel free to contact our Support Team for help.

More info
How to upload the Connection Bridge for WooCommerce migration?

How to Upload the Connection Bridge for WooCommerce Data Migration?

Since WooCommerce is a WordPress plugin, you need to upload the Connection Bridge to your WordPress root directory (e.g., http://[yourstoreurl]/) during your WooCommerce data migration with Cart2Cart. The Connection Bridge facilitates secure data transfer between your WooCommerce store and the Cart2Cart platform, ensuring a smooth and reliable eCommerce data migration process.

WooCommerce Connection Bridge for eCommerce Data Migration

Detailed Steps for Uploading the WooCommerce Connection Bridge for Seamless Data Migration

To ensure a successful eCommerce data migration to or from WooCommerce, follow these steps to upload the Connection Bridge:

  1. Access your WordPress root directory: Use an FTP client (like FileZilla) or your hosting provider's file manager to access the main directory of your WordPress installation.
  2. Locate the root directory: This is typically the directory where your wp-config.php file is located.
  3. Upload the Connection Bridge: Drag and drop the Connection Bridge file into the root directory.
  4. Verify the upload: Ensure the file is successfully uploaded and accessible through your browser (e.g., http://[yourstoreurl]/bridge.php, if the bridge file is named 'bridge.php').

Once the Connection Bridge is uploaded, you can proceed with your WooCommerce data migration using Cart2Cart. Our service supports the latest versions of WooCommerce, ensuring compatibility and a seamless migration experience. If you encounter any issues, our support team is available to assist you.

Next Steps: Ready to migrate your data to or from WooCommerce? Start your free demo now! Or Schedule a Call with a Migration Expert to discuss your specific needs.

More info
Are there any shopping cart features that may limit migration options?

Yes, it is a common situation that shopping cart functionality limits migration opportunities. The following shopping carts don’t allow the creation of extra fields: Shopify, BigCommerce, osCommerce, CRE Loaded, Loaded 7, Zen Cart, WP e-Commerce. Therefore, Cart2Cart can’t import extra fields to those platforms.

You can only choose default order statuses and can’t create new ones on: Shopify, Yahoo Store, Volusion, 3dcart. That’s why merchants will only be able to map order statuses on the source store with default ones on these carts.

When performing migrations to WooCommerce, remember that you’ll only be able to map all order statuses from your source cart with the default ones on WooCommerce stores.

Shopify Data Migration Considerations

When migrating to Shopify, be aware of the following limitations:

  • You can transfer no more than 100,000 redirects from your source cart.
  • You can transfer no more than 65,000 orders per customer.
  • Each product description should contain fewer than 65,000 characters on the source store; otherwise, the product will be skipped during migration.

Note: If your customers and/or orders contain invalid data in shipping or billing addresses, our service will replace them with default details suitable for Shopify. The original information won’t be lost, however; it’ll be moved to Additional details -> Note for each appropriate customer and order.

Additionally, Shopify’s product Type field is limited to 255 characters.

The platform takes product types from your source cart categories, so if a product on your old store is in multiple categories simultaneously, it might be skipped during migration.

Ready to migrate to Shopify? Start your free demo now or schedule a call with our migration expert to discuss your specific needs.

Shopify Data Migration Limitations

More info
Is there a possibility to migrate reviews to WooCommerce?

Can I Migrate Reviews to WooCommerce with Cart2Cart?

Yes, Cart2Cart supports the comprehensive migration of customer reviews when moving to or from WooCommerce. This includes not only the review text itself but also the associated review ratings, ensuring you maintain valuable social proof and customer feedback during your platform transition.

Migrating reviews to WooCommerce helps preserve your store's reputation and build trust with new customers on the platform. Cart2Cart ensures a seamless transfer of this critical data, minimizing disruption to your business.

How to Migrate Reviews to WooCommerce Using Cart2Cart

The review migration process is automatically included when you select reviews as one of the entities to migrate during your Cart2Cart migration setup. Here's a simplified overview:

  1. Set up your Source and Target carts: Specify your current e-commerce platform and your new WooCommerce store.
  2. Choose the data to migrate: Select "Reviews" from the list of available entities.
  3. Start the Demo Migration: Run a free demo migration to see how your reviews will look in WooCommerce.
  4. Perform the Full Migration: Once satisfied, proceed with the full migration to transfer all your reviews.

With Cart2Cart, migrating your customer reviews to WooCommerce is a straightforward process. Start your free demo today to see how easily you can transfer your data and maintain your store's valuable customer feedback.

More info
How can I enable Custom fields in WooCommerce?

How to Display Custom Fields After WooCommerce Data Migration

Cart2Cart, the automated data migration service, facilitates the transfer of custom fields to your WooCommerce store. After performing a data migration to WooCommerce, you might notice that custom fields aren't displayed by default. This guide explains how to enable them.


WooCommerce admin panel showing custom fields after data migration

WooCommerce doesn’t display Custom fields by default.

To enable this option you have to:

  • go to "store/wp-content/plugins/woocommerce/templates/single-product/tabs"
  • find file "additional-information.php"
  • add the following code:
echo '';
foreach(get_post_meta($post->ID, $key, true) as $key => $attr) {if(strpos($key, "_") !== 0) {echo '';echo '';echo '';}}echo '
'.$key.' '.array_shift($attr).'
';

Adding code to WooCommerce template to display custom fields after data migration

Ready to migrate your store to WooCommerce? Start your free demo now!

More info
Will my customer groups be migrated to WooCommerce?

Will my customer groups be migrated to WooCommerce?

Yes, Cart2Cart supports the migration of customer groups to WooCommerce (and other WordPress e-commerce plugins) as part of its comprehensive data migration services. We provide the functionality to map your source store's customer groups to the corresponding roles within your target WooCommerce store. This ensures your customer segmentation is preserved during the migration process.

However, there's a key consideration for these transfers. WooCommerce, by default, provides a limited set of basic customer roles. To maintain a wider range of customer groups from your source platform, you'll need to create these roles in WooCommerce before initiating the data migration. For this purpose, we recommend using a free plugin like User Role Editor. This will allow you to create custom customer roles that match your existing customer groups, ensuring a seamless transition of your customer data.

To ensure a smooth data migration of your customer groups, we recommend the following steps:

  1. Review your customer groups: Identify all the customer groups in your source store.
  2. Install User Role Editor: Install and activate the User Role Editor plugin in your WooCommerce store.
  3. Create corresponding roles: Use the plugin to create customer roles in WooCommerce that match the names and characteristics of your customer groups in the source store.
  4. Start your data migration: Use Cart2Cart's data migration service to migrate your data.
  5. Map customer groups: During the migration process, map your source store's customer groups to the newly created roles in WooCommerce.

Ready to migrate your store? Start your free demo now and see how easy it is to migrate your customer groups and other data to WooCommerce with Cart2Cart.

If you have any questions about migrating customer groups or need assistance with the process, please contact our support team via live chat or schedule a call with a migration expert.

More info
Hvor finner jeg Mystore.no Client ID, Secret og Authorization Code?

Click here for the English version

For å kunne migrere data til Mystore.no trenger du API-detaljene for din butikk: Client ID, Client Secret og Authorization Code. Følg denne stegvise manualen for å få til dette:

    1. For å komme i gang, gå til Mystore API.
Mystore API Login for data migration
    1. Skriv først inn nettbutikknavnet ditt under “Butikk”. Dette er samme som du skrev inn i onlineregistreringen.
      Videre skriver du inn samme detaljene som du bruker for å logge inn i ditt Mystore.no Kontrollpanel. Epostadresse og Passord. Videre klikk på 'Logg Inn'.
    2. I seksjonen “OAuth Clients” velg “Create New Client”.
Create New Client in Mystore API for data migration
    1. I feltet “Name” skriv inn “Сart2Сart” og lim inn følgende link inn i feltet “Redirect URL”: https://newapp.shopping-cart-migration.com/auth/#sign-up
Cart2Cart Redirect URL for Mystore data migration
    1. Etter at du har opprettet “new client”, kopier Client ID og Secret og lim dette inn i de samsvarende feltene i Cart2Cart Migration Wizard.
Copy Client ID and Secret for data migration
    1. Etter du har fylt inn Client ID og Client Secret fields, klikk på “Grant Access”. Dette vil sende deg tilbake til Mystore API igjen. Om du blir bedt om det, logg inn igjen med Store Name, Email og Password. Klikk så “Logg Inn”.
Grant access to Mystore API for data migration
    1. Klikk på “Authorize” for å gi Сart2Сart tilgang til din Mystore.no-nettbutikk.
Authorize Cart2Cart for Mystore data migration
    1. Etter autoriseringen vil du sendes til Migration Wizard med en Authorization Code ferdigutfylt i dette feltet. Nå når alle API-detaljene er på plass er du klar for å velge entiteter ved å klikke på Choose Entities.
Data migration Authorization Code in Migration Wizard

Ready to migrate your data to Mystore.no? Start your free demo now!

More info
Hva må tas hensyn til ved en migrasjon til Mystore.no?

Click here for the English version

Considerations for Mystore.no Data Migration with Cart2Cart

When performing a data migration to Mystore.no with Cart2Cart, keep the following points in mind to ensure a smooth transition. Cart2Cart streamlines the process of moving your online store data.

Important Notes for Migrating to Mystore.no

  1. Customer Address Fields: If the "First Name," "Last Name," or "City" fields are empty under "Customer address," the migration will populate them with "N/A" (Not available).
  2. Order Address and Customer Info: The "First name," "Last name," "City," and "Country" fields in "Order Address" and "Order Customer Info" are mandatory. If these are empty after migration, Mystore.no will autofill them based on its default standards:
    • First name — N/A
    • Last name — N/A
    • City — City
    • Country — Sweden
  3. Product Categories: All Products not assigned to a Product Category in your current store will be automatically placed in a hidden Category within your Mystore.no store. You will need to manually sort these products into the correct categories after the migration.
  4. Reviews: Before migrating to Mystore.no, verify that Reviews are linked to both Product and Customer entities. Otherwise, these reviews will be skipped during the migration process.
  5. Orders: Orders not linked to a customer will also be skipped. This might occur if a customer checked out as a guest or if the customer account has been deleted.
  6. Clear Current Data: The "Clear current data on Target Store before Migration" option may take longer to execute during a migration to Mystore.no compared to other platforms.
  7. URL Duplication: Because Mystore.no URLs do not include category information, some URLs might be duplicated. In such cases, a number (1, 2, etc.) will be appended to the end of the duplicated URLs to ensure uniqueness.

Example of URL Duplication During Mystore.no Migration

Consider the following two product URLs in your current store:

http://www.source-store.com/men-belts/belt-armani
http://www.source-store.com/women-belts/belt-armani

The migration to Mystore.no will see these as duplicates because they would both become:

http://www.source-store.com/belt-armani

To prevent duplication, a number will be added to the end of one of the URLs:

http://www.source-store.com/belt-armani
http://www.source-store.com/belt-armani-1

Ready to migrate your store to Mystore.no? Start your free demo now!

More info
What are Mystore.no migration peculiarities?

Click here for Norwegian version

Mystore.no Data Migration: Important Peculiarities to Consider

Migrating to Mystore.no involves some specific considerations. Please review the following points to ensure a smooth eCommerce data migration:

  1. Customer Address Information: If the First Name, Last Name, or City fields are empty in the “Customer address” on your source cart, they will be filled with “N/A” after the migration to Mystore.no.
  2. Order Address and Customer Information: The First name, Last name, City, and Country fields are mandatory in the “Order Address” and “Order Customer Info” sections. If these fields are empty, Mystore.no will automatically populate them according to its default settings:
    • First name — N/A
    • Last name — N/A
    • City — City
    • Country — Sweden
  3. Product Categories: Any Products in your source cart that are not assigned to a Product Category will be assigned to an automatically created hidden Category within your Mystore.no store.
  4. Product Reviews: Before initiating the Mystore.no import, verify that your Reviews are linked to both the Product and Customer entities. Reviews lacking these associations will be skipped during the migration process.
  5. Order Associations: Orders that are not linked to any customer will be skipped. This can occur if an order was placed by a guest or if the customer account has been deleted.
  6. "Clear Current Data" Option: The “Clear current data on Target Store before Migration” additional option may require more time to complete during a Mystore.no import compared to other platforms.
  7. URL Structure and Duplicates: Because Mystore.no's URL structure doesn't include a category path, some URLs may become duplicated after the migration. In such cases, a numerical suffix (e.g., -1, -2, etc.) will be added to differentiate them.

    Example:

    Consider these product URLs in your source cart:

    http://www.source-store.com/men-belts/belt-armani

    http://www.source-store.com/women-belts/belt-armani

    After migration to Mystore.no, these URLs will be considered duplicates, resulting in:

    http://www.source-store.com/belt-armani

    http://www.source-store.com/belt-armani

    To resolve the duplication, number suffixes will be added to the URL structures, such as:

    http://www.source-store.com/belt-armani

    http://www.source-store.com/belt-armani-1

Ensure a smooth and accurate eCommerce data migration to Mystore.no by keeping these points in mind. Ready to migrate? Start your free demo now!

More info
Where can I get CoreCommerce store API details?

Where can I get CoreCommerce store API details for data migration?

To perform an automated CoreCommerce data migration with Cart2Cart, you'll need to provide your CoreCommerce store's API details in the Migration Wizard. These details allow Cart2Cart to securely connect to your store and transfer your data.

Here's a list of the required CoreCommerce store details:

  • Username
  • Password
  • XML Key
  • Store Name
  • Connection URL

To obtain these credentials, you'll need to create an API user within your CoreCommerce store. Follow these step-by-step instructions:

How to Create an API User in CoreCommerce for Data Migration

  1. Log in to your CoreCommerce backend. Access your CoreCommerce administration panel using your store's URL and admin credentials.

  2. Navigate to Store API settings. Click on Settings, then on the Settings page, click on Store API. This will take you to the API configuration section.

    CoreCommerce Settings - Navigate to Store API for data migration
  3. Create your API User credentials. You'll need to create a Username, Password, and XML Key. Enter your desired values into the corresponding fields. Make sure to choose strong, unique credentials for security purposes.

    CoreCommerce Create API User - Enter Username, Password, and XML Key for data migration
  4. Copy Store Name and Connection URL. Copy the existing Store Name and Connection URL from the provided fields. These are essential for establishing the connection between Cart2Cart and your CoreCommerce store. Click the “Save” button to save your API user details.

  5. Enter the details into the Cart2Cart Migration Wizard. Return to the Cart2Cart Migration Wizard and paste the Store Name and Connection URL into the appropriate fields. Also, enter the Username, Password, and XML Key you just created.

With these API details configured, you're now ready to proceed with your CoreCommerce data migration using Cart2Cart. Good luck!

Ready to migrate your data to or from CoreCommerce? Start your free demo now!

Need assistance? Contact our support team via Live Chat or Schedule a Call with a Migration Expert.

More info
Can I migrate data from stores installed on WordPress Multisite?

Can I Migrate Data from WordPress Multisite Stores?

Yes, WordPress Multisite data migration is possible with Cart2Cart, but only through our Data Migration Service Package. This ensures a smooth and accurate transfer, as it includes hands-on assistance from our expert tech team.

Due to the complexities of WordPress Multisite configurations, automated migration isn't available. Our Data Migration Service Package provides the necessary expertise to handle these technical restrictions effectively.

To learn more about migrating your WordPress Multisite store's data and to get a personalized quote, please contact our 24/7 support team. We're here to help you plan your migration and answer any questions you may have.

Next Steps:

More info
Why do I have more customers to transfer from Weebly?

Why Do I See More Customers to Transfer from Weebly Than Expected?

During the Weebly migration setup, Cart2Cart estimates the number of customers by equating it to the number of orders. This is done to expedite the initial setup process. Therefore, in the Migration Wizard, the displayed quantity of Customers will initially match the quantity of Orders.

This estimation helps streamline the initial setup for your Weebly data migration. If you require a precise customer count before initiating the full migration, we recommend running a demo migration. This will allow you to verify the data and ensure accurate customer counts are reflected in the target store.

If you have any questions regarding this, feel free to contact our Support manager.

Next Steps for Your Data Migration

Ready to migrate your data with Cart2Cart?

More info
Will Cart2Cart migrate my product images to CoreCommerce?

Will Cart2Cart Migrate My Product Images to CoreCommerce?

Due to CoreCommerce API limitations, the Cart2Cart service can migrate only one main product image and one product image thumbnail to CoreCommerce.

For example, if a product in your source cart has 10 images, only one main image and one thumbnail will be migrated to CoreCommerce.

If your products contain more than one image, you'll need to import the remaining images manually to CoreCommerce. Here are a few options:

  • Manual Upload: You can manually upload the remaining product images through the CoreCommerce admin panel.
  • CSV Import: CoreCommerce supports importing product data, including images, via CSV files. You can contact the Cart2Cart support team for assistance in obtaining an archive of your product images. You can then use this archive to create a CSV file that can be imported into CoreCommerce.

For technical assistance and guidance on importing product images to CoreCommerce, please contact our 24/7 support team. Our support staff can provide you with access to an archive of all your product images and guide you through the import process.

Ready to migrate your store to CoreCommerce? Start your free demo and see how easy shopping cart migration can be!

More info
How can I export data from Network Solutions?

To migrate your data from Network Solutions, you'll need to export your store data as CSV files and upload them to the Cart2Cart Migration Wizard. Cart2Cart streamlines the process of migrating your products, customers, orders, categories, and other essential data to a new e-commerce platform.

Here's a step-by-step guide on how to export your data from Network Solutions for a seamless data migration:

How to Export Products from Network Solutions for Data Migration

  1. Log in to your Network Solutions admin panel and navigate to the Export Data section.
  2. Specify the products you want to export. Choose "All Products" to export your entire product catalog.

Network Solutions admin panel - Export Products for data migration

  1. Select "CSV" as the file type.
  2. Choose "Select all" (recommended) or specify the product fields you want to export. Then, click the "Export file" button.

Network Solutions product export options for data migration

How to Export Customers from Network Solutions for Data Migration

Exporting customers follows a similar process to exporting products:

  1. In the Export Section, choose "Customers."
  2. Select "CSV" as the export format and click the "Export file" button.

Network Solutions customer export options for data migration

How to Export Orders from Network Solutions for Data Migration

  1. In the Export section, choose "Orders."
  2. Enter a specific date range for the orders you want to migrate, or select a range from the drop-down list.

Network Solutions order export options for data migration

  1. Choose all "Order Statuses."
  2. Select "CSV" as the format and click "Export file."

How to Export Categories from Network Solutions for Data Migration

To export your categories, follow these steps:

  1. Choose "Categories" in the Export Section.
  2. Select "CSV" as the export format and click the "Export file" button.

Once you've completed these steps for all necessary entities, you'll be ready to upload your CSV files to the Cart2Cart Migration Wizard and begin your data migration. You can migrate to various platforms such as Shopify, WooCommerce, or Magento.

Ready to start your data migration? Try our free demo or schedule a call with a migration expert today!

More info
How can I export products from Shopware?

Exporting Products from Shopware for Data Migration

Need to export your products from Shopware for a data migration? Here's how to easily export your product data, which you can then use to migrate to another platform using a service like Cart2Cart.

    1. First, download the free Shopware “Import/Export” module from the Shopware app store. This module allows you to export your product data in XML or CSV formats, which are compatible with Cart2Cart.
Shopware import export products CSV
    1. In the “Export” section, choose the CSV format. Keep in mind that in Shopware, products are referred to as “Articles.”
Selecting CSV format for Shopware product export
  1. When you've selected the products you want to export from Shopware to CSV, start the export by clicking the “Export starten” button. A progress bar will display the import process of your products to CSV.
Shopware product export progress bar

For more detailed instructions, consult the Shopware Community or contact the Shopware support team. Once you have your CSV file, you can use Cart2Cart to migrate your products to your new platform.

Ready to migrate your data? Start your free demo with Cart2Cart today!

More info
Is multilanguage migration to Shopware possible?

Multilingual Data Migration to Shopware: Is It Possible?

Yes, Cart2Cart supports the Shopware data migration of multiple languages. If you're looking to switch data, including multiple languages, to your Shopware store, you can migrate from various platforms including Magento, OpenCart, osCommerce, ThirtyBees, VirtueMart, WooCommerce, WP eCommerce, X-Cart, xt:Commerce, and Zen Cart. Cart2Cart simplifies the process of migrating your store's data, ensuring a smooth transition to Shopware.

For a complete list of source carts that support multilingual data migration, please visit the Cart2Cart Multiple Languages Migration page.

Please note that Shopware includes only English and German language packs by default, and these may require separate installation. Additional language packs are available, but they might be a paid add-on. You can find and download them from the Shopware Store.

Ready to migrate your store to Shopware? Start your free demo now and see how easy the data migration process can be with Cart2Cart!

More info
What are the peculiarities of migration from Squarespace?

Q: Can I migrate Product Additional Info from Squarespace?

A: Yes, Cart2Cart supports the migration of Product Additional Info from Squarespace. There are, however, a few peculiarities. From the additional info section, we migrate only basic content blocks like: Text, Markdown, Quote, Image, Video, Audio, and Embed.

Squarespace additional info basic blocks for data migration

Other content blocks like Gallery, Summary, Chart, and Social blocks cannot be transferred using Cart2Cart's data migration service.

Note that additional information will be migrated as custom attributes (extra fields). In the Target store, these extra fields will be named custom fields 2, 3, 4, 5…

Q: Can I migrate Downloadable Products from Squarespace?

A: Currently, Cart2Cart doesn’t directly support the transfer of Downloadable products like music files, photos, eBooks, software, etc. However, information about Downloadable products (product name, description, price) can be moved to the Simple product section on a Target store during data migration.

Service type products can be migrated to a Target store as Virtual products if the platform supports such an option. Consider exploring migration options to see the possibilities.

Ready to migrate your store? Start your free demo now!

More info
What are the peculiarities of users migration from Volusion?

When performing an eCommerce data migration from Volusion, the Cart2Cart service migrates only users with the "Customer" status. This status is designated by a "C" in the "accesskey field" of your CSV users file. Users with other statuses, such as "Partner," are skipped during the automated process.

Here's an example illustrating the "Customer" status designation in your Volusion user data:

Example of Volusion user data with 'C' for Customer status for eCommerce data migration

Will Orders Placed by Skipped Customers be Migrated During eCommerce Data Migration?

Yes, all your orders will be migrated during the eCommerce data migration. However, orders made by users who were skipped due to their status (e.g., "Partner") will be associated with a "Guest" user group. Customer details will not be available for these orders.

How Can I Migrate Customers with Other Statuses During eCommerce Data Migration?

To migrate customers with statuses other than "Customer," you can opt for a customized eCommerce data migration. This is offered through our Data Migration Support Package, which allows for tailored solutions to meet your specific needs. This also covers the migration of customer groups.

For any questions or assistance related to your eCommerce data migration, please don't hesitate to contact our 24/7 support staff.

Ready to migrate your store? Start your free demo today!

More info
Where can I get Mystore.no Client ID, Secret and Authorization Code?

Click here for Norwegian version

To enable data migration to Mystore.no, you'll need to provide your store's API details: Client ID, Client Secret, and Authorization Code. Follow this step-by-step tutorial to learn how to obtain this information.

How to Obtain Mystore.no API Credentials for Data Migration

  1. Go to the Mystore API login page.
    Mystore API Login Page for Cart2Cart Data Migration
  2. Enter your Store Name (Butikk) as you entered it during store registration. Then, enter your Mystore.no admin credentials: Admin email (Epostadresse) and Admin password (Passord). Click 'Logg Inn'.
  3. In the “OAuth Clients” section, choose “Create New Client”.
    Create New Client in Mystore.no API for Data Migration
  4. In the “Name” field, type “Cart2Cart” and paste the following link into the Redirect URL field: https://newapp.shopping-cart-migration.com/login?sign-up
    Name and Redirect URL fields for Cart2Cart API Client in Mystore.no
  5. After creating the new client, copy the Client ID and the Secret and paste them into the corresponding fields in the Cart2Cart Migration Wizard.
    Client ID and Secret fields in Mystore.no API
  6. After filling in the Client ID and Client Secret fields, click “Grant Access”. You will be redirected to the Mystore API again. If required, provide your Store Name, Email, and Password again. Then click “Logg Inn”.
    Mystore.no login screen
  7. Click “Authorize” to permit Cart2Cart to access your Mystore.no store.
    Authorize Cart2Cart access to your Mystore.no store
  8. After authorizing, you’ll be redirected to the Migration Wizard with the Authorization Code field filled in automatically. Now that all the necessary API information is provided, you're ready to proceed with entity selection by clicking Choose Entities.
Grant Access and Choose Entities in Cart2Cart Migration Wizard

Ready to migrate your store to or from Mystore.no? Start your free demo now or schedule a call with a migration expert to discuss your specific needs.

More info
Can I perform SEO migration from BigCommerce to Magento (1.x, 1.9, 2)?

Yes, you can migrate SEO URLs from BigCommerce to Magento 1.x - 2.x by picking “Migrate categories and products SEO URLs” additional option when configuring your data migration.

SEO Migration from BigCommerce to Magento 1.x

Q: How will my URLs look after migrating BigCommerce to Magento 1.x?

Here’s an example of how the “Migrate categories and products SEO URLs” option works.

Let’s say you have a product named “Able Brewing System” on your BigCommerce store with this URL:
http://bigcommerce-store.com/able-brewing-system/

Example of BigCommerce URL before Magento 1.x data migration services

After migrating to Magento 1.x with the “Migrate SEO URLs” option, the URL for “Able Brewing System” will be:
http://magento-store.com/index.php/able-brewing-system.html/

Example of Magento 1.x URL after BigCommerce data migration services

Q: How do I remove the .html suffix from product and category links in Magento 1.x?

By default, Magento 1.x URLs have the .html suffix. You can remove it in your Magento Admin Panel.

Log in to your Magento Admin Panel and go to: System -> Configuration -> Catalog (from the menu on the left) -> Search Engine Optimizations.

Magento 1.x Search Engine Optimizations settings

Delete the .html suffix from the “Product URL Suffix” and “Category URL Suffix” fields and save the changes.

Removing .html suffix in Magento 1.x for BigCommerce data migration services

Afterward, clear your Cache and perform Reindex to apply the changes. See detailed instructions on how to do that.

Q: How do I remove /index.php/ from my product and category links on Magento 1.x?

Magento URLs often include /index.php/. To remove it, modify your .htaccess file.

Go to your Magento root folder via FTP, find the .htaccess file, and open it. Look for the block. If present, paste this code after the line containing RewriteBase:

RewriteRule ^index\.php$ - [L] RewriteCond %{REQUEST_FILENAME} !-f RewriteCond %{REQUEST_FILENAME} !-d RewriteRule . /index.php [L]

If you don’t find the block, paste the code at the bottom of the .htaccess file:

RewriteEngine On RewriteBase / RewriteRule ^index\.php$ - [L] RewriteCond %{REQUEST_FILENAME} !-f RewriteCond %{REQUEST_FILENAME} !-d RewriteRule . /index.php [L]

Clear your Cache and Reindex afterward. See detailed instructions.

SEO Migration from BigCommerce to Magento 2

Q: How will my URLs look after migrating BigCommerce to Magento 2?

Here’s an example of how the “Migrate categories and products SEO URLs” option works for Magento 2 data migration.

Let’s say you have a product named “Sample Smith Journal 13” on your BigCommerce store with this URL:
http://bigcommerce-store.com/shop-all/sample-smith-journal-13/

BigCommerce URL example before data migration services to Magento 2

After migrating to Magento 2 with the “Migrate SEO URLs” option, the URL for “Sample Smith Journal 13” will be:
http://magento-store.com/shop-all/sample-smith-journal-13.html

Magento 2 URL example after data migration services from BigCommerce

Q: How do I remove the .html suffix from product and category links in Magento 2?

By default, Magento 2 URLs have the .html suffix. You can remove it in your Magento 2 Admin Panel.

Log in to your Magento 2 Admin Panel and go to: Stores -> Configuration -> Catalog -> Search Engine Optimization.

Here, delete the .html suffix from the “Product URL Suffix” and “Category URL Suffix” fields and leave them empty. Save the changes.

Removing .html suffix in Magento 2 for BigCommerce data migration services

Afterward, clear your Cache and perform Reindex to apply the changes. See

More info
Can I perform SEO migration from BigCommerce to WooCommerce?

Yes, you can migrate SEO URLs from BigCommerce to WooCommerce during your data migration by selecting the “Migrate categories and products SEO URLs” additional option provided by Cart2Cart.

How Will My URLs Look After the Data Migration?

Here’s an example of how the “Migrate categories and products SEO URLs” option works in practice when performing your shopping cart migration.

Let’s say you're selling a product named “Tesla THREE 150w FULL KIT **BEST IN CLASS**” on your BigCommerce store. Its URL is:
http://bigcommerce-store.com/tesla-three-150w-full-kit-best-in-class/

BigCommerce to WooCommerce SEO URL migration example 1

After migrating to WooCommerce with the “Migrate SEO URLs” option selected, the product URL will look like this:
http://woocommerce-store.com/starter-kits/tesla-three-150w-full-kit-best-in-class

BigCommerce to WooCommerce SEO URL migration example 2

Preserving URL Structure During Data Migration from BigCommerce to WooCommerce

Due to the specifics of the WordPress CMS, it’s impossible to preserve the exact same URL structure. However, you can customize it to some extent.

In the example above, /starter-kits/ represents the product’s category name. You can modify the URL structure by logging into your WordPress admin panel and navigating to Settings -> Permalinks.

For example, entering `/shop` in the Custom Base field will result in URLs like:
http://woocommerce-store.com/shop/tesla-three-150w-full-kit-best-in-class/

Customizing WooCommerce URL structure for SEO after BigCommerce data migration

Similarly, you can make the product URLs look like
http://woocommerce-store.com/product/tesla-three-150w-full-kit-best-in-class/ by entering “/product” in the Custom Base field. Remember to click Save Changes afterward.

Ready to migrate your store? Start your free demo now and experience seamless data migration with Cart2Cart!

Need assistance? Schedule a call with a migration expert.

More info
Can I perform SEO migration from PrestaShop to Magento 2?

SEO Migration: Preserving Your PrestaShop SEO URLs When Migrating to Magento 2

Are you planning a data migration from PrestaShop to Magento 2 and worried about losing your hard-earned SEO rankings? With Cart2Cart, you can seamlessly migrate your SEO URLs, ensuring a smooth transition and minimizing any negative impact on your search engine visibility.

Yes, you can migrate SEO URLs from PrestaShop to Magento 2 by selecting the "Migrate categories and products SEO URLs" additional migration option during your migration setup. This option ensures that your product and category URLs are transferred to your new Magento 2 store.

However, before performing the migration, you need to make sure the Friendly URL option is activated on your PrestaShop store. To do so, log in to your PrestaShop admin panel, go to Preferences -> SEO & URLs. Here, ensure the “Yes” box is checked. Then, you can proceed with the data migration.

How Will My PrestaShop URLs Look After Migrating to Magento 2?

Let’s assume that one of the products you’re currently selling on your PrestaShop store is named “Faded Short Sleeve T-Shirt”. It has the following URL:
http://prestashop-store.com/tshirts/1-faded-short-sleeve-t-shirt.htm

After migrating to Magento 2 (with the “Migrate SEO URLs” option selected), the structure of the “Faded Short Sleeve T-Shirt” product URL will look exactly the same:
http://magento-store.com/tshirts/1-faded-short-sleeve-t-shirt.html

Removing the .html Suffix from Magento 2 URLs After Migration

By default, product and category URLs on Magento 2 have .html suffix at the end. However, you can remove it manually via your Magento 2 Admin Panel.

To do this, log in to your Magento 2 Admin Panel and go to: Stores -> Configuration -> Catalog -> Search Engine Optimization.

Here, delete the .html suffix from the “Product URL Suffix” and “Category URL Suffix” fields and leave them empty. Save the changes.

Removing .html suffix from Magento 2 URLs after PrestaShop data migration

Afterwards, it’s obligatory to clear your Cache and perform Reindex to apply the changes. Please, see detailed instructions on how to do that.

Ready to migrate your PrestaShop store to Magento 2 and preserve your SEO? Start your free demo now!

More info
Can I perform SEO migration from PrestaShop to PrestaShop?

Migrate SEO URLs from PrestaShop to PrestaShop: URL Preservation Guide

Yes, you can migrate SEO URLs when performing a PrestaShop to PrestaShop migration using Cart2Cart. This is crucial for maintaining your search engine rankings and ensuring a seamless transition for your customers. By selecting the "Migrate categories and products SEO URLs" additional option, you can preserve the SEO value of your existing URLs.

How will my URLs look after the PrestaShop data migration?

Here’s an example of how the "Migrate categories and products SEO URLs" option works when migrating between PrestaShop stores:

Let’s assume you have a product named "Macbook Pro" on your source PrestaShop store with the following URL:

http://prestashop-source.com/laptops/4-macbook-pro.html

After migrating to your target PrestaShop store with the "Migrate categories and products SEO URLs" option enabled, the structure of the "Macbook Pro" product URL will be preserved. It will look like this:

http://prestashop-target.com/laptops/4-macbook-pro.html

Category SEO URLs will also be preserved. For example, if your source category URL is:

http://prestashop-source.com/5-laptops

After the migration, it will look similar to this (the ID might change depending on existing data in your target store):

http://prestashop-target.com/14-laptops

Product variant SEO URLs will also be migrated. For example, if your source product variant URL is:

http://prestashop-source.com/laptops/3-macbook-air.html#/color-metal/disk_space-80gb_parallel_ata_drive_4200_rpm/icu-160ghz_intel_core_2_duo

After the migration, it will look similar to this (the IDs might change depending on existing data in your target store):

http://prestashop-target.com/laptops/3-macbook-air.html#/3-color-metal/12-disk_space-80gb_parallel_ata_drive_4200_rpm/13-icu-1_60ghz_intel_core_2_duo

Ready to migrate your PrestaShop store and preserve your SEO? Start your free demo now!

More info
Can I perform SEO migration from OpenCart to WooCommerce?

Yes, you can migrate SEO URLs from OpenCart to WooCommerce using Cart2Cart by selecting the “Migrate categories and products SEO URLs” additional option during your data migration process.

Before migrating to WooCommerce, ensure the SEO URLs feature is enabled in your OpenCart store. To do this, log in to your OpenCart Admin area, navigate to System -> Server, find “Use SEO URLs” and check the “Yes” box.

Enabling SEO URLs in OpenCart for data migration

Once enabled, the SEO Keyword field will appear in the settings of your products and categories. This is the data that will be transferred when you choose the “Migrate categories and products SEO URLs” additional option with Cart2Cart.

SEO Keyword field in OpenCart product settings for data migration

How Will My URLs Look After the OpenCart to WooCommerce Data Migration?

Let's say you have a product named "Apple Cinema 30" in your OpenCart store with the following URL:

http://opencart-store.com/apple-cinema-30

OpenCart product URL before data migration to WooCommerce

After migrating to WooCommerce with the “Migrate SEO URLs” option, the URL structure for the "Apple Cinema 30" product will be:

http://woocommerce-store.com/product/apple-cinema-30

WooCommerce product URL after data migration from OpenCart

Can I Preserve the Exact Same URL Structure After the Data Migration?

Due to the way WordPress CMS and WooCommerce are structured, it's not possible to maintain the exact same URL structure as your OpenCart store. WooCommerce automatically adds "/product/" to product URLs, as shown in the example above:

http://woocommerce-store.com/product/apple-cinema-30

However, you can customize the URL structure to some extent by logging into your WordPress admin panel and navigating to Settings -> Permalinks.

For instance, you can enter /shop in the Custom Base field, which would change your product URLs to:

http://woocommerce-store.com/shop/apple-cinema-30

Customizing WooCommerce permalinks after data migration

Remember to click Save Changes after making any adjustments.

Ready to migrate your store? Start your free demo now or schedule a call with a migration expert to discuss your specific needs.

More info
Will Cart2Cart create redirects to my new products and categories after migration?

Will Cart2Cart create redirects to my new products and categories after data migration?

Yes, Cart2Cart can create 301 redirects to ensure a smooth transition for your customers and search engines after your data migration. This is achieved by selecting the "Create 301 redirects on your target store after migration" option in the Migration Wizard.

How Cart2Cart's 301 Redirects Work During Data Migration

Here's how it works: Cart2Cart creates redirects on your target eCommerce platform, taking the URL of your source store product (or category) and using the URL path (without the domain name) as the Source URL in the redirect settings. Then, it sets the corresponding new product (or category) page on your target store as the Target URL. This ensures that anyone accessing the old URL is automatically redirected to the new one. The key is to keep your old domain name active so that customers and search engines experience a seamless transition after your data migration.

Data Migration Example: WooCommerce to Shopify with 301 Redirects

For example, let's say you migrated from WooCommerce to Shopify and kept your domain 'www.mystore.com' the same. Because WooCommerce and Shopify have different URL structures, the URL paths to your products will change. For instance:

www.mystore.com/category/american-apparel/jeans/pants

might change to:

www.mystore.com/american-apparel/jeans/pants

The Importance of 301 Redirects After Data Migration

Without redirects, users and search engine bots (like Googlebot) trying to access your 'Pants' product via the old WooCommerce URL would land on a '404 Not Found' page on your Shopify store. This negatively impacts user experience and SEO.

However, if you choose the "Create 301 SEO Redirects" option during your data migration, Cart2Cart automatically creates redirects from all your old WooCommerce pages to the new ones on Shopify. As a result, users can access any product or category page via both the old and new URLs, regardless of how different their structures are, provided the domain name remains the same.

eCommerce Platforms Supported for 301 Redirect Creation

The "Create 301 SEO Redirects" option is currently available for the following source and target eCommerce platforms:

Source Platforms

Target Platforms

More info
Can Cart2Cart create redirects to my new products and categories after migration to BigCommerce?

Does Cart2Cart Create Redirects to BigCommerce After Migration?

Yes, Cart2Cart can create 301 redirects to your new products and categories on BigCommerce after the data migration process. This ensures that your existing customers and search engine rankings are seamlessly transferred to your new store, preventing broken links and lost traffic. To enable this functionality, select the additional option "Create 301 redirects on your target store after migration" during the Migration Wizard setup. This is a crucial step in preserving your website's SEO and user experience when switching to BigCommerce. For more information, refer to Cart2Cart documentation on migration options.

Without setting up redirects, customers and search engines accessing old URLs will encounter 404 errors, negatively impacting your SEO and potentially losing sales. Cart2Cart's redirect creation feature is a valuable tool for maintaining a smooth transition during your shopping cart migration.

Next Steps:

More info
How to create redirects to my new products and categories after migration to or from CS-Cart?

How to Create 301 Redirects After eCommerce Data Migration with Cart2Cart

Cart2Cart offers a seamless way to preserve your SEO rankings after an eCommerce data migration. By creating 301 redirects, you ensure that your customers and search engines are automatically directed to the new URLs of your products and categories on your target store. This prevents lost traffic and maintains your search engine ranking.

Here's how to enable 301 redirects during your migration:

  1. Go to the Cart2Cart Migration Wizard.
  2. During the migration setup, locate the "Create 301 redirects on your target store after migration" additional option. This option is typically found within the additional options section of the migration wizard.
  3. Select this option to activate 301 redirect creation.
  4. Launch the Full Migration process. Cart2Cart will automatically create the necessary 301 redirects on your target store as part of the migration.

Why are 301 Redirects Important for eCommerce Data Migration?

When you migrate your eCommerce store, the URLs of your products and categories often change. Without 301 redirects, visitors and search engines accessing the old URLs will encounter "404 Not Found" errors. This leads to:

  • Lost Traffic: Potential customers are unable to find your products.
  • SEO Ranking Decline: Search engines penalize websites with broken links, negatively impacting your search engine rankings.
  • Damaged User Experience: Frustrated visitors may leave your site and not return.

301 redirects solve these problems by permanently redirecting traffic from the old URLs to the corresponding new URLs. This ensures a seamless transition for your customers and preserves your SEO rankings.

Benefits of Using Cart2Cart for eCommerce Data Migration with 301 Redirects:

  • Automated Process: Cart2Cart automates the creation of 301 redirects, saving you time and effort.
  • SEO Preservation: Maintain your search engine rankings and avoid traffic loss.
  • Improved User Experience: Ensure a smooth transition for your customers.
  • Comprehensive Migration: Migrate your products, categories, customers, orders, and other essential data with ease.

Ready to migrate your store and preserve your SEO? Start your free demo today! If you have any questions, contact our support team via live chat or schedule a call with a migration expert.

More info
Can I migrate SEO URLs from WooCommerce to Magento?

Yes, you can migrate SEO URLs from WooCommerce to Magento by selecting the “Migrate categories and products SEO URLs” option during your data migration with Cart2Cart.

How Will My URLs Look After WooCommerce to Magento Data Migration?

Here’s an example of how the “Migrate categories and products SEO URLs” option works in practice when performing a WooCommerce to Magento data migration.

Let's say you have a product named "Hair Spray" in your WooCommerce store with the following URL:

http://woocommerce-store.com/product/hair-spray/

And the URL of its category is:

http://woocommerce-store.com/product-category/hair-care/

WooCommerce product and category URLs before data migration

After migrating to Magento with Cart2Cart (and selecting the “Migrate SEO URLs” option), the "Hair Spray" product URL will look like this:

http://magento-store.com/index.php/hair-spray.html

The URL of its category will be:

http://magento-store.com/index.php/hair-care.html

Magento product and category URLs after WooCommerce data migration

How to Remove the .html Suffix from Magento Product and Category URLs After Data Migration

By default, Magento product and category URLs include the .html suffix. You can remove this suffix through your Magento Admin Panel.

Log in to your Magento Admin Panel and navigate to: Stores -> Configuration -> Catalog -> Catalog -> Search Engine Optimization.

Magento Search Engine Optimization settings

Delete the .html suffix from the "Product URL Suffix" and "Category URL Suffix" fields, leaving them empty. Save your changes.

Removing .html suffix from Magento URL settings

After making these changes, clear your Magento cache and reindex your data. Refer to these detailed instructions for guidance.

How to Remove /index.php/ from Magento URLs After Data Migration

Magento URLs often contain /index.php/ by default. To remove this, you need to modify your .htaccess file.

Access your Magento root folder via FTP or your hosting file manager and locate the .htaccess file. Open it in a text editor. Check if a block exists. If so, paste the following code immediately after the line containing RewriteBase:

RewriteRule ^index\.php$ - [L] RewriteCond %{REQUEST_FILENAME} !-f RewriteCond %{REQUEST_FILENAME} !-d RewriteRule . /index.php [L]

If you can't find the block, paste the following code at the bottom of the .htaccess file:

RewriteEngine On RewriteBase / RewriteRule ^index\.php$ - [L] RewriteCond %{REQUEST_FILENAME} !-f RewriteCond %{REQUEST_FILENAME} !-d RewriteRule . /index.php [L]

Afterwards, clear your cache and perform a Magento reindex via SSH.

What to Do if My WooCommerce Products Had /product/ in Their URLs After Data Migration

WooCommerce and Magento use different URL structures. New products created directly in Magento will not include the /product/ segment in their URLs.

To maintain SEO and redirect users from old WooCommerce URLs, you can set up a mass redirect from, for example, http://woocommerce-store.com/product/hair-spray/ to http://magento-store.com/hair-spray for all migrated products. This requires modifying your .htaccess file again.

Locate the .htaccess file in your Magento root folder and open it. Find the line RewriteEngine on. Paste the following code immediately after it:

RewriteCond %{REQUEST_URI} ^/product/[\w-\?\.=]+ RewriteRule ^product/(.*)$ http://magento-store.com/$1 [R=301,L]

If the RewriteEngine on line doesn't exist, add the following code to the bottom of the .htaccess file:

RewriteEngine on RewriteCond %{REQUEST_URI} ^/product/[\w-\?\.=]+ RewriteRule ^product/(.*)$ http://magento-store.com/$1 [R=301,L]

Replace http://magento-store.com/ with your actual Magento store URL. Ensure that “$1” remains at the end of the URL, as shown in the example.

Clear your cache and perform a Magento reindex via SSH after making these changes.

These steps will help preserve search engine rankings and prevent losing referral/direct traffic from old WooCommerce URLs. Customers accessing your products via old WooCommerce URLs (e.g., http://woocommerce-store.com/product/hair-spray) will be redirected to the corresponding new Magento URLs (e.g., http://magento-store.com/hair-spray) without .html or /index.php/.

Ready to migrate your store? Start your free demo now or schedule a call with a migration expert to discuss your project.

More info
How to export Miva Merchant data files?

How to Export Your Data from Miva Merchant for Migration

Migrating your store from Miva Merchant? To ensure a smooth and complete data transfer using Cart2Cart, you'll first need to export your data from your Miva Merchant store. This guide provides step-by-step instructions for exporting your product, order, and customer data.

Exporting Data from Miva Merchant (Versions 4-9+)

The process for exporting data from Miva Merchant varies slightly depending on your store version. Follow the instructions below that best match your Miva Merchant version.

Exporting Data from Miva Merchant 4.x

Follow these steps to export data from Miva Merchant 4.x:

  1. To transfer Products, log into your Miva Merchant admin panel.
  • Go to Utilities -> Export Data -> Export Products to Flat File.
  • Name the file products.dat and set Import Product From Flat File as the format, with Tab as the File Delimiter.
  • Check the box to Export Field Names as Header.
  • You can also check Category Settings to export products from a specific category if needed.
  • Press the Export button and save the file to your computer.
  • Upload this data to Migration Wizard and proceed to the next step.
  1. To export Orders, log into your Miva Merchant admin panel.
  • Go to Utilities -> Export Data -> Export Orders to Flat File.
  • Name the file orders.dat, and set Tab as the File Delimiter.
  • Check the box to Export Field Names as Header.
  • Press the Export button and save the file to your computer.
  • Upload this data to Migration Wizard and proceed to the next step.
  1. To export Customers, log into your Miva Merchant admin panel.
  • Go to Utilities -> Export Data -> Export Customers to Flat File.
  • Name the file customers.dat, set Import Customers From Flat File Format as the format and Tab as the File Delimiter.
  • Check the box to Export Field Names as Header.
  • Select the following fields to export: ‘Login Pass; Recovery Email Ship; First Name Ship; Last Name Ship; Email Ship; Phone Ship; Fax Ship; Company Ship; Address Ship; City Ship; State Ship; Zip Ship; Country Bill; First Name Bill; Last Name Bill; Phone Bill; Fax Bill; Email Bill; Company Bill; Address Bill; City Bill; State Bill; Zip Bill; Country’.
  • Press the Export button and save the file to your computer.
  • Upload this data to Migration Wizard and proceed to the next step.

Exporting Data from Miva Merchant (Versions 5.x - 9.x and later)

The file export procedure for Miva Merchant versions 5 through 9 and later is slightly different. The path for export differs depending on your version.

  1. To transfer Products, log into your Miva Merchant admin panel.
  • In Miva 5.x go to Utilities -> Export Data -> Export Products to Flat File.
  • In Miva 9.x and later go to Menu -> Data Management -> Export Products to Flat File.
  • Name the file products.dat, set Legacy Import Product From Flat File Format as the format and Tab as the File Delimiter.
  • Choose Replace File instead of Append To File in the If File Exist select box.
  • Check the box to Export Field Names as Header.
  • You can also check Category Settings to export products from a specific category if needed.
  • Press the Export button and save the file to your computer.
  • Upload this data to Migration Wizard and proceed to the next step.
  1. To transfer Attributes, log into your Miva Merchant admin panel.
  • In Miva 5.x go to Utilities -> Export Data -> Export Attributes to XML File.
  • In Miva 9.x and later go to Menu -> Data Management -> Export Attributes to XML File.
  • Name the file provide.xml and press the Export button.
  • Choose Replace File instead of Append To File in the If File Exist select box.
  • Download the file to your computer and save it in an easily accessible location.
  • Upload the XML file to Migration Wizard and proceed to the next step.
  1. To export Categories, log into your Miva Merchant admin panel.
  • In Miva 5.x go to Utilities -> Export Data -> Export Categories to Flat File.
  • In Miva 9.x and later go to Menu -> Data Management -> Export Categories to Flat File.
  • Name the file categories.dat, then set Legacy Import Categories From Flat File Format as the format and Tab as the File Delimiter.
  • Check the box to Export Field Names as Header.
  • Choose Replace File instead of Append To File in the If File Exist select box.
  • Select 'Code, Name, Active, Parent Category Code' fields to export.
  • Press the Export button and save the file to your computer.
  • Upload this data to Migration Wizard and proceed to the next step.
  1. To transfer Orders, log into your Miva Merchant admin panel.
  • In Miva 5.x go to Utilities -> Export Data -> Export Orders to Flat File.
  • In Miva 9.x and later go to Menu -> Data Management -> Export Orders to Flat File.
  • Name the file orders.dat and set Tab as the File Delimiter.
  • Choose All Orders instead of All Unbatched Orders in the Batch to Export select box.
  • Choose Replace File instead of Append To File in the If File Exist select box.
  • Check the box to Export Field Names as Header.
  • Press the Export button and save the file to your computer.
  • Upload this data to Migration Wizard and proceed to the next step.
  1. To transfer Customers, log into your Miva Merchant admin panel.
    More info
    How to install Cart2Cart ThirtyBees Passwords Migration Plugin?

    How to Migrate Thirty Bees Passwords Using Cart2Cart

    If you're planning a data migration to a new Thirty Bees store and want to seamlessly transfer your customer passwords, Cart2Cart offers a plugin to ensure a quick, secure, and accurate process. Follow these steps to install the Cart2Cart Thirty Bees Passwords Migration Plugin:

    1. Download the Cart2Cart Thirty Bees Passwords Migration Plugin.
    2. Log in to your Thirty Bees admin panel and navigate to "Modules and Services."
    3. Accessing Modules and Services in Thirty Bees for data migration

    4. In the upper right corner, click the "Add a new module" button.
    5. Adding a new module in Thirty Bees for password data migration

    6. Choose the "Cart2Cart-ThirtyBees-Passwords-Migration.zip" file and click "Upload this module."
    7. Uploading the Cart2Cart password migration module in Thirty Bees

    8. Once the plugin is successfully uploaded, you'll receive a "The module was successfully downloaded" notification. You can now proceed with your full migration settings.
    9. Successful plugin download notification for Thirty Bees password data migration

    Need help with your Thirty Bees data migration? Schedule a call with a migration expert or start your free demo today!

    More info
    How do I get a Client ID and Client Secret to migrate nopCommerce?

    How do I get a Client ID and Client Secret to migrate nopCommerce using data migration service?

    While launching a demo or full nopCommerce data migration with Cart2Cart, you'll need to provide your nopCommerce cart URL, Client ID, and Client Secret.

    nopCommerce data migration setup

    Follow the instructions below to obtain your Client ID and Client Secret:

    Note: The following instructions are applicable for nopCommerce versions supporting API client creation. If you encounter any issues or are using an older version, please contact our Support Team for assistance.

    1. Download the API plugin from the nopCommerce marketplace or a trusted source.
    2. To install the API plugin:
      • Upload the plugin to the "Plugins" folder in your nopCommerce directory.
      • Restart your application (or click the "Reload list of plugins" button).
      • In the list of plugins, find the newly installed plugin.
      • Click the "Install" link to install the plugin.
      • The plugin will be displayed in the Plugins windows (Configuration → Plugins → Local Plugins).
      • After installation, you'll see a new API field in your Admin panel. Tick the checkbox next to "Enable API" and click "Save" in the upper right corner.
    nopCommerce API configuration for data migration
      • Go to API → Clients → Add New Client.
      • In the "Name" field, enter a descriptive name for your client.
      • The Client ID and Client Secret will be automatically generated.
      • In the "Redirect URL" field, enter: https://www.getpostman.com/oauth2/callback
    nopCommerce Redirect URL setup for data migration
    • Cart2Cart will prompt you to provide your Client ID and Client Secret during the data migration setup. Copy and paste these values into the Migration Wizard.
    • Check the "Is Active" box.
    • Click the "Save" button to complete the process.
    nopCommerce Client ID and Secret for data migration

    Ready to migrate your nopCommerce store? Start your free demo now or schedule a call with our migration expert to discuss your specific needs.

    More info
    What to do if purchase of Data Migration Service was interrupted?

    What if My Data Migration Service Purchase Was Interrupted?

    If you started the process of purchasing a Data Migration Service package with Cart2Cart, entered all the necessary information, and clicked the "Purchase" button, but didn't complete the checkout process, don't worry! You can easily resume your purchase later without having to re-enter your migration details.

    Here's how to complete your interrupted data migration service purchase:

    1. Log in to your Cart2Cart account.
    2. Click on "Profile".
    3. Navigate to the "Billing" section.
    4. Click the "DD PACKAGE FUNDS" button.

    You'll then be able to review the details of your data migration, including the source and target carts you selected, and proceed with the payment to activate your data migration service.

    Resuming Data Migration Service Purchase

    Need a hand with your data migration? Schedule a call with one of our migration experts!

    Ready to get started? Try our free demo and see how easy it is to migrate your store with Cart2Cart!

    More info
    How much does the service cost?

    How Much Does Shopping Cart Data Migration Cost?

    The cost of your shopping cart data migration is flexible and depends on several factors:

    • Source Cart: The platform you're migrating *from*.
    • Target Cart: The platform you're migrating *to*.
    • Data Volume: The number and types of entities you're migrating, such as products, customers, orders, categories, and blog posts.
    • Additional Options: Selecting additional migration options may affect the final price.

    Our pricing is transparent and based on these key variables. To get an accurate estimate, we recommend using our Migration Estimator.

    Understanding the Factors Affecting Your Data Migration Cost

    Here's a more detailed look at what influences the cost of your shopping cart data migration:

    • Platform Complexity: Some platforms have more complex data structures than others, which can affect the migration effort and cost. For example, migrating from a simpler platform like WooCommerce might be less expensive than migrating from a more complex one like Magento.
    • Data Volume: Naturally, the more products, customers, and orders you have, the longer the migration process will take, impacting the cost.
    • Customizations: If you have significant customizations or custom fields in your existing store, these may require additional effort to migrate correctly.
    • Additional Services: Cart2Cart offers a range of additional services, such as migration insurance, recent data migration, and migration of images from product descriptions that can enhance your migration but may affect the overall price.

    Try a Free Demo & Get a Custom Quote

    The best way to determine the exact cost of your shopping cart data migration is to use our Migration Estimator. You can also start a free demo to see how Cart2Cart works with your specific platforms and data. During the demo, a limited number of entities will be migrated. This allows you to examine the results on your new store and estimate the migration quality. If you have any questions or need a custom quote, don't hesitate to contact our support team via live chat or schedule a call with our migration expert to discuss your specific requirements.

    Ready to migrate? Start your free demo now!

    More info
    Why am I being charged VAT?

    Why am I being charged VAT?

    According to international regulations, all software service purchases are accompanied by sales taxes. To comply with this requirement for a smooth data migration, every Cart2Cart refill includes tax collection. More specifically, Paypro, the company handling taxes from Cart2Cart, collects VAT from Canada and EU countries.

    For EU-based companies, VAT is charged and due in the EU country where the goods are consumed by the final consumer. To check out the VAT rates depending on countries, click here. Every EU country has its specific VAT percentage that can be seen after the country is chosen.

    For Canadian residents, the GST/HST is collected and paid to the Government of Canada. However, according to Canadian law, you can get compensation from the State by providing the GST number of the company receiving the payment, i.e., Cart2Cart. Please, contact our support team to request the GST number.

    Note: If you are a business with a valid VAT ID, you do not need to pay VAT. In case you've already paid VAT, you may request a refund. Just provide your Order ID and VAT ID in the corresponding fields, and our accounting department will refund the VAT. Private individuals cannot have VAT refunded.

    Fixed VAT is collected with each recurring payment. For more detailed information about VAT rates for different countries, please go here. The residences of the countries not included in the list won’t be charged while refilling the Cart2Cart account. After each successful payment, PayPro sends an invoice to the customer's email indicated on the order page.

    Ready to start your data migration? Start your free demo now!

    More info
    How to get an invoice for my migration?

    How to Get Your Cart2Cart Data Migration Invoice

    Need to retrieve your invoice for your recent data migration with Cart2Cart? Here's a simple guide on how to access it through two convenient methods.

    There are 2 ways to obtain your invoice:

    1. Receive Your Data Migration Invoice via Email from PayPro

    Immediately after your transaction, you'll receive an email from [email protected] with the subject "Your Shopping Cart Migration order is complete". This email will contain your invoice. Simply click the Download invoice link.

    PayPro email with a link to download data migration invoice

    You can also download the invoice directly from the PayPro website. Log in to your account at https://cc.payproglobal.com/Customer/Account/Login?returnUrl=%2FCustomer (your login credentials should have been emailed to you). For any questions, contact PayPro support: https://payproglobal.com/customer-support

    2. Download Your Data Migration Invoice from the Cart2Cart Website

    Alternatively, you can generate an invoice directly on the Cart2Cart website. Log in to your Cart2Cart account, go to the My Payments tab, and click Generate Invoice.

    Generate data migration invoice on Cart2Cart website

    If you are a Cart2Cart partner, navigate to the top menu and click Add Funds. When done, go to the Generate Invoice tab:

    Cart2Cart partner Add Funds tab Cart2Cart partner Generate Invoice tab

    Need assistance with your data migration? Schedule a call with our migration expert or start your free demo now!

    More info
    How to fix PayPal authorization error: Authorization Failed?

    How to Fix PayPal Authorization Error: Authorization Failed During Data Migration?

    Experiencing a "PayPal Authorization Failed" error during your data migration can be frustrating. Here's how to troubleshoot and resolve this PayPal authorization error:

    You can contact our Support Team for instructions, or you can try to resolve the PayPal authorization error yourself by following these steps:

    1. Wait at least 30 minutes before starting a new attempt. This allows the system to clear any pending authorizations.
    2. Use another browser or clear your browser's cookies and restart it. This ensures a clean session.
    3. Ensure you've completed all the necessary steps to start a new purchase session, such as clearing your cart or logging out and back in.
    4. Replace the order and proceed with your migration again.

    If you continue to experience problems and can't complete the purchase, contact your bank to inquire about potential reasons for payment declines. They may have blocked the transaction due to security concerns.

    Ready to start your data migration? Start your free demo now!

    More info
    How to fix PayPal authorization error: Do Not Honor?

    Troubleshooting PayPal Authorization Errors: Do Not Honor - Cart2Cart Data Migration

    This type of error, often displayed as "Do Not Honor," typically occurs because the customer's bank aborts the transaction. This means that the information passes validation at Cart2Cart’s end, initiating the transaction for your data migration, but the bank declines the authorization of the payment.

    You can contact our Support Team for further instructions, or resolve this issue by your own:

    1. Contact the customer's bank, as it is the only transaction party that can see the authorization attempts.
    2. Ask the customer to inform their bank manager that they wish the transaction to go through for their data migration.
    3. After the customer gets a confirmation from their bank that they can try to pay again.
    4. Replace the Cart2Cart order and pay as usual. Refer to our guide on how to replace your order.
    5. If the customer still faces errors, it means that their purchase session is blocked because of previous declines. So, they will need to:
      • Wait at least 30 minutes before starting a new attempt.
      • Use another browser or clear cookies and restart their browser.
      • Make sure they've done everything to start a new purchase session.
      • Replace the order and proceed with their data migration.

    If you require further assistance, please don't hesitate to contact our support team via Live Chat.

    Ready to start your data migration? Start your free demo now!

    More info
    Can I pay for migration using PayPro system?

    Can I pay for my shopping cart data migration using PayPro?

    Yes, you can use PayPro to pay for your with Cart2Cart. PayPro offers a secure and convenient way to fund your migration process.

    Here’s how to pay with PayPro:

    1. Log in to your Cart2Cart account.
    2. Go to the Add Funds menu.
    3. Enter the amount you’d like to add to your account.
    4. Click the Add Funds button.
    5. Select PayPro as your payment method and follow the on-screen instructions to complete the transaction.

    PayPro payment option for shopping cart data migration

    Need help with your ? Don't hesitate to contact our Support Team if you have any questions.

    Ready to migrate your store? Start your free demo now!

    More info
    Does the cost of remigration include the price of additional options?

    Does the cost of remigration include the price of additional options when performing an eCommerce data migration?

    The Remigration Service offered by Cart2Cart provides a cost-effective way to re-transfer your data. The base cost for a remigration is 50% of your initial Full eCommerce data migration price. However, it's important to note that any additional options you select, such as migrating SEO URLs or customer passwords, are charged separately according to their individual pricing.

    Here's an example:

    Let's say your initial full eCommerce data migration cost $80. The remigration service would then cost $40 (50% of $80). If you also choose the additional option "Migrate categories and products SEO URLs" which costs $59, the final price for your remigration would be $99 ($40 + $59).

    Therefore, while the core remigration service offers a significant discount, remember to factor in the costs of any desired additional options to get an accurate estimate for your total eCommerce data migration remigration project.

    Ready to start your eCommerce data migration? Start your free demo now!

    More info
    I run into an error during the payment process. What shall I do?

    I ran into an error during the payment process. What should I do?

    Experiencing issues during payment for your shopping cart migration can be frustrating. Here's a breakdown of potential causes and solutions:

    There are several reasons for payment errors during the shopping cart migration process. Here's what you can try:

    1. Clear Browser Data: Start by clearing your browsing history, cache, and cookies. A quick way to do this is by pressing Ctrl + Shift + Delete (or Cmd + Shift + Delete on a Mac). If that doesn't work, follow specific instructions for your browser.
    2. Verify Payment Information: Double-check that your credit card number is entered correctly, with no spaces or dashes, and that your name is typed exactly as it appears on the card.
    3. Check Card Security Code (CVV):
      • For Visa and Mastercard, the CVV is a 3-digit number located on the BACK of the card.
      • For American Express, the CVV is a 4-digit number located on the FRONT of the card.
    4. Avoid Interruptions: Refrain from hitting the back button during the purchase process.
    5. Consider Alternative Payment Methods: If the issue persists, explore using a different credit card or payment method. Cart2Cart supports various payment options for your convenience.

    Still Having Trouble with Your Shopping Cart Migration Payment?

    If none of the above steps resolve the issue, please don't hesitate to contact our Support Team. Our experts are available to assist you and ensure a smooth payment experience for your shopping cart migration.

    Ready to migrate your store? Start your free demo now!

    More info
    Can I pay for a service with Credit Card?

    Yes, you can pay for your data migration service with all major credit cards, including Visa, MasterCard, Maestro, and American Express. We strive to make the payment process as convenient as possible when you choose Cart2Cart for your data migration needs.

    Using a credit card is a secure and efficient way to pay for your data migration service. It allows for immediate processing, ensuring your migration can start promptly. If you are looking to migrate your online store from one platform to another, for example, from Magento to Shopify, paying with a credit card is a simple and fast way to get started.

    Ready to migrate your store? Start your free demo now!

    More info
    Can I pay for migration with PayPal?

    Can I pay for my shopping cart data migration with PayPal?

    PayPal is a popular and secure payment option. Paying for your shopping cart data migration with PayPal offers enhanced security and convenience. Here's how to use it for your automated migration with Cart2Cart:

    How to Pay for Your Data Migration with PayPal

    Follow these steps to pay for your shopping cart migration using PayPal:

    1. Log in to your Cart2Cart account.
    2. Click Add Funds at the top of the page.
    3. Enter the amount of credits you need and click the green button.
    4. You will be redirected to the checkout page. Select PayPal as your payment method and submit your order.

    Cart2Cart Add Funds with PayPal for shopping cart data migration

    Notice: PayPal offers a high level of transaction security, but occasional errors can occur. These might be due to:

    • Paying from a different location than your card's registered address.
    • An email address not linked to a PayPal account.
    • Exceeding your bank's transaction limit.

    If you encounter issues during checkout, please contact our Support Team for assistance.

    Ready to start your shopping cart data migration? Start your free demo now!

    More info
    How can I pay for your service?

    To pay for your Cart2Cart service and initiate your data migration, you'll need to add funds to your Cart2Cart account balance. Here's how:

    1. Log in to your Cart2Cart account.
    2. Navigate to the Add Funds page.

    Login to your Cart2Cart account and open the Add Funds page to start your data migration

    1. Enter the amount you wish to add to your balance and click the Add Funds button.

    Enter the amount of money to pay for your data migration

    More info
    Do you provide refunds?

    Do you provide refunds for data migration services?

    Unfortunately, we do not offer refunds for completed data migration services. This is because once the migration is finished, the data has already been transferred to your new store, and the process cannot be reversed.

    Therefore, we strongly recommend taking advantage of our free demo migration service before initiating a full, paid data migration. The demo allows you to evaluate the quality of the migration and ensure that your data is transferred correctly to your new platform. This helps you avoid any potential dissatisfaction with the final result. You can test a limited number of entities to see how Cart2Cart works with your specific data and configurations.

    By using the free demo, you can verify that the data migration process meets your expectations before committing to a full migration. We are confident in our service, and the demo is designed to give you peace of mind. If you have any questions or concerns during the demo migration, please don't hesitate to contact our support team. We are here to assist you every step of the way.

    Next Steps:

    More info
    How to avoid paying VAT?

    VAT Exemption for Cart2Cart Data Migration Services

    You do not need to pay VAT (Value Added Tax) on your Cart2Cart data migration if you are a business with a valid VAT ID. This applies to businesses registered within the European Union and other regions where VAT exemptions are applicable for cross-border transactions.

    To claim your VAT exemption, simply provide your valid VAT ID in the corresponding field during the checkout process:

    VAT ID field during Cart2Cart checkout for VAT exemption

    In case you've already paid VAT and were eligible for an exemption, you may request a refund by sending an email with your Order ID and VAT ID to [email protected].

    Please note: To receive a VAT refund, you must provide the details of a legal entity (company or organization).

    Ready to migrate your store? Start your free demo now! Or, if you have questions, schedule a call with a Migration Expert.

    More info
    How to migrate 301 SEO URLs from CS-Cart?

    Cart2Cart supports the migration of 301 SEO URLs *from* CS-Cart as an additional option during your data migration. Here's how:

    1. Go to the Cart2Cart Migration Wizard.
    2. Choose the “Migrate 301 SEO URLs of categories and products” additional option.
    3. Launch the Full Migration.

    Please note that the migration of 301 SEO URLs *to* CS-Cart is currently unavailable.

    More info
    I keep getting the “HTTP Error Occurred” message, what should I do?

    Troubleshooting HTTP Errors During Data Migration

    An "HTTP Error" during your data migration typically indicates that a stable connection to your server couldn't be established. This often means that Cart2Cart’s Connection Bridge (a file crucial for secure data exchange) is unable to properly communicate with your store's database.

    Here's a breakdown of potential causes and how to address them:

    • Invalid Store URLs: Ensure the URLs you entered in the Migration Wizard are accurate and accessible. A simple typo can prevent the Connection Bridge from working correctly.
    • Connection Bridge Issues: The Connection Bridge might not be installed correctly, or your server could be blocking it.
    • Server Security: Your server's firewall or security settings might be interfering with the connection.
    • PHP Configuration: Certain PHP settings (e.g., `allow_url_fopen`, `max_execution_time`) might need adjustment.

    How to Fix HTTP Errors During Data Migration

    To resolve the "HTTP Error" and continue your data migration, try these steps:

    • Verify Store URLs: Double-check the source and target store URLs in the Migration Wizard. Confirm they are correct and that your stores are online.
    • Manually Upload the Connection Bridge:
      • Download the Connection Bridge file from the Migration Wizard.
      • Unzip the file.
      • Using an FTP client (e.g., FileZilla), securely upload the unzipped files to the root directory of your store. Ensure the files are uploaded correctly and are accessible.
    • Check Server Security Settings: Temporarily disable your server's firewall or security plugins to see if they are blocking the Connection Bridge. If this resolves the issue, configure your firewall to allow connections from Cart2Cart's IP addresses (contact support for a list).
    • Review PHP Configuration: Ensure that the following PHP settings are enabled or set to appropriate values:
      • `allow_url_fopen`: Should be enabled.
      • `max_execution_time`: Increase the execution time to prevent timeouts during migration.
      • `memory_limit`: Ensure sufficient memory is allocated for PHP scripts.
    • Check your .htaccess file: Your .htaccess file could be blocking access to the Connection Bridge. Ensure there are no rules preventing access to the bridge files.

    If you've tried these steps and are still encountering the "HTTP Error," our dedicated Support Team is ready to assist. We can help diagnose the problem and guide you to a solution.

    Ready to see how Cart2Cart can simplify your data migration? Start your free demo today!

    More info
    HTTP Error Code 500 Internal Server Error

    Fixing HTTP 500 Error During Cart2Cart Data Migration

    Encountering an HTTP 500 Internal Server Error during your Cart2Cart data migration? This usually indicates a problem with file permissions related to the Cart2Cart bridge file on your server. The bridge file facilitates the connection between your source and target stores, allowing Cart2Cart to securely transfer your data.

    Resolving Incorrect File Permissions for the Cart2Cart Bridge

    The most common cause of this error is incorrect file permissions for the bridge2cart folder and its contents.

    1. Specify the file permissions 755 for the bridge2cart directory.
    2. Specify the permissions 644 for the bridge.php and config.php files within the bridge2cart directory.

    Important: Ensure that the user your web server runs as has the correct permissions to read and write to these files. Incorrect permissions can prevent Cart2Cart from accessing and processing the data needed for the migration.

    Still Experiencing Issues?

    If correcting the file permissions doesn't resolve the issue:

    1. Contact your system administrator. They can access server logs for more detailed error information.
    2. Request technical assistance from your hosting provider.
    3. Contact Cart2Cart support for further assistance. Our experts can help diagnose and resolve the problem.

    Ready to migrate your store? Start your free demo to see how easy data migration can be with Cart2Cart!

    More info
    Can I migrate reward points to CS-Cart?

    Yes, Cart2Cart supports the migration of reward points to CS-Cart. However, you need to activate the default "Reward points" add-on in your CS-Cart admin panel before initiating the migration to ensure successful transfer of this data.

    How to Activate the Reward Points Add-on in CS-Cart

    Follow these steps to enable the Reward Points add-on:

    1. Log in to your CS-Cart admin panel and navigate to "Add-ons" -> "Manage Add-ons".

    Navigate to Add-ons in CS-Cart admin panel for reward points migration

    2. In the list of add-ons, locate "Reward points." Click the "Disabled" dropdown menu and select "Active".

    Activate Reward Points add-on for CS-Cart data migration

    Once the Reward Points add-on is activated, you can proceed with your data migration to CS-Cart using Cart2Cart.

    Ready to migrate your store to CS-Cart? Start your free demo now!

    More info
    Can't connect to MySQL Database

    Troubleshooting: Can't Connect to MySQL Database During Data Migration

    Encountering a "Can't connect to MySQL database" error during your data migration? This typically indicates a problem with accessing your source or target store's database. Here are the common reasons and how to resolve them to ensure a smooth data migration with Cart2Cart:

    Possible Causes of MySQL Connection Errors

    • Incorrect Database Credentials: Double-check the database host, username, password, and database name you've entered in the Cart2Cart setup. Even a small typo can prevent a successful connection. Contact your hosting provider or system administrator if you're unsure of the correct credentials.
    • Firewall Restrictions: Your server's firewall might be blocking connections from Cart2Cart's servers. You may need to whitelist our IP addresses in your firewall settings. Please contact our support team via Live chat to obtain a list of IP addresses to whitelist.
    • Remote MySQL Access Disabled: Some hosting providers disable remote MySQL access by default. You'll need to enable it in your hosting control panel (e.g., cPanel, Plesk) or request your hosting provider to enable it for you.
    • Incorrect Configuration File Settings: If you are using a custom configuration file, ensure that the database access details within the file are accurate and up-to-date.
    • Insufficient Permissions: The user account you're using to connect to the database might lack the necessary permissions (e.g., SELECT, CREATE, INSERT, UPDATE, DELETE) on the database. Grant the user account full permissions to the database, or at least the permissions required for the data migration to proceed.
    • MySQL Server Not Running: Verify that your MySQL server is running and accessible. You can usually check this through your hosting control panel or by contacting your hosting provider.
    • Outdated MySQL Version: While Cart2Cart supports a wide range of MySQL versions, using a very old or unsupported version could cause compatibility issues. Consider upgrading your MySQL server to a more recent, stable version.

    Troubleshooting Steps for MySQL Connection Issues During Data Migration

    1. Verify Credentials: Carefully review and re-enter your database credentials in the Cart2Cart migration setup.
    2. Check Firewall Settings: Ensure that your firewall is not blocking connections from Cart2Cart's servers.
    3. Enable Remote Access: If remote MySQL access is disabled, enable it in your hosting control panel or contact your hosting provider.
    4. Review Configuration File: Double-check the database access details in your configuration file, if applicable.
    5. Grant Sufficient Permissions: Ensure that the user account has the necessary permissions on the database.
    6. Check MySQL Server Status: Verify that your MySQL server is running and accessible.
    7. Update MySQL Version: Consider upgrading your MySQL server to a more recent, stable version.

    If you've tried these steps and are still unable to connect to your MySQL database, please contact our support team via Live chat. They can provide further assistance and help you diagnose the issue.

    Ready to migrate your store? Start your free demo with Cart2Cart today!

    More info
    Can I migrate customer passwords to/from CS-Cart?

    The migration of customer passwords is supported when migrating *to* Magento, WooCommerce, PrestaShop, OpenCart, and ThirtyBees *from* CS-Cart. To ensure accurate password transfer during your *data migration*, you'll need to install the Cart2Cart Password Migration plugin. Click here for the most up-to-date information on supported source and target carts and detailed instructions on installing the plugin for your specific shopping cart pair.

    Additionally, you can migrate customer passwords during a CS-Cart upgrade. When migrating data from one CS-Cart version to another, this option is available for free during the migration setup. No plugin installation is required in this scenario; simply select the option when launching your CS-Cart upgrade via Cart2Cart.

    Next steps: Ready to migrate your store? Start your free demo today!

    More info
    Security Token for my store was changed. Why is it so?

    Security Token Changed: Troubleshooting Your Data Migration

    During your data migration, you might encounter an issue where the Security Token of your Cart2Cart account doesn't match the Security Token of the Connection Bridge you've uploaded to your store. This typically happens when the Connection Bridge was downloaded from a different Cart2Cart account than the one you're currently using for the migration. This discrepancy prevents Cart2Cart from securely accessing your store's data for migration.

    Don't worry, this is easily resolved! Follow these steps to correct the Security Token mismatch and continue your data migration smoothly:

    1. Click the ‘Continue Migration’ button on your “My Migrations” page within your Cart2Cart account.
    2. You'll be taken to the first step of the migration setup. Download the Connection Bridge again directly from this page. This ensures you're using the correct Bridge associated with your current migration.
    3. Unzip the downloaded Connection Bridge file and paste the contents into the root directory of your online store. Make sure to replace any existing Connection Bridge files.
    4. After re-uploading the Connection Bridge, proceed with your data transfer. The updated Security Token will now allow Cart2Cart to connect securely.

    By following these steps, you'll ensure the Security Tokens match, allowing Cart2Cart to securely and accurately migrate your data. If you continue to experience issues, please don't hesitate to contact our support team via Live Chat for assistance. You can also schedule a call with a migration expert here.

    Ready to migrate your store? Start your free demo now!

    More info
    How can I migrate reviews and products tags to or from CS-Cart?

    How to Migrate Reviews and Product Tags to or from CS-Cart using eCommerce Data Migration

    Before performing an eCommerce data migration of reviews and product tags to or from CS-Cart, you need to ensure the necessary add-ons are enabled. Here's how:

    1. Enter the admin panel of your CS-Cart store.
    2. Navigate to Add-ons > Manage add-ons.
    3. Locate the Tags add-on in the list and activate it.
    4. Activating the Tags add-on for CS-Cart eCommerce data migration
    5. Find the Comments and reviews add-on and activate it as well.
    6. Activating the Comments and reviews add-on for CS-Cart eCommerce data migration

    Once these add-ons are active, you can proceed with transferring your reviews and product tags using Cart2Cart. Our service simplifies the eCommerce data migration process, ensuring a smooth transition of your valuable data.

    Ready to migrate your CS-Cart data? Start your free demo now!

    More info
    When can I use my discount coupon?

    How to Redeem Your Cart Migration Discount Coupon

    You can redeem your discount coupon during the full migration confirmation step. Simply check the designated checkbox and enter your promo code. The discount will then be applied to your total.

    Here's a visual guide:

    Redeeming your data migration coupon code in the Cart2Cart Migration Wizard

    To reiterate, you'll find the option to enter your coupon code on the final step before initiating the full data migration. Look for the checkbox specifically labeled for coupon code redemption.

    Need assistance? Contact support via Live chat.

    More info
    Can I migrate SEO URLs of products and categories to and from CS-Cart?

    Yes, Cart2Cart supports the migration of SEO URLs for products and categories to and from CS-Cart, provided you are using version 2.0 or higher.

    If you're migrating data *to* CS-Cart, activating the free "SEO" module is necessary. This module is also required to enable the "Create 301 SEO Redirects" additional option during your data migration. Here’s how to activate it:

    1. Log in to your CS-Cart admin panel.
    2. Navigate to Add-ons → Manage add-ons.
    3. Type “SEO” in the search bar.
    4. Turn on the found module by clicking the inverted triangle and selecting Active.
    Activating the SEO module in CS-Cart for data migration Enabling the SEO module for CS-Cart data migration

    If you are migrating SEO URLs *from* CS-Cart, plugin installation is not required.

    Note: SEO URL migration for multilingual stores is supported for CS-Cart 3.0 and later versions.

    More info
    What to do if the migration has stopped at 99% for a long time?

    What to Do if Your Data Migration Stalls at 99%?

    Sometimes, data transfer can proceed a bit longer than expected during a data migration. If your full migration process stalls at 99% for more than an hour, it's crucial to take specific steps. This often happens due to the finalization of data processing on either the source or target store, which can take some time depending on the size and complexity of your data. Before taking any action, please review the following:

    • Check the Cart2Cart Migration App: Make sure the Cart2Cart migration app is still running and connected to both your source and target stores.
    • Review Error Logs: Check the error logs within the Cart2Cart interface for any specific error messages that may indicate the cause of the delay.

    If the migration remains stuck at 99% after performing the steps above, please contact our Support Team immediately for assistance. To expedite the troubleshooting process, provide your migration ID and a brief description of the issue. Do not implement any changes on the Target store, as this could potentially corrupt the partially migrated data.

    Our expert team can assess the situation, identify the bottleneck, and guide you through the necessary steps to complete your data migration successfully. If you'd like personalized assistance, schedule a call with our Migration Expert to discuss your specific situation and receive tailored guidance.

    More info
    What can I do if my store's MySQL database sends responses in error?

    Troubleshooting MySQL Response Errors During Data Migration

    To establish a connection with your store's database, Cart2Cart performs test queries. If these queries don't receive the expected responses, a “MySQL Response Error” message will appear. This indicates that while a connection to your store was established, an issue occurred while retrieving data.

    What Causes a "MySQL Response Error" During Data Migration?

    A "MySQL Response Error" during data migration signals that Cart2Cart is having trouble communicating with your store's database. This could be due to various reasons, such as:

    • Incorrect database credentials (hostname, username, password, database name).
    • Firewall restrictions blocking access to the database.
    • Database server being temporarily unavailable.
    • Database server configuration issues.
    • Specific database settings preventing proper data retrieval.

    How to Resolve a MySQL Response Error During Data Migration

    If you encounter a "MySQL Response Error" during your data migration process with Cart2Cart, the most efficient way to resolve this is to:

    Submit a ticket to our Support Team. Our experts can quickly diagnose the cause of the error and guide you through the necessary steps to fix it.

    While waiting for support, you can also double-check the following:

    • Database Credentials: Ensure that you've entered the correct hostname, username, password, and database name in the Cart2Cart setup.
    • Firewall Settings: Verify that your firewall isn't blocking access to your database server from Cart2Cart's servers.

    Cart2Cart simplifies the data migration process, but occasional issues can arise. Our support team is dedicated to ensuring a smooth and successful migration experience.

    Ready to migrate your data? Start your free demo today!

    More info
    How to migrate data after changing the structure of the store?

    Looking for seamless automated eCommerce data migration? Cart2Cart offers a streamlined solution for transferring your store's data to a new platform. However, if your current platform has undergone significant customization, particularly changes to the database structure, the standard automated migration process may not be sufficient.

    Data Migration for Customized Shopping Carts

    The Cart2Cart service is optimized for standard shopping cart configurations. If your platform deviates significantly from the default structure due to extensive customization (including alterations to the database schema), a fully automated migration might not be possible. In these cases, our skilled tech engineers can provide a tailored Data Migration Service Package to ensure all your data is accurately transferred. This personalized approach guarantees a smooth transition even with complex data structures.

    If your store has a non-standard data configuration, don't worry! Cart2Cart can still help you migrate your data. Our team will analyze your store's unique setup and develop a customized migration plan to ensure a complete and accurate transfer. We specialize in handling complex migrations that go beyond the capabilities of standard automated tools.

    Need Help with a Complex Data Migration?

    If you suspect your store's data structure is highly customized, we recommend contacting our support team for a consultation. They can assess your specific needs and guide you towards the best data migration solution.

    Next Steps:

    More info
    Standart HTTP Errors list

    Understanding HTTP Error Codes for eCommerce Data Migration

    When performing an eCommerce data migration, understanding HTTP error codes can be crucial for troubleshooting potential issues. Here's a breakdown of common HTTP error codes you might encounter:

    Redirection Errors (3xx) During Data Migration

    Redirection errors indicate that the client needs to take additional action to complete the request. While less common in the core data migration process itself, they can occur when the source or target store has redirection rules in place that interfere with data access.

    300 Multiple Choices - Indicates multiple options for the resource that the client may follow.

    301 Moved Permanently - This and all future requests should be directed to the given URL. This is a permanent redirect.

    302 Found - Requires the client to perform a temporary redirect (the original describing phrase was "Moved Temporarily"). This is a temporary redirect.

    303 See Other - The response to the request can be found under another URL using a GET method.

    304 Not Modified - Indicates that the resource has not been modified since the version specified by the request headers If-Modified-Since or If-Match.

    306 Switch Proxy - No longer used. Originally meant "Subsequent requests should use the specified proxy."

    307 Temporary Redirect (since HTTP/1.1) - In this case, the request should be repeated with another URL; however, future requests should still use the original URL. This is a temporary redirect.

    308 Permanent Redirect - The request, and all future requests should be repeated using another URL. This is a permanent redirect.

    Client Errors (4xx) Impacting eCommerce Data Migration

    Client errors indicate that the request contains bad syntax or cannot be fulfilled. These are often the most common errors encountered during data migration, indicating issues with access permissions, incorrect URLs, or missing data.

    400 Bad Request - The request cannot be fulfilled due to bad syntax.

    401 Unauthorized - Similar to 403 Forbidden, but specifically for use when authentication is required and has failed or has not yet been provided.

    402 Payment Required - Reserved for future use.

    403 Forbidden - The request was a valid request, but the server is refusing to respond to it. This often indicates a permissions issue.

    404 Not Found - The requested resource could not be found but may be available again in the future. This could be a broken link or incorrect URL.

    405 Method Not Allowed - A request was made of a resource using a request method not supported by that resource.

    406 Not Acceptable - The requested resource is only capable of generating content not acceptable according to the Accept headers sent in the request.

    407 Proxy Authentication Required - The client must first authenticate itself with the proxy.

    408 Request Timeout - The server timed out waiting for the request.

    409 Conflict - Indicates that the request could not be processed because of a conflict in the request, such as an edit conflict in the case of multiple updates.

    410 Gone - Indicates that the resource requested is no longer available and will not be available again.

    411 Length Required - The request did not specify the length of its content, which is required by the requested resource.

    412 Precondition Failed - The server does not meet one of the preconditions that the requester put on the request.

    413 Request Entity Too Large - The request is larger than the server is willing or able to process.

    414 Request-URI Too Long - The URI provided was too long for the server to process.

    415 Unsupported Media Type - The request entity has a media type which the server or resource does not support.

    416 Requested Range Not Satisfiable - The client has asked for a portion of the file, but the server cannot supply that portion.

    417 Expectation Failed - The server cannot meet the requirements of the Expect request-header field.

    418 I'm a teapot - This code was defined in 1998 as one of the traditional IETF April Fools' jokes, in RFC 2324, Hyper Text Coffee Pot Control Protocol, and is not expected to be implemented by actual HTTP servers.

    419 Authentication Timeout - Not a part of the HTTP standard, 419 Authentication Timeout denotes that previously valid authentication has expired.

    420 Method Failure - Not part of the HTTP standard, but defined by Spring in the HttpStatus class to be used when a method failed.

    420 Enhance Your Calm - Not part of the HTTP standard, but returned by version 1 of the Twitter Search and Trends API when the client is being rate limited.

    422 Unprocessable Entity - The request was well-formed but was unable to be followed due to semantic errors.

    423 Locked - The resource that is being accessed is locked.

    424 Failed Dependency - The request failed due to failure of a previous request.

    425 Unordered Collection - Defined in drafts of "WebDAV Advanced Collections Protocol", but not present in "Web Distributed Authoring and Versioning (WebDAV) Ordered Collections Protocol".

    426 Upgrade Required - The client should switch to a different protocol such as TLS/1.0.

    428 Precondition Required - The origin server requires the request to be conditional.

    429 Too Many Requests - The user has sent too many requests in a given amount of time.

    431 Request Header Fields Too Large - The server is unwilling to process the request because either an individual header field, or all the header fields collectively, are too large.

    440 Login Timeout - A Microsoft extension. Indicates that your session has expired.

    444 No Response - Used in Nginx logs to indicate that the server has returned no information to the client and closed the connection.

    449 Retry With - A Microsoft extension. The request should be retried after performing the appropriate action.

    450 Blocked by Windows Parental Controls - A Microsoft extension. This error is given when Windows Parental Controls are turned on and are blocking access to the given webpage.

    451 Unavailable For Legal Reasons - Defined in the internet draft "A New HTTP Status Code for Legally-restricted Resources".

    451 Redirect - Used in Exchange ActiveSync if there either is a more efficient server to use or the server cannot access the users' mailbox.

    494 Request Header Too Large - Nginx internal code similar to 431 but it was introduced earlier.

    495 Cert Error - Nginx internal code used when SSL client certificate error occurred to distinguish it from 4XX in a log and an error page redirection.

    496 No Cert - Nginx internal code used when client didn't provide certificate to distinguish it from 4XX in a log and an error page redirection.

    497 HTTP to HTTPS - Nginx internal code used for the plain HTTP requests that are sent to HTTPS port to distinguish it from 4XX in a log and an error page redirection.

    499 Client Closed Request - Used in Nginx logs to indicate when the connection has been closed by client while the server is still processing its request, making server unable to send a status code back.

    Server Errors (5xx) During Data Migration

    Server errors indicate that the server

    More info
    How to create customer groups?

    Cart2Cart provides a possibility to map your customer groups from your Source cart to those on your Target cart during data migration. It's important to ensure that Customer Groups are already created in your Target store before you begin the migration process. This allows Cart2Cart to accurately map the groups during the transfer. If you haven’t set up Customer Groups in your Target cart yet, the following instructions will guide you through the process for some popular platforms.

    How to Create Customer Groups for Data Migration

    These steps outline how to create customer groups in various e-commerce platforms, ensuring a smooth data migration with Cart2Cart.

    Creating Customer Groups in Magento

    To create customer groups in Magento, navigate to Customers -> Customer Groups and click Add New Customer Group in the top right of the page.

    Creating Customer Groups in Magento for Data Migration

    Then, fill in the "Group Name" and select a "Tax Class" from the dropdown.

    • Group Name - Enter the name of the Customer Group as it will appear in the admin panel.
    • Tax Class - Assign a Customer Class Tax to each Customer Group. Tax classes are assigned to Customer Groups, which are then assigned to customers.

    Magento Customer Groups Settings for Data Migration

    After that, simply click “Save Customer Group”.

    Creating Customer Groups in PrestaShop

    To create Customer Groups on PrestaShop, navigate to Customers -> Groups. You will see 3 default Customer Groups - Visitor, Guest, and Customer. To create a new one, click "Add New" and fill in the form.

    Creating Customer Groups in PrestaShop for Data Migration

    • Name - How your Customer Group will be called. Use a short and descriptive name.
    • Discount - A discount that will be applied to members of the group. It will be applied to all products in your shop.
    • Price display method - Choose whether to include or exclude tax.
    • Show prices - Decide if you want customers to see prices.

    Then click “Save”.

    Creating Customer Groups in OpenCart

    To create a new Customer Group on OpenCart, go to the Sales -> Customers -> Customer Groups page. Above the list, click the "Insert" button. You will need to provide the Customer Group Name, Description, approve or disapprove customer logins, and allow the customer to select their company no. or Tax ID.

    Creating Customer Groups in OpenCart for Data Migration

    Ready to migrate your store? Start your free demo now!

    More info
    Unable to find your Store configuration file

    Troubleshooting: Unable to Find Your Store Configuration File During Data Migration

    Encountering the "Unable to find your Store configuration file" error during your data migration with Cart2Cart? This usually indicates an issue with the connection between our migration tool and your source store. Here's a breakdown of potential causes and how to resolve them:

    Possible Reasons Why Cart2Cart Can't Locate Your Store Configuration File

    • Incorrect Bridge Location: The Migration Bridge, a crucial component for establishing the connection, might be placed in the wrong directory. Ensure it's located in the root directory of your store's installation.
    • Missing or Misplaced Configuration File: The configuration file itself could be missing, incorrectly named, or located in the wrong directory. Double-check its presence and location. If you've renamed it, revert to the original name.
    • Unsupported Cart: While Cart2Cart supports a wide range of platforms, your specific cart might not be supported. Verify that your shopping cart platform is listed on our supported carts list. If you cannot find the platform, contact our team to check if it can be added.
    • File Permissions Issue: The configuration file might not have the correct read permissions. Ensure the file is readable by the web server. You may need to adjust file permissions or contact your system administrator for assistance.
    • Firewall Restrictions: Your server's firewall might be blocking access to the configuration file. Check your firewall settings and ensure that Cart2Cart's IP addresses are whitelisted.
    • Incorrect Store URL: The URL provided during the connection setup might be incorrect. Verify that the URL accurately points to your store's root directory.
    • SSL Certificate Issues: Problems with your SSL certificate (e.g., self-signed certificate, expired certificate) can sometimes prevent the bridge from connecting properly. Ensure your SSL certificate is valid and properly installed.

    Next Steps for Your Data Migration

    If you've checked these potential issues and are still encountering problems, we recommend the following:

    • Review Cart2Cart Documentation: Consult our comprehensive documentation for detailed instructions and troubleshooting tips.
    • Contact Cart2Cart Support: Our support team is available 24/7 to assist you. Contact us via live chat or email for personalized assistance.
    • Schedule a Call: For more in-depth assistance, schedule a call with a migration expert.

    Ready to start your data migration? Start your free demo today!

    More info
    HTTP Error Code 503 Service Unavailable

    Why Am I Seeing a "503 Service Unavailable" Error During Data Migration?

    Encountering a "503 Service Unavailable" error during your data migration process indicates that the server you're trying to access is temporarily unable to handle your request. This is similar to a website being down for maintenance.

    Common Causes of 503 Errors During Data Migration

    A 503 error typically stems from the following reasons:

    • Server Overload: The target server is experiencing a high volume of traffic or requests, exceeding its capacity. This is especially common during peak hours or when migrating large amounts of data.
    • Technical Maintenance: The server is undergoing scheduled or unscheduled maintenance. This is often a planned event, but can sometimes occur unexpectedly.
    • Resource Limits: Your hosting plan may have limitations on resources like CPU, memory, or database connections. If the migration process exceeds these limits, a 503 error can occur.
    • Network Issues: Problems with network connectivity between the source and target servers can also trigger this error.
    • Firewall Restrictions: Firewall settings on either server might be blocking the data migration process.

    Troubleshooting a 503 Error During Data Migration

    Here's a step-by-step approach to resolving the 503 error and resuming your data migration:

    1. Wait and Retry: The simplest solution is often the most effective. Wait a few minutes and try the migration again. The server might have recovered from a temporary overload.
    2. Check Server Status: Contact your hosting provider to inquire about the status of your server. They can provide information about any ongoing maintenance or known issues.
    3. Review Hosting Resources: Ensure that your hosting plan has sufficient resources (CPU, memory, database connections) to handle the data migration process. Consider upgrading your plan if necessary.
    4. Optimize Migration Settings: Within the Cart2Cart migration wizard, explore options to throttle the migration speed or limit the number of concurrent connections. This can reduce the load on the server.
    5. Disable Non-Essential Plugins/Extensions: Temporarily disable any non-essential plugins or extensions on your target store. These can sometimes interfere with the migration process.
    6. Contact Cart2Cart Support: If you've tried the above steps and are still encountering the error, contact Cart2Cart support for assistance. Provide them with details about your migration setup and the error message you're seeing.

    Preventing 503 Errors During Data Migration

    Proactive measures can help minimize the risk of encountering 503 errors during your data migration:

    • Plan Ahead: Schedule your migration during off-peak hours when server traffic is typically lower.
    • Optimize Your Store: Before migrating, optimize your existing store by removing unnecessary data, compressing images, and ensuring your database is clean.
    • Choose a Reliable Hosting Provider: Select a hosting provider with a proven track record of reliability and performance.
    • Monitor Server Resources: Keep an eye on your server's resource usage during the migration process. This will help you identify potential bottlenecks.

    If you continue to experience issues, don't hesitate to contact our support team for personalized assistance. You can also schedule a call with a migration expert to discuss your specific needs.

    Ready to start your data migration? Start your free demo today!

    More info
    What do I do if the cart type you selected is invalid?

    Troubleshooting: Invalid Shopping Cart Type Selection for Data Migration

    If you encounter an error message indicating an invalid shopping cart type, it means the system couldn't recognize the platform you selected or the version you're using isn't supported. This can also occur if your cart's core files have been significantly modified.

    Here's what you should do:

    1. Double-Check Your Selection: Carefully review the list of supported platforms on the Cart2Cart website and ensure you've chosen the correct one.
    2. Verify Your Platform Version: Confirm the exact version of your source and target shopping carts. While Cart2Cart strives to support the latest stable versions (e.g., Magento, Shopify, WooCommerce, OpenCart, PrestaShop) , older or heavily customized versions might not be fully compatible.
    3. Investigate Modifications: If you've made significant customizations to your shopping cart's core files, this can interfere with Cart2Cart's ability to connect and extract data. Consider if these modifications are necessary for the migration process.
    4. Contact Cart2Cart Support: If you've confirmed the correct platform and version, and you haven't made significant modifications, reach out to Cart2Cart Support. When contacting support, please provide the following information:
      • Your source and target cart platforms and their versions.
      • Details about any modifications made to your cart's core files.
      • A screenshot of the error message.

    Need to migrate your store to a new platform? Start your free demo now and experience the ease of automated shopping cart migration with Cart2Cart!

    For personalized assistance, schedule a call with a migration expert. Or contact support via Live chat.

    More info
    HTTP Error Code 413 Request Entity Too Large

    Fixing HTTP Error 413: Request Entity Too Large During Data Migration

    Encountering an HTTP Error 413 "Request Entity Too Large" during your data migration with Cart2Cart? This error indicates that the server is rejecting the request because it exceeds the configured size limit. Here's how to resolve it:

    1. Increase PHP Configuration Values: Adjust the memory_limit and post_max_size parameters in your PHP configuration file (php.ini). These settings control the maximum amount of memory a script can allocate and the maximum size of data that can be sent in a POST request, respectively. A common starting point is to increase these values to 64M or 128M.
    2. Adjust Suhosin Extension (If Installed): If the Suhosin extension is installed for PHP, it may be further restricting the size of POST requests. Increase the suhosin.post.max_value_length parameter. A value of 32M is often sufficient.

    Explanation: During a data migration, especially with a large online store, substantial amounts of data are transferred between your source and target platforms. The "Request Entity Too Large" error occurs when the server-side settings limit the size of this data transfer. By increasing the PHP memory limit and post size, you allow the server to handle the larger data payloads required for a complete and successful data migration. For example, migrating from Magento to Shopify or from WooCommerce to BigCommerce may require more resources, especially when dealing with images and product descriptions.

    If you're unsure how to modify these settings or continue to experience issues, please contact your hosting provider or system administrator for assistance. You can also reach out to Cart2Cart's support team via live chat for further guidance.

    Next Steps: Ready to migrate your store? Start your free demo now!

    More info
    HTTP Error Code 302 Moved Temporarily, 301 Moved Permanently

    Troubleshooting Cart2Cart Bridge Errors During Data Migration

    Encountering a 301 or 302 redirect error during your Cart2Cart data migration often indicates that the connection between our service and your store is being blocked. This can be due to incorrect bridge placement, URL issues, or server-side configurations like .htaccess rules. Here's how to resolve it:

    Possible Solutions for Cart2Cart Data Migration Issues:

    1. Verify Bridge Location: Ensure the Cart2Cart bridge file is located in the root directory of your store. This is crucial for establishing a proper connection.
    2. Confirm Store URL: Double-check that the store URL you provided is accurate and accessible. A typo can easily lead to a connection error.
    3. Inspect .htaccess File for Redirects: The .htaccess file, located in your store's root directory, controls important server configurations. Review it for any redirects or directives that might be blocking access to the Cart2Cart bridge.
      Warning: Incorrectly editing the .htaccess file can break your website. If you're unsure, consult with your system administrator or web developer.
    4. Whitelist Cart2Cart IPs: Your server's firewall might be blocking Cart2Cart's access. Whitelisting our IPs can resolve this. Refer to our detailed guide on whitelisting Cart2Cart IPs for instructions.
    5. Pinnacle Cart .htaccess Exception: If you're using Pinnacle Cart, you may need to add a specific exception for the bridge in your .htaccess file.

      To do this, change the following line:

      !^(\#(.)*|\?(.)*|login\.php(.)*|admin\.php(.)*|index\.php(.)*|images\ /(.)*|robots\.txt(.)*|\.htaccess\.back(.)*|download\.php(.)*|\.htaccess(.)* /readme\.txt(.)*|install\/(.)*|content\/(.)*)

      Into this:

      !^(\#(.)*|\?(.)*|login\.php(.)*|admin\.php(.)*|index\.php(.)*|images\ /(.)*|robots\.txt(.)*|\.htaccess\.back(.)*|download\.php(.)*|\.htaccess(.)* /readme\.txt(.)*|install\/(.)*|content\/(.)*|bridge2cart\/(.)*)
    6. Contact Your System Administrator: If none of the above solutions work, your system administrator can provide further assistance in diagnosing and resolving the issue.

    Still having trouble with your eCommerce data migration? Start your free demo or contact our support team via live chat for expert help.

    More info
    HTTP Error Code 403 Forbidden, Access Denied

    Troubleshooting 403 Forbidden Errors During eCommerce Data Migration

    Encountering a 403 Forbidden error during your eCommerce data migration can be frustrating. This error indicates that access to certain files or folders is restricted, preventing Cart2Cart from completing the migration process. Here's how to diagnose and resolve common causes of this issue to ensure a smooth data migration experience.

    1. Verify File Permissions: Incorrect file permissions are a common cause. For the bridge2cart folder, specify file permissions of 755. For files within that folder, use permissions of 644. These permissions ensure that the server can access and execute the necessary files.

    2. Check for Access Restrictions in .htaccess: Contact your system administrator or hosting provider to determine if there are any access restrictions configured in the .htaccess file that might be blocking the bridge file. This file controls access to your website's files and folders.

    3. Ensure a Valid Index Page Exists: The main page file of your site should be named index.shtml, index.html, index.htm, index.phtml, or index.php. File names are case-sensitive, so index.html and Index.html are treated as different files. If your home page has a different name (e.g., home.html), you have the following options:

      • Rename your home page to one of the valid index file names (index.shtml, index.html, index.htm, index.phtml, or index.php).
      • Set up a redirect on the index page to your actual home page.
      • Configure a different default home page in your .htaccess file.
    4. Incorrect File Ownership: A 403 Forbidden error can also stem from incorrect ownership of your web content files and folders. Ensure that the files are owned by the correct user (usually the web server user).

    5. Create .htaccess file: Create .htaccess file inside bridge2cart folder with content:

                
                  Order deny,allow
                  Deny from all
                  <Files "*.php">
                  Allow from all
                  </Files>
              

    If you're still experiencing issues with your eCommerce data migration and encountering a 403 Forbidden error, don't hesitate to seek expert assistance. Schedule a call with a Cart2Cart migration expert to get personalized support and ensure a seamless transition.

    More info
    HTTP Error Code 401 Unauthorized

    Troubleshooting HTTP Error Code 401 Unauthorized During Data Migration

    Encountering an HTTP Error Code 401 Unauthorized during your data migration with Cart2Cart? This error indicates that the connection to your source or target store is being blocked. Here's how to troubleshoot and resolve this issue to ensure a smooth data migration services experience:

    1. Check for HTTP Basic Authentication:

      Ensure that access to your shopping cart content is not blocked by HTTP Basic Authentication. HTTP Basic Authentication is a security method that requires a username and password to access a webpage or resource. If enabled, temporarily disable it or provide the correct credentials to Cart2Cart.

    2. Verify Store Availability:

      Confirm that your store is accessible online during the data migration process. Downtime or connectivity issues can trigger a 401 error.

    3. Whitelist Cart2Cart IPs:

      Your server's firewall might be blocking Cart2Cart's access. Whitelisting Cart2Cart's IP addresses can resolve this. Refer to our detailed guide for instructions on how to whitelist IPs.

    4. Contact Your System Administrator:

      If none of the above solutions work, it's best to consult your system administrator for further assistance. They can investigate server configurations and security settings that might be causing the issue.

    Still having trouble? Contact our support team for expert help with your data migration.

    Start your free demo - https://newapp.shopping-cart-migration.com/

    Schedule a Call with Migration Expert - https://meet.shopping-cart-migration.com/team/csm

    More info
    Connection Bridge Not Found!

    Troubleshooting: Connection Bridge Issues During Data Migration

    During your eCommerce platform migration, the Connection Bridge plays a crucial role in enabling Cart2Cart to access your store's data. If you encounter issues, it's often related to the bridge setup. This guide will help you troubleshoot and resolve common problems.

    Please ensure you've uploaded the Connection Bridge to your store's root directory. You can verify its installation with these steps:

    1. Enter http://[yourstore url]/bridge2cart/bridge.php in your browser's address bar.
    2. If the message "BRIDGE_INSTALLED" appears, the bridge files are working correctly.
    3. Alternatively, you can try http://[yourstore url]/bridge2cart/. If you see a directory listing or a similar indication that the folder is accessible, the bridge is likely installed.

    If the "BRIDGE_INSTALLED" message doesn't appear, check the file permissions:

    • bridge.php: Set to 644 (if /bridge2cart folder permission is 755) or 666 (if /bridge2cart folder permission is 777), depending on your server configuration.
    • /bridge2cart folder: Set to 755 (if bridge.php permission is 644) or 777 (if bridge.php permission is 666), depending on your server configuration.

    These permissions ensure that the web server can access and execute the bridge file. Incorrect permissions are a common cause of the "Connection Bridge Not Found" error during the data migration process.

    If you're still experiencing difficulties after checking the installation and permissions, our Support Team is ready to assist. They can provide personalized guidance to resolve any issues with your Connection Bridge setup and ensure a smooth data migration experience.

    Ready to start your eCommerce platform migration? Start your free demo now.

    More info
    Store images directory is not writable or doesn't exist.

    Troubleshooting: 'Store images directory is not writable or doesn't exist' Error During eCommerce Data Migration

    When performing an eCommerce data migration, you might encounter the error: "Store images directory is not writable or doesn't exist." This typically indicates that the system lacks the necessary permissions to access or write to the directory where your store's images are stored. To resolve this, ensure that the image directory exists and has the correct write permissions. Here's a detailed breakdown of potential causes and solutions:

    1. Path to image directory doesn’t exist:
      • Solution: Create the image directory on your server. Ensure the directory name matches the one configured in your target store's settings.
    2. Path to image directory doesn’t correspond to the path specified in store configuration:
      • Solution: Verify that the image directory path in your store's configuration settings is accurate and points to the correct location on your server. Double-check for typos or incorrect slashes.
    3. Insufficient access permissions:
      • Solution: Set the write permissions for the image directory and all its subfolders and files. Use the following command via SSH: chmod -R 777 [images_dir]. Note: While 777 grants broad permissions, consider using more restrictive permissions if security is a concern. Consult your hosting provider for the most appropriate permissions settings.
    4. Non-default image directory:
    5. Magento fresh install:
      • Solution: If your target store is a fresh installation of Magento, ensure that the catalog/category and catalog/product folders exist within the media directory. Create them if they are missing.

    Important Note: Correct file permissions are crucial for a successful eCommerce data migration, especially when transferring images. Ensure that your server configuration allows the migration tool to write to the image directory.

    Facing challenges with your eCommerce data migration? Start your free demo and experience seamless migration with Cart2Cart! Or Schedule a Call with Migration Expert.

    More info
    Default language is not specified

    Default Language Not Specified During Data Migration?

    Encountering issues because the default language isn't specified during your data migration? This usually indicates a problem with the language configuration on your source or target store. To ensure a smooth data migration, your shopping cart platform must have at least one language set as the default.

    Troubleshooting Default Language Issues

    If you're facing this issue, follow these steps:

    1. Check your Source Store: Verify the language settings in your source e-commerce platform. Ensure that a default language is properly configured. For example, if you're migrating from Magento, navigate to Stores > Configuration > General > General > Locale Options and confirm the Default Country and Default Locale are set.
    2. Check your Target Store: Similarly, check the language settings on your target store. A default language must be configured before initiating the data migration process.
    3. Cart2Cart Requirements: The Cart2Cart migration tool requires a default language to map data correctly. Without it, certain data fields may not be transferred properly.

    If you continue to experience issues after verifying your language settings, contact our support team via Live Chat. We are available to assist you with your data migration needs.

    Need help with your shopping cart migration? Start your free demo today!

    More info
    Couldn't connect to host

    Troubleshooting Connection Issues During Data Migration

    Encountering connection problems during your data migration process? Here's a guide to help you diagnose and resolve the issue:

    1. Verify Store Availability:

      Begin by ensuring your source and target stores are both online and accessible. Use a web browser to visit the storefront and admin panel of each store. If either is unavailable, investigate the cause (e.g., server downtime, maintenance) and resolve it before attempting the data migration again. Consider checking the website's status using online tools like Down for Everyone or Just Me.

    2. Firewall Restrictions:

      Firewalls can sometimes block connection requests from Cart2Cart's servers. Contact your system administrator or hosting provider's support team to check if a firewall is preventing Cart2Cart from accessing your store. Provide them with Cart2Cart's IP addresses (available in our documentation or by contacting support) and ask them to whitelist these IPs. This will allow Cart2Cart to establish a connection and proceed with the data migration.

    3. Incorrect Store Credentials:

      Double-check the API credentials (API key, username, password) you entered for both your source and target stores. Ensure there are no typos or incorrect characters. Incorrect credentials are a common cause of connection failures. If you're unsure, reset the credentials in your store's admin panel and try again.

    4. SSL Certificate Issues:

      If your store uses HTTPS (SSL), ensure that the SSL certificate is valid and correctly installed. An invalid or expired certificate can prevent Cart2Cart from establishing a secure connection. You can use online SSL checkers to verify your certificate's status.

    5. Server Resource Limits:

      In some cases, server resource limitations (e.g., memory, CPU) can prevent Cart2Cart from connecting to your store. Contact your hosting provider to ensure that your server has sufficient resources to handle the data migration process. Consider temporarily increasing resource limits during the migration.

    Still having trouble with your data migration? Don't hesitate to contact Cart2Cart support via Live Chat for immediate assistance. You can also schedule a call with a migration expert for personalized guidance.

    Ready to start your data migration?

    Start your free demo now!

    More info
    HTTP Error Code 406, Not Acceptable

    Web browsers request information from the server by sending an Accept header. If the server can't provide the data in the format specified in the Accept header, it returns a 406 Not Acceptable error.

    Reasons for a 406 Error During Data Migration

    A 406 error can arise due to your server's mod_security rules. Mod_security is an Apache web server security module often enabled by default on hosting accounts. If a site, page, or function violates these rules, the server might return a 406 error during the data migration process.

    How to Resolve 406 Errors During Data Migration

    You can try disabling mod_security. You might also be able to disable a specific rule or disable it for a specific domain within your control panel.

    Note: The option to enable/disable mod_security might not be available in your cPanel or on dedicated servers. In such cases, use the command line via SSH or contact your tech support.

    If you have any questions about your data migration and encounter a 406 error, contact the Cart2Cart Support Team for prompt assistance.

    More info

    Just set up the migration and choose the entities to move – the service will do the rest.

    Try It Free

    Delegate the job to the highly-skilled migration experts and get the job done.

    Choose Package