How can we help you?
How to create, update and delete metafields on a Shopify store?
After a Shopify migration with Cart2Cart, extra product/customer data often lands as metafields. You can create definitions and edit values in Shopify admin without a third-party app.
Create or edit metafield definitions (current)
1. In Shopify app, choose Metafields Guru
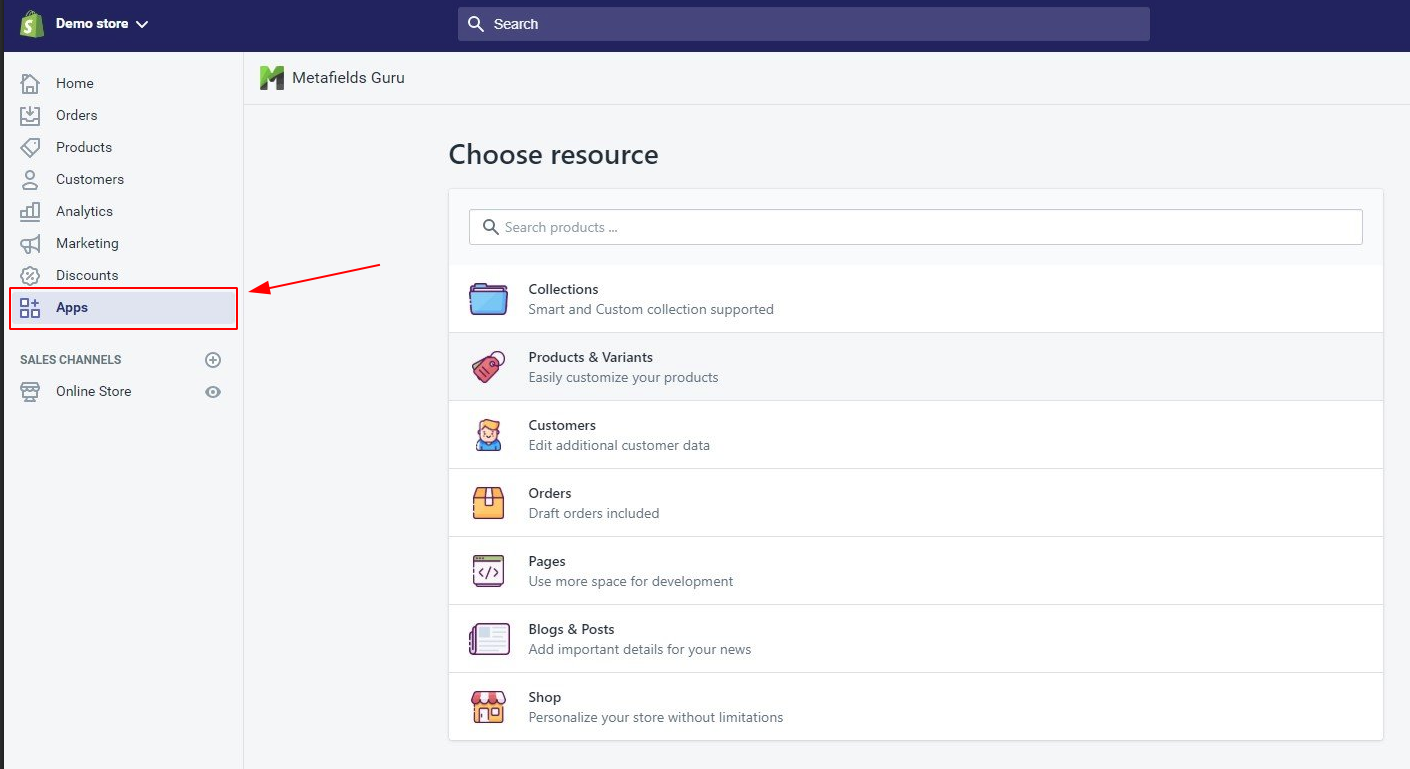
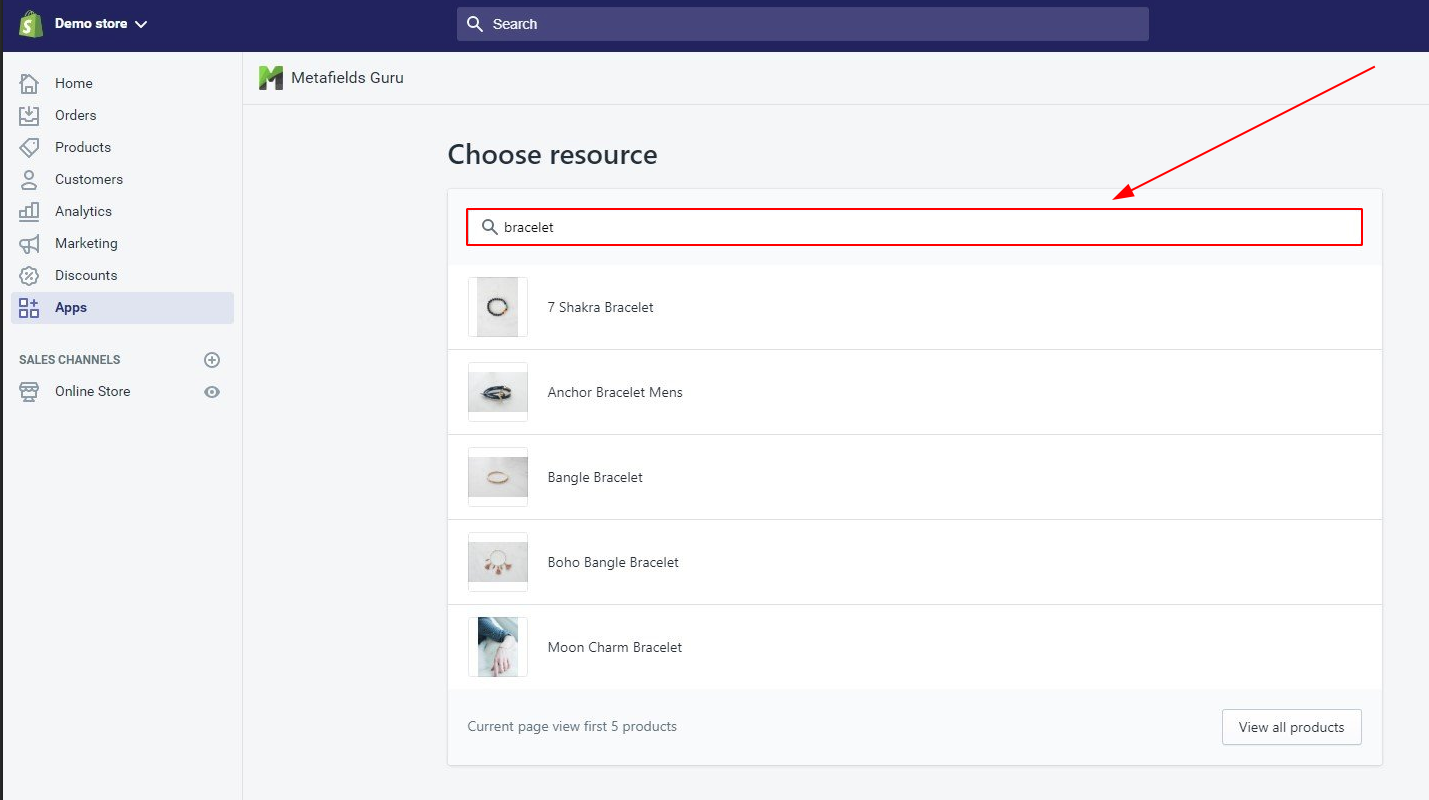
2. Choose the resource (for example Products, Variants, Customers, Orders, or Collections).
3. Click Create metafield (or open an existing definition).
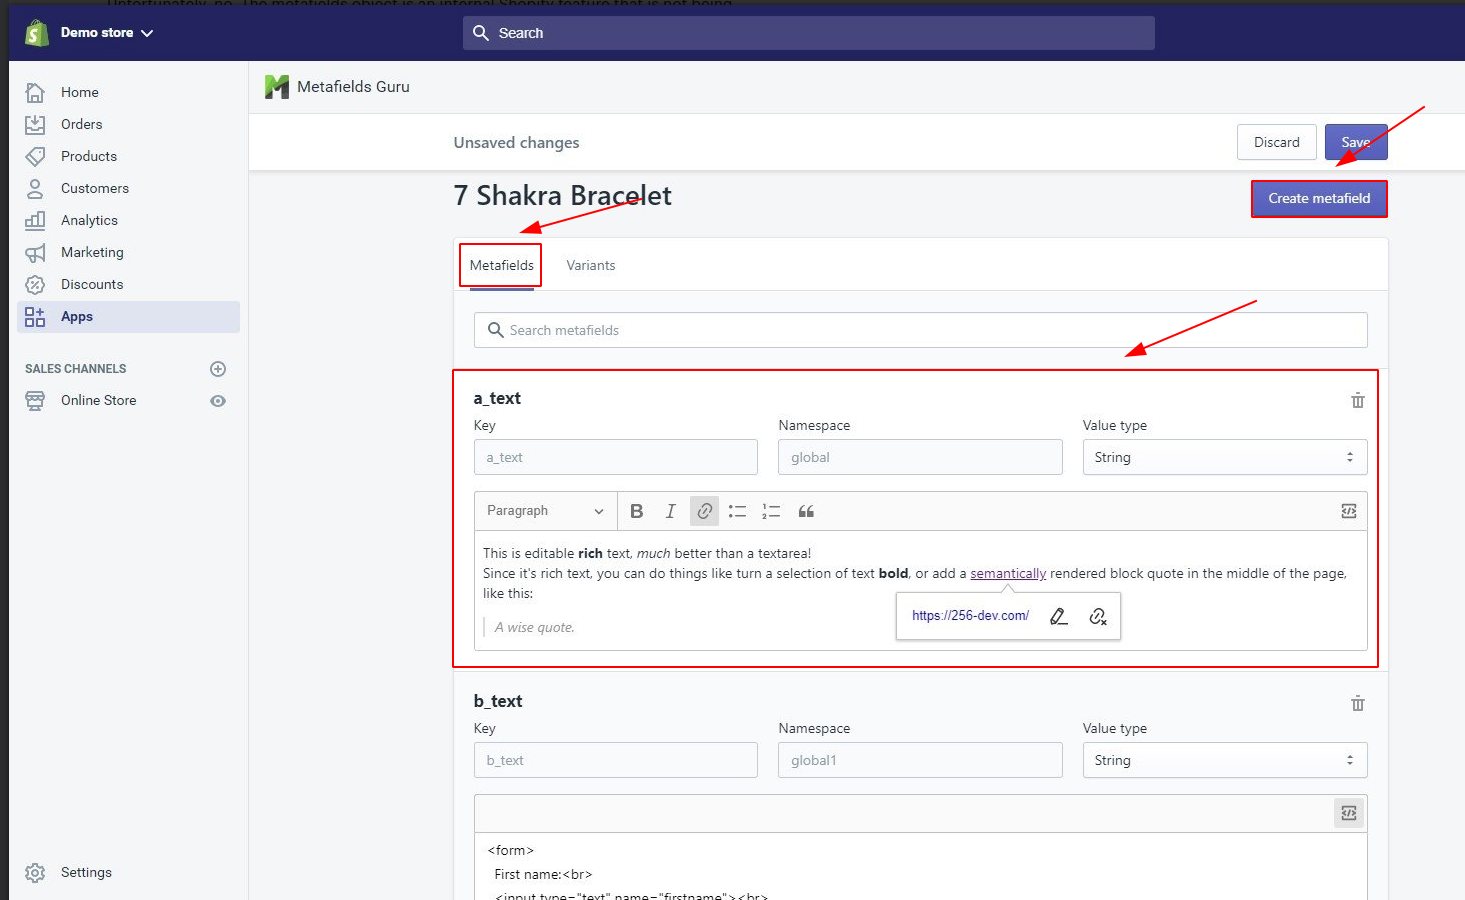
4. Enter a name, confirm namespace/key, choose a type, set validations if needed, then Save.
5. Open a product (or other resource) and scroll to the metafields section to add or update values.
Official reference: Shopify Help — Metafields.
Optional apps (for bulk editing) are still available in the Shopify App Store, but native Custom data covers create/update/delete for most migration follow-up work.
Do you need help? Contact our support team
Just set up the migration and choose the entities to move – the service will do the rest.
Try It FreeDelegate the job to the highly-skilled migration experts and get the job done.
Choose Package