
How can we help you?
The Connection Bridge is a small file package that lets Cart2Cart connect securely to a self-hosted store during migration. Each download is unique to your Cart2Cart account (it includes a Security Token), so another account cannot use your bridge.
Do you need a Connection Bridge?
Yes — self-hosted carts such as Magento, WooCommerce, and PrestaShop. In the wizard, enter the store URL, then install the bridge.
No — hosted / API carts such as Shopify and BigCommerce. Enter API credentials instead. Do not upload a bridge.
Where the files must go
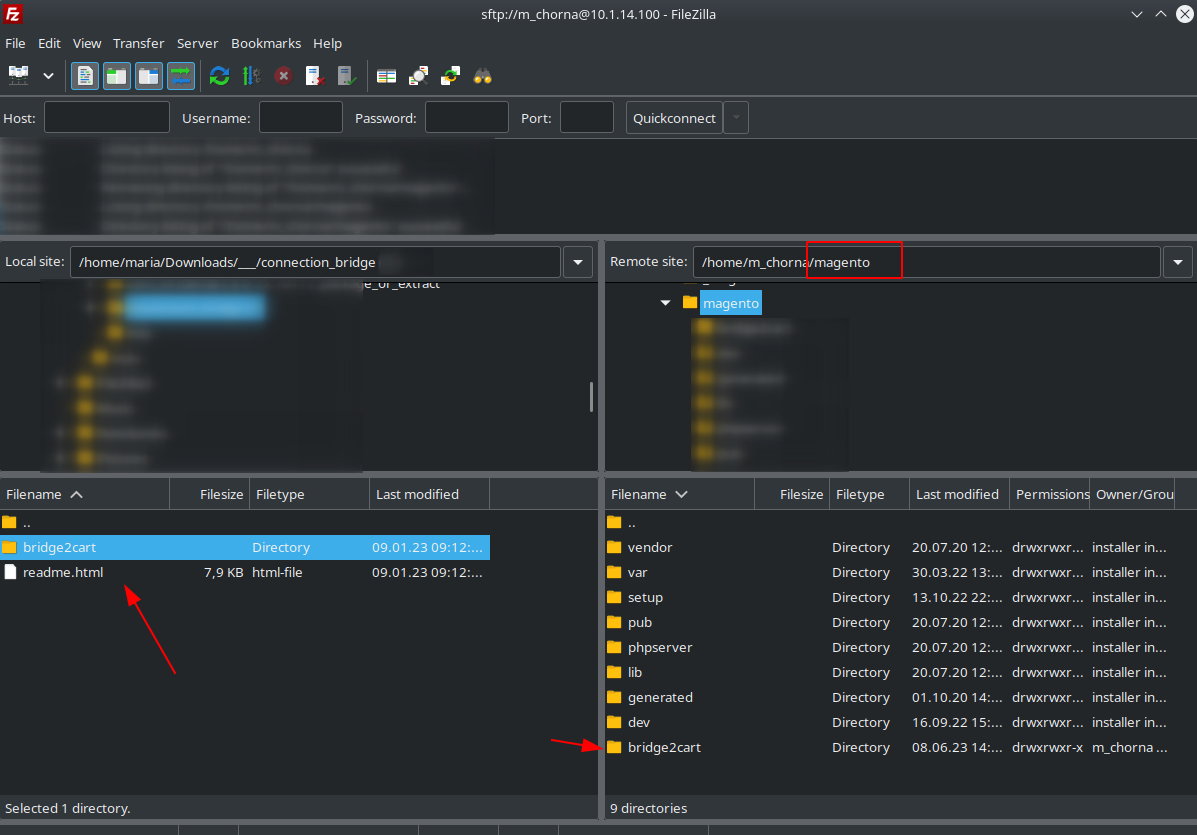
After you extract the ZIP, you should have a folder named bridge2cart (it contains bridge.php and related files). Upload that folder to the store root — the same directory as the cart’s main config file. For WordPress/WooCommerce, that is next to wp-config.php.
Do not place it inside a plugins, themes, or wp-content folder. If the store runs in a subdirectory (for example https://your-store.com/shop/), put bridge2cart in that subdirectory.
Install the Connection Bridge
Use automatic upload when the wizard offers it. Otherwise download the ZIP and upload the folder yourself.
Option 1: Automatic upload (easiest)
1. In the wizard, choose automatic Connection Bridge upload.
2. Enter your FTP/SFTP host, port (if not the default), login, password, and the path to the store root.
3. Let the wizard upload the files. Continue when the store connection check succeeds.
If this fails (wrong path, firewall, or unsupported login method), use Option 2. Full detail: How can I upload Connection Bridge automatically?
Option 2: Manual upload
1. After you enter the Source or Target store URL, download the Connection Bridge ZIP from the wizard and extract it on your computer.
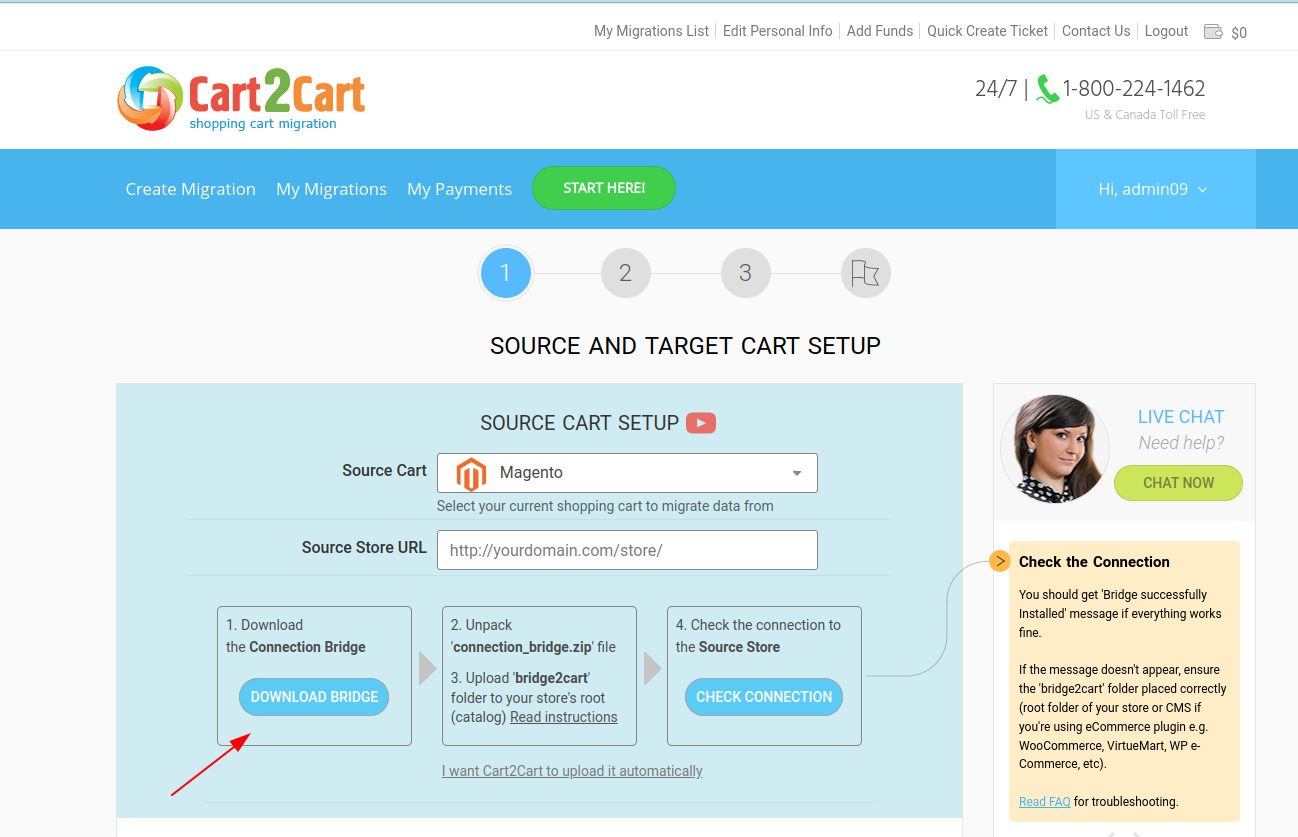
2. Connect with SFTP/FTP or your host file manager, open the store root, and upload the extracted bridge2cart folder there.
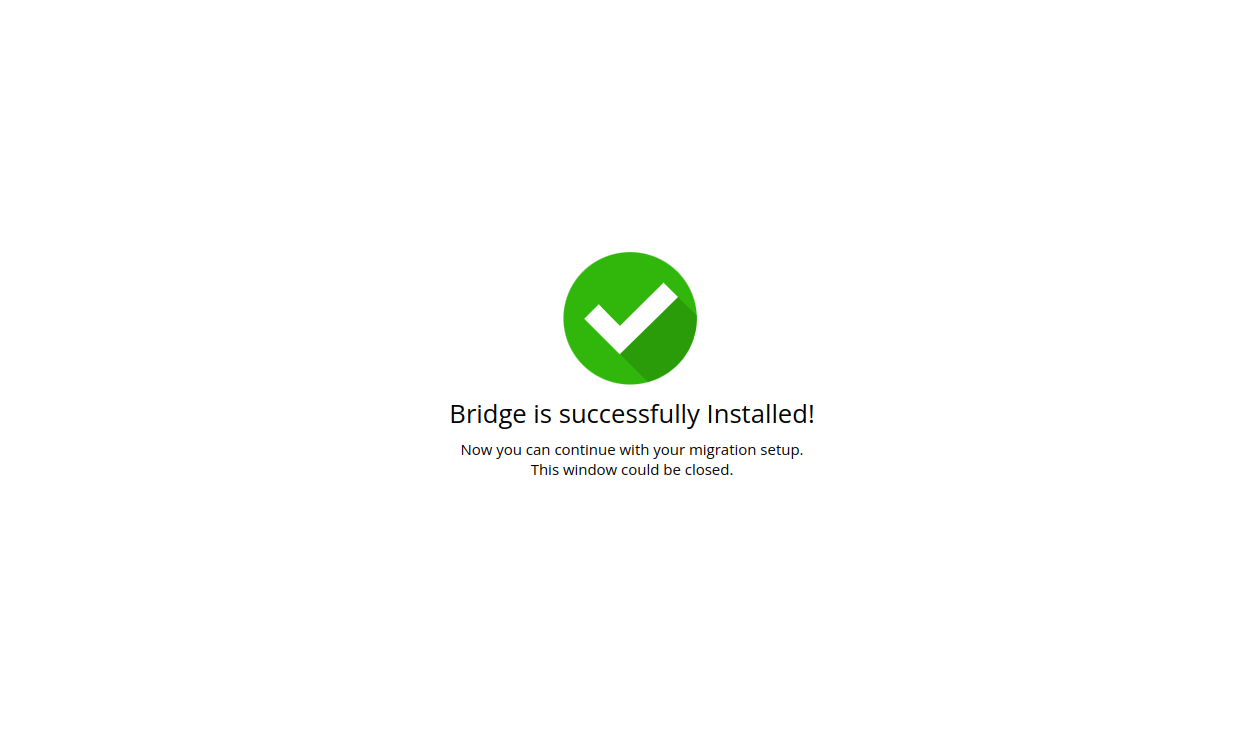
3. In a browser, open https://your-store.com/bridge2cart/bridge.php (add a subdirectory if your cart lives in one). You should see BRIDGE_INSTALLED. Then return to the wizard and continue.
The video below shows Magento. Other self-hosted carts use the same ZIP → bridge2cart → store-root steps.
If you do not see “BRIDGE_INSTALLED”
Work through this list, then retry the wizard connection check:
1. Re-upload the extracted bridge2cart folder (not the ZIP file) to the true store root.
2. Set folder permissions to 755 (use 777 only if your host requires it).
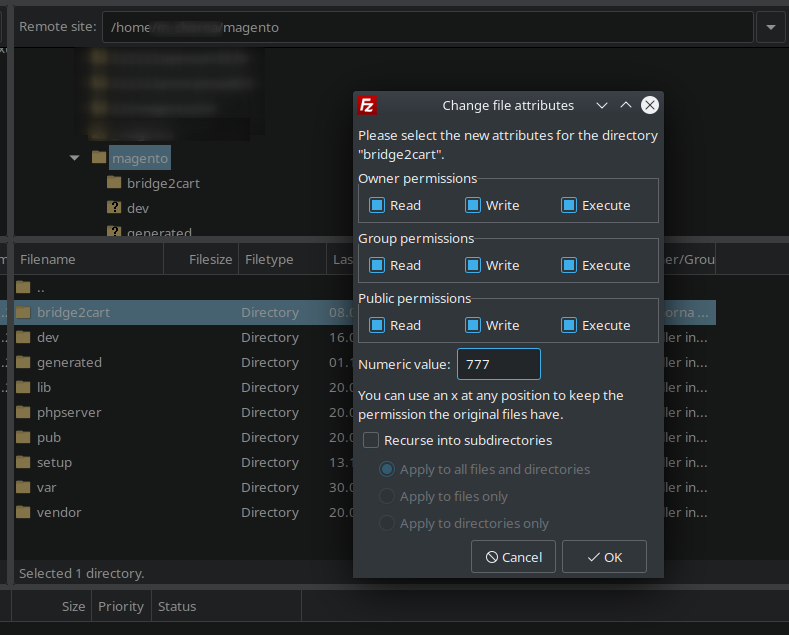
3. Set bridge.php to 644 (or 666 if the folder is 777).
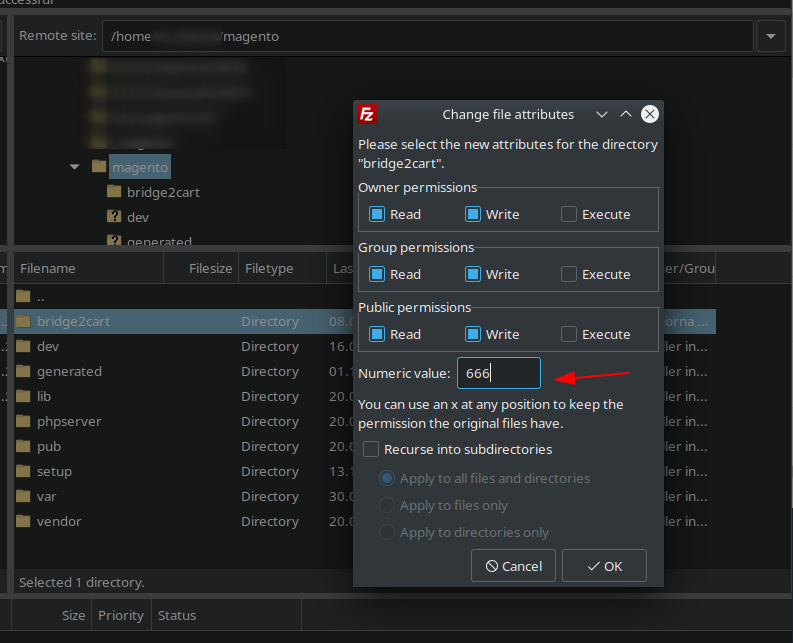
4. Confirm PHP can run .php files, and that redirects (often in .htaccess) are not sending /bridge2cart/ somewhere else. The check URL should stay on bridge.php and show BRIDGE_INSTALLED.
Related: Connection Bridge Not Found and PHP configuration for the bridge check. If it still fails, contact the Support Team.
Is it secure? When can I delete it?
The bridge only helps copy the data you select for migration. The unique Security Token ties it to your account. Keep the folder in place until the migration is finished — do not delete it during an active transfer. Also leave redirects that rewrite /bridge2cart/ off until the transfer is done.
After migration completes, you can delete the bridge2cart folder from the store root.
Do you need help? Contact our support team
Just set up the migration and choose the entities to move – the service will do the rest.
Try It FreeDelegate the job to the highly-skilled migration experts and get the job done.
Choose Package