General Questions

How can I get data out of SellerDeck?

Migrating from SellerDeck: A Guide to eCommerce Data Migration

Please note: To migrate from SellerDeck, you need to export a CSV file and import it into your desired shopping cart using CSV File migration. This is a common method for eCommerce data migration. Alternatively, you can delegate the entire migration process to the Cart2Cart team by purchasing one of our Data Migration Service Packages. This allows for a hands-off approach to your eCommerce data migration.

In some cases, to complete a migration from SellerDeck (formerly Actinic), you may need to extract data from your SellerDeck client beforehand. Here's a detailed instruction on how to export your data for eCommerce data migration:

Exporting Your SellerDeck Data for Migration

Before exporting data from SellerDeck, ensure you have a designated TXT file to store the exported information. Follow these steps:

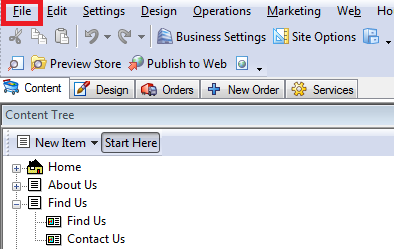
  1. Open the “File” menu.
    SellerDeck File Menu - eCommerce data migration
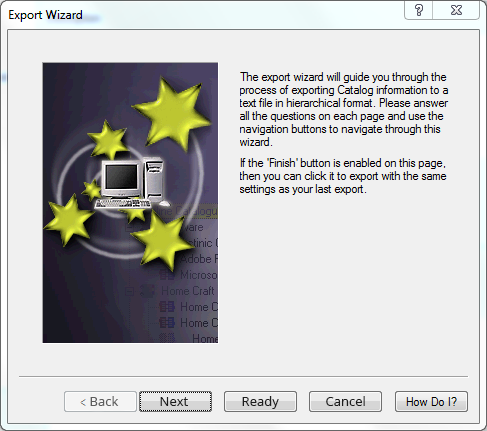
  2. Choose “Export” and click “Next”.
    SellerDeck Export Option - eCommerce data migration
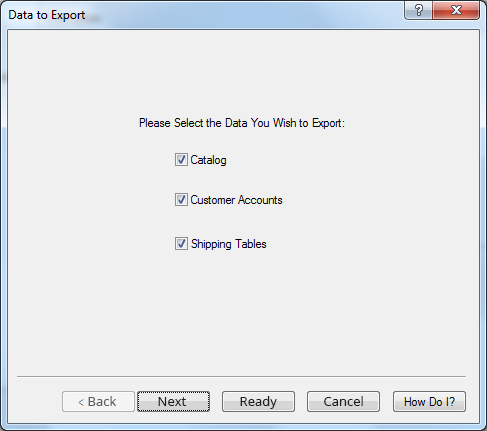
  3. Select the specific entities you want to export for your eCommerce data migration.
    SellerDeck Select Entities - eCommerce data migration
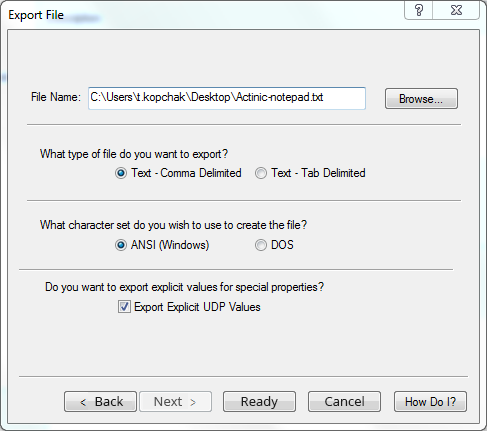
  4. In the “File Name” field, specify the TXT file you created and press “Ready”.
    SellerDeck Select File - eCommerce data migration

Once these steps are completed, all selected data will be exported to the specified TXT file, which can then be used for your eCommerce data migration. You can then use the CSV File migration option to continue your data migration.

Ready to migrate your store? Start your free demo now!


Do you need help? Contact our support team

Just set up the migration and choose the entities to move – the service will do the rest.

Try It Free

Delegate the job to the highly-skilled migration experts and get the job done.

Choose Package