Once the migration to Magento 2 is over and your newly-established store is ready for business, we advise you not to rush into the eCommerce world immediately. Even if the transition to Magento went smoothly and error-free, you may still need to settle some issues before the store goes live.
Table of Contents:
Adobe Commerce (Magento 2) is a platform for people with professional web development experience. Thus, handling its post-migration peculiarities can sometimes be challenging. Therefore, today we'll provide you with some tips and tricks for managing the Adobe Commerce (Magento 2) store after the switch.
Data Reindexing
One should keep in mind that Magento 2 indexes data to manage it faster. Thus, it is essential to perform the reindexing to make imported entities displayed on the front end correctly. After migration, it's crucial to check your migration results to ensure all data appears as expected.
There are two ways of data reindexing - you can either do it from the Magneto 2 admin panel or reindex via SSH.
Reindex from admin panel
-
- Log in to the admin panel using your Magento credentials (username and password).
-
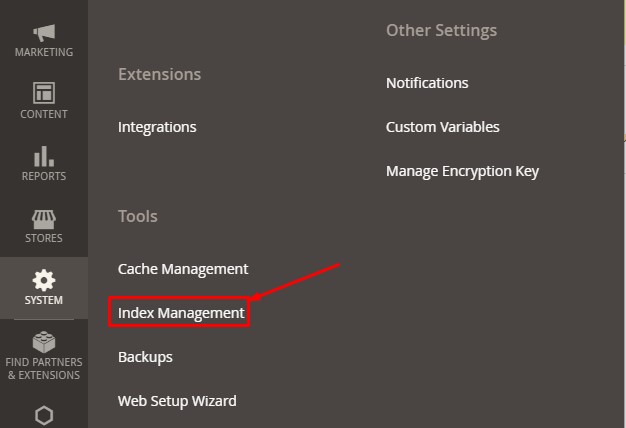
- Go to System → Index Management and review indexers' status.
-
- Choose the components with the status Reindex required. Then, go to Actions → Update on schedule (this mode provides you with the ability to reindex data on a recurring basis - e.g., once a day).
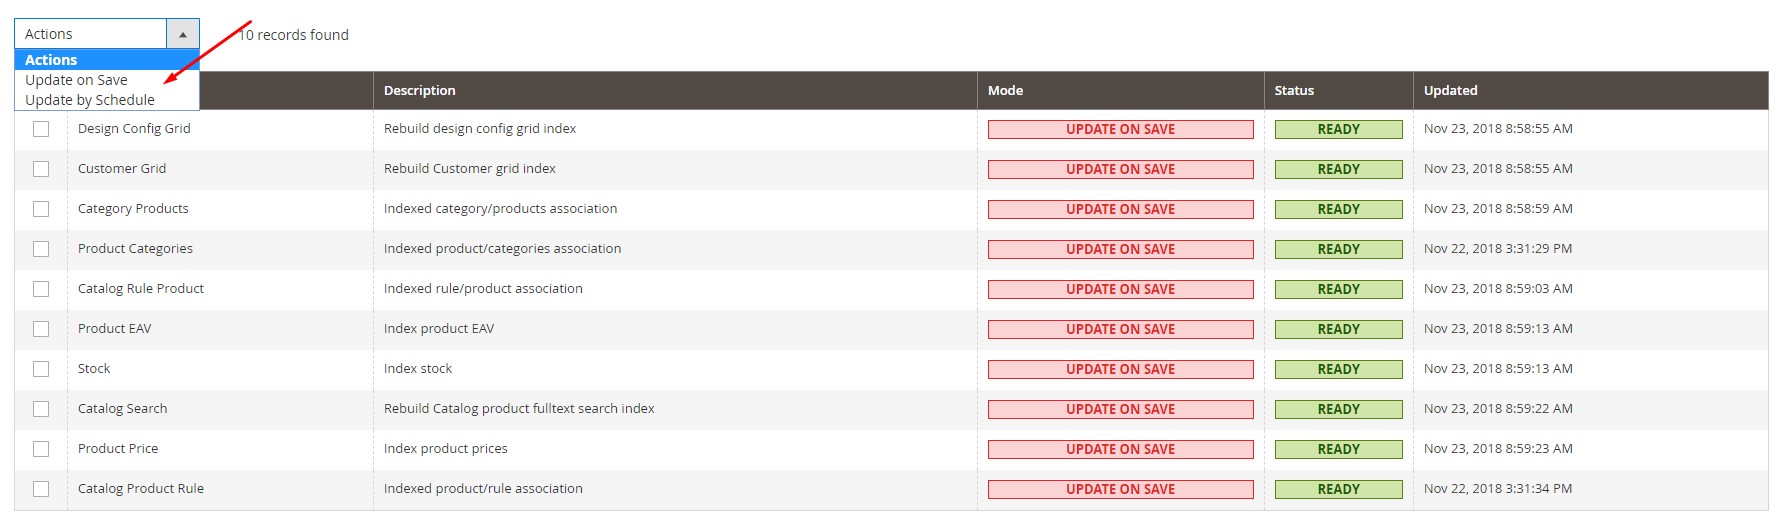
Alternatively, you can set the indexing mode to Update on save. The reindexing procedure will begin right after the admin configurations have been saved. Both the Magento company and Cart2Cart highly recommend this particular option.
Reindex via SSH
Sometimes, it is impossible to reindex all the indexes through the Admin panel, even though their status is already set to "Updated." Hence, we urge you to check the reindex process using the SSH/CLI reindex method:
-
- Connect to your Magento 2 store via SSH.
- Find the folder that contains your store (in the command line).
- Go to your Magento 2 Store's root directory.
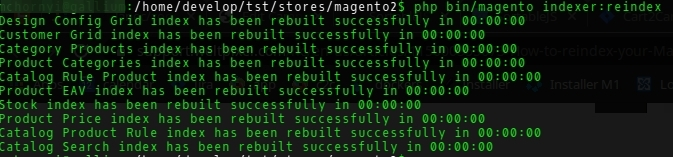
- Reindex data using the following command: php bin/magento indexer:reindex
-
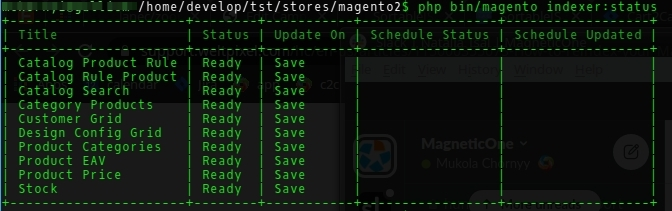
- Examine the status of the indexers and identify those that haven't been reindexed (use the command: php bin/magento indexer:status)
-
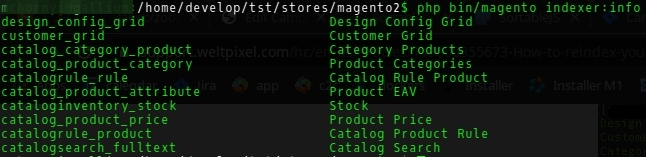
- Apply the command php bin/magento indexer:info to get the list of the indexers and corresponding indexer ids for separate reindex.
- Reindex indexers with the status Reindex required by means of the command php bin/magento indexer:reindex [catalog_category_flat]
- Check the status of the indexers with the command: php bin/magento indexer:reindex. If everything is okay, all the statuses should be set to Ready.
| Indexer Name | Indexer Method Name |
| Category Products | catalog_category_product |
| Product Categories | catalog_product_category |
| Product Price | catalog_product_price |
| Product Entity Attribute Value | catalog_product_attribute |
| Stock | cataloginventory_stock |
| Catalog Rule Product | catalogrule_rule |
| Catalog Product Rule | catalogrule_product |
| Catalog Search | catalogsearch_fulltext |
Important note: Cart2Cart performs reindexing of your store's data right after the migration is over. But we often lack some of the necessary access details, so it's recommended to reindex data manually via SSH.
Migration to Magento 2: Cache Handling
Another thing that makes the store's data visible on the front end is cache management. Caches are used for saving loaded data, images, etc. Clearing them helps to improve the overall performance of your store.
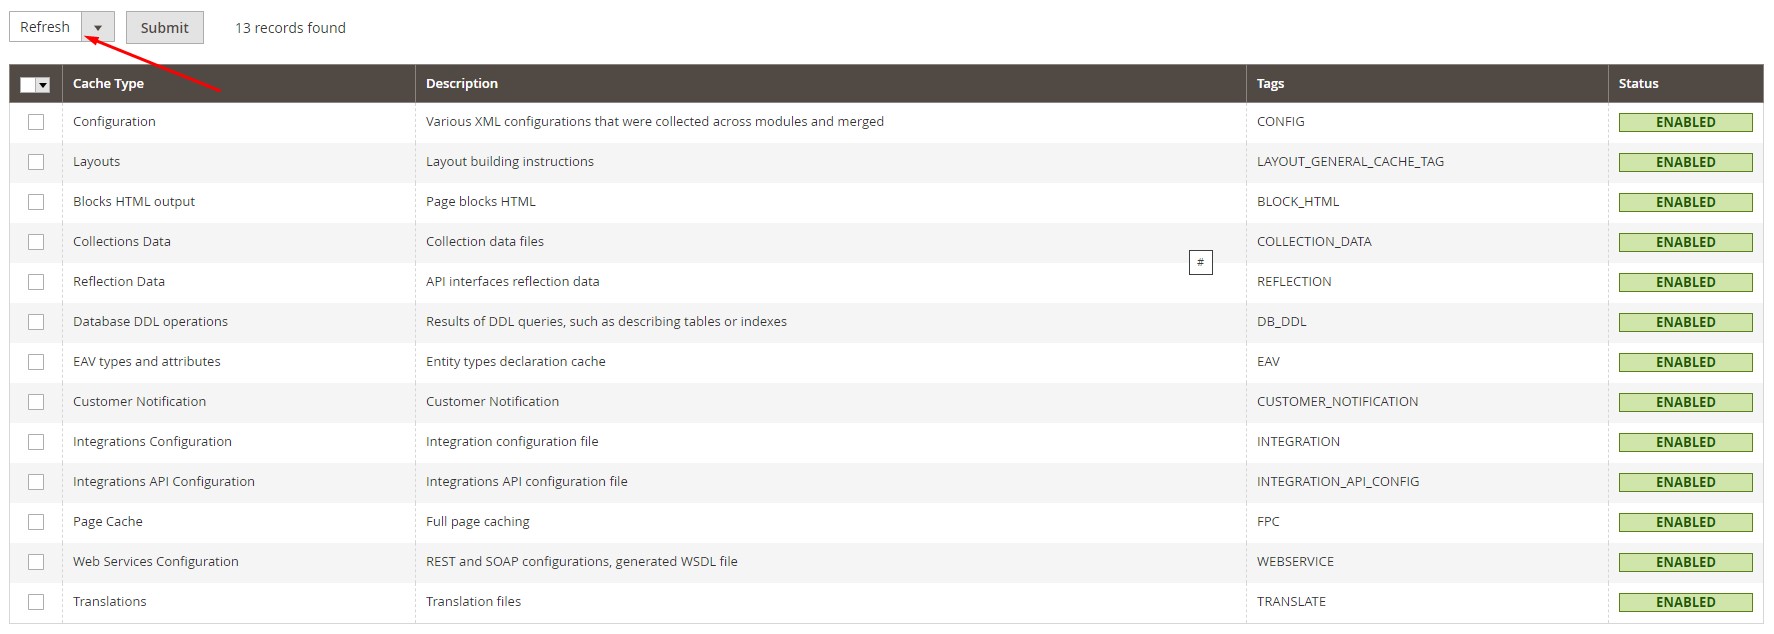
How to clear cache?
To clear your store's cache, please follow these steps:
-
- Log in to your Magento admin panel.
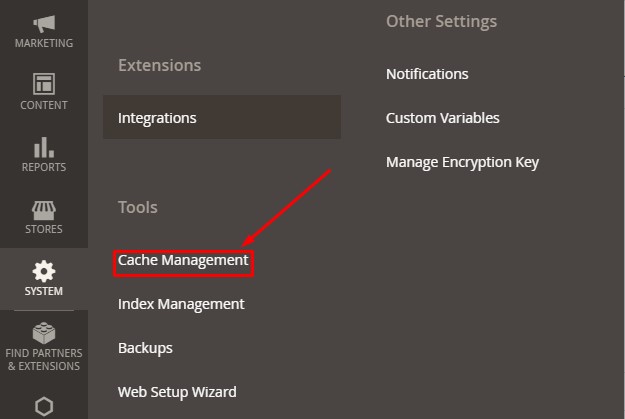
- Go to System → Cache Management.
-
- Determine the cache types that you wish to refresh.
- Choose the Cache Type blocks with the status Invalidated. Or, alternatively, select All in case you're not sure which ones need to be refreshed.
- Choose the Refresh action from the popup menu and click the Submit button.
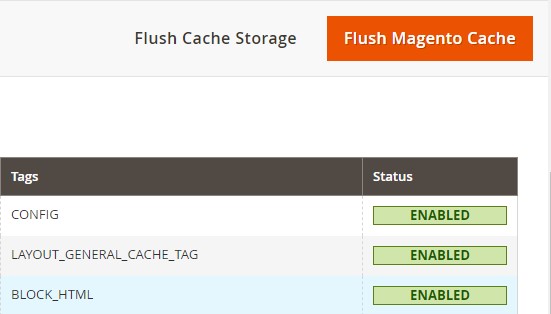
It is also possible to use the Flush Magento Cache and Flush Cache Storage buttons. The first one refreshes the cache from the backend and inner cache with the Magento tag. The latter - cache from all the Magento stores with the same storage, but located on different servers.
After clearing the cache, don't forget to refresh your browser and check whether the most recent files are visible. Please note that you may also need to clear the web browser cache to see all the updated content.
Additionally, it is advisable to flush the cache when:
- Installing extensions or modules,
- Switching to Magento Commerce,
- Upgrading your current Magento store.
Important note: We recommend you to disable the cache during the store maintenance to avoid any unforeseen issues. Just go to the Cache Management menu, select all cache types, and set Disable by clicking the Submit button on the upper left drop-down menu. Once done, make sure to Enable the cache by repeating the same procedure.

Migration to Magento 2: Product Management
One of the most common problems that may arise right after the migration is the non-visibility of some products. If this issue remains after the reindexing and cleaning the cache, we suggest you to consider the following product management tips, or explore remigration services if deeper issues persist:
Out of stock products are not displayed on the front end
Magento doesn't show products with no inventories by default. Therefore, they do not appear on the front end and are not visible to visitors.
If you wish to display the out of stock notification on the product page, do the next:
-
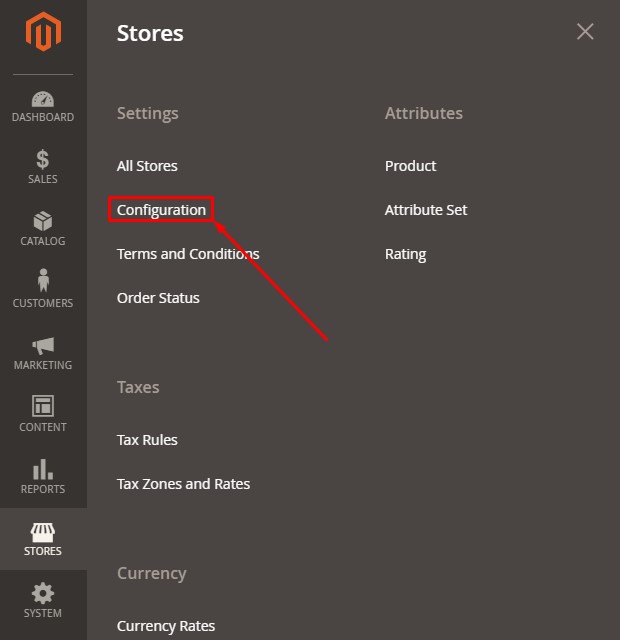
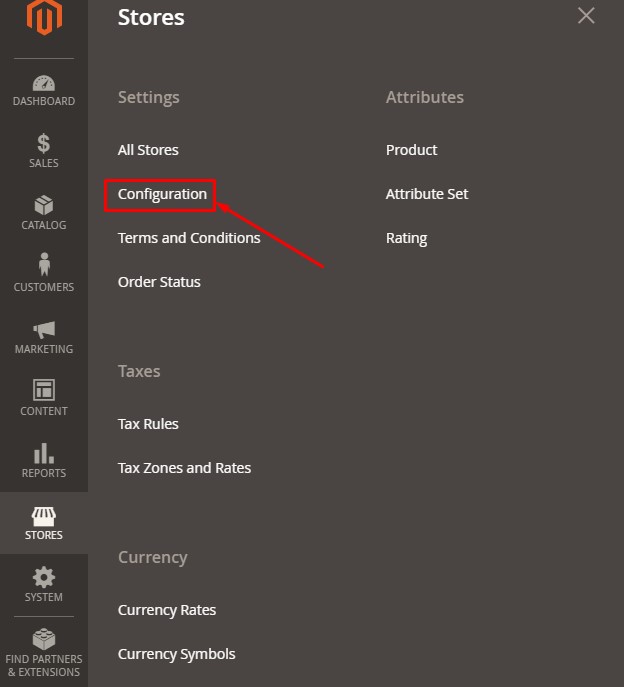
- In the admin panel, choose Stores → Settings → Configuration.
-
- Select Inventory from the drop-down Catalog menu.

-
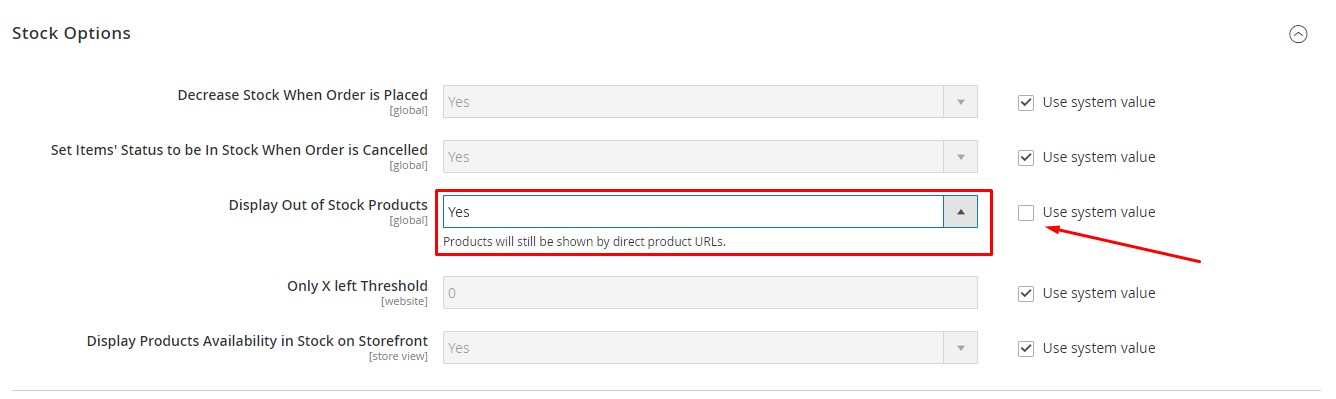
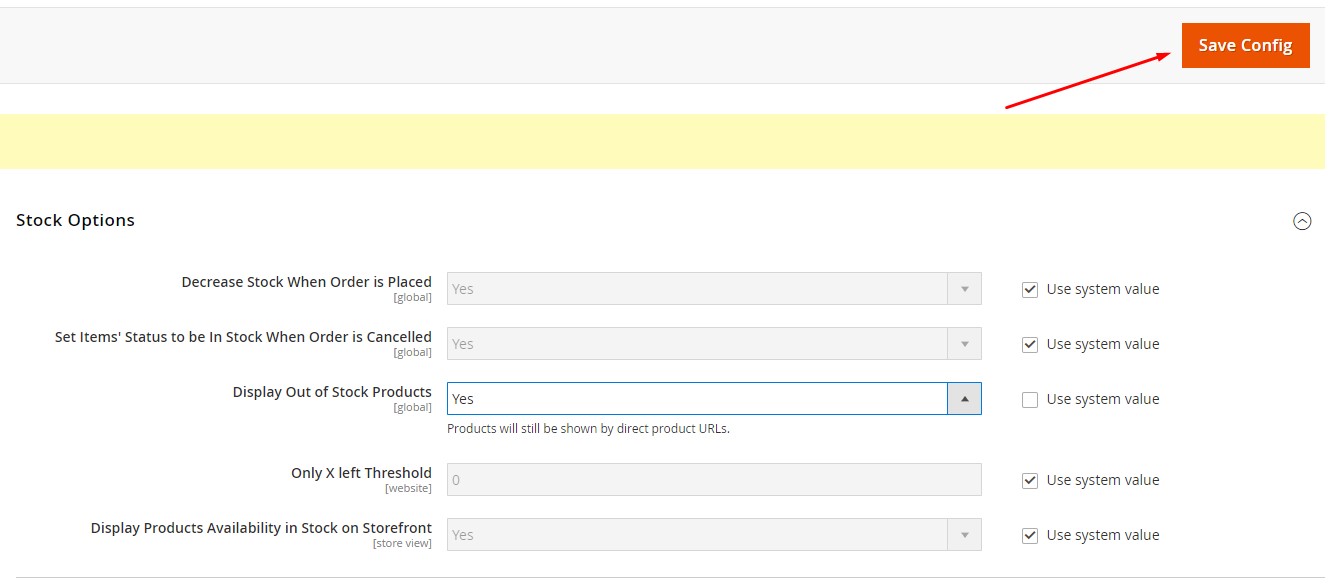
- Click the Stock Options and find the Display Out of Stock Products field. Uncheck the System Value box and change NO to YES.
-
- Tap the Save Config button in the right upper corner.
- Perform the reindex.
Planning to upgrade your store to the latest stable version of Adobe Commerce (Magento 2), follow our comprehensive step-by-step guide!
Categories or products are not displayed on the front end
If the categories or products have the wrong location or status, they may become invisible. To change that:
-
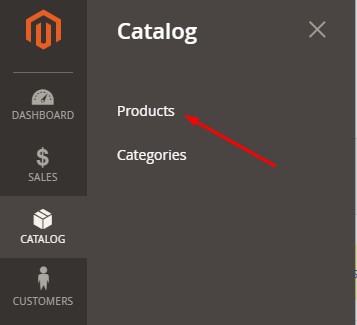
- Select Catalog → Products in the admin panel. Check whether the products you want to display are located in the needed categories.
-
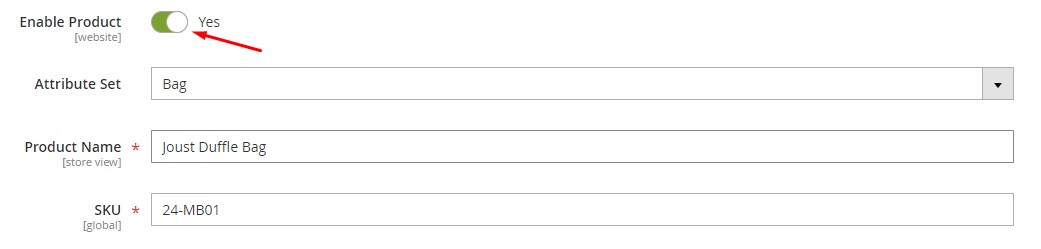
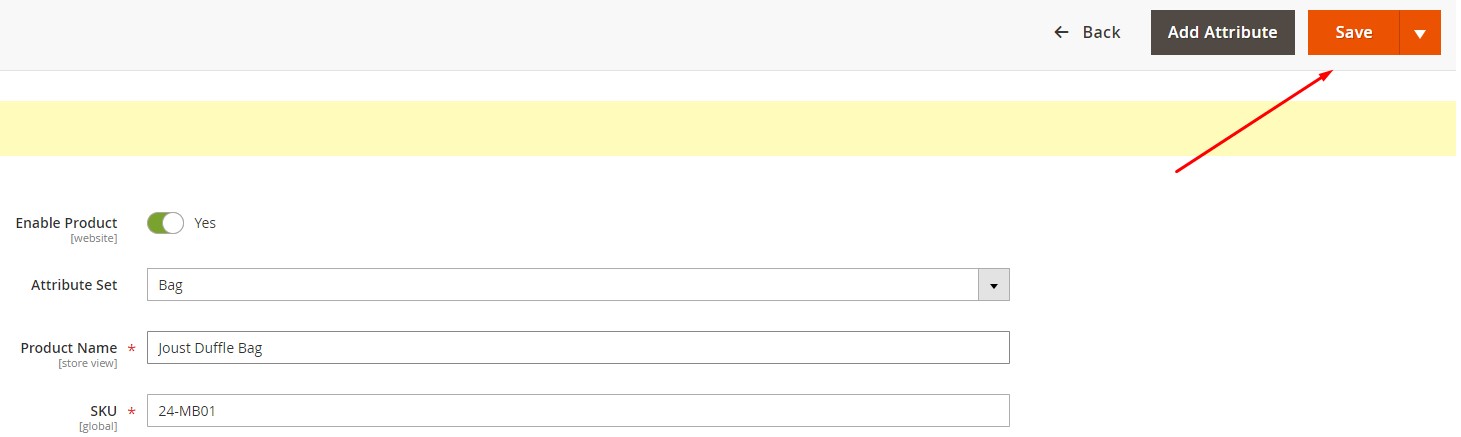
- Click on the desired product. The Enable Product section must be set to YES.
-
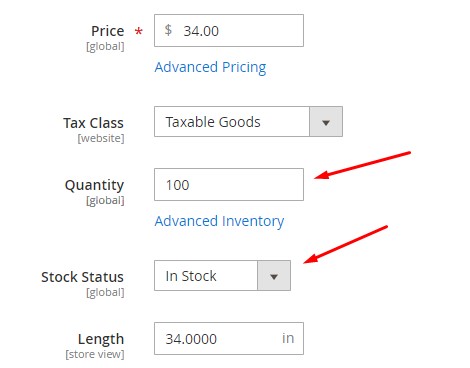
- Specify the Quantity and set the Status to In Stock.
-
- Configure Visibility to Catalog, Search.

-
- Save the product's settings (the Save button is in the right upper corner) and run the reindex.
Product images are not displayed on the front end
The problem with the product images visibility is quite common among the Adobe Commerce (Magento 2) store owners. To resolve it, we advise you to do the following:
-
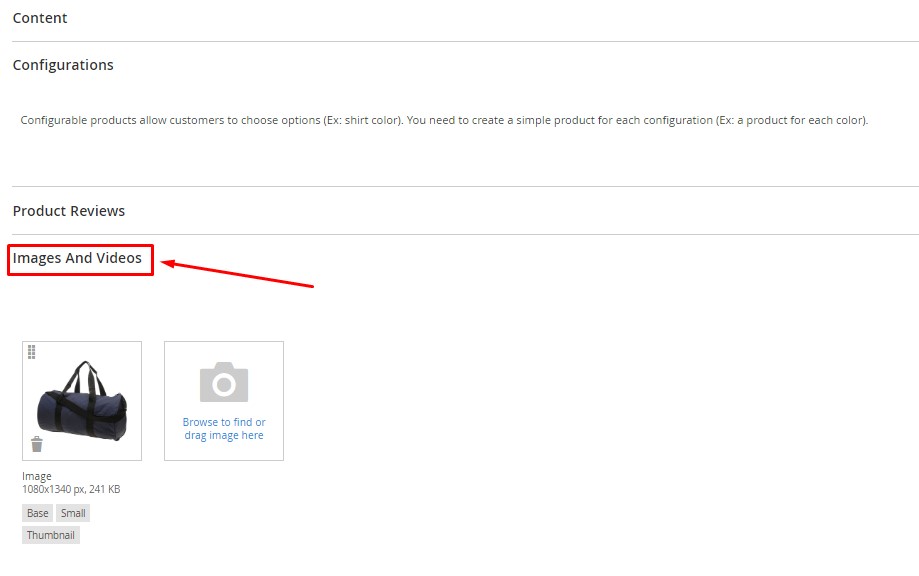
- Go to Catalog → Products in the admin panel.
- Click on the needed item and scroll down to the Images and Videos section.
-
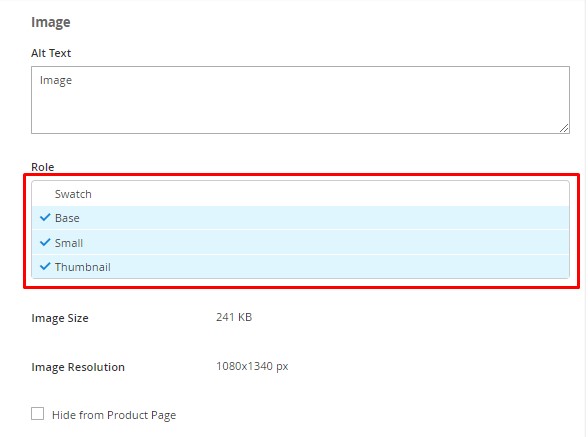
- Check whether you have uploaded all the necessary photos. After that, click on the image and make sure that the thumbnail, base image, and small image fields are marked with the tick.
-
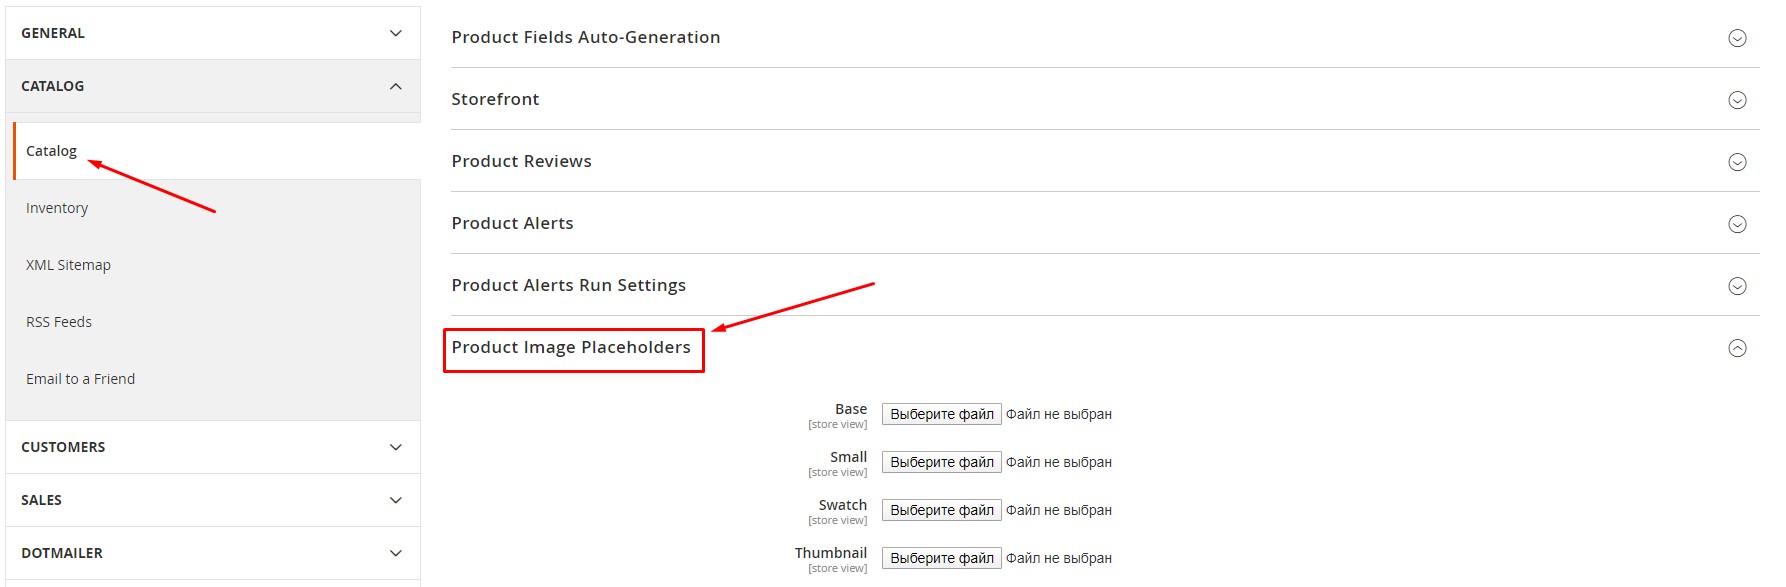
- Next, go to Stores → Configuration → Catalog → Product Image Placeholders and ensure that the default image is uploaded for each of the particular image types.
- And lastly, go to System → Cache Management → Flush catalog images cache.
Migration to Magento 2: Tax Management
Magento 2 transfers prices without taxes by default. You can configure the tax calculation in the admin panel:
-
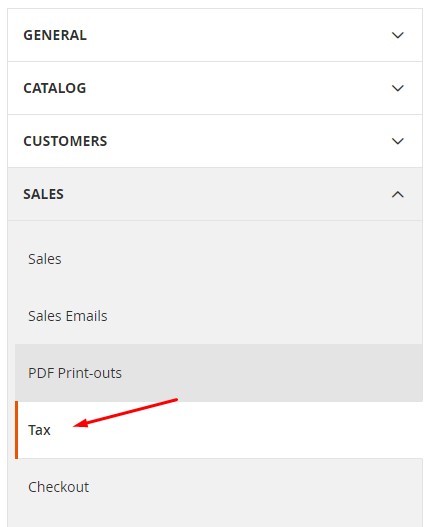
- Go to Stores → Settings → Configuration.
- Expand the Sales section and click on Tax.
-
- In Calculation Settings find the field Catalog prices. Uncheck the System Value box and choose one of the two options - either to Exclude or Include the Tax.
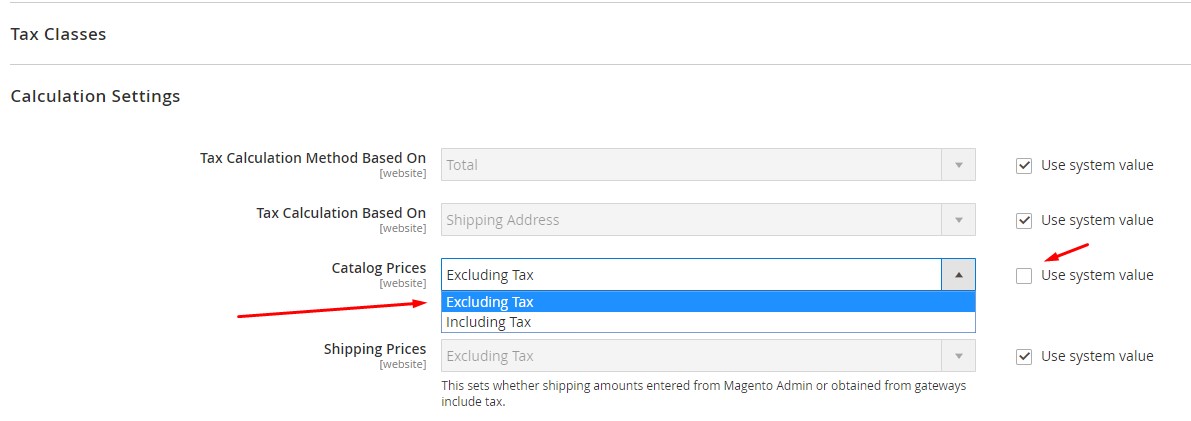
- Click the Save Config button in the right upper corner.
eCommerce replatforming is a major step forward for every online business owner. It is surely not a one-click affair. But when done with the right tools at hand, it will improve the overall performance of your store and increase the revenue. Now you're equipped with all the necessary knowledge and skills for managing your Adobe Commerce (Magento 2) store not only during, but also after the migration.
Manage Your Store After Magento 2 Migration - FAQs
What does Reindexing do in Magento?
Data transformation in Magento 2 is called reindexing, and it updates the transformed data as it changes. Changing a product price, for example, requires reindexing to appear correctly on the front end.
What is cache storage in Magento 2?
In Magento, cached pages are stored to speed up loading. This allows requests for data to be served quickly by storing it in a cache. As a result, users will be able to quickly access content in the storefront & the overall user experience will be enhanced. There are many types of caches available in Magento, ranging from layouts to block HTML layouts.
What is Tax Rate in Magento?
The tax rate is the result of combining a country's tax zone, a state's tax zone or a zip code's tax zone with a percentage. The following steps will guide you through setting up tax rates.
- Step 1 − Login to Magento Admin Panel.
- Step 2 − Go to Sales menu → Tax and click on the Manage Tax Zones & Rates option.
P.S. Since the official end of support for Magento 1 many years ago, migrating to the latest version of Adobe Commerce has become a critical security and performance measure. If you're still on an older platform, consider a migration to Adobe Commerce (Magento 2). You can run a free demo to see how easy it can be!
Monthly Update – March 2026
March 2026 presents key opportunities for Adobe Commerce (Magento 2) users to refine their strategies in customer engagement and operational efficiency. A significant trend gaining traction is the integration of advanced AI functionalities. Businesses are increasingly leveraging AI-powered chatbots to provide instant customer support, enhancing satisfaction and reducing response times. Furthermore, AI-driven fraud detection systems are becoming indispensable for securing transactions and building customer trust in a dynamic digital marketplace. Many Adobe Commerce merchants are also implementing AI-enhanced product recommendation engines that analyze real-time customer behavior to offer hyper-personalized shopping experiences, directly impacting conversion rates. Alongside these advancements, maintaining a vigilant security posture is crucial. Regular security audits, prompt patching of extensions, and strict adherence to compliance standards like PCI DSS are vital for protecting sensitive data. Embracing these technological and security best practices will ensure your Adobe Commerce store remains competitive and resilient. For more details, explore our FAQ section or schedule a call with a migration expert.