How can we help you?
3DCart-related questions4
Note: 3dcart is now Shift4Shop. Admin labels in older screenshots may still say 3dcart.
How to Migrate Images to 3DCart After Data Migration?
When performing an eCommerce data migration to 3DCart using Cart2Cart, it's important to understand how images are handled. Cart2Cart doesn't physically move image files during the automated migration process. Instead, it generates links to the images on your source store. To ensure your images remain accessible on your 3DCart store after you shut down your source store, you'll need to manually transfer them to your 3DCart server.
During the migration setup with Cart2Cart, you can select the option to generate image URLs. If you've already completed your migration, follow these steps to copy the image folder from your source shopping cart to 3DCart using an FTP client like FileZilla.
Step-by-Step Guide: Transferring Images to 3DCart via FTP
This detailed instruction outlines how to connect to your 3DCart server and move your images using FileZilla.
1. Create a New Site in FileZilla
Open FileZilla and navigate to File -> Site Manager.

2. Name Your New Site
In the Site Manager window, click the New Site button. Give your site a descriptive name, such as "3DCart."

3. Configure the Connection Settings
Select the newly created site and configure the connection details on the right side of the window.
4. General Settings
Go to the General menu and fill in the following details:
- Host: Your 3DCart store's FTP host address (provided by 3DCart)
- Protocol: FTP - File Transfer Protocol
- Encryption: Require implicit FTP over TLS
- Logon Type: Normal
- User: Your 3DCart FTP username (provided by 3DCart)
- Password: Your 3DCart FTP password (provided by 3DCart)
- Port: 990

5. Transfer Settings
Navigate to the Transfer Settings menu and set the Transfer mode to Passive.

6. Save and Connect
Click OK to save the changes.
7. Connect to the Server
In the FileZilla control panel, select your newly created site and click Connect to connect to the 3DCart server.

8. Trust the Certificate
During the connection process, you may be prompted to confirm that the server is trusted. Check the box labeled Always trust certificate in future sessions and click OK.

9. Navigate to the Images Directory
In the right pane of FileZilla, you'll see the folder structure of your 3DCart server.

10. Upload Your Images
Navigate to the following path: /web/assets/images. Upload the folder containing your images from your source shopping cart to this directory. For example, in Magento, this folder is typically called "media."

By following these steps, you can ensure that all your product and other images are properly transferred to your 3DCart store, maintaining a seamless customer experience after your eCommerce data migration.
Ready to migrate your store to 3DCart? Start your free demo now! or Schedule a call with our migration expert.
Shift4Shop (formerly 3dcart) migrations with Cart2Cart use the store REST API. Enable it in the Shift4Shop control panel before connecting the Migration Wizard.
1. Log in to your Shift4Shop (3dcart) admin.
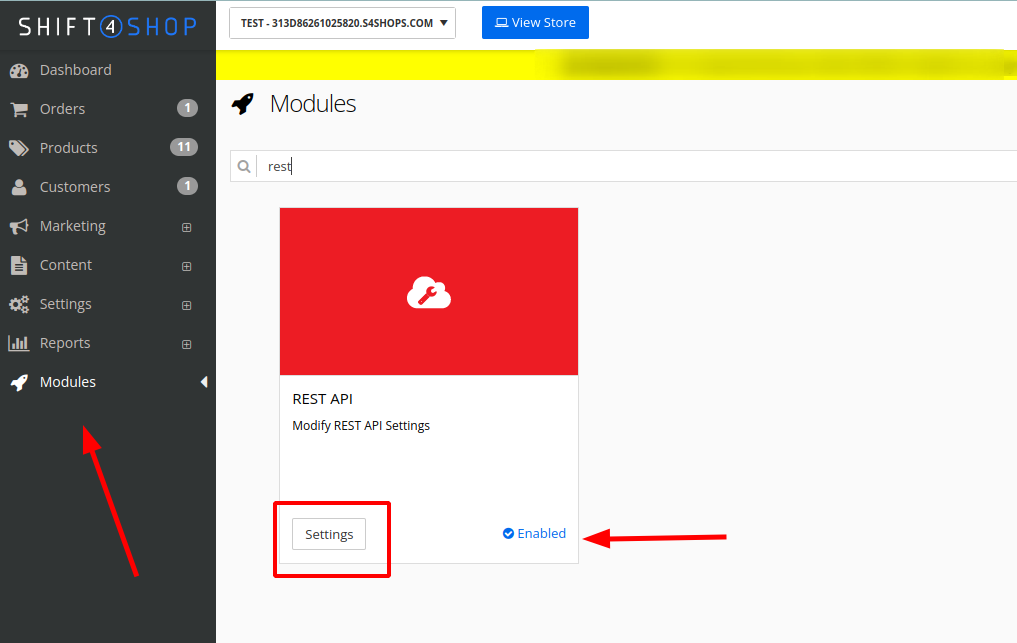
2. Go to Modules (or Settings → Modules, depending on your theme/build).
3. Find REST API / Advanced API and open its settings.
4. Enable the module / API access.
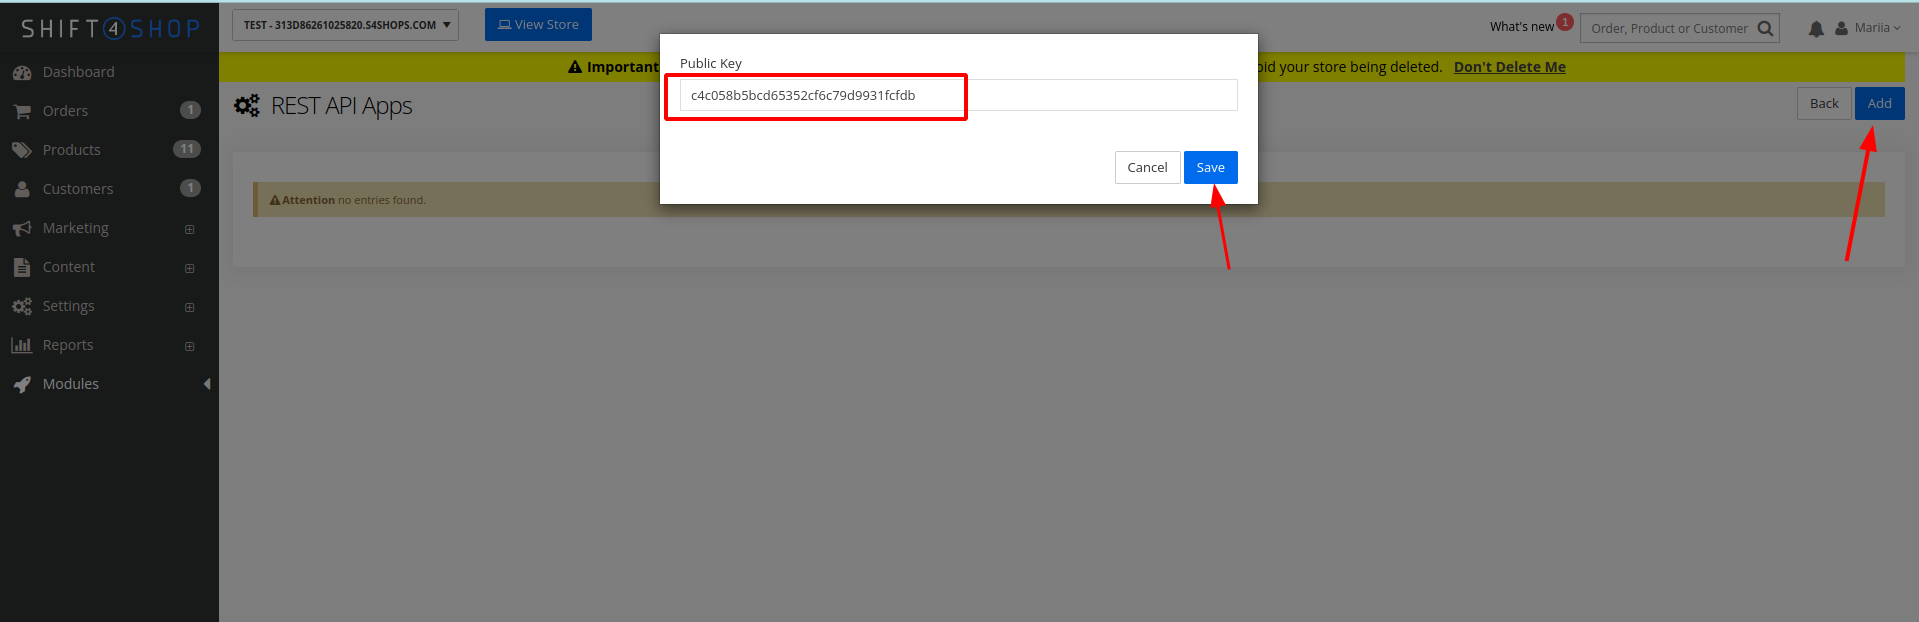
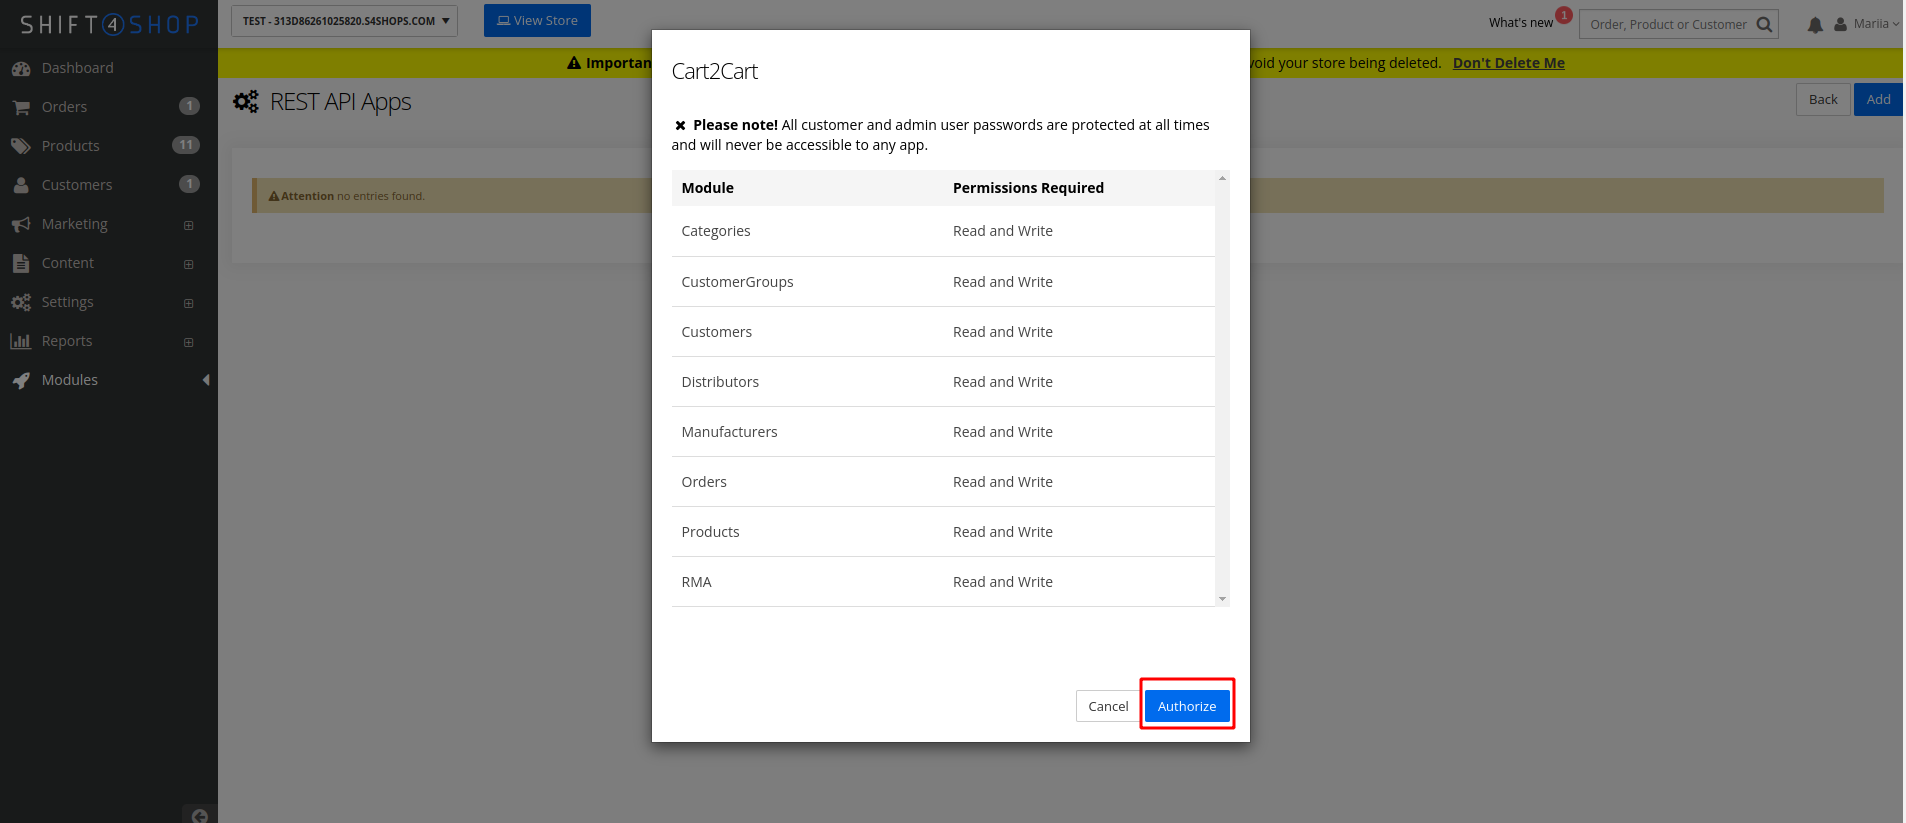
5. Create or copy the API credentials (token / key) the module displays.
6. Paste those credentials into the Cart2Cart Migration Wizard when prompted for Shift4Shop / 3dcart API details.
If your control panel still shows “3dcart” branding, the same Modules → REST/Advanced API path applies under the Shift4Shop product.
Troubleshooting Image Resizing After Shift4Shop Data Migration
If your store images haven't been automatically resized during the Shift4Shop data migration (due to platform-specific configurations), follow these steps to manually adjust them:
How to Resize Product Thumbnails in Shift4Shop After Data Migration
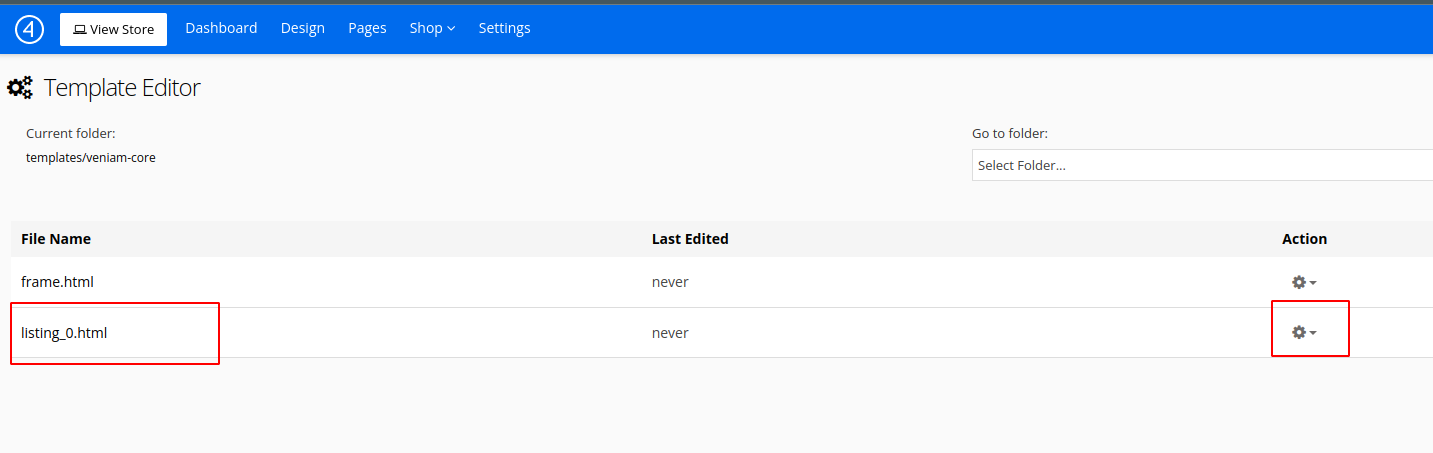
Navigate to the Template Editor by choosing “Design” -> “Edit Template” within your Shift4Shop admin panel. This section allows you to modify the visual presentation of your online store.
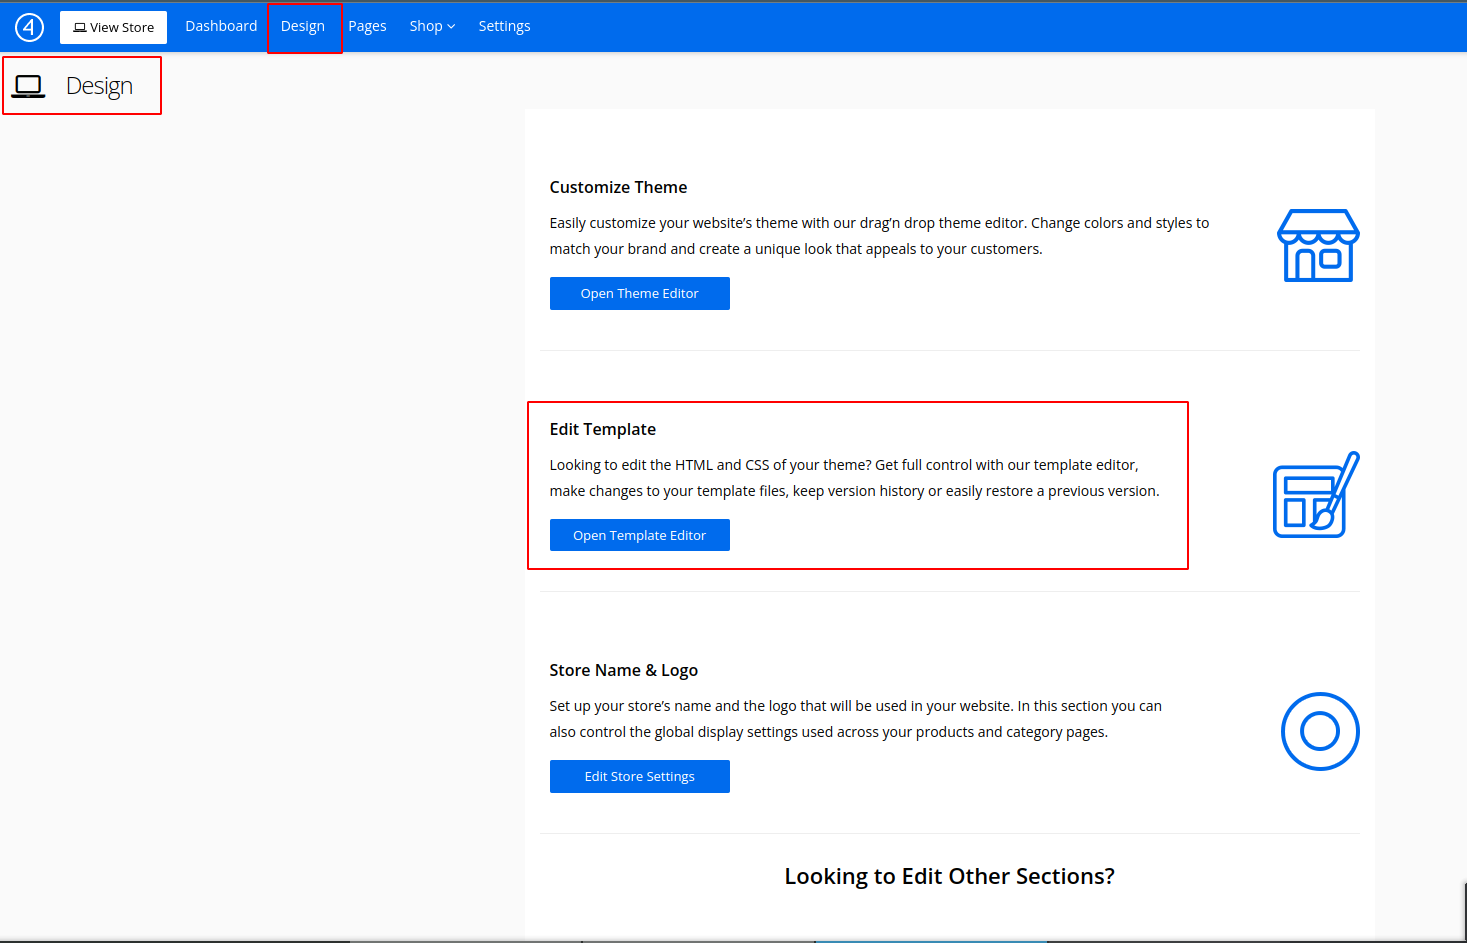
Select the listing_0.html file to edit. This file controls the display of product listings on your storefront. Editing this file will allow you to adjust the image sizes.
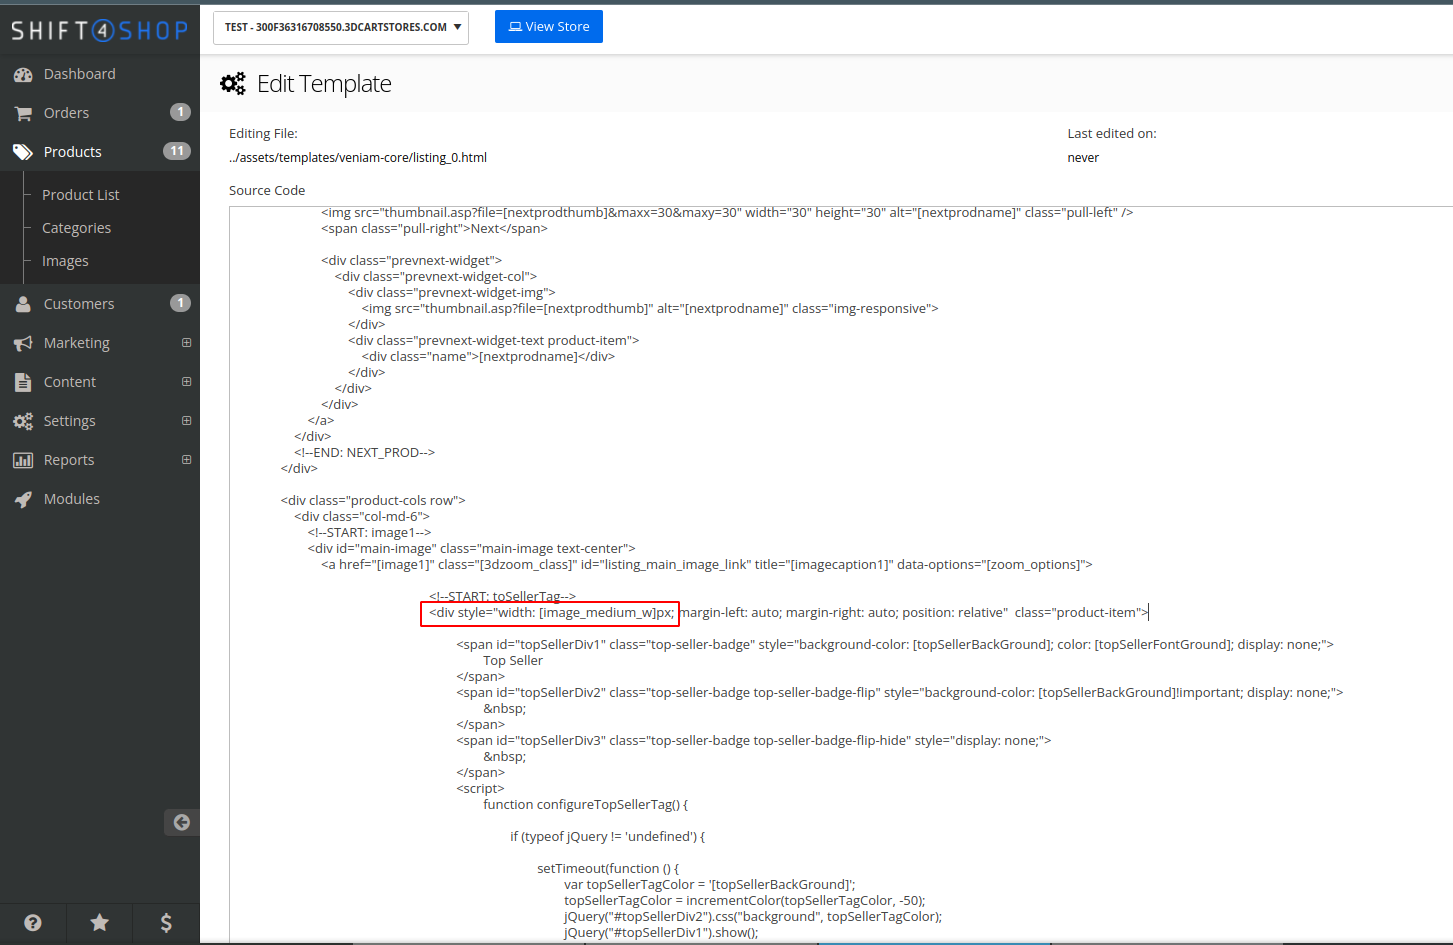
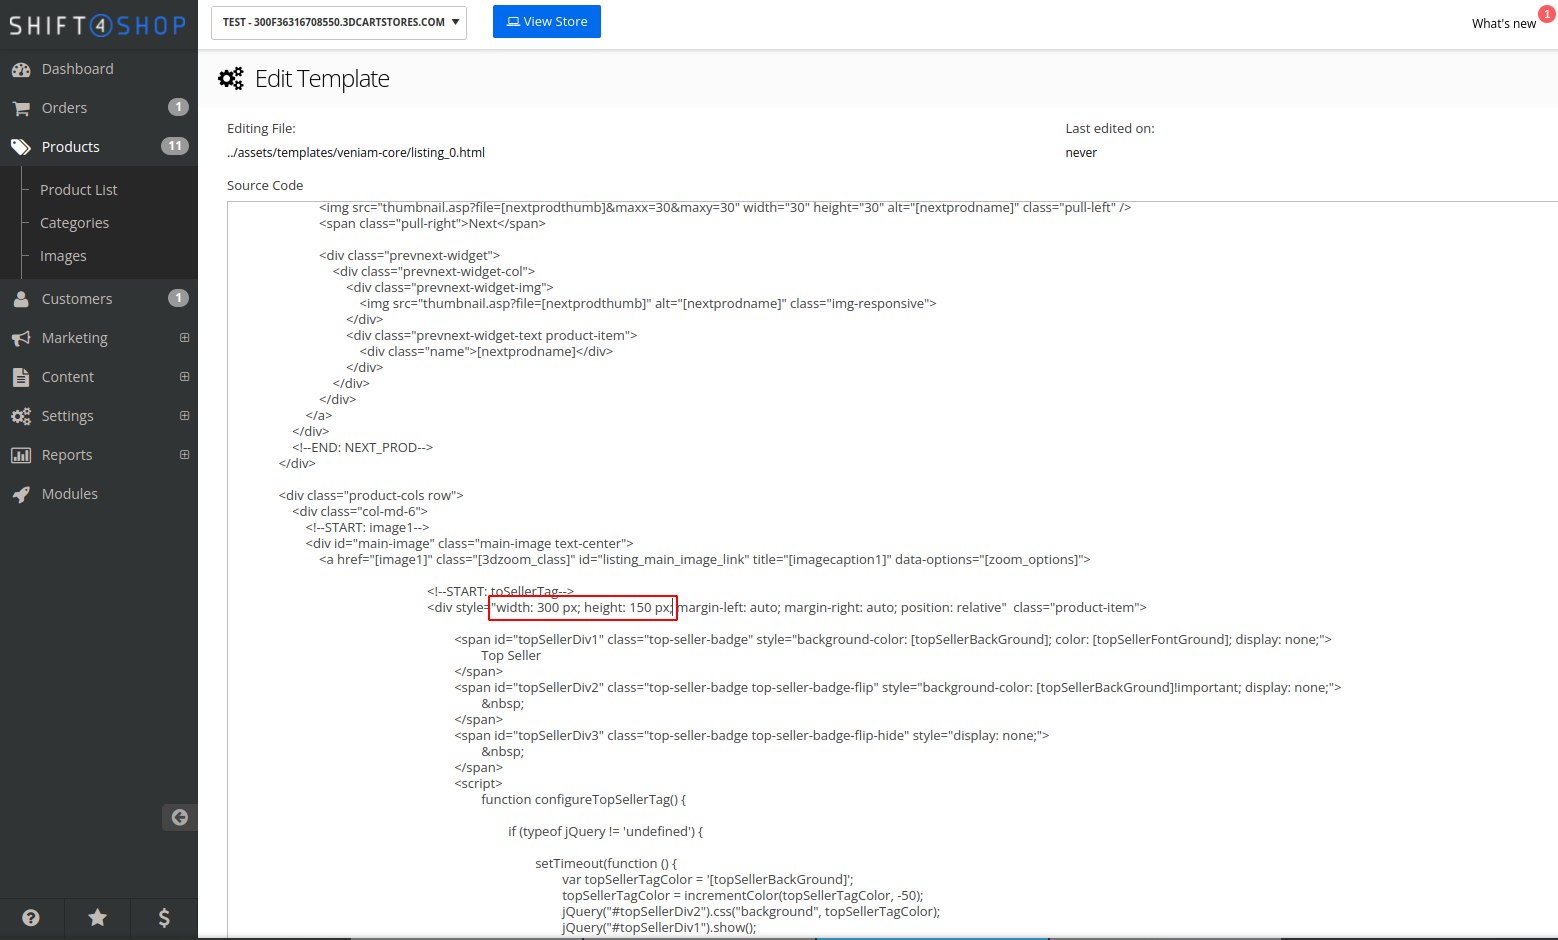
Within the HTML code, locate the image size definitions that need adjustment. Specify the desired width and height attributes for the product thumbnails. This will ensure your images display correctly after the data migration.
By following these steps, you can effectively manage and resize product thumbnails after your eCommerce data migration to Shift4Shop, ensuring a visually appealing and consistent storefront.
Need help with your data migration? Start your free demo now!
Note: 3dcart is now Shift4Shop. Admin labels in older screenshots may still say 3dcart.
Please, ensure there's at least one customer created in your 3dcart store. If not, you won't be able to set up the data migration properly.
Peculiarities of 3dcart Data Migration via Cart2Cart
Due to technical restrictions of the REST API used by 3dcart and the platform itself, data migration to and from 3dcart via Cart2Cart has certain peculiarities you should be aware of:
- Customer groups won’t be migrated to 3dcart.
- Reviews won’t be migrated either to or from 3dcart.
- All order statuses will be imported to 3dcart as “New”.
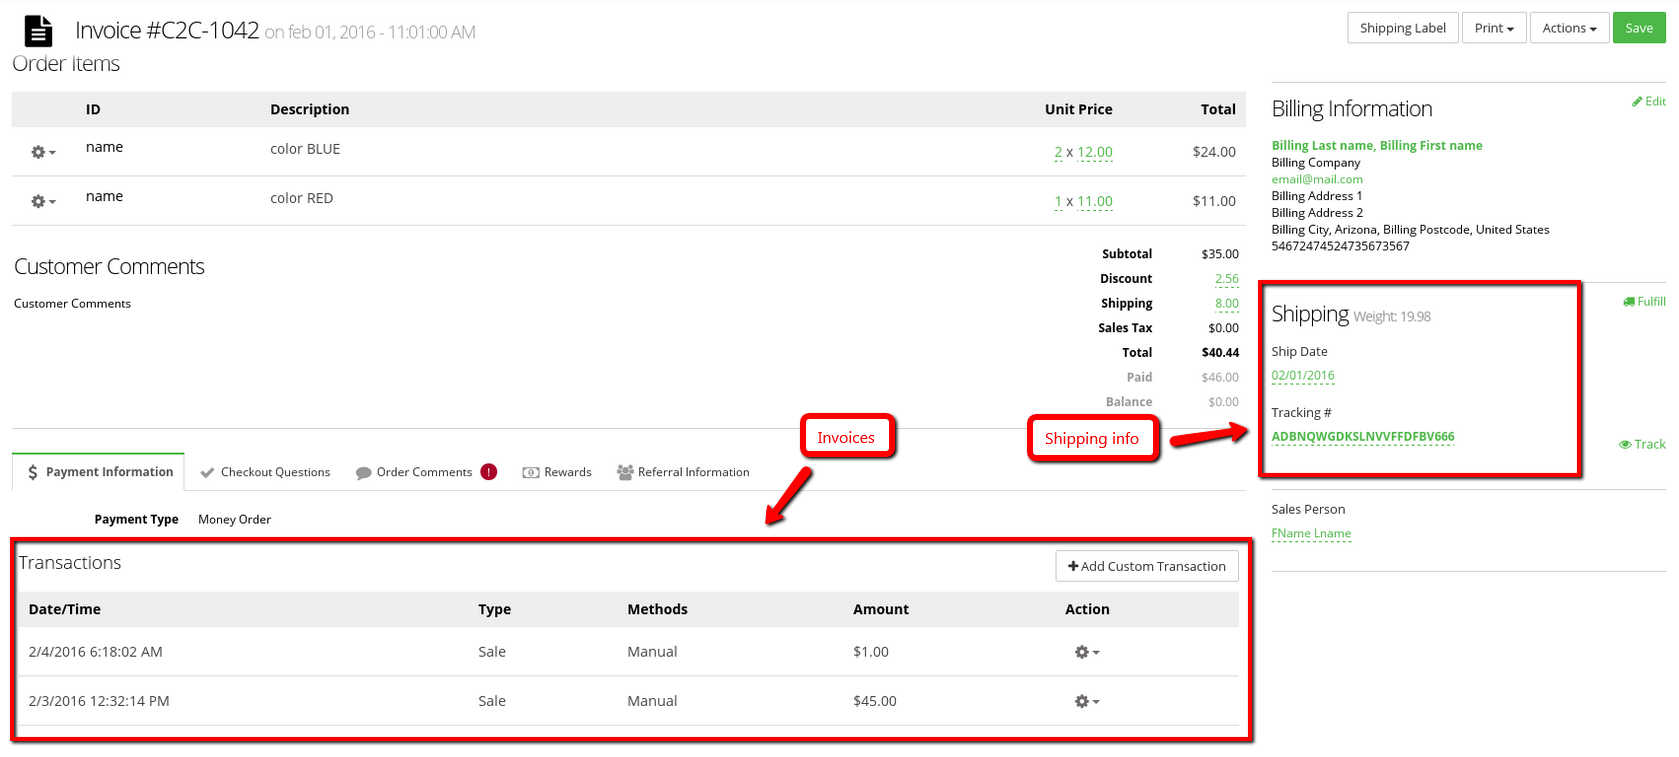
- Migration of Shipping info (e.g., tracking number and weight) to 3dcart is possible from Magento only.
- Migration of invoices to 3dcart is possible from Magento and PrestaShop only (they’ll be migrated to the “Transactions” section under the Type “Sale” and Methods “Manual”).
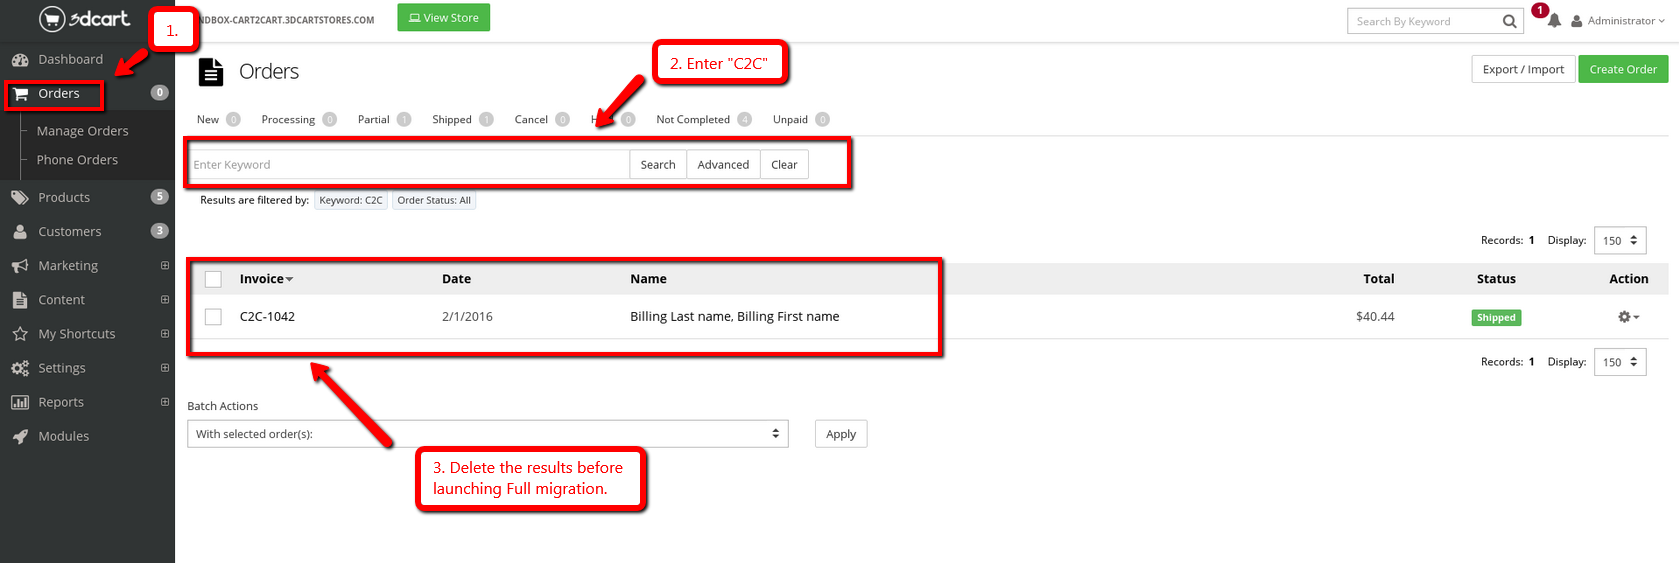
Also, to avoid duplication of orders during the data transfer via REST API, you should clear them manually after the Demo migration. To do this, log in to your 3dcart admin panel, go to “Orders”, enter C2C in the search field, and delete the results. Then, you may proceed to the Migration Wizard and launch the Full migration.
Have any questions? Feel free to contact us: [email protected]
Ready to migrate? Start your free demo now!
Just set up the migration and choose the entities to move – the service will do the rest.
Try It FreeDelegate the job to the highly-skilled migration experts and get the job done.
Choose Package