eCrater to Shopify Migration - Step-by-Step Guide & Expert Services
Achieve a seamless eCrater to Shopify migration with Cart2Cart. Ready to move eCrater store to Shopify? Our trusted service ensures a secure, fast, and SEO-friendly switch from eCrater to Shopify, preserving rankings and guaranteeing zero downtime. Effortlessly transfer data like products, customers, and orders. Explore our detailed step-by-step guide for DIY users or opt for expert, done-for-you assistance. Start your confident eCrater to Shopify migration today.
What data can be
migrated from eCrater to Shopify
-
Products
-
Product Categories
-
Manufacturers
-
Customers
-
Orders
Estimate your Migration Cost
The price of your migration depends on the volume of data to migrate and the additional migration options you pick. To check the price for eCrater to Shopify conversion, click “Get estimates” and follow the suggested steps.
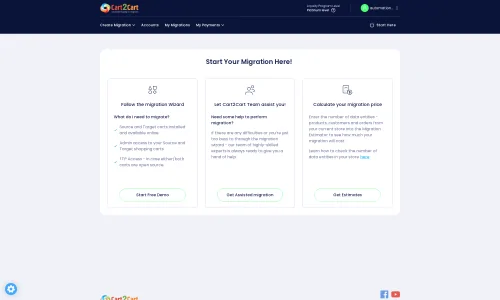
How to Migrate from eCrater to Shopify In 3 Steps?
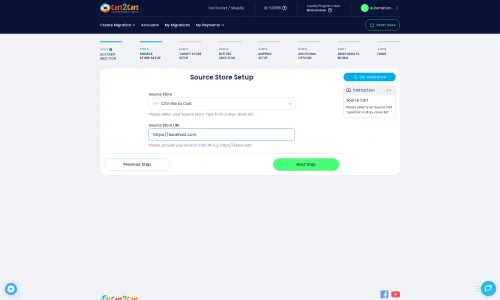
Connect your Source & Target carts
Choose eCrater and Shopify from the drop-down lists & provide the stores’ URLs in the corresponding fields.
Select the data to migrate & extra options
Choose the data you want to migrate to Shopify and extra options to customise your eCrater to Shopify migration.
Launch your Demo/Full migration
Run a free Demo to see how the Cart2Cart service works, and when happy - launch Full migration.
Migrate eCrater to Shopify: Your Definitive Guide for a Smooth Transition
Seamlessly Migrate Your E-commerce Store from eCrater to Shopify
In the dynamic world of e-commerce, staying competitive means evolving your platform to meet growing demands for features, scalability, and performance. For many merchants, eCrater has served as a foundational platform. However, its limitations in customization, advanced marketing tools, and scalability often prompt businesses to seek more robust solutions. This is where Shopify, a leading e-commerce platform renowned for its extensive features, user-friendly interface, and vast app ecosystem, becomes an ideal choice for replatforming.
This comprehensive guide will walk you through the entire process of transitioning your online store from eCrater to Shopify. Since eCrater does not offer a direct API for automated migration tools, our strategy will involve exporting your eCrater data into CSV files and then utilizing a powerful migration service like Cart2Cart to import this data into your new Shopify store. By following these steps, you can ensure a smooth, efficient, and data-secure transfer, preserving your valuable customer and product information.
The journey to a more powerful e-commerce presence begins here. Let's explore how to move your store with confidence.
Prerequisites for a Successful Migration
Before embarking on your eCrater to Shopify migration, it's crucial to prepare both your existing store and your new platform. Proper preparation minimizes potential hiccups and ensures a seamless transition.
Preparing Your eCrater (Source) Store:
- Data Backup: Always perform a full backup of your eCrater store data. This includes products, categories, customer information, orders, images, and any custom pages. While you'll be exporting data, a comprehensive backup is your safety net.
- Data Audit & Cleanup: Use this opportunity to clean up your store. Remove outdated product listings, inactive customer accounts, or redundant information. This ensures you're only moving relevant data to Shopify.
- Identify Data for Export: Determine all the data entities you wish to transfer. Typically, this includes products (with SKUs and variants), product categories, customer records, and order history. Be aware that certain eCrater-specific features or custom data might require manual handling or specialized migration customization.
- Export Data to CSV: Since eCrater lacks an advanced API for direct connection, you will need to manually export your data into CSV (Comma Separated Values) files. Navigate your eCrater admin panel to find options for exporting products, customers, and orders. Ensure the CSV format is as clear and organized as possible, as this will facilitate the import process.
- For more general advice, consult our guide on how to prepare Source store for migration.
Preparing Your Shopify (Target) Store:
- Create a Shopify Account: If you haven't already, sign up for a Shopify account. You can choose a plan that suits your business needs, such as Basic Shopify, Shopify, or Advanced Shopify. Note that Shopify's "Pause and Build" plan might block orders, so consider your plan carefully during active migration.
- Install the Migration App: For an efficient migration, you'll need the Cart2Cart Store Migration App. This app will facilitate the transfer of your eCrater data (via CSV) to Shopify.
- Basic Store Configuration: Set up essential store details like your store name, currency, time zone, and any basic tax settings. You can also start browsing themes in the Shopify Theme Store, though extensive design customization can follow the migration.
- Disable Notifications: It is highly recommended to disable customer notifications on your Shopify store during the migration process. This prevents customers from receiving automated emails related to orders or accounts that are being imported, which could be confusing.
- Reviews App Consideration: Note that migrating product reviews to Shopify often requires an additional app, such as AirReviews, to correctly import and display them. Plan for this if reviews are critical to your business.
- For a detailed checklist, refer to How to prepare Target store for migration?
Performing the Migration: A Step-by-Step Guide
With your preparations complete, it's time to initiate the data transfer from eCrater to Shopify using a migration tool like Cart2Cart. This process leverages your exported CSV files to populate your new Shopify store.
Step 1: Export Data from eCrater to CSV Files
As eCrater does not provide direct API access for migration tools, the first critical step is to manually export your store's data into CSV files. Log into your eCrater admin panel and locate the export functions for:
- Products: Ensure you export all product details, including titles, descriptions, images, prices, SKUs, variants, and stock levels.
- Categories: Export your product category structure.
- Customers: Include customer names, email addresses, billing and shipping information.
- Orders: Export order IDs, customer details, product details within each order, order statuses, and dates.
Pay close attention to the format of your CSV files. Consistent headers and data types will simplify the subsequent import process. If you encounter difficulties with data structuring, consider utilizing a CSV.File Data Migration service.
Step 2: Connect Your Source Store (CSV File)
Navigate to the Cart2Cart migration wizard. The first step in the wizard is to configure your source store.
- From the dropdown menu, select "CSV File to Cart" as your Source Cart.
- Upload the CSV files you exported from eCrater. The wizard will guide you on how to upload your product, customer, and order CSVs.
- Once uploaded, the system will validate the files to ensure they can be processed.
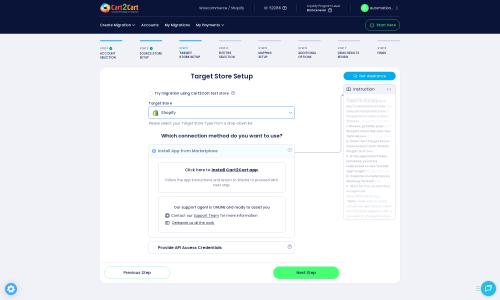
Step 3: Connect Your Target Store (Shopify)
Next, you will configure your new Shopify store as the target for your data transfer.
- Choose "Shopify" from the Target Cart dropdown list.
- Enter your Shopify store URL (e.g., your-store-name.myshopify.com).
- The recommended connection method for Shopify is to "Install App from Marketplace." Click the provided link to go to the Shopify App Store, install the Cart2Cart Store Migration App, and then return to the migration wizard. This app acts as the bridge for data transfer.
- (Optional) Alternatively, you can choose to "Provide API Access Credentials," which would require an Admin API access token. However, the app method is generally simpler and recommended.
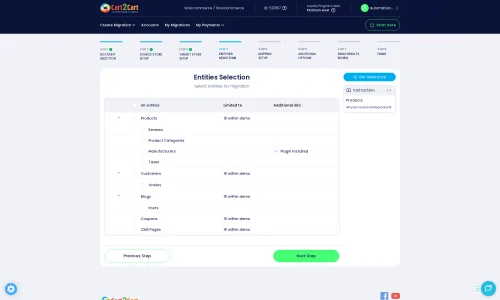
Step 4: Select Data Entities for Migration
This crucial step allows you to specify exactly what data you want to move from your eCrater CSVs to Shopify. You will see a list of supported entities based on Shopify's capabilities and what Cart2Cart can handle.
- Select the checkboxes for the data types you wish to migrate, such as Products, Product Categories, Customers, Orders, and if applicable (and present in your CSVs), Product Reviews, CMS Pages, and Blogs.
- You can select "All entities" or choose them individually for precise control over your data transfer scope.
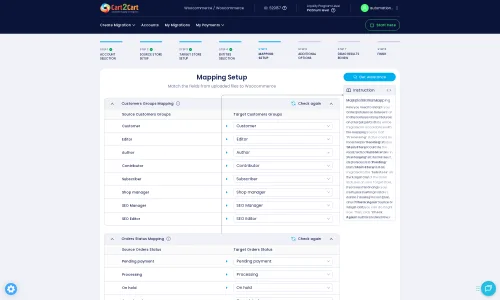
Step 5: Configure Data Mapping
Data mapping is vital to ensure that information from your eCrater CSVs is correctly interpreted and placed into the corresponding fields in Shopify. The wizard will present you with options to map:
- Product Attributes: Match custom product fields from your CSV to Shopify's product fields or tags.
- Customer Groups: Map eCrater customer roles (if any) to Shopify customer tags or segments.
- Order Statuses: Align your eCrater order statuses (e.g., "Pending," "Shipped") with Shopify's order fulfillment statuses.
Carefully review these mappings to maintain data integrity and ensure everything appears correctly on your new Shopify store.
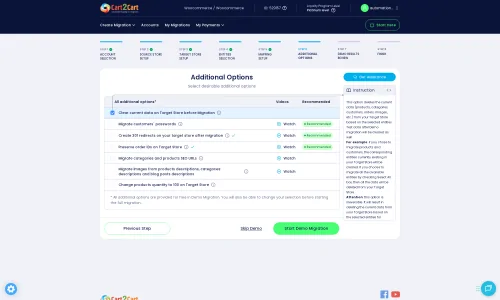
Step 6: Choose Additional Migration Options
This step offers various optional features to tailor your migration:
- Preserve Order IDs: This highly recommended option (How Preserve IDs options can be used?) ensures your old order numbers are retained in Shopify, which is crucial for accounting and customer service.
- Migrate Images in Description: If your product or category descriptions contain embedded images, select this to ensure they are also transferred.
- Create 301 SEO URLs: Absolutely critical for maintaining your SEO rankings and link equity. This option automatically sets up redirects from your old eCrater URLs to the new Shopify URLs, preventing broken links and preserving search engine visibility.
- Clear Current Data on Target Store: Use this with caution. If your Shopify store already contains data, selecting "Clear Target" (Clear current data on Target store before migration option) will erase it before the migration, ensuring a clean slate.
- Reviews Handling: As noted in the Shopify limitations, migrating reviews often requires a specific Shopify app like AirReviews. Be prepared to install and configure this separately if it's not handled directly by the migration tool's options.
Step 7: Run Free Demo Migration
Before committing to a full migration, run a free demo. This allows you to transfer a limited number of entities (e.g., 10-20 products, customers, and orders) to your Shopify store. Use this demo to:
- Verify Data: Check if products, images, customer information, and order details have been transferred correctly.
- Identify Issues: Spot any mapping errors or data inconsistencies.
- Understand the Process: Familiarize yourself with how your data will appear on Shopify.
Address any issues found during the demo before proceeding to the full migration.
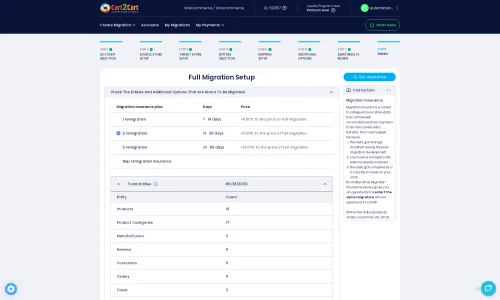
Step 8: Perform Full Migration
Once you are satisfied with the demo results and have resolved any identified issues, you are ready for the full data transfer.
- Review your migration settings, selected entities, and additional options one last time.
- Consider purchasing a Migration Insurance Plan. This optional service provides you with the flexibility to re-migrate your data a certain number of times within a specified period, which can be invaluable if you discover post-migration adjustments are needed (How Migration Insurance works?).
- Click the button to initiate the full migration. The migration tool will then systematically transfer all your selected eCrater data to your Shopify store.
Post-Migration Steps: Activating Your Shopify Store
Completing the data transfer is a major milestone, but the migration process isn't over. Several crucial post-migration tasks are necessary to ensure your new Shopify store is fully functional, optimized, and ready for customers.
1. Thorough Data Verification
Immediately after the full migration, meticulously review all migrated data on your Shopify store:
- Products: Check product titles, descriptions, images, prices, SKUs, variants, stock levels, and category assignments. Ensure all images are displaying correctly.
- Customers: Verify customer accounts, particularly their contact details and order history.
- Orders: Confirm that all past orders, including their statuses and line items, have been transferred accurately. Pay attention to fulfillment dates (What will be the Fulfilled date on Shopify target store?).
- Reviews: If you migrated reviews, ensure they are correctly linked to their respective products and visible as intended. You might need to integrate a third-party review app if the migration tool didn't fully support this out-of-the-box, as indicated by Shopify's requirements for a reviews app.
- CMS Pages & Blogs: Verify that all static pages (e.g., "About Us," "Contact Us") and blog posts are present and formatted correctly.
2. Configure Essential Shopify Settings
Now is the time to finalize your Shopify store's operational settings:
- Payment Gateways: Set up your preferred payment methods (Shopify Payments, PayPal, Stripe, etc.).
- Shipping Methods: Configure shipping zones, rates, and carriers to ensure customers are charged correctly.
- Tax Settings: Double-check your tax calculations and settings to comply with local regulations.
- Install Key Apps: Explore the Shopify App Store for apps that enhance functionality, such as marketing tools, customer support, SEO, and inventory management.
- Design and User Experience: Customize your chosen Shopify theme to match your brand identity and optimize the user experience. Ensure mobile responsiveness and intuitive navigation.
3. Implement 301 Redirects
Even if you used the "Create 301 SEO URLs" option during migration, it's wise to double-check and manually set up any custom or critical 301 redirects from your old eCrater URLs to their new Shopify counterparts. This is paramount for maintaining your existing SEO rankings and preventing "Page Not Found" errors, which can negatively impact user experience and search engine visibility.
4. Update DNS Settings
Once you're confident in your Shopify store's readiness, update your domain's DNS settings to point to Shopify. This is the moment your new store officially goes live. Plan this carefully to minimize any downtime for your customers.
5. SEO Optimization & Testing
- Submit New Sitemap: Submit your Shopify store's sitemap to Google Search Console and other relevant search engines.
- Monitor Search Performance: Keep an eye on your search engine rankings and traffic to quickly address any dips.
- Conduct Final Testing: Before announcing your new store, perform final tests. Place a few test orders, verify payment processing, check all forms (contact, signup), and ensure all links are working correctly.
6. Consider Post-Migration Services
- Recent Data Migration: If your eCrater store continued to receive orders or customer registrations during the migration period, consider a Recent Data Migration Service to transfer any new data that appeared after your main migration.
- Remigration Service: If you find significant issues or decide to make major changes that require a fresh start, a Cart2Cart Remigration Service can be a valuable option.
By diligently completing these post-migration steps, you will ensure your new Shopify store is not only a functional platform but also a powerful engine for your e-commerce growth. Congratulations on making the switch!
Ways to perform migration from eCrater to Shopify
Automated migration
Just set up the migration and choose the entities to move – the service will do the rest.
Try It Free
Data Migration Service Package
Delegate the job to the highly-skilled migration experts and get the job done.
Choose Package

Benefits for Store Owners

Benefits for Ecommerce Agencies
Choose all the extra migration options and get 40% off their total Price

The design and store functionality transfer is impossible due to eCrater to Shopify limitations. However, you can recreate it with the help of a 3rd-party developer.
Your data is safely locked with Cart2Cart
We built in many security measures so you can safely migrate from eCrater to Shopify. Check out our Security Policy
Server Security
All migrations are performed on a secure dedicated Hetzner server with restricted physical access.Application Security
HTTPS protocol and 128-bit SSL encryption are used to protect the data being exchanged.Network Security
The most up-to-date network architecture schema, firewall and access restrictions protect our system from electronic attacks.Data Access Control
Employee access to customer migration data is restricted, logged and audited.Frequently Asked Questions
Can customer passwords from eCrater be migrated to Shopify?
How long does it take to migrate an eCrater store to Shopify?
Will my eCrater store's design and theme transfer to Shopify?
Should I use an automated tool or hire an expert for eCrater to Shopify migration?
What factors influence the cost of migrating eCrater data to Shopify?
What data entities can I migrate from eCrater to Shopify?
Is my eCrater store data secure during the transfer to Shopify?
How can I ensure data accuracy after migrating from eCrater to Shopify?
Will my eCrater store go offline during migration to Shopify?
How can I keep SEO rankings when switching from eCrater to Shopify?
Why 150.000+ customers all over the globe have chosen Cart2Cart?
100% non-techie friendly
Cart2Cart is recommended by Shopify, WooCommerce, Wix, OpenCart, PrestaShop and other top ecommerce platforms.
Keep selling while migrating
The process of data transfer has no effect on the migrated store. At all.
24/7 live support
Get every bit of help right when you need it. Our live chat experts will eagerly guide you through the entire migration process.
Lightning fast migration
Just a few hours - and all your store data is moved to its new home.
Open to the customers’ needs
We’re ready to help import data from database dump, csv. file, a rare shopping cart etc.
Recommended by industry leaders
Cart2Cart is recommended by Shopify, WooCommerce, Wix, OpenCart, PrestaShop and other top ecommerce platforms.


