How can we help you?
Looking for seamless Shopify data migration? If you want to relocate your Shopify store using the "Cart2Cart Store Migration App", this step-by-step guide will walk you through the process. Cart2Cart offers a streamlined solution for your Shopify data migration needs.
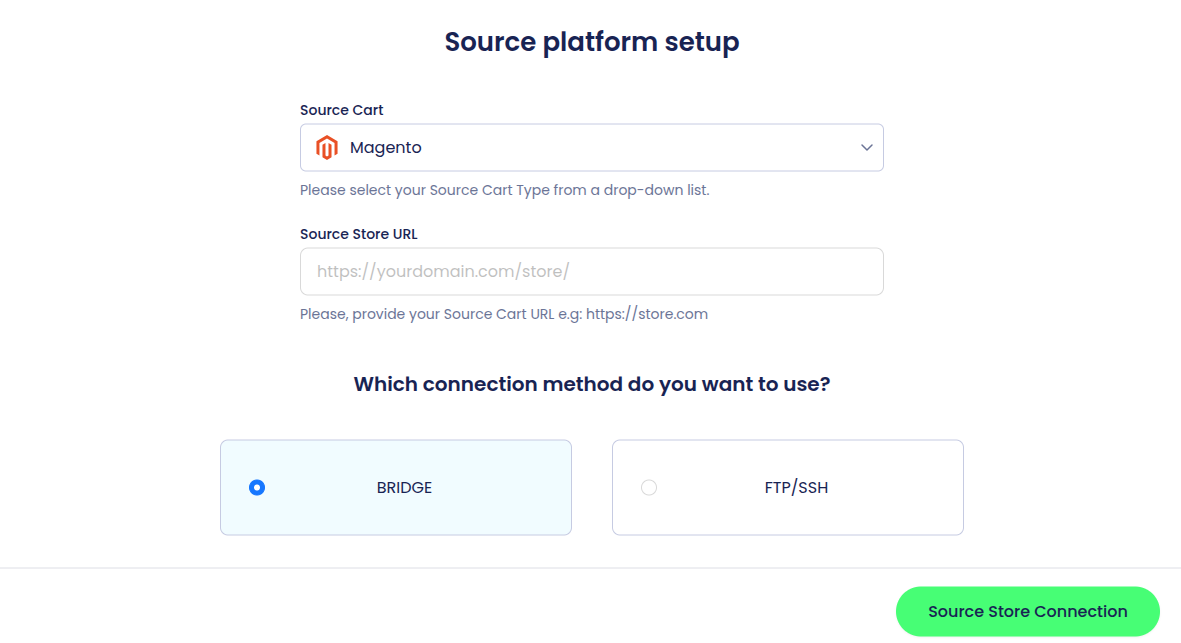
- Step 1: Source & Target Cart Setup for Shopify Data Migration
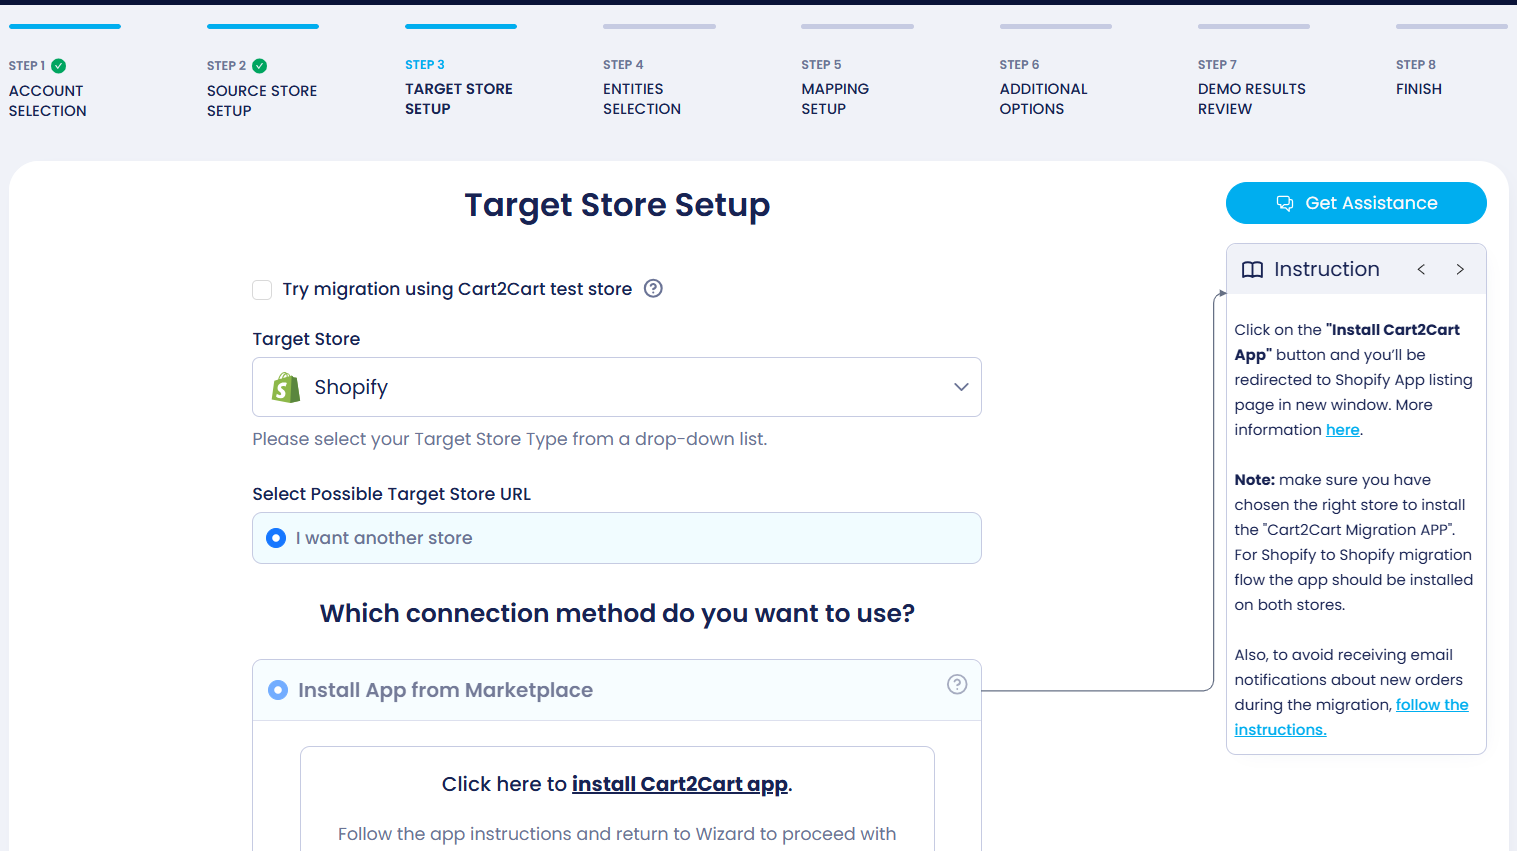
In the migration wizard, specify your current shopping cart platform. Provide the store’s URL address (if migrating from an open-source cart) or the store’s API details (if migrating from a hosted solution). Then, choose Shopify as your target cart.
Install the Shopify App on your target Shopify store. You'll be redirected to the Shopify App Store, and after installation, back to the Migration wizard
Note: The access details are required to establish an automated connection between the stores. The provided information is secure and protected according to the Cart2Cart Privacy Policy.
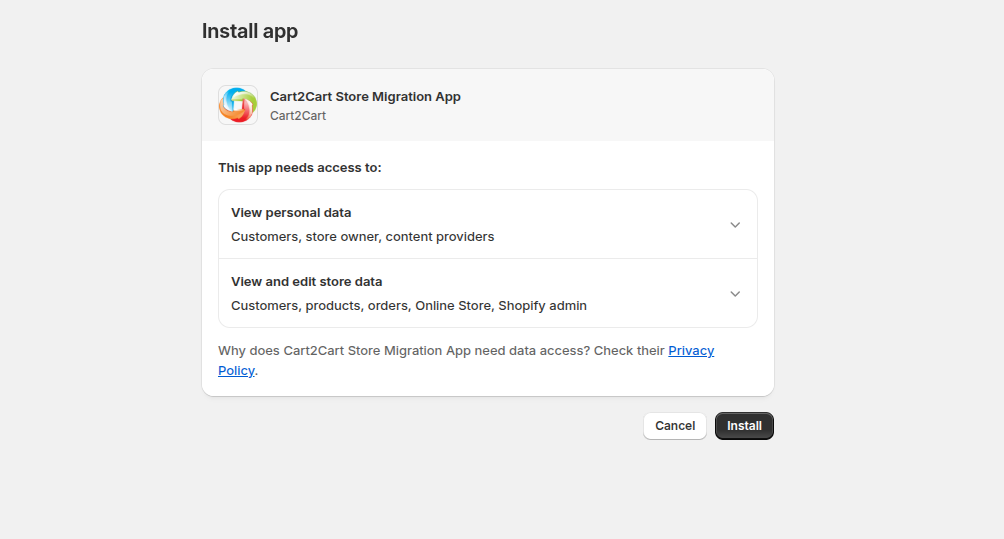
- Step 2: Install the Cart2Cart Store Migration App for Shopify
Install the "Cart2Cart Store Migration App" and proceed with the migration setup within your Shopify Admin Panel. After installation, you can proceed with the migration.
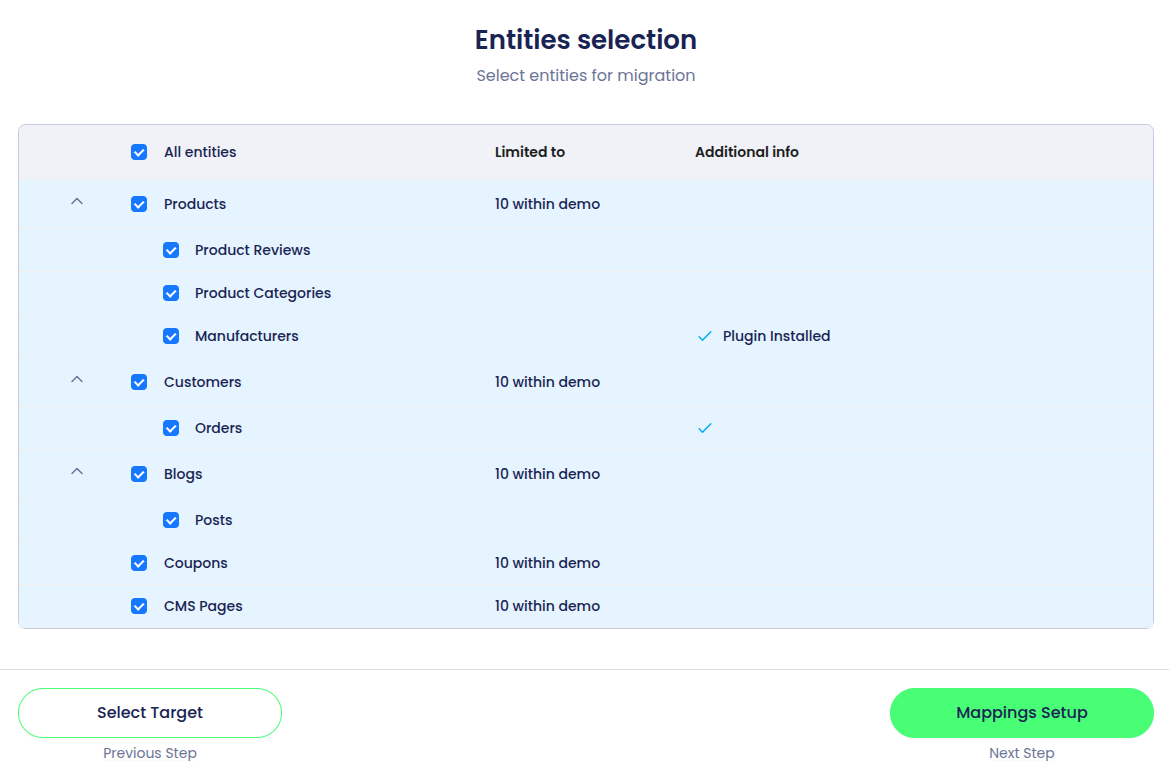
- Step 3: Choose the Data to Migrate to Shopify
Select the specific store data you’d like to transfer during your Shopify data migration. Click the respective checkboxes or use the Select All option to transfer all store data.
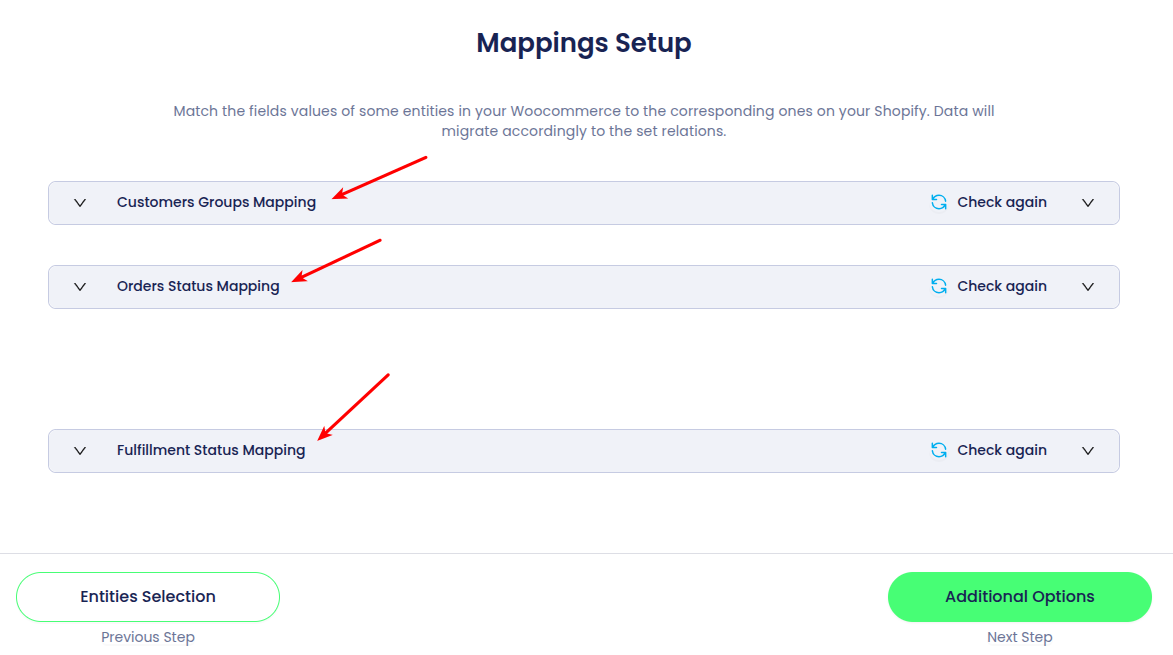
- Step 4: Perform Data Mapping for Shopify
Match Order Statuses and Customer Groups from your current shopping cart to the corresponding ones on your Shopify store. Data will migrate according to these established relationships, ensuring accurate Shopify data migration.
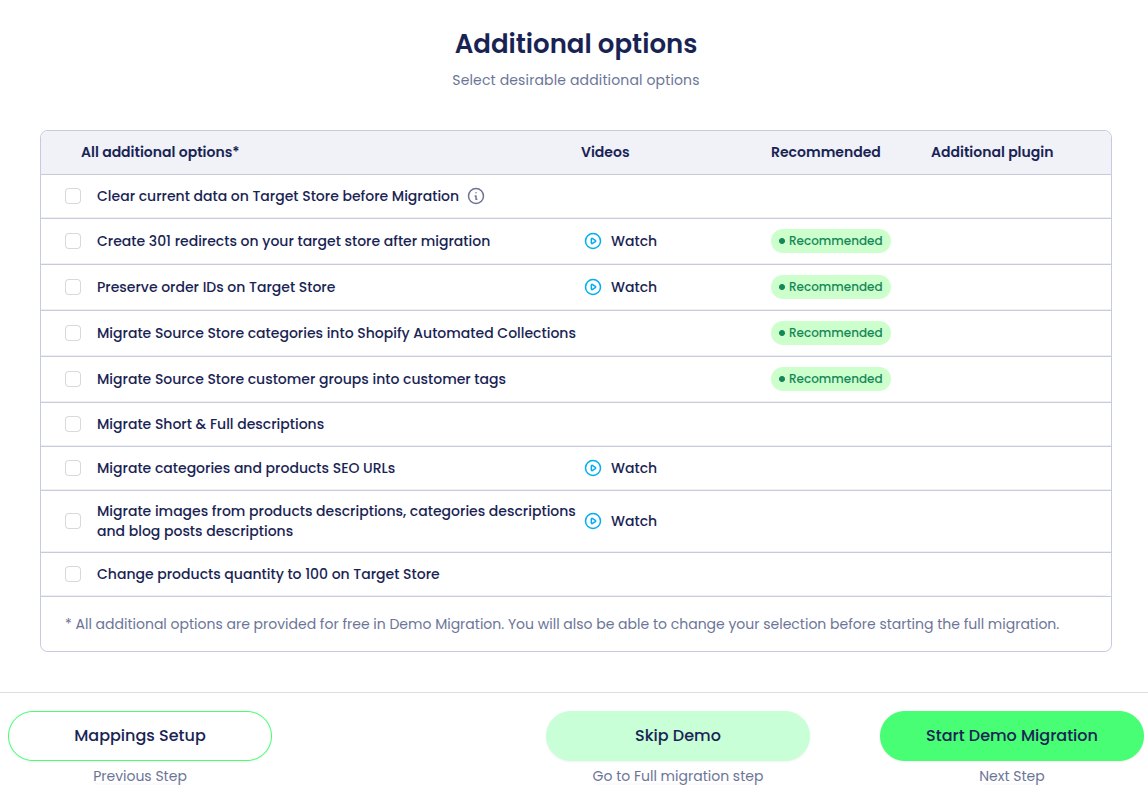
- Step 5: Select Additional Options for Your Shopify Data Migration
Choose additional options that best suit your specific migration needs. These options can customize your Shopify data migration for optimal results.
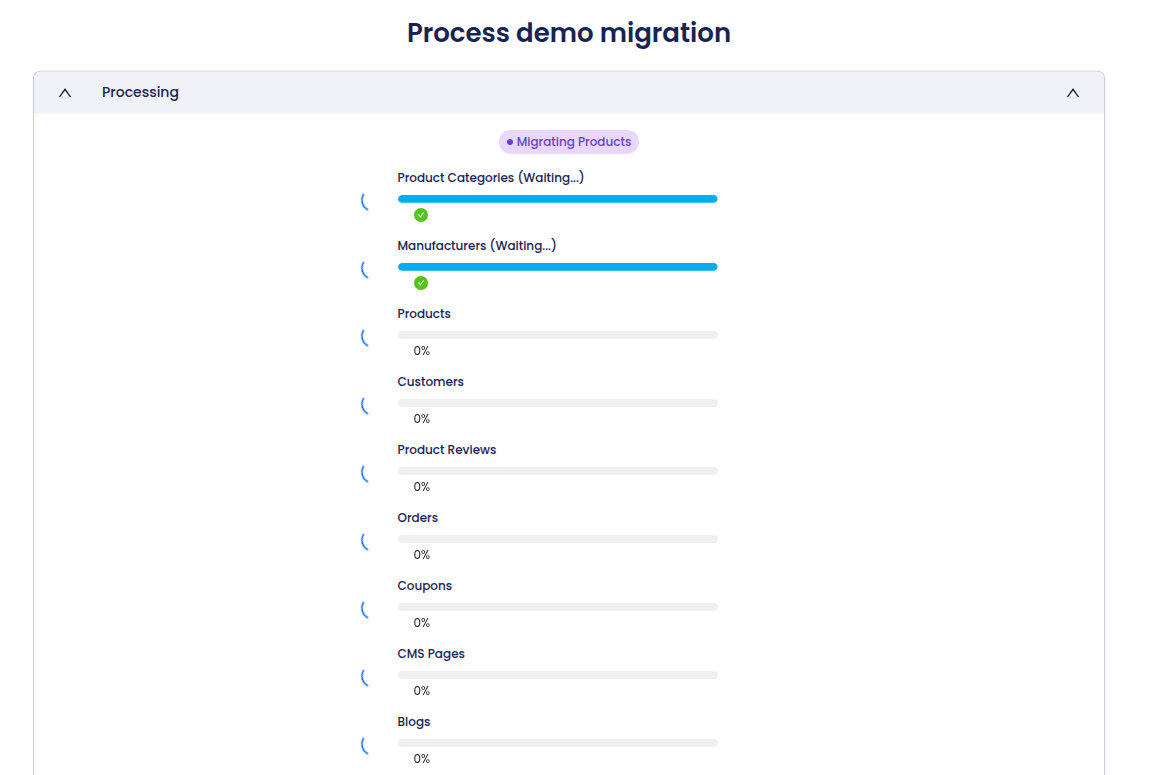
- Step 6: Launch a Demo Migration to Shopify
Test the service by launching a demo migration. This allows you to transfer a limited amount of data to your Shopify store and preview how your store entities will appear on the new platform. This is a crucial step in ensuring a successful Shopify data migration.
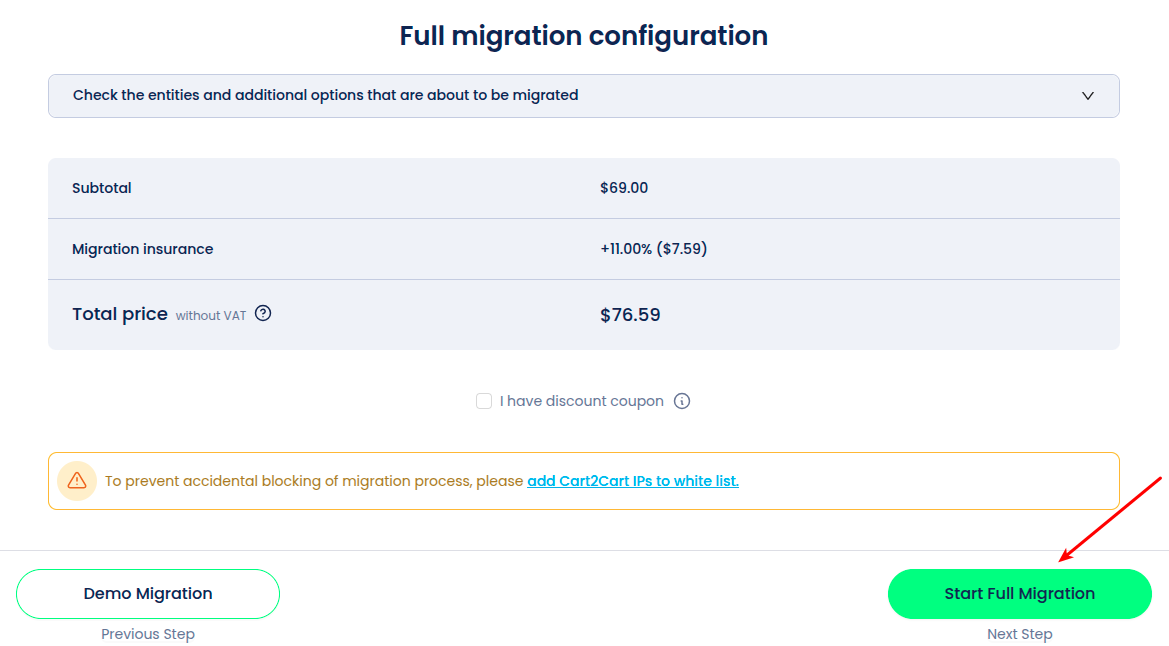
- Step 7: Start Full Shopify Data Migration
Activate the Start Full Migration button to migrate all your current store data to Shopify in a fully automated manner. Get ready to launch your store on Shopify!
Ready to start your Shopify data migration? Start your free demo now!
Do you need help? Contact our support team
Just set up the migration and choose the entities to move – the service will do the rest.
Try It FreeDelegate the job to the highly-skilled migration experts and get the job done.
Choose Package