How can we help you?
Drupal Commerce-related questions2
Troubleshooting: "Drupal Commerce CSV file got corrupted" Error During Data Migration
Encountering a "Drupal Commerce CSV file got corrupted" error during your eCommerce data migration with Cart2Cart? This usually indicates a problem with the structure or content of your CSV files. To ensure successful upload of your Drupal Commerce files into the migration wizard, carefully check the following:
- Empty First Line: Ensure the first line of your CSV file is not empty. The first line should contain the header row with column names.
- Column Consistency: Verify that the number of columns in the header row matches the number of columns in each subsequent data row. Discrepancies will cause parsing errors.
- Data Integrity: Confirm that the data within each column corresponds correctly to its header. For example, the 'category' column should only contain category names, not product weights or other unrelated information.
- Character Encoding: Save your CSV file with UTF-8 encoding to avoid issues with special characters.
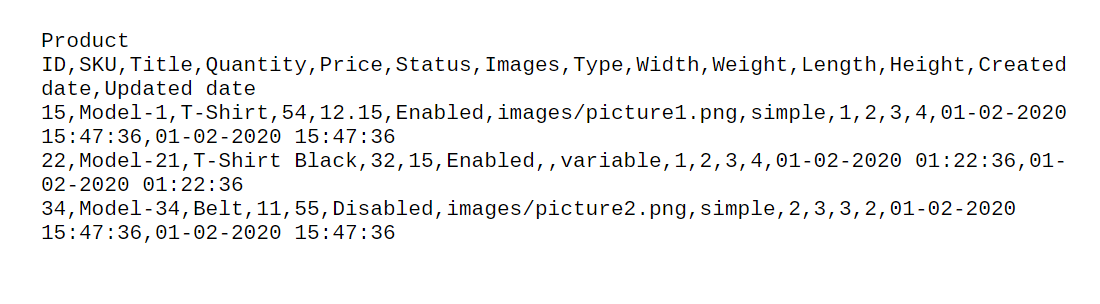
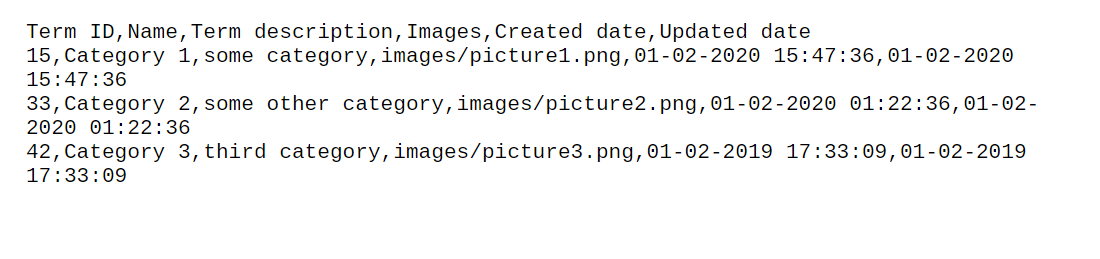
Additionally, for optimal data recognition and accurate migration, rename your column names to standard English equivalents. This helps the Cart2Cart system correctly interpret and map your data fields. Here’s an example of a valid CSV template for Drupal Commerce data migration:
If you're still facing issues with your Drupal Commerce data migration, don't hesitate to contact Cart2Cart support for assistance. You can also Schedule a Call with Migration Expert to discuss your specific migration needs. Alternatively, start your free demo now to see Cart2Cart in action.
To export products and categories from Drupal Commerce for your data migration, you'll need to activate the free Views data export plugin. Beforehand, ensure you've installed the free Views and Ctools modules to guarantee the Views data export plugin functions correctly.
Alternatively, you can follow the instructions below or watch this video guide.
Once all three modules are downloaded, installed, and activated, follow these steps separately to export your Drupal Commerce products and categories:
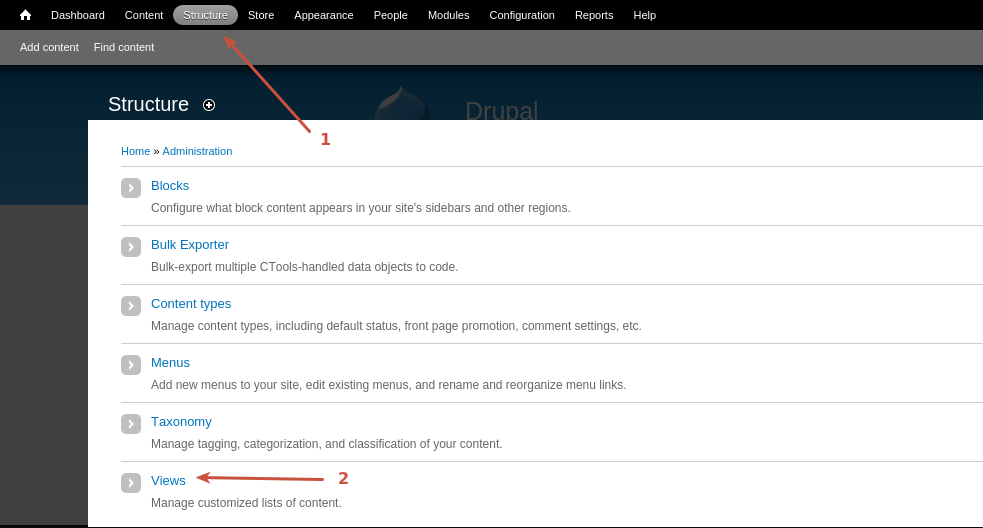
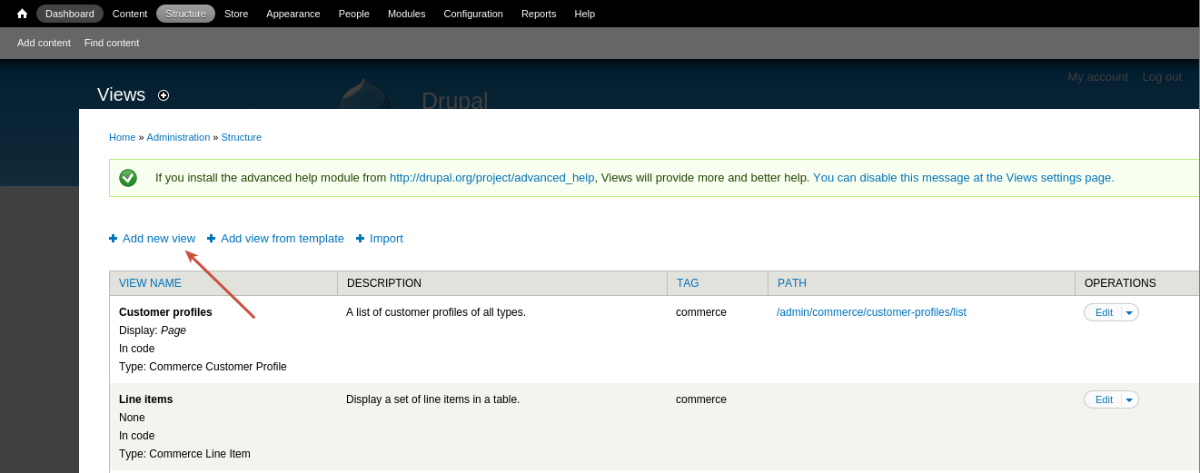
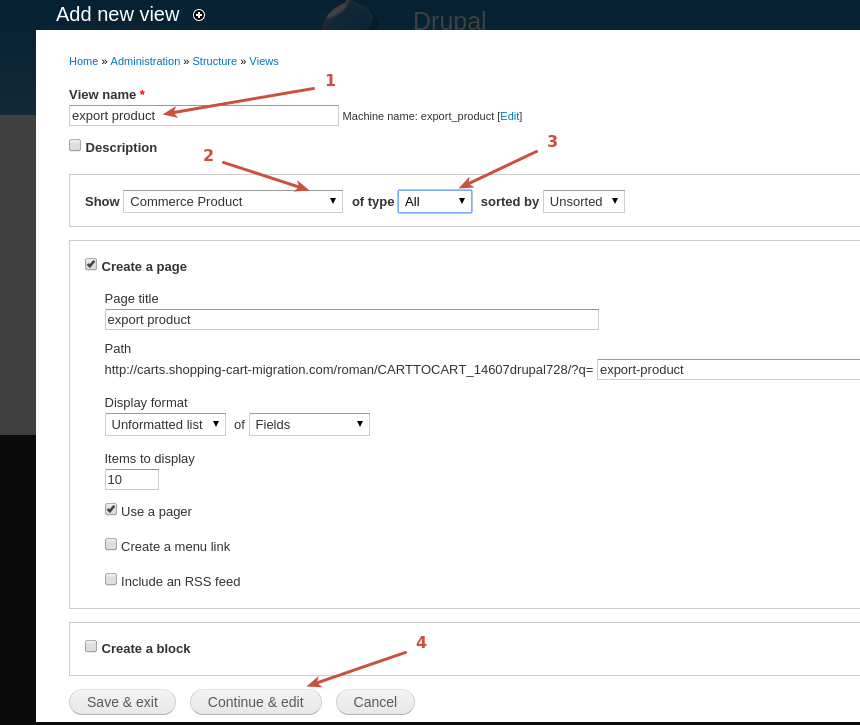
1. Log in to your Drupal Commerce admin panel, navigate to Structure-> Views, and click Add new view.
2. Fill in the View name field. Use "export_product" for products and "export_category" for categories as examples.
3. From the “Show” dropdown menu, select Commerce Products (for products) or Taxonomy Terms (for categories). In the “of type” dropdown, choose All.
4. Click Continue and Edit.
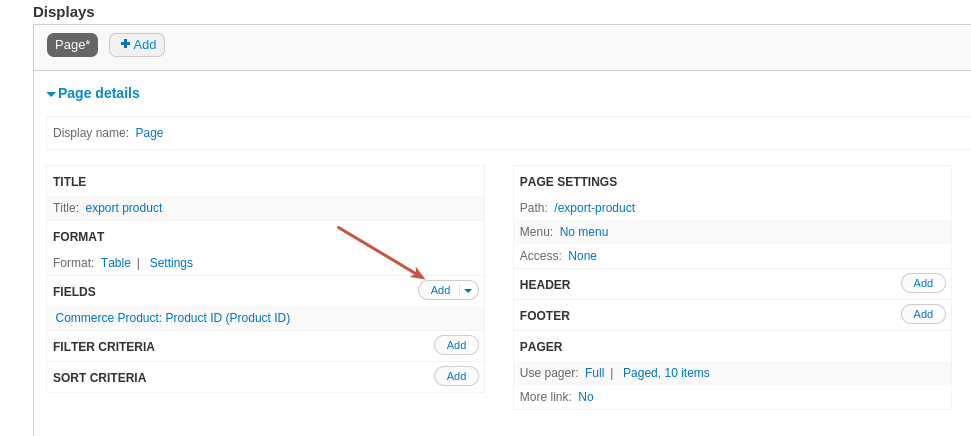
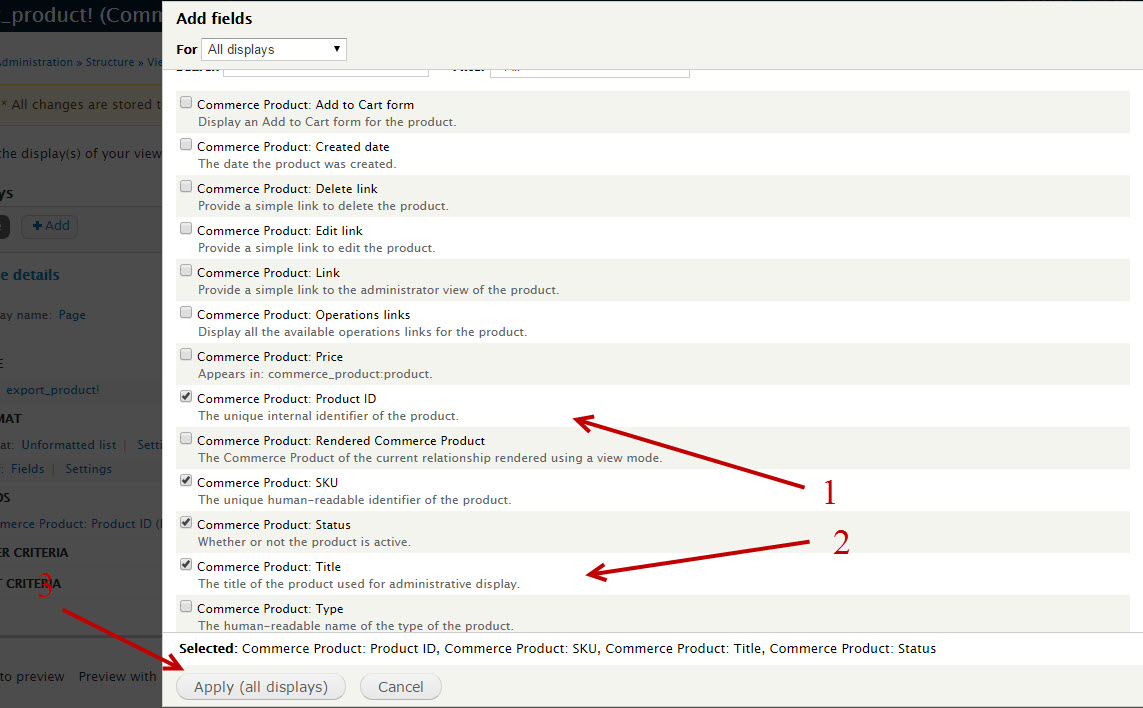
5. In the Fields section, click Add and check the boxes next to:
- For products: “Commerce Product: Product ID”, “Commerce Product: SKU”, “Commerce Product: Status”, and “Commerce Product: Title”.
- For categories: “Taxonomy term: Name”, “Taxonomy term: Term description”, and “Taxonomy term: Term ID”.
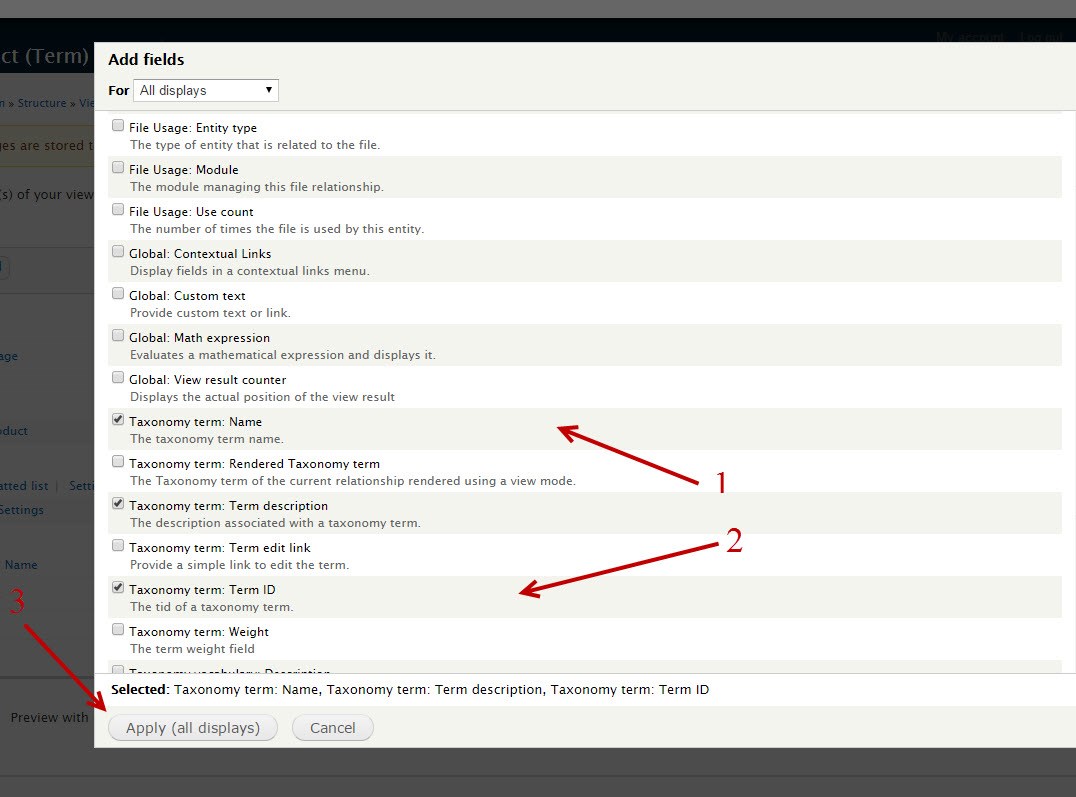
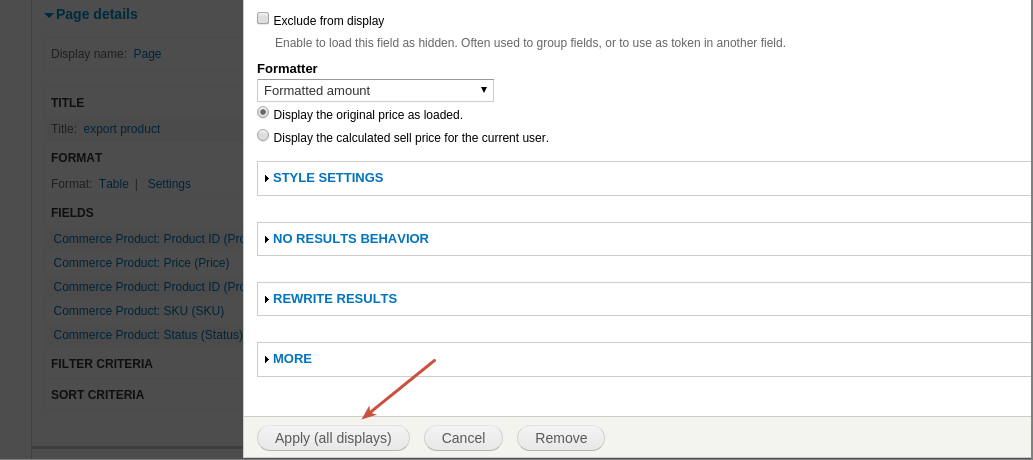
6. Click Apply (All Displays) repeatedly until all necessary fields are configured.
7. Click Save.
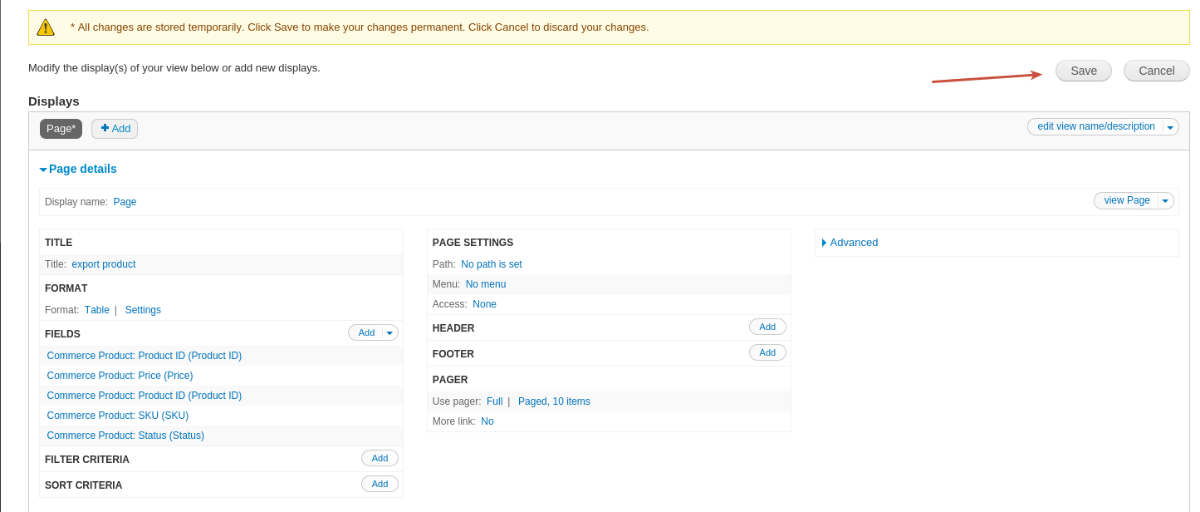
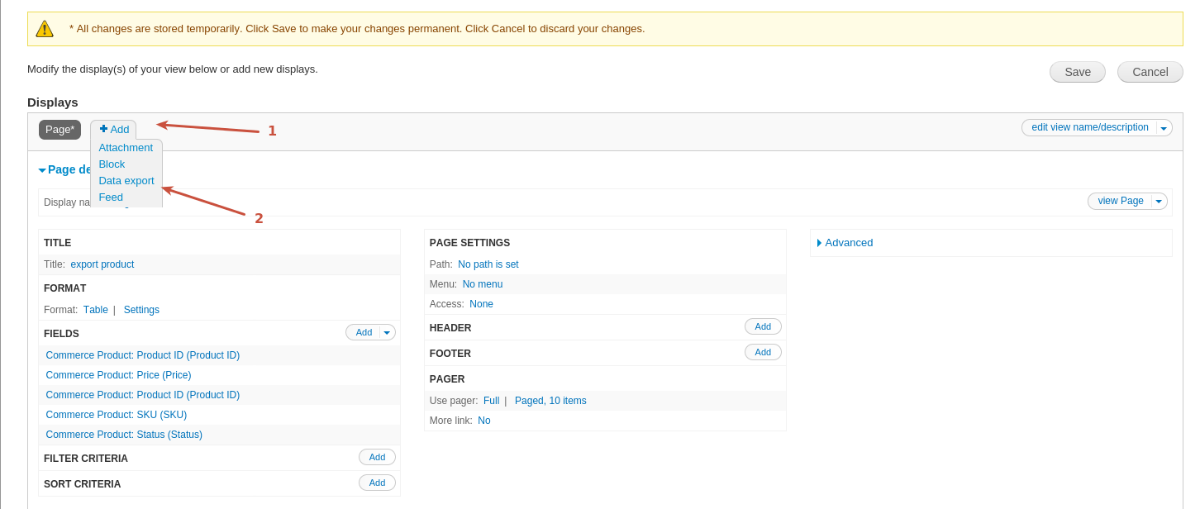
8. Under the Displays heading, click Add, then select Data Export.
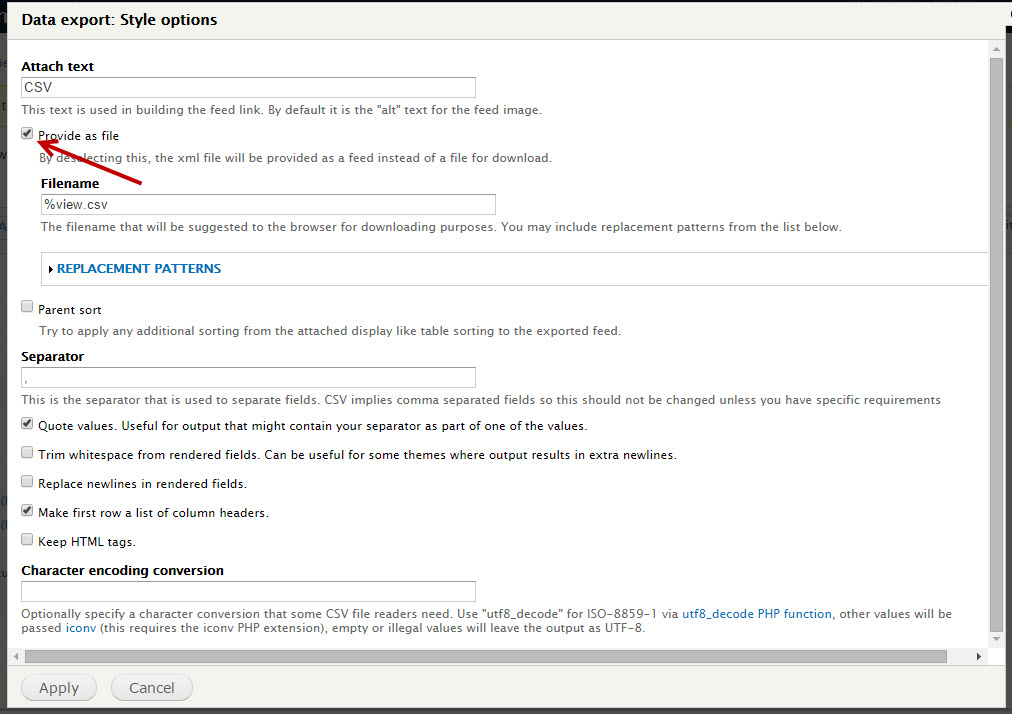
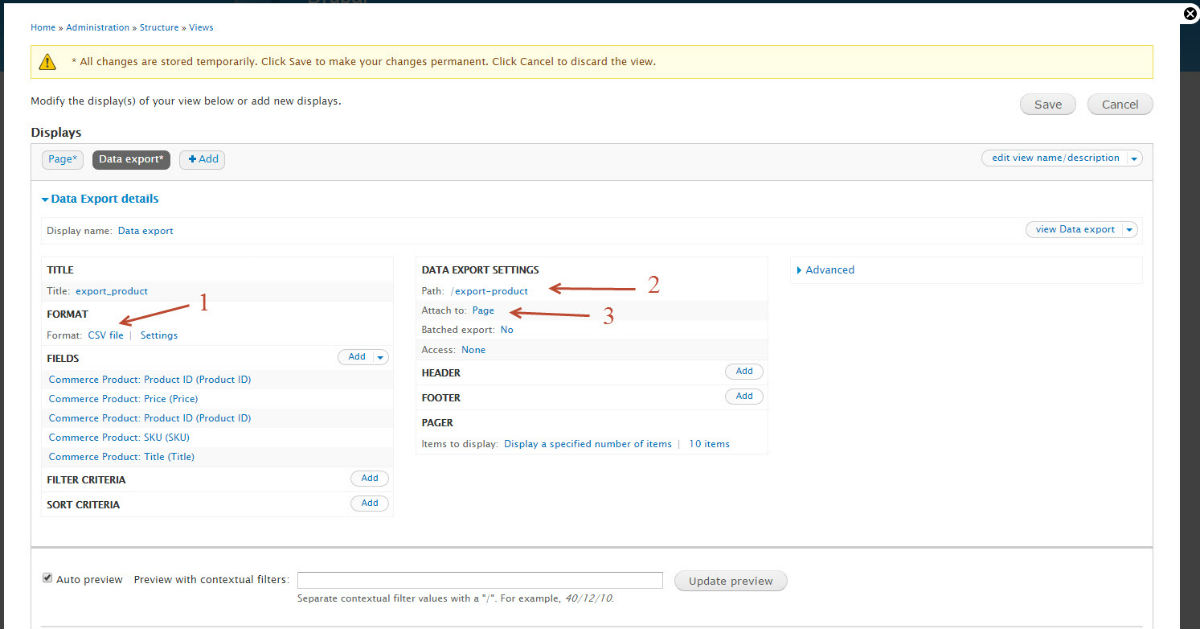
9. In the Format field, choose CSV file. Within its settings, select Provide as a file and apply the changes.
10. Go to Data Export Settings. In the Path field, enter "export-product" (for products) or "export-categories" (for categories). Choose Page in the Attach to field, and then click Apply.
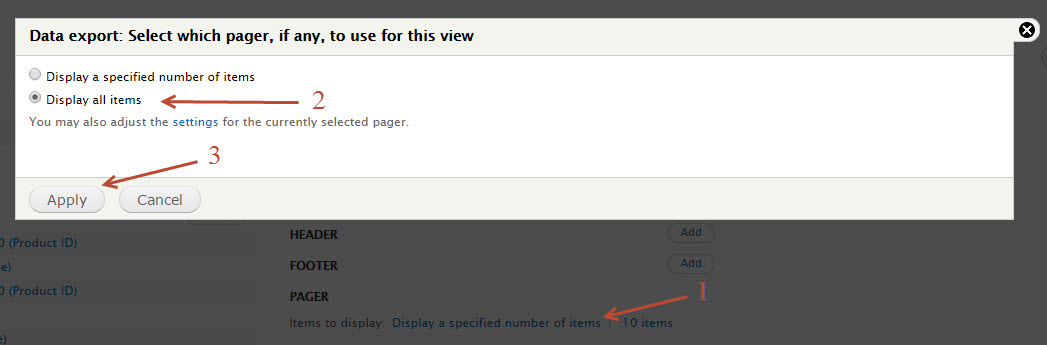
11. Open the Display a specified number of entities menu, choose Display all items, and click Apply.
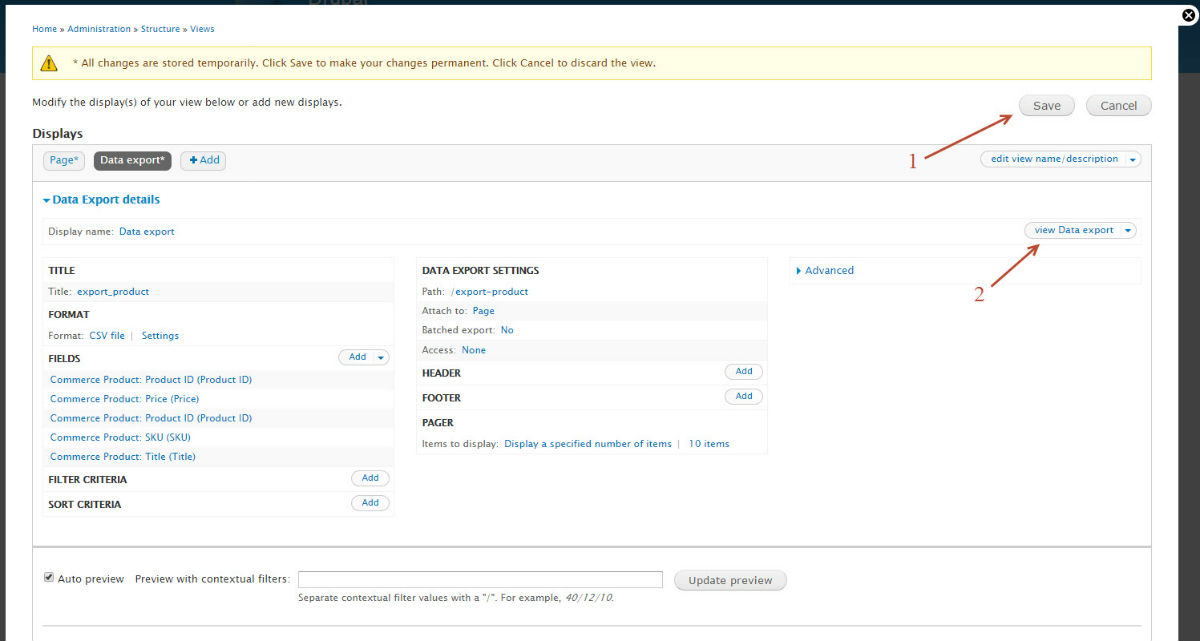
12. Finally, save the changes and click view Data export.
Once you've completed these steps, upload the generated CSV files to the appropriate fields in the Migration Wizard to begin your data migration.
Just set up the migration and choose the entities to move – the service will do the rest.
Try It FreeDelegate the job to the highly-skilled migration experts and get the job done.
Choose Package