How can we help you?
When performing a shopping cart migration, preserving your store's multiple languages is crucial for maintaining a consistent customer experience. To ensure a successful migration with all your languages intact, you need to add and configure the corresponding languages properly in your Target Cart *before* initiating the data transfer.
For example, if your Source Cart has both English and Spanish languages enabled, you must ensure that both are present and properly configured as available languages in your Target Cart. It's also critically important that each language uses the *identical ISO code* in both the Source and Target carts. This ensures that the data is correctly mapped and displayed after the migration.
Below are general guidelines for adding and editing languages in some of the most popular e-commerce platforms: OpenCart, PrestaShop, and Magento.
How to Add Languages for Accurate Shopping Cart Data Migration
Adding Languages and Editing ISO Codes in OpenCart
- Go to the OpenCart marketplace and download the language pack you need. Unzip and upload the contents to your OpenCart root folder.
- Navigate to your OpenCart Admin Panel: System → Localization → Languages → "Add New."
- Consult the README file included with the language pack for specific language information.
- Enter the necessary details, including the language name, ISO code, locale, image, and directory. Ensure the ISO code matches the one used in your Source Cart.
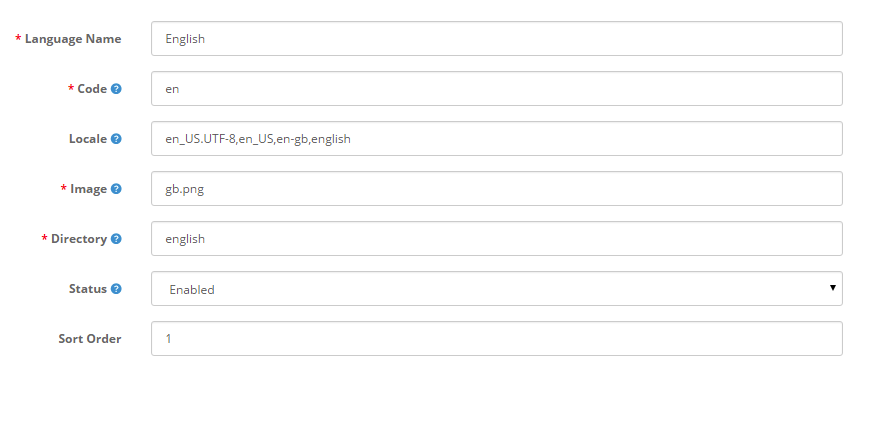
- Click "Save."
If you only need to verify or modify the ISO code of an existing language, click "Edit" and make the required changes.
Adding Languages in PrestaShop for Data Migration
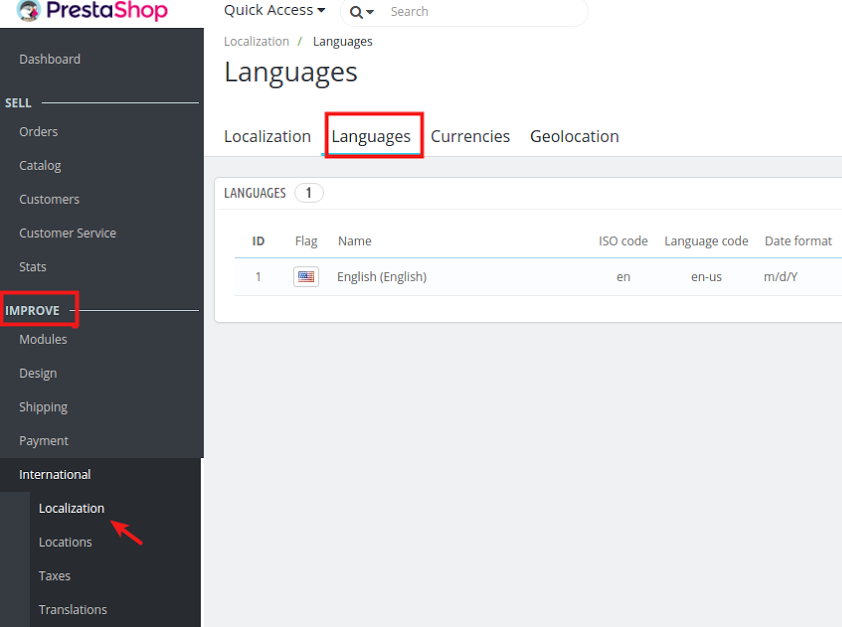
- Log in to your PrestaShop Admin Panel and go to "Improve" → International → Localization → Languages. You'll see English as the default language.
- To add more languages, go to International → Translations → Add/Update Language.
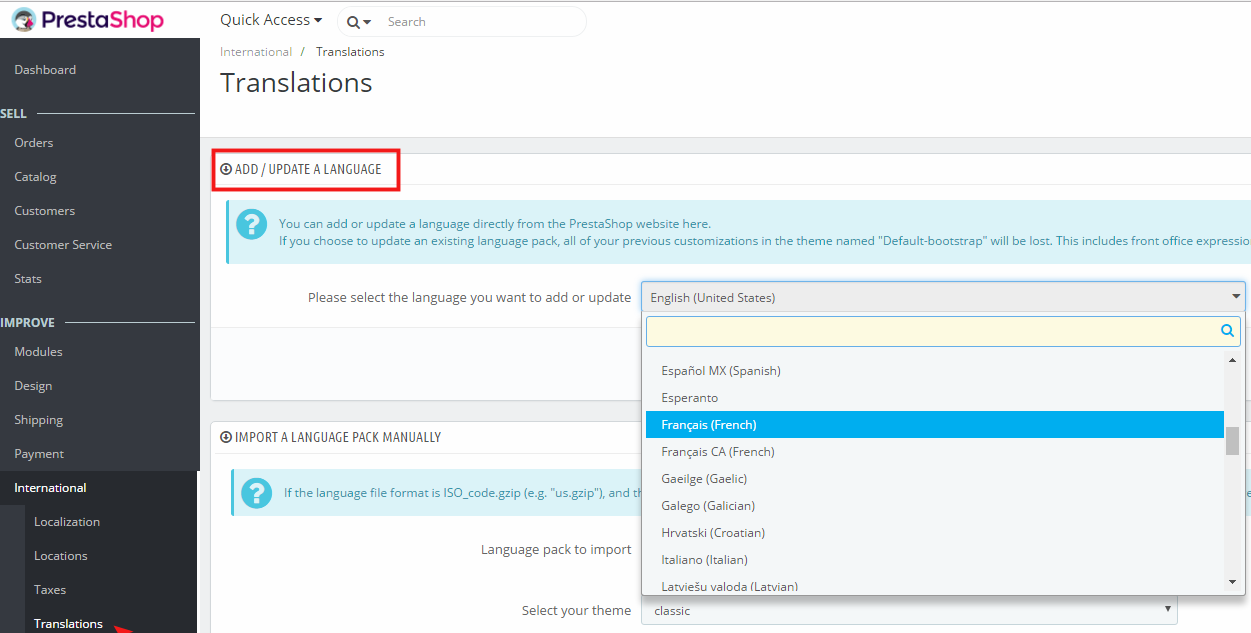
- Select the language that corresponds to your Source Cart. The ISO code will be populated automatically based on your selection.
To confirm that the ISO codes match your Source Cart, go to Localization → Languages → ISO code.

Adding Languages in Magento for Data Migration
Magento's language packs are available through the Magento Marketplace. Installation methods may vary depending on the specific language pack and your Magento version.
- Download the desired language pack from the Magento Marketplace and follow the installation instructions provided.
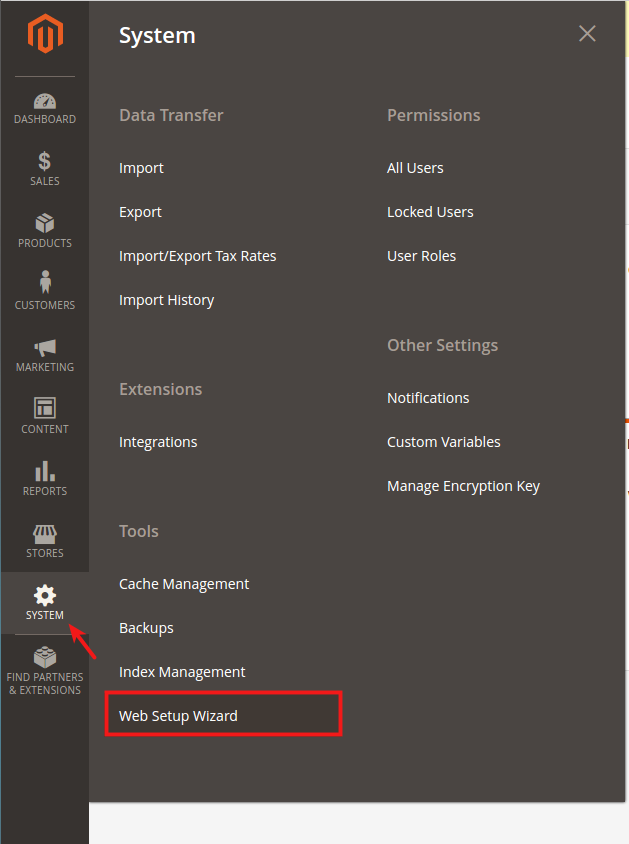
- Log in to your Magento Admin Panel.
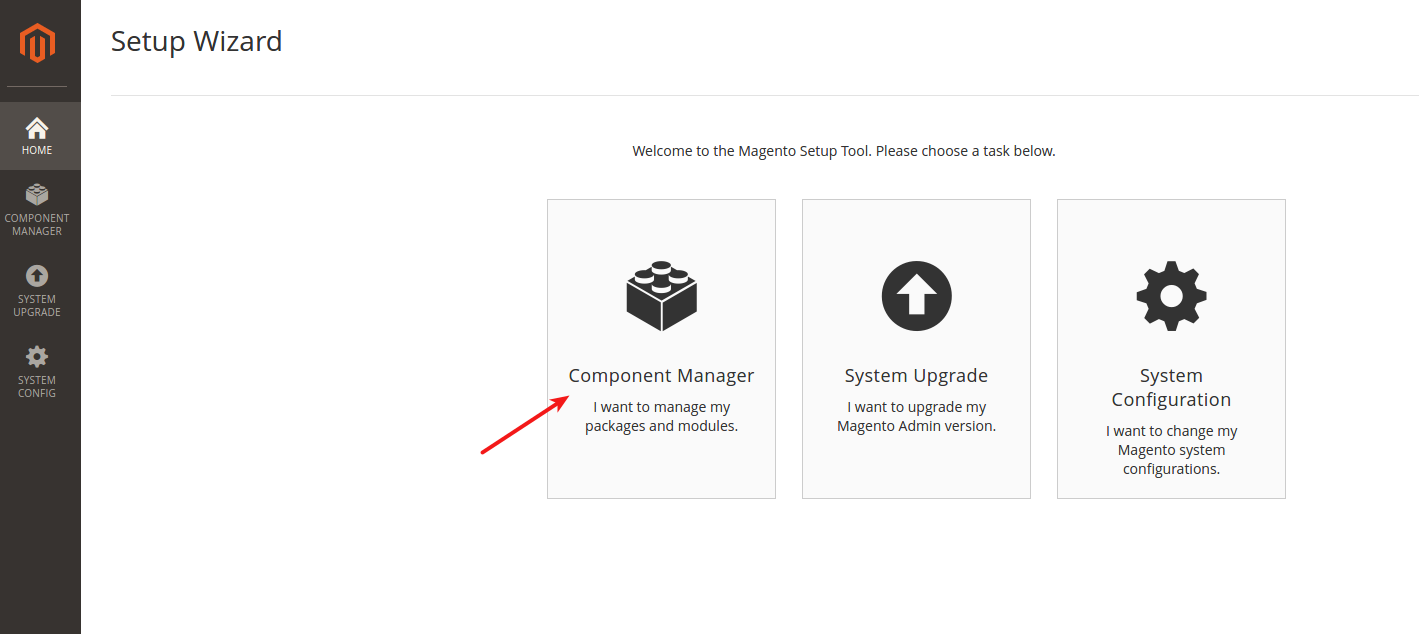
- Navigate to System → Web Setup Wizard (or similar, depending on your Magento version).
- Go to Component Manager.
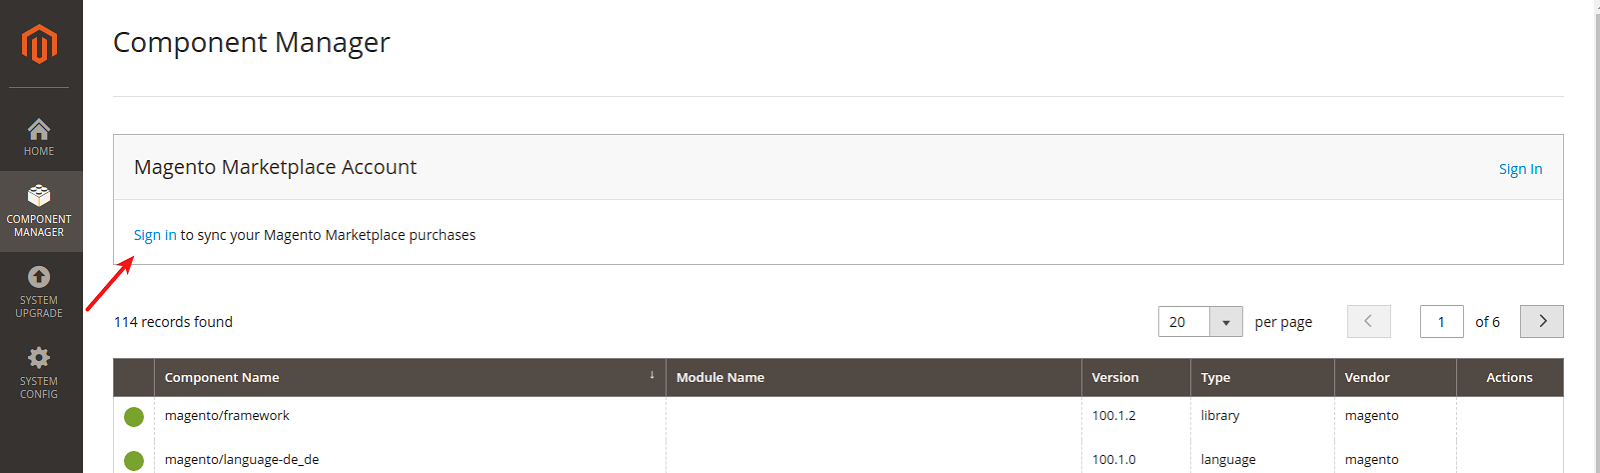
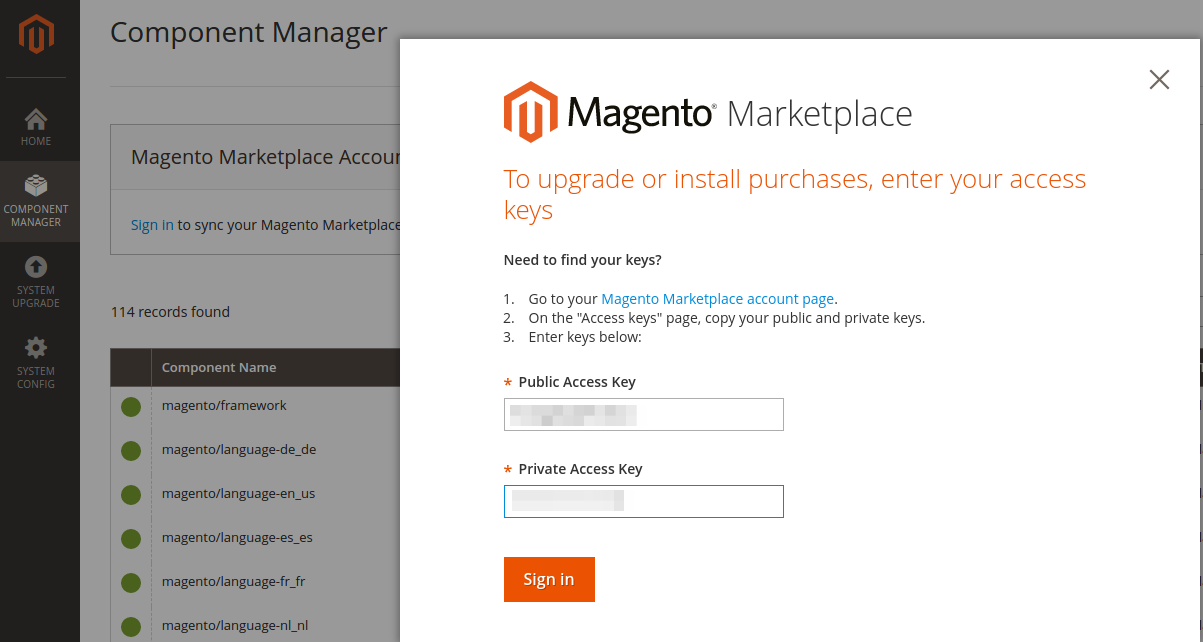
- Sign in to your Magento Marketplace account using your Public and Private Access Keys.
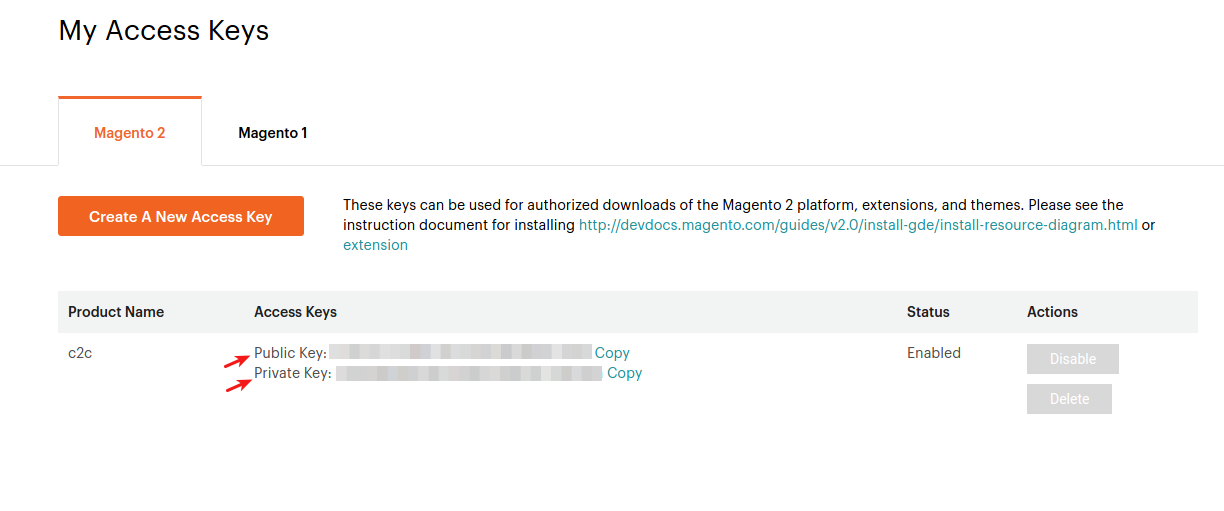
- To find your keys, go to Magento Marketplace → My Profile → Access Keys. Copy and paste them into the required fields.
- Click "Sync" to synchronize the Component Manager with your Marketplace purchases. Under "New Purchases," click "Install."
- The Extensions Grid will appear. Locate the language pack and click "Install."
- After installation, configure the language pack according to the developer's instructions, which can be found in the Magento Marketplace User Guide.
Finally, double-check that the ISO code of the installed language is identical in both your Source and Target carts. Cart2Cart can help ensure a smooth and accurate data migration, preserving your multilingual store's integrity.
Ready to migrate your store with all languages intact? Start your free demo now!
Do you need help? Contact our support team
Just set up the migration and choose the entities to move – the service will do the rest.
Try It FreeDelegate the job to the highly-skilled migration experts and get the job done.
Choose Package