
This guide is designed for those planning to export/import online store’s products, customers, orders, and other data to or from Shopify. We’ll cover how to export products from Shopify, whether you're performing a full platform migration or just updating inventory. Both the manual data export-import and 3rd party assisted approach. Also, you’ll get some valuable tips on how to get the most out of your eCommerce inventory management. So, let’s dive in!
Export your Shopify-based orders in 5 simple steps
The Shopify platform has an in-built functionality that supports basic CSV file order export. First off, we’ll discuss the manual approach. Follow these steps to discover how to export products from Shopify quickly:
-
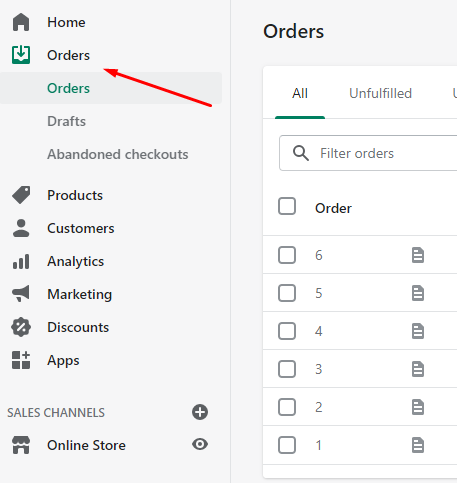
- Step 1. In your Shopify admin dashboard, go to the Orders menu.
-
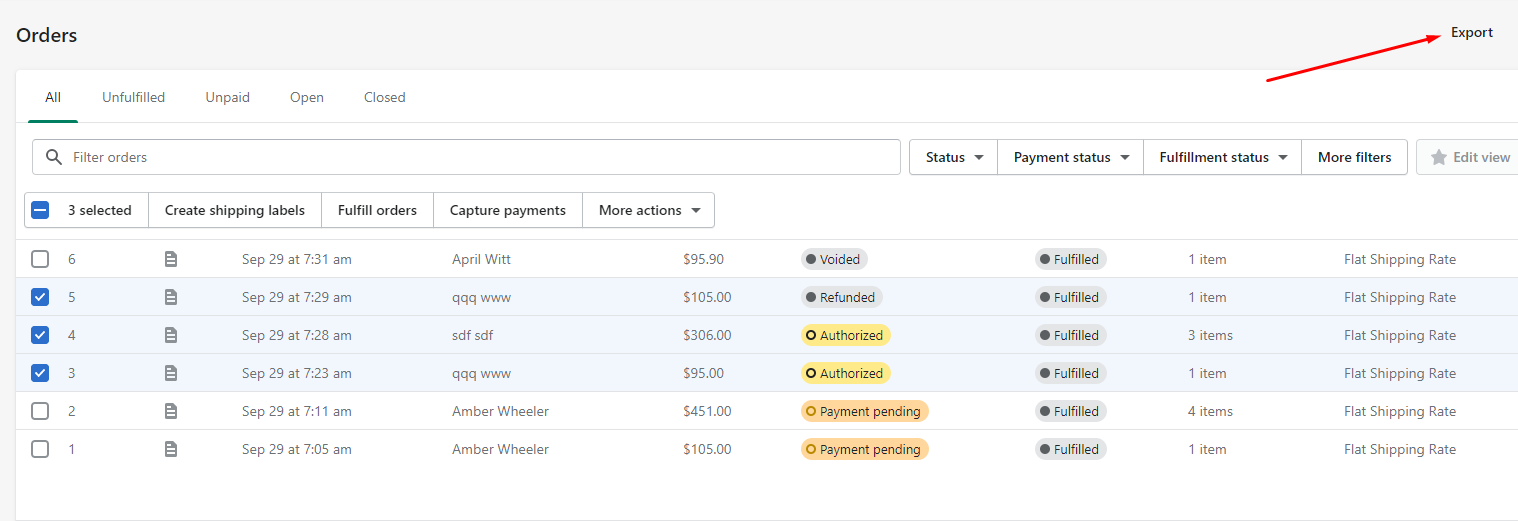
- Step 2. Select the orders you are planning to download and click the Export button in the right upper corner.
-
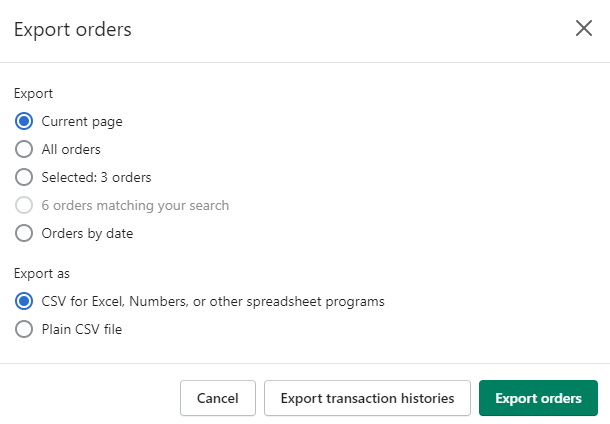
- Step 3. Configure the export options. Select the file format - either the simple CSV file or CSV for Excel and other spreadsheet tools.
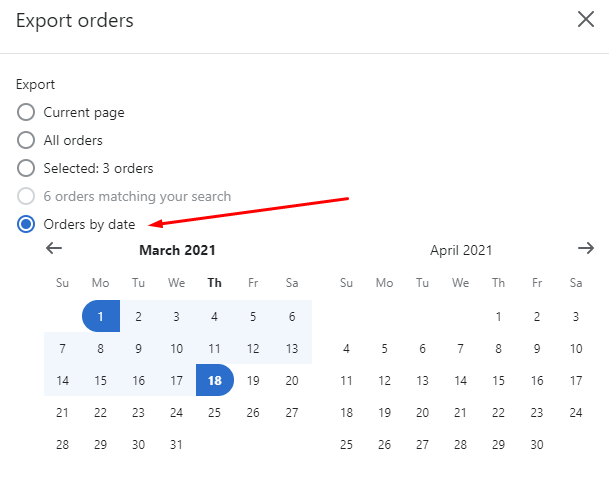
Note: You can also filter the list of orders by date.
-
- Step 4. Click the Export Transaction Histories button to download the transaction info. Also, if you wish to get all the Shopify store order information- hit the Export button.
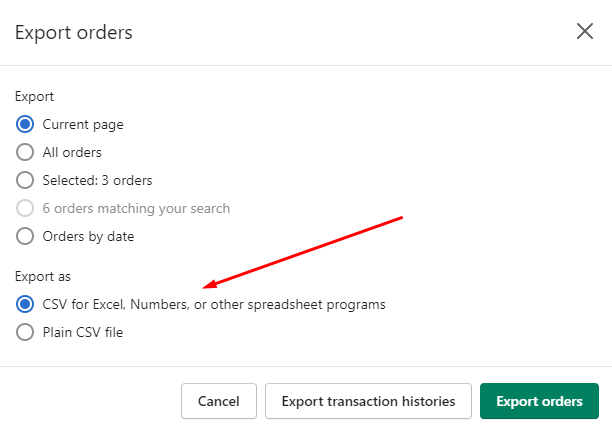
- Step 5. Save the CSV file to your local storage.
Master the export of Shopify products with plugins
Those online business owners, who wish to discover how to export products from Shopify and add more advanced features, and download advanced e-data (products, orders, and more) with some extra configurations, need to check the recommended modules list.
- Control your e-commerce list of records with the Excelify app. The tool has unlimited product import/export capabilities (internal IDs, metafield data importing, multiple location inventory, image positions, etc.) and a straightforward interface.
- The highly customizable Xporter tool supports a great variety of formats for inventory export. Users can filter the database, save the reports online, automatically send them to different emails and servers.
- Use the Metorik app to run a quick order export with no impact on your current e-shop. The tool supports data segmenting and can send automated reports to your email.
- Export Orders Pro will help you create a customizable CSV/HTML file of your inventory. The app automatically inserts product images into the generated reports and retrieves numerous data types.
- Exportify supports personalized report formats with a large number of orders. It automates the business workflow and provides users with access to API fields.
For more comprehensive data transfer needs, particularly when migrating to or from Shopify, explore our detailed Shopify migration guides.
Learn how to import Shopify-based products using a CSV file rapidly
In case you have exported a CSV from another store or plan on importing any product file into your existing online shop, please, follow these instructions:
-
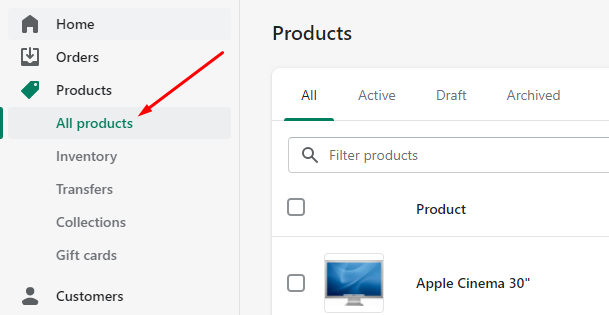
- Step 1. Go to Products → All Products in your admin dashboard.
-
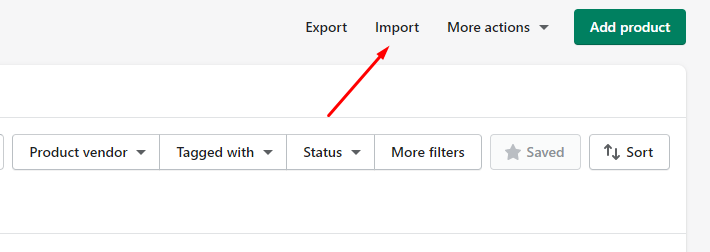
- Step 2. Hit the Import button in the top-right corner of the Products panel.
-
- Step 3. Add your CSV inventory products file and click the Upload and Continue button
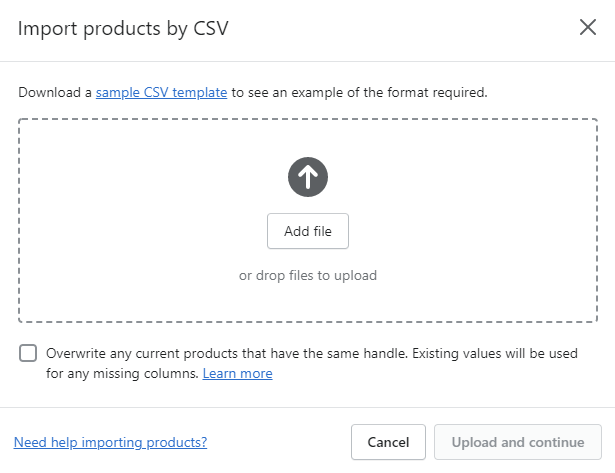
Once the upload is complete, you will receive an email notification.
Essential tips for you to succeed in product import:
- Start your inventory import only with a few items (you might also consider a migration preview). If everything goes correctly - transfer all the products from your list. For a comprehensive preparation, refer to our Universal eCommerce Migration Checklist.
- Copy the product names to the spreadsheet, no need to fill in the rows manually.
- Delete those product titles that won’t be imported to Shopify. This way, you will avoid overwriting them during the importing process.
Import your products from Shopify: quick tips
If you’re looking for a way to discover how to export products from Shopify and save your Shopify webshop records, wish to edit the product CSV via spreadsheet, or planning to transitioning your store to a new platform, here’s a detailed guide for you:
-
- Step 1. Go to the Products tab in your Shopify admin and select All Products.

-
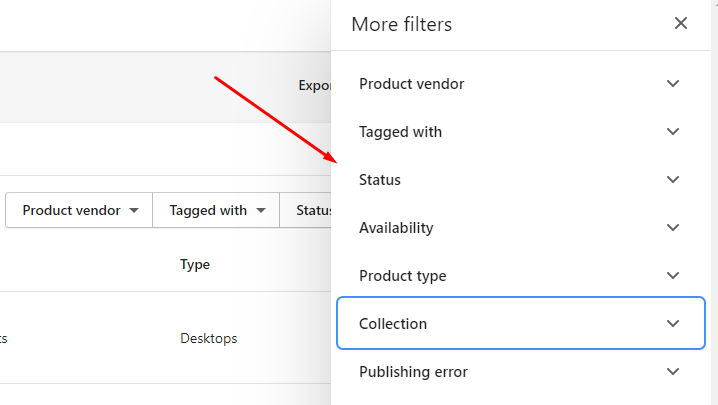
- Step 2. Users can filter the records. Just tap the More filters button and choose the necessary filter from the list.
-
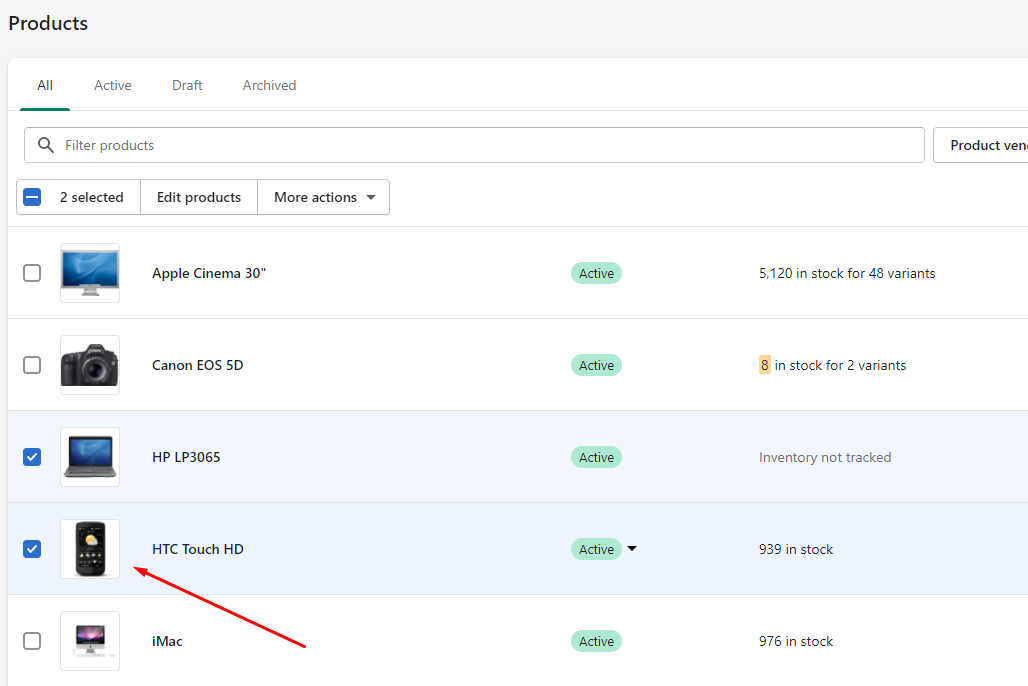
- Step 3. Decide on the products you are willing to import.
It is possible to choose a particular product by clicking the corresponding checkbox.
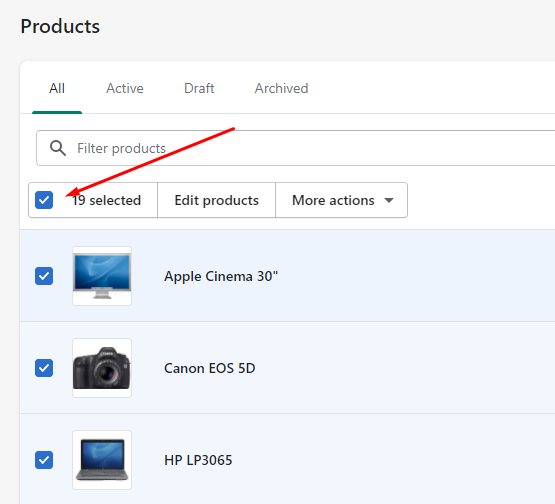
The master checkbox lets you select all the products from the current page.
-
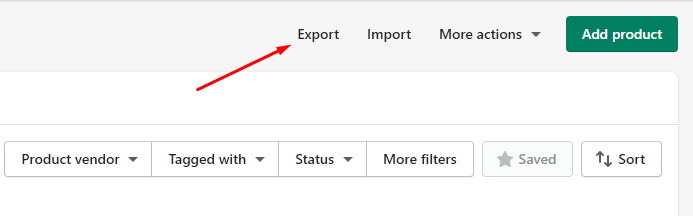
- Step 4. Tap the Export button in the right upper corner of the Products panel.
-
- Step 5. Configure the data for exporting. Choose one of the following options for your inventory export from the list and set the file format.

- Step 6. Once done, click the Export Products button to finish the process. If you are importing only one page - the file will be uploaded to your computer. In case the product count is above 50, the CSV will be sent to your email. You might also consider our Remigration Service for ongoing data synchronization.
Want to export your Shopify products?
Turn to the Cart2Cart and get the job done with no tech skills or developer's assistance.
Ok! I'm readyHow To Export Products From Shopify - FAQs:
Does Shopify allow users to export their product lists?
In order to export Shopify products, you first need to filter the product list. When done, choose the specific products which you want to export and the type of CSV file you want to export (CSV file for a spreadsheet program or Plain CSV file). Select Export products and then click OK.
How to export product data from the current store to Shopify?
To transfer your current store products to Shopify, you only need to check the matching box on the appropriate step of the Migration Wizard.
Leave a Reply Cancel reply
We hope this comprehensive guide will help you overcome some of the most common difficulties in products importing/exporting and managing your Shopify-based business, whether you're refining your current setup or optimizing your perfect shopping cart, especially when looking to transfer from WooCommerce to Shopify. Should you have any further questions, don’t hesitate to ask them in the comments section below.
What can we do for you?
Looking for a change in your trade routine? Try out a new platform with our free demo migration option!
Monthly Update – March 2026
In March 2026, the landscape of e-commerce management continues its rapid evolution, with a significant focus on intelligent automation and personalized customer experiences. Businesses are increasingly leveraging advanced product data export functionalities not just for inventory updates, but for sophisticated segmentation and targeted marketing campaigns. A key trend emerging this month is the integration of AI-powered analytics to predict purchasing patterns and optimize product visibility across diverse sales channels. When exporting product data, it’s crucial to ensure compatibility with these new AI tools, demanding cleaner, more structured datasets. Furthermore, security and data compliance remain paramount, especially with evolving regulations like GDPR and CCPA influencing how customer and product information is handled during export and import processes. Retailers are advised to prioritize robust data validation and mapping to prevent discrepancies and enhance the integrity of their digital storefronts, ensuring a seamless and compliant transition across platforms or when integrating new technologies.
For more details, explore our FAQ section or schedule a call with a migration expert.