E-junkie to Shopify Migration - Step-by-Step Guide & Expert Services
E-junkie to Shopify migration made easy and secure. Ready to move E-junkie store to Shopify? Cart2Cart ensures a seamless switch from E-junkie to Shopify, preserving your SEO rankings with zero downtime. Our automated service quickly and securely transfers all your essential data. Whether you're researching how to transfer data or seeking expert assistance for a hassle-free E-junkie to Shopify migration, we provide step-by-step guides or full-service solutions to get you selling on Shopify fast.
What data can be
migrated from E-junkie to Shopify
-
Products
-
Product Categories
-
Manufacturers
-
Customers
-
Orders
Estimate your Migration Cost
Cart2Cart will seamlessly migrate E-junkie to Shopify ecommerce data like products, orders, customers, etc. in a few hours with zero effect on your current E-junkie store performance.
How to Migrate from E-junkie to Shopify In 3 Steps?
Connect your Source & Target carts
Choose E-junkie and Shopify from the drop-down lists & provide the stores’ URLs in the corresponding fields.
Select the data to migrate & extra options
Choose the data you want to migrate to Shopify and extra options to customise your E-junkie to Shopify migration.
Launch your Demo/Full migration
Run a free Demo to see how the Cart2Cart service works, and when happy - launch Full migration.
Migrate E-junkie to Shopify: The Ultimate 2025 Guide
Seamlessly Migrate Your E-junkie Store to Shopify
Are you an E-junkie merchant looking to expand your digital product sales or integrate a more robust e-commerce platform for a diverse range of products? The time has come to consider a powerful transition to Shopify. While E-junkie excels as a simple solution for selling downloads, Shopify offers unparalleled scalability, a vast app ecosystem, and comprehensive features for managing products, customers, and orders across various channels. This guide will walk you through the entire process of migrating your valuable store data from E-junkie to Shopify, ensuring a smooth and secure data transfer with minimal downtime.
Since E-junkie data is typically exported in CSV format, our migration strategy will leverage CSV files as the source to move your products, customer data, and order history to your new Shopify store. We’ll employ a trusted migration tool to simplify this replatforming journey, focusing on data integrity and preserving your vital SEO rankings.
Prerequisites for a Successful Migration
Before you embark on your E-junkie to Shopify data transfer, a bit of preparation is essential to ensure a smooth transition and avoid any hiccups. Think of these steps as setting the stage for your new, enhanced online presence.
- E-junkie Data Export: As E-junkie does not offer direct API integration for automatic migrations, you will need to manually export your data. Go into your E-junkie admin and export all available data: products, customers, and orders, typically as CSV files. Ensure these files are clean and well-organized, as their quality directly impacts the migration.
- Set Up Your Shopify Store: Create a new Shopify account or ensure your existing one is ready. Choose a Shopify plan (Basic, Shopify, Advanced, or Shopify Plus) that aligns with your business needs. You’ll need administrator access to this store. For more details on preparing your new platform, see our guide on how to prepare your target store for migration.
- Install Cart2Cart Shopify App: Shopify requires the installation of the Cart2Cart Store Migration App from the Shopify App Store to establish a connection. This app will facilitate the data transfer process.
- Disable Notifications on Shopify: To prevent customers from receiving premature notifications during the data transfer, it's highly recommended to disable all order and customer notifications in your Shopify admin settings temporarily.
- Review App Requirements for Specific Data: If you plan to migrate product reviews, be aware that Shopify's default functionality might not fully support this. The platform notes that "Reviews require AirReviews app." Plan to install a compatible review app, such as AirReviews, on your Shopify store to successfully transfer and display customer feedback.
- Consider Shopify Plan Limitations: If you are on a "Pause and Build" plan during the migration, note that this plan "blocks orders." Ensure your plan allows for the necessary operations if you anticipate receiving orders during the migration window, or schedule your migration accordingly.
Performing the Migration: A Step-by-Step Guide
With your preparations complete, you're ready to initiate the data transfer from E-junkie (via CSV) to Shopify using the Cart2Cart migration wizard. This step-by-step process is designed to be straightforward and secure.
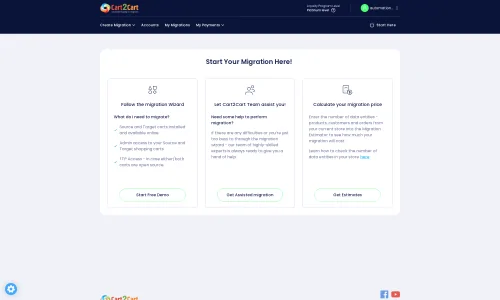
Step 1: Initiate Your Migration
Begin by navigating to the migration service platform. If you haven't already, sign up for an account. Once logged in, you'll be directed to the main dashboard where you can start a new migration.
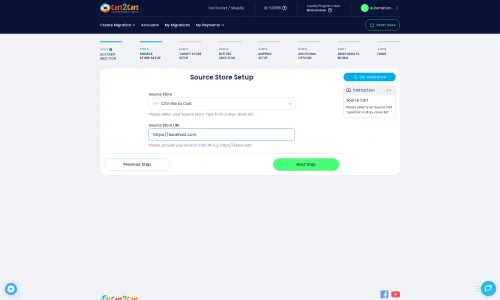
Step 2: Connect Your Source Store (E-junkie via CSV)
In the migration wizard, select "CSV File to Cart" as your Source Cart. This option allows you to upload the CSV files you exported from your E-junkie store. You will then be prompted to upload your product, customer, and order CSV files. Ensure you map the columns correctly based on your E-junkie export.
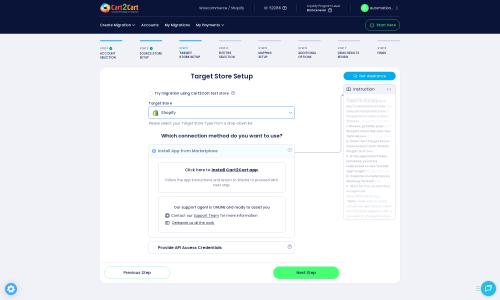
Step 3: Connect Your Target Store (Shopify)
Next, choose "Shopify" as your Target Cart. The wizard will then guide you on connecting your Shopify store. The recommended method is to install the Cart2Cart app directly from the Shopify App Marketplace. Follow the on-screen instructions, which typically involve clicking a link to the Shopify App Store, installing the app, and then returning to the migration wizard to confirm the connection. Alternatively, you can provide API credentials if you prefer that connection method, though the app is generally simpler.
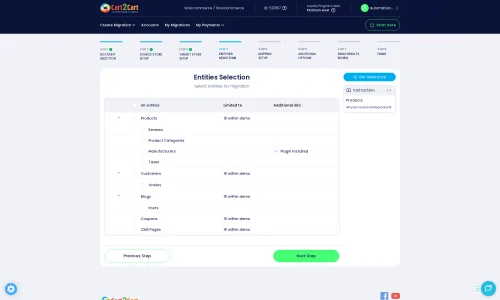
Step 4: Select Data Entities for Transfer
This critical step allows you to choose exactly what data you wish to transfer from your E-junkie CSV files to Shopify. You can select all entities or pick specific ones like:
- Products (including SKUs and variants from your CSV)
- Product Categories
- Customers
- Orders (with consideration for fulfilled dates)
- Product Reviews (requiring the AirReviews app on Shopify)
- CMS Pages
- Blogs & Blog Posts
Carefully review your selections to ensure all vital business data is included in the migration.
Step 5: Configure Data Mapping and Additional Options
This is where you refine how your E-junkie data fits into Shopify's structure. You'll perform:
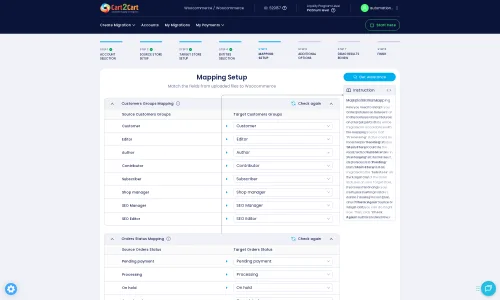
- Data Mapping: Match customer groups and order statuses from your E-junkie data (if available in your CSV) to their corresponding equivalents in Shopify. This ensures data consistency.
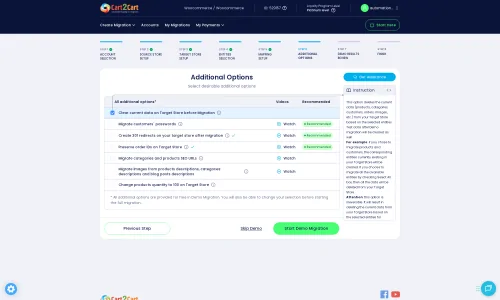
- Additional Options: Enhance your migration with several powerful features:
- "Preserve Order IDs": Keep your original E-junkie order numbers on Shopify. (Learn more about How Preserve IDs options can be used).
- "Create 301 Redirects": Crucial for maintaining your SEO rankings and link equity by automatically redirecting old E-junkie URLs to new Shopify URLs.
- "Migrate Images in Description": Ensure product images embedded within descriptions are transferred.
- "Clear Target Store Data": (Use with caution) This option will remove all existing data from your Shopify store before migration. (Understand more about clearing target store data).
- "Migrate Groups to Tags": Convert customer groups from your source into tags on Shopify for easier segmentation.
Step 6: Run a Free Demo Migration (Highly Recommended)
Before committing to the full migration, run a free demo. This allows you to transfer a limited number of entities (e.g., 10 products, 10 customers, 10 orders) to your Shopify store. Use this opportunity to thoroughly inspect the transferred data, check mappings, and ensure everything appears as expected. It's a risk-free way to preview your new store and catch any potential issues.
Step 7: Start Full Migration to Shopify
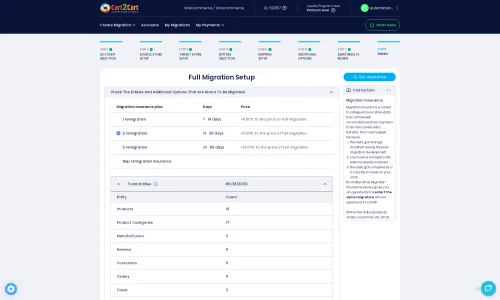
Once you're satisfied with the demo results, proceed with the full migration. Review the summary of your selected entities and chosen additional options. You can also consider adding a Migration Insurance Service, which provides a safety net with remigrations if any issues arise post-transfer. Confirm your settings and launch the migration. The system will handle the data transfer automatically, allowing you to monitor its progress.
Post-Migration Steps
Completing the data transfer is a significant milestone, but your journey to a fully optimized Shopify store isn't over. Here are the crucial steps to take after your E-junkie data has been moved:
- Thorough Data Verification: Rigorously check all migrated data on your new Shopify store. Verify product listings, images, SKUs, pricing, customer accounts, order history, and any other specific information you transferred. Ensure reviews are displaying correctly if you used a compatible app.
- Configure Your Shopify Theme: Customize your Shopify theme to align with your brand's aesthetics and provide an excellent user experience. Ensure all navigation, collections, and product pages are visually appealing and functional.
- Install Essential Shopify Apps: Explore the Shopify App Store for apps that enhance functionality, such as payment gateways, shipping solutions, marketing automation tools, inventory management, and customer service integrations. Remember that "Reviews require AirReviews app" if you migrated reviews.
- Verify SEO & Redirects: Test your 301 redirects to confirm that old E-junkie URLs are successfully redirecting to their new Shopify counterparts. This is vital for preserving your search engine rankings and link equity.
- Conduct Extensive Testing: Place test orders, create test customer accounts, and navigate your entire store as if you were a customer. Check checkout flows, email notifications, search functionality, and mobile responsiveness.
- Update Your Domain DNS: Once you are confident that your Shopify store is fully operational and ready for live traffic, update your domain's DNS settings to point to your new Shopify store.
- Deactivate Your E-junkie Store: After successfully moving your store and thoroughly testing your Shopify platform, you can safely deactivate your E-junkie account.
- Consider Recent Data Migration: If you continued to process orders or add new products on E-junkie during the migration period, consider utilizing a Recent Data Migration Service to transfer any new data that appeared after your main migration.
Migrating from E-junkie to Shopify is a strategic move that positions your business for growth and expanded capabilities. By following this comprehensive guide, you can ensure a smooth, efficient, and secure transfer of your valuable e-commerce data. If you encounter any challenges or prefer expert assistance, consider our contact us or explore our Ultimate Data Migration Service for a fully managed solution.
Ways to perform migration from E-junkie to Shopify
Automated migration
Just set up the migration and choose the entities to move – the service will do the rest.
Try It Free
Data Migration Service Package
Delegate the job to the highly-skilled migration experts and get the job done.
Choose Package

Benefits for Store Owners

Benefits for Ecommerce Agencies
Choose all the extra migration options and get 40% off their total Price

The design and store functionality transfer is impossible due to E-junkie to Shopify limitations. However, you can recreate it with the help of a 3rd-party developer.
Your data is safely locked with Cart2Cart
We built in many security measures so you can safely migrate from E-junkie to Shopify. Check out our Security Policy
Server Security
All migrations are performed on a secure dedicated Hetzner server with restricted physical access.Application Security
HTTPS protocol and 128-bit SSL encryption are used to protect the data being exchanged.Network Security
The most up-to-date network architecture schema, firewall and access restrictions protect our system from electronic attacks.Data Access Control
Employee access to customer migration data is restricted, logged and audited.Frequently Asked Questions
Will my E-junkie store experience downtime during migration to Shopify?
Should I use an automated tool or hire an expert for E-junkie to Shopify migration?
What data entities can be migrated from E-junkie to Shopify?
Is my E-junkie store data secure during migration to Shopify?
How can I prevent losing SEO rankings when migrating from E-junkie to Shopify?
What factors influence the cost of migrating from E-junkie to Shopify?
How long does it take to migrate an E-junkie store to Shopify?
Can customer passwords be migrated from E-junkie to Shopify?
Will my E-junkie store's design and theme transfer directly to Shopify?
How do I ensure data accuracy after migrating from E-junkie to Shopify?
Why 150.000+ customers all over the globe have chosen Cart2Cart?
100% non-techie friendly
Cart2Cart is recommended by Shopify, WooCommerce, Wix, OpenCart, PrestaShop and other top ecommerce platforms.
Keep selling while migrating
The process of data transfer has no effect on the migrated store. At all.
24/7 live support
Get every bit of help right when you need it. Our live chat experts will eagerly guide you through the entire migration process.
Lightning fast migration
Just a few hours - and all your store data is moved to its new home.
Open to the customers’ needs
We’re ready to help import data from database dump, csv. file, a rare shopping cart etc.
Recommended by industry leaders
Cart2Cart is recommended by Shopify, WooCommerce, Wix, OpenCart, PrestaShop and other top ecommerce platforms.


