QuickeSelling to WooCommerce Migration - Step-by-Step Guide & Expert Services
QuickeSelling to WooCommerce migration doesn't have to be daunting. Confidently move your QuickeSelling store to WooCommerce with Cart2Cart, ensuring a fast, secure, and SEO-preserving transfer data process with zero downtime. Whether you’re looking for a detailed step-by-step guide to switch from QuickeSelling to WooCommerce yourself or need expert assistance to manage everything for you, we provide the ultimate solution. Achieve a smooth, worry-free QuickeSelling to WooCommerce migration and continue growing your business.
What data can be
migrated from QuickeSelling to WooCommerce
-
Products
-
Product Categories
-
Manufacturers
-
Customers
-
Orders
- Name, SKU, Short Description, Full Description, Manufacturer , Tax Class, Sort Order.
- Meta Title, Meta Keywords, Meta Description.
- Quantity, Stock Availability.
- Weight, Width, Height.
- Related Products.
- Options(Name, Price).
- Name, Status.
- Meta Title, Meta Description, Meta Keywords.
- Name.
- Customer Billing Address.
- Customer Shipping Address.
- ID, Order Date, Order Status, Order Products(Name, SKU), SubTotal Price, Discount Price, Tax Price, Shipping Price, Total Price.
- Customer Name, Email, Billing Address.
- Shipping Address.
Products
Estimate your Migration Cost
The price of your migration depends on the volume of data to migrate and the additional migration options you pick. To check the price for QuickeSelling to WooCommerce conversion, click “Get estimates” and follow the suggested steps.
How to Migrate from QuickeSelling to WooCommerce In 3 Steps?
Connect your Source & Target carts
Choose QuickeSelling and WooCommerce from the drop-down lists & provide the stores’ URLs in the corresponding fields.
Select the data to migrate & extra options
Choose the data you want to migrate to WooCommerce and extra options to customise your QuickeSelling to WooCommerce migration.
Launch your Demo/Full migration
Run a free Demo to see how the Cart2Cart service works, and when happy - launch Full migration.
Migrate QuickeSelling to WooCommerce: The Ultimate How-To Guide
A Comprehensive Guide to Transitioning from QuickeSelling to WooCommerce
Migrating your e-commerce store is a significant step towards scalability and enhanced functionality. If you're currently operating on QuickeSelling and are considering a move to the powerful and flexible WooCommerce platform, this guide is designed for you. WooCommerce, built on WordPress, offers unparalleled customization, a vast plugin ecosystem, and robust control over your online store, making it an excellent choice for merchants looking to grow.
Given that QuickeSelling is not directly supported by most automated migration tools, we will guide you through a proven method that involves exporting your data from QuickeSelling into a CSV file format and then importing it into your new WooCommerce store. This ensures a comprehensive data transfer, moving your valuable products, customer information, orders, and more.
This article will walk you through the entire process, from essential prerequisites to post-migration checks, ensuring a smooth and successful replatforming experience. Let's begin your journey to a more feature-rich and adaptable e-commerce future!
Prerequisites for Migration
Before embarking on your migration journey from QuickeSelling to WooCommerce, a few crucial preparatory steps are necessary to ensure a smooth and efficient transition. Proper planning minimizes downtime and safeguards your valuable business data.
- Backup Your QuickeSelling Store Data: Always start by creating a complete backup of your current QuickeSelling store. This includes all products, customer records, orders, and any other critical information. While migrating, there's always a slim chance of unforeseen issues, and a backup ensures you can restore your data if needed.
- Set Up Your WooCommerce Environment:
You'll need a functional WordPress installation with the WooCommerce plugin activated. If you haven't already:- Choose a Hosting Provider: Select reliable hosting that meets WooCommerce's system requirements for optimal performance.
- Install WordPress: Most hosting providers offer one-click WordPress installation.
- Install and Activate WooCommerce: From your WordPress dashboard, navigate to Plugins > Add New, search for "WooCommerce," install, and activate it.
- Perform Initial Setup: Go through the WooCommerce setup wizard to configure basic store settings like currency, store location, and shipping/tax options.
- Export QuickeSelling Data to CSV Files:
As QuickeSelling doesn't typically offer direct API or bridge connections for third-party migration tools, you'll need to export your store's data into CSV (Comma Separated Values) files. This usually involves going into your QuickeSelling admin panel and finding export options for:- Products (including SKUs, variants, descriptions, images)
- Categories
- Customers
- Orders
- Reviews (if available)
- Review WooCommerce Limitations: Be aware of some WooCommerce characteristics:
- Stores with 10,000+ products may experience performance considerations.
- For advanced functionalities like manufacturers and custom order statuses, additional plugins might be required. Similarly, managing distinct customer groups often necessitates a dedicated plugin.
- Review Access Credentials: Ensure you have full administrative access to both your QuickeSelling (for export) and your new WooCommerce (WordPress) admin panels. For WooCommerce, you may need to generate API keys later. Read our guide on Access Credentials for more details.
Performing the Migration: A Step-by-Step Guide
With your preparations complete, you're ready to initiate the data transfer. We'll use a widely recognized migration service to facilitate the process, treating your QuickeSelling data as a CSV source.
Step 1: Get Started with the Migration Tool
Begin by accessing the migration tool's interface. You'll typically find an option to start a new migration.

Step 2: Configure Your Source Store (QuickeSelling via CSV)
In this crucial step, you'll specify where your data is coming from. Since QuickeSelling exports data as CSV, select 'CSV File to Cart' as your source platform.
- Select Source Platform: From the dropdown list, choose "CSV File to Cart."
- Upload Your CSV Files: The system will prompt you to upload the CSV files you exported from QuickeSelling. Ensure all relevant files (products, customers, orders, etc.) are uploaded correctly.

Step 3: Connect Your Target WooCommerce Store
Next, you'll establish a connection to your new WooCommerce store. This step requires the installation of a connection bridge or plugin to allow secure data transfer.
- Select Target Platform: Choose "WooCommerce" from the target cart dropdown.
- Enter WordPress Admin URL: Provide the full URL to your WordPress Admin panel (e.g.,
https://yourstore.com/wp-admin). - Choose Connection Method: The most common and recommended method is to install the Cart2Cart WooCommerce Universal Migration plugin. This typically involves downloading the plugin, uploading it to your WordPress via the 'Plugins > Add New > Upload Plugin' section, and activating it. Alternatively, you might be given options to upload a Connection Bridge file to your store's root directory via FTP, or provide API credentials if available for direct integration. Make sure the plugin is installed as it's a requirement for WooCommerce migrations.
- Verify Connection: After setting up the connection method, the system will verify the link to your WooCommerce store.

Step 4: Select Data Entities for Migration
Now, decide which types of data you want to transfer from your QuickeSelling CSVs to WooCommerce. You'll typically find a checklist of entities like products, product categories, customers, orders, and reviews.
- Choose Entities: Select all the entities you wish to migrate. You can choose to migrate "All entities" or pick specific ones.
- Review Counts: The tool will often display the number of items for each entity found in your CSV files.

Step 5: Configure Additional Migration Options
This step allows you to fine-tune your migration with various optional features that can enhance data integrity and SEO.
- Explore Options: Review the available checkboxes. Common options include:
- "Clear Target Store Data": If you're starting with a fresh WooCommerce installation and want to remove any default or test data, select this option. Read more about clearing target data.
- "Migrate Customer Passwords": This is crucial for seamless customer login post-migration.
- "Create 301 Redirects": Highly recommended for preserving your SEO rankings and link equity by automatically redirecting old QuickeSelling URLs to their new WooCommerce counterparts. This helps prevent 404 errors.
- "Preserve Order IDs": Maintains the original order numbering, which can be important for accounting and record-keeping. Learn more about preserving IDs.
- "Migrate Images in Description": Ensures product images embedded within descriptions are transferred.
- Select Relevant Options: Choose the options that align with your business needs and priorities.

Step 6: Map Data Fields
Data mapping is essential to ensure that your QuickeSelling data fields correctly align with their corresponding fields in WooCommerce. This step typically focuses on customer groups and order statuses.
- Customer Groups Mapping: Match customer roles (e.g., 'Customer', 'Editor') from your QuickeSelling data to the available roles in WooCommerce. Remember that customer groups may require additional plugins in WooCommerce.
- Order Statuses Mapping: Map your QuickeSelling order statuses (e.g., 'Pending', 'Processing', 'Completed') to the standard or custom order statuses in WooCommerce. Custom order statuses often need a plugin in WooCommerce to function.

Step 7: Perform a Demo Migration
Before committing to a full migration, a demo migration is highly recommended. It transfers a limited number of entities (e.g., a few products, customers, and orders) for free, allowing you to preview the results and identify any potential issues.
- Initiate Demo: Click the "Start Free Demo Migration" button.
- Review Results: Once the demo is complete, thoroughly check the migrated data on your WooCommerce store. Verify product details, customer accounts, and order information.
- Make Adjustments: If you notice any discrepancies, you can adjust your CSV files or migration settings and rerun the demo.
Step 8: Initiate Full Migration
Once you are satisfied with the demo migration results, you can proceed with the full data transfer.
- Final Review: Double-check all your selections and options.
- Choose Insurance Plan (Optional): Consider adding a Migration Insurance Plan for additional remigrations within a specified period, offering peace of mind. Learn more about how Migration Insurance works.
- Start Full Migration: Click the "Start Full Migration" button. The time taken will depend on the volume of your data.

Post-Migration Steps
Completing the data transfer is a major milestone, but your work isn't quite finished. These post-migration steps are crucial for ensuring your new WooCommerce store is fully functional, optimized, and ready for your customers.
- Thoroughly Test Your New Store:
This is the most critical step. Test every aspect of your WooCommerce store as if you were a customer and an administrator.- Product Pages: Check descriptions, images, pricing, variants, and stock levels. Add products to the cart and proceed to checkout.
- Customer Accounts: Log in with migrated customer credentials. Check order history and account details.
- Ordering Process: Place test orders to ensure the checkout, payment gateways, and order processing work correctly.
- Navigation: Verify all internal links, menus, and category structures.
- Search Functionality: Test product search and general site search.
- Forms: Check contact forms, newsletter sign-ups, and review submission forms.
- Configure SEO & Redirects:
Even if you used the 301 redirects option during migration, it's wise to double-check.- Verify 301 Redirects: Use an online redirect checker to ensure your old QuickeSelling URLs are correctly pointing to the new WooCommerce URLs. This is vital for maintaining your SEO rankings and link equity.
- Update SEO Settings: Implement an SEO plugin (like Yoast SEO or Rank Math) for WordPress/WooCommerce to optimize titles, meta descriptions, and sitemaps.
- Google Search Console: Update your site's address in Google Search Console and submit your new sitemap.
- Install Essential WooCommerce Plugins:
Leverage WooCommerce's extensive plugin ecosystem to add desired functionalities. Consider plugins for:- Payment Gateways: Integrate your preferred payment processors.
- Shipping Solutions: Set up accurate shipping rates and carriers.
- Marketing & Analytics: Tools for email marketing, social media integration, and analytics (e.g., Google Analytics).
- Security: Enhance your store's security with robust plugins.
- Performance: Caching and image optimization plugins can significantly improve your store's speed.
- Manufacturers/Vendors: If your QuickeSelling store had manufacturer data, you'll need a plugin for this in WooCommerce.
- Custom Order Statuses/Customer Groups: As noted, these require additional plugins to fully replicate QuickeSelling functionalities.
- Update DNS Records and Go Live:
Once you're confident everything is working perfectly, it's time to point your domain name to your new WooCommerce store's hosting. This will make your new store publicly accessible. Schedule this for a low-traffic period to minimize potential disruption. - Announce Your New Store:
Inform your customers about your upgraded store experience through email, social media, and on-site banners.
Migrating from QuickeSelling to WooCommerce via CSV is a methodical process that, when executed carefully, leads to a powerful and versatile e-commerce platform. Should you encounter any challenges or prefer expert assistance, don't hesitate to Contact Us for our specialized Ultimate Data Migration Service or Migration Customization Service.
Ways to perform migration from QuickeSelling to WooCommerce
Automated migration
Just set up the migration and choose the entities to move – the service will do the rest.
Try It Free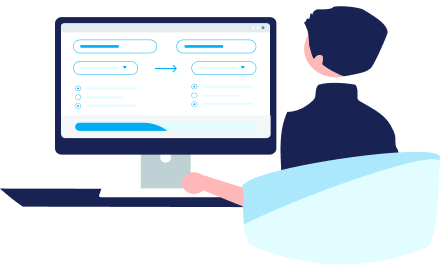
Data Migration Service Package
Delegate the job to the highly-skilled migration experts and get the job done.
Choose Package

Benefits for Store Owners

Benefits for Ecommerce Agencies
Choose all the extra migration options and get 40% off their total Price

The design and store functionality transfer is impossible due to QuickeSelling to WooCommerce limitations. However, you can recreate it with the help of a 3rd-party developer.
Your data is safely locked with Cart2Cart
We built in many security measures so you can safely migrate from QuickeSelling to WooCommerce. Check out our Security Policy
Server Security
All migrations are performed on a secure dedicated Hetzner server with restricted physical access.Application Security
HTTPS protocol and 128-bit SSL encryption are used to protect the data being exchanged.Network Security
The most up-to-date network architecture schema, firewall and access restrictions protect our system from electronic attacks.Data Access Control
Employee access to customer migration data is restricted, logged and audited.Frequently Asked Questions
How long does a QuickeSelling to WooCommerce migration typically take?
How can I verify data accuracy after migrating from QuickeSelling to WooCommerce?
Should I use an automated tool or hire an expert for QuickeSelling to WooCommerce migration?
Will my QuickeSelling store's design automatically transfer to WooCommerce?
What data entities can be migrated from QuickeSelling to WooCommerce?
Will my QuickeSelling store experience downtime during migration to WooCommerce?
What factors influence the cost of migrating from QuickeSelling to WooCommerce?
Can customer passwords be transferred from QuickeSelling to WooCommerce?
How can I protect my SEO rankings when moving from QuickeSelling to WooCommerce?
Is my store data secure during the QuickeSelling to WooCommerce migration?
Why 150.000+ customers all over the globe have chosen Cart2Cart?
100% non-techie friendly
Cart2Cart is recommended by Shopify, WooCommerce, Wix, OpenCart, PrestaShop and other top ecommerce platforms.
Keep selling while migrating
The process of data transfer has no effect on the migrated store. At all.
24/7 live support
Get every bit of help right when you need it. Our live chat experts will eagerly guide you through the entire migration process.
Lightning fast migration
Just a few hours - and all your store data is moved to its new home.
Open to the customers’ needs
We’re ready to help import data from database dump, csv. file, a rare shopping cart etc.
Recommended by industry leaders
Cart2Cart is recommended by Shopify, WooCommerce, Wix, OpenCart, PrestaShop and other top ecommerce platforms.
Trusted by eCommerce dominators since 2009

So now I have a perfect copy of my Shopify store on my Woocommerce platform. All within 2 days and I didn’t have to code anything – the migration took just a few clicks – fully automated. Ok, that’s it I just like when I see somebody really care about your business so I felt like I’d let the world know about my experience with this company
Review source
My migration from BigCommerce to WooCommerce was so easy, so time-saving, and so successful that I can’t believe all that work was done with one click!
Thanks to Cart2Cart for a fantastic service. Totally recommended!
Review source
I had a lot of pre-sales questions about the plugin and the migration. The service provided was absolutely perfect, quick and in-depth responses. My final migration has just finished and it did so in 27 minutes to be precise. If you are looking for the perfect, headache-free tool for your (in my case Magento to Woocommerce) migration, look no further, THIS IS IT! For those who expected such a plugin to be for free, are you kidding me?!?!
Review source
I’ve used the service/software for two website migrations (ZenCart to WooCommerce). The second one failed, also because of my own error, but the supprt was great and Cart2Cart team helped getting it all working flawless.
Very impressed by this software and even more by the aftersales support. Will use again when needed.
Review source
I moved a site from Jigoshop Version 2 (the jigoshop upgrade from v1 to v2 was poor) to WooCommerce and I am very happy with the results. My original Jigoshop site had been hacked so it wasn’t ideal, but Cart to Cart were very helpful and their support was very good. 🙂
Review source
Excellent Support for the non expert who needs a lot of assistance they spent as much time as I needed to insure I got my migration. The upload went well after the Demo. Customer service was there when I had questions or issues to fine tune after purchase. I would recommend if you need to import / migrate your Products from Shopify to Woocommerce in Word Press as I did.
Review source
Company went above and beyond to handle the migration, even doing 2 additional trials to get it right.
The project was involved as it had a large product count, user count, and orders going back 5 years. This involved doing the CMS and Shopping cart migration from Drupal / Ubercart to WordPress / Woocommerce.
I had the new site up the same day as the migration and only had to do some fine tuning, menus setup, and correct some links.
Pleasure to have a second migration done with this company.
Review source
Tried to do the data migration myself and failed even after spending so many hours attempting different things. With Cart2Cart the data import from 3dcart to WooCommerce was quick and easy. Support response time was great and replies were really helpful. Definitely worth the cost and it saved me many more headaches
Review source
I needed to migrate a lot of product data (title, price, description, images) from an old Mojishop installation on Joomla to a new shop system based on Woocommerce on WordPress. The setup was very easy (you need FTP access on your webspace).
Before you pay for the great service you can make several test migrations. It turned out there were some product information missing on the new system, because my data base had a custom name. I did not find out this by my own.
So I contacted the customer support of Cart2Cart. I got immediately help and two days later a custom solution for my problem.
This is a service! Thanks a lot.
Review source