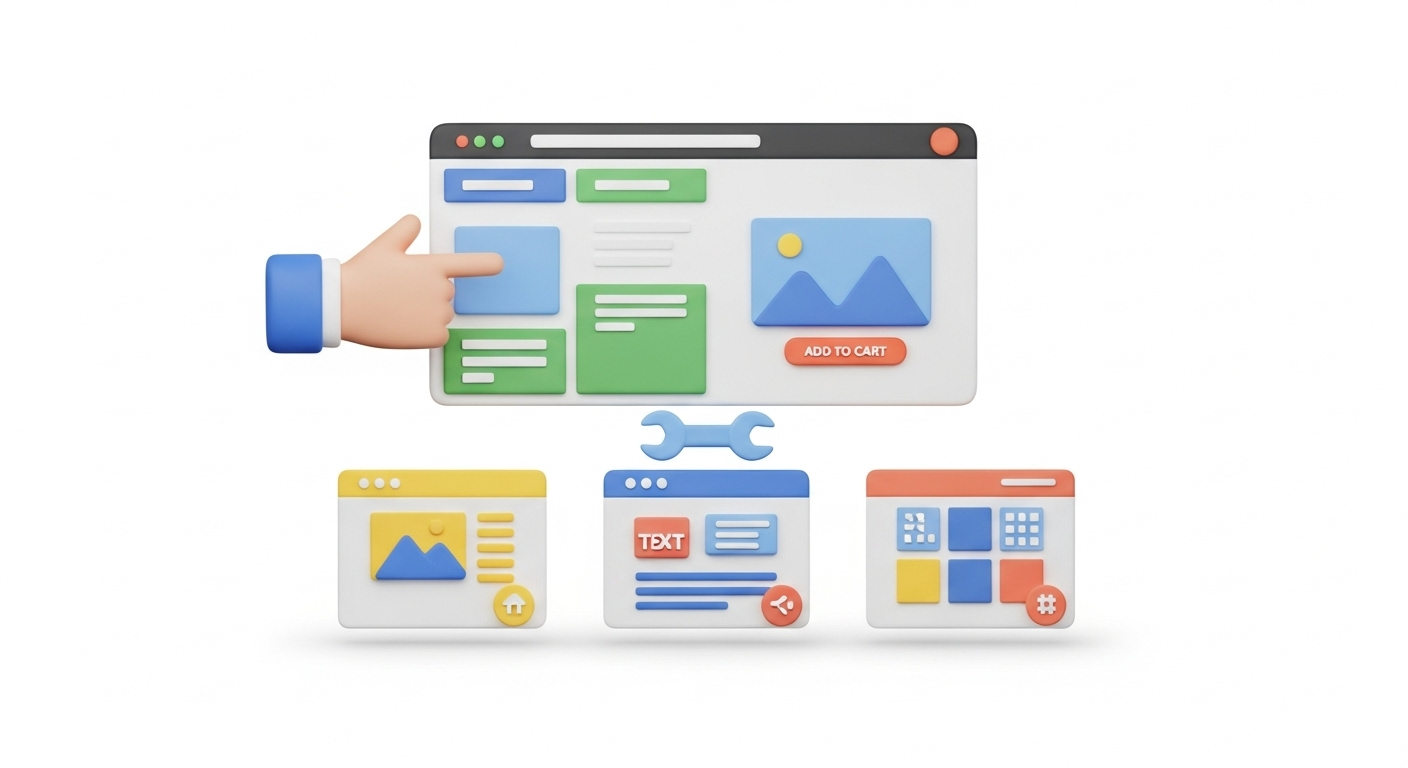
Digital downloads comprise a huge segment of all products sold online and continue to increase their share. A lot of retailers are attracted by the advantages of distributing non-physical items and tend to shift totally to that domain or combine selling physical products with virtual ones.
Why sell virtual products?
There is number of reason why selling digital products can look so tempting for a lot of entrepreneurs:
- No shipping required. The absence of logistic and calculation connected with shipping makes selling products really an easy task. Moreover, they are delivered in an instance and consequently, no troubles are caused by delays.
- Higher profit margins. You can earn more due to an extremely low cost of production and absence of shipping and handling spendings.
- Unlimited stock. Once the product is created, you can sell its copies endlessly without any ongoing expenses. This scalability simplifies inventory management.
If you have expertise in a certain sphere and you are willing to share your knowledge - becoming a self-published author can become your cup of tea. There is a wide range of activities you can get involved in: writing e-books, making video tutorials or mastering an integrated online course.
Selling virtual products online can turn out to be a treasure box for graphic designers, as there is a great demand for themes, patterns, wallpapers, templates, logos and so on. Thousands of web graph items are sold each day on various resources and make a good profit for their creators.
Ready to Sell Digital Downloads with PrestaShop?
Migrate your store’s products and data effortlessly with Cart2Cart! Transfer your digital products securely and get your store up and running in no time. Start your seamless migration today!
TRY IT FREE
How to sell digital downloads with PrestaShop?
There are 2 ways of selling virtual stuff: via marketplace or via a stand-alone online store. The latter one is a perfect framework for digital downloads as it allows to skip cooperation with the publisher or other intermediate and consequently you don’t have to pay hefty fees and obtain a 100% profit. Another pros is that it diminishes fierce competition, as customers avoid browsing tons of similar items on one website and get straightforward to your store, but, of course, it will demand more marketing efforts. Moreover, you have a full control over your store to develop and transform it according to your tastes and needs. You can also define pricing strategy and react to constant changes of online market in a more flexible way, especially with the right additional migration options.
One of the top open source e-Commerce solutions for digital downloads is PrestaShop. It possesses an impressive set of out-of-box functionality for building a fully-fledged store for virtual as well as for tangible products. In the same time, it is easy to setup and manage, as it has an intuitive and comprehensive backend suitable even for newcomers and users with limited coding knowledge. Due to being SEO-friendly platform it provides high Google ranking and good site exposure to attract customers. Regarding PrestaShop frontend, it offers a broad choice of highly-customizable and responsive themes to secure adequate content display on various devices and excellent omnichannel shopping experience. For a truly perfect shopping cart experience.
How to create digital downloads in PrestaShop?
In PrestaShop, there are some specific steps to be done for creating and setting up digital product to your stock, but everything can be done easily as with tangible products.
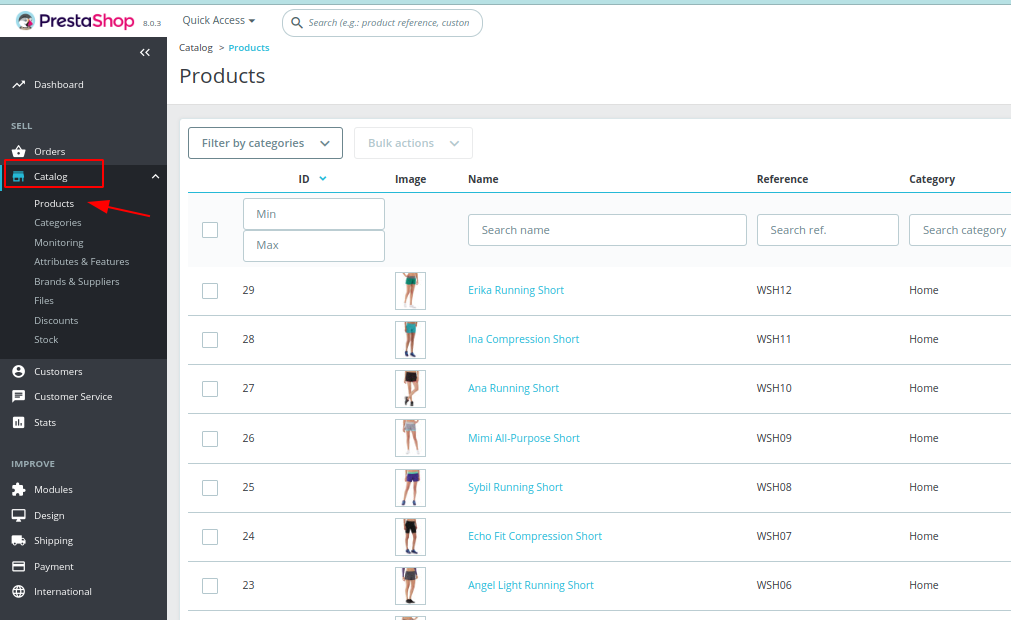
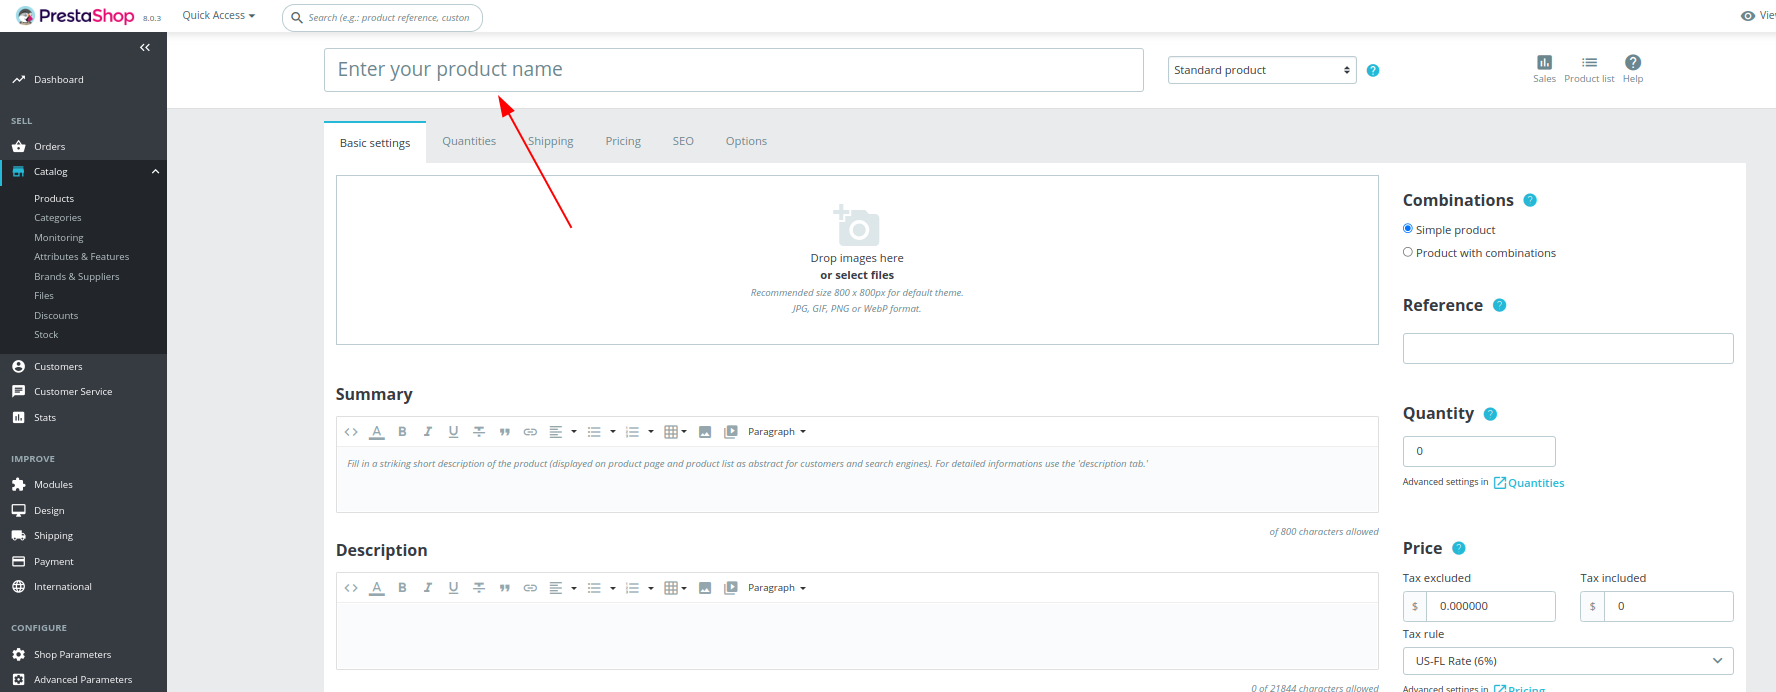
Log in to your PrestaShop admin panel, go to the menu on the left and choose Catalog button, in the drop-down menu click on Products.
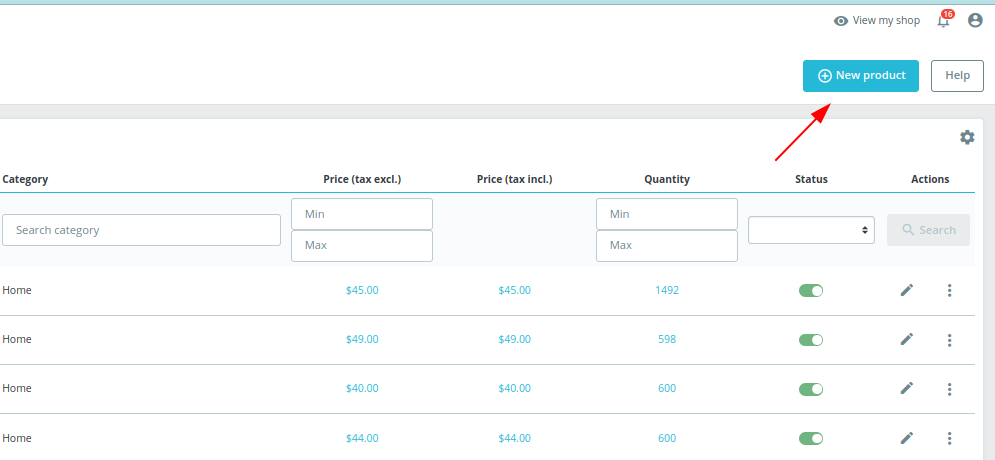
In the top right corner click on a sign Add new product.
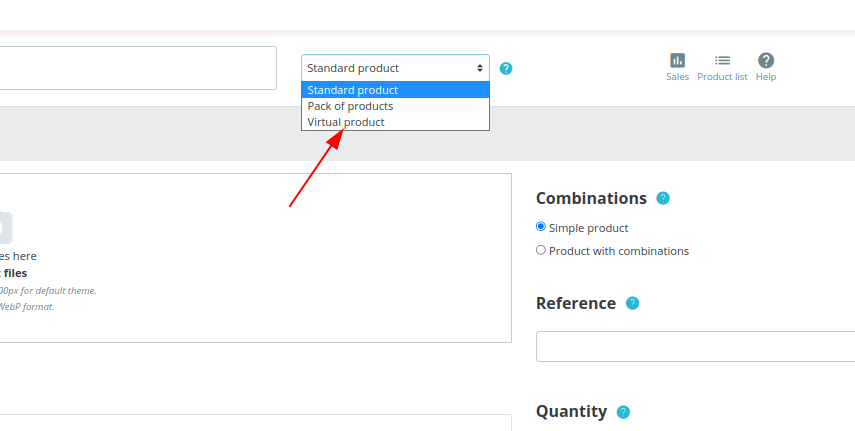
After loading the New product page, choose Virtual product among three options: standard, pack and virtual one.
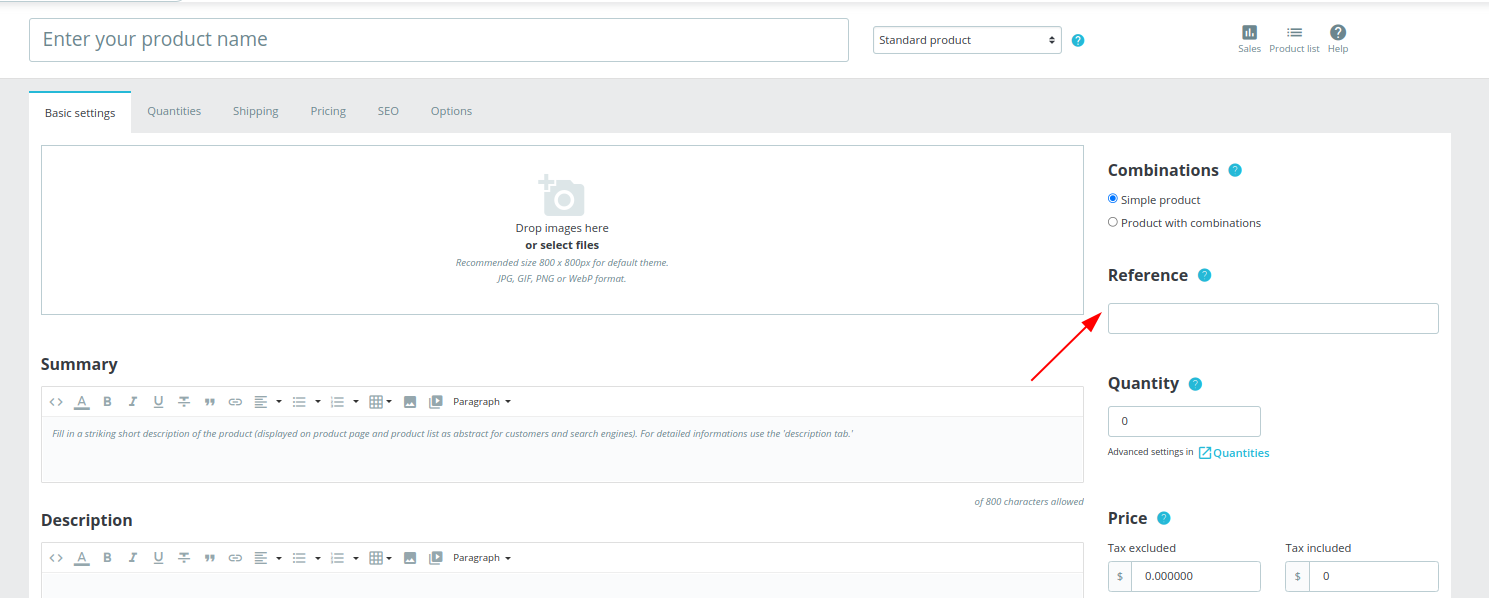
Now you need to fill in the rest of the form:
-
- Name: e-book, mp3 etc.
-
- Reference Code: if you have one fur personal use.
-
- EAN-13 or JAN barcode / UPC barcode: usually not relevant for digital products, so you can leave it blank.
-
- Enabled: leave YES to make sure that the product is active.
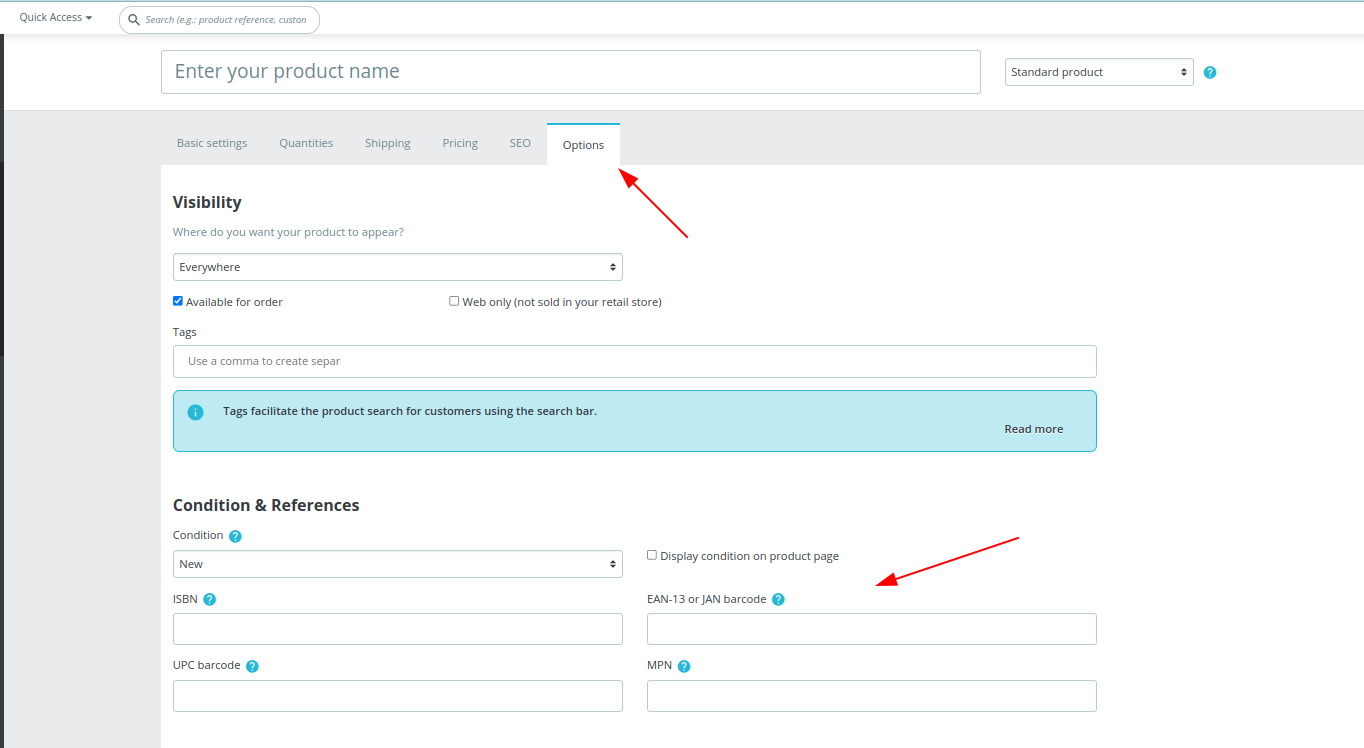
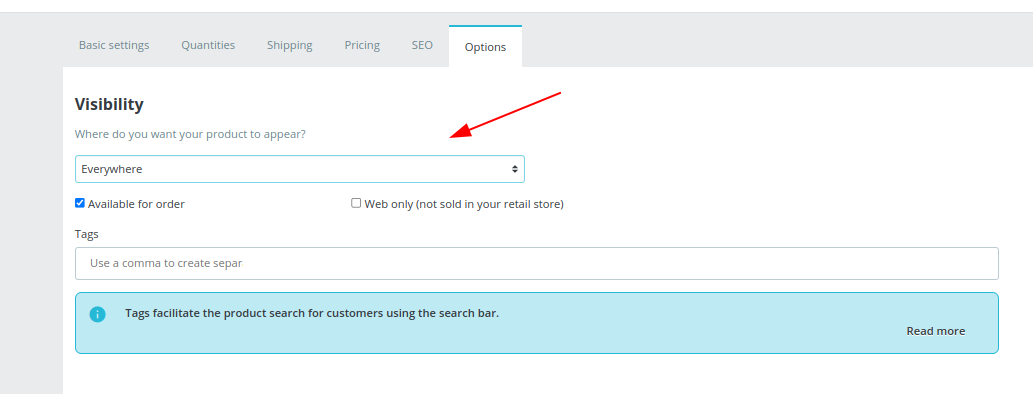
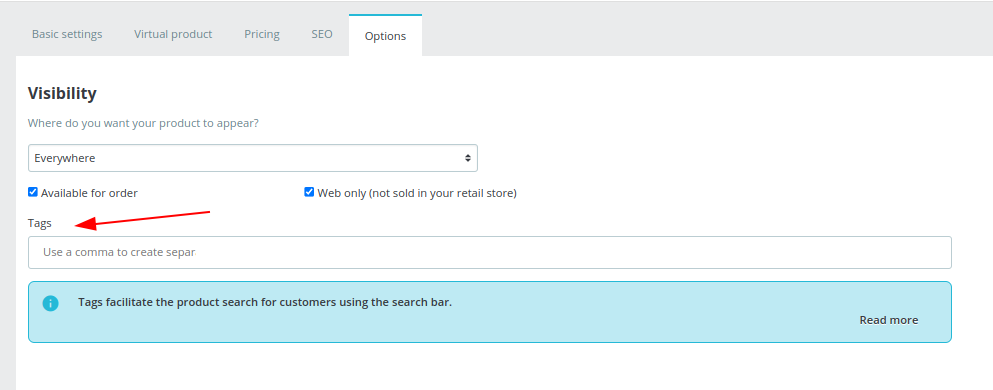
- Visibility: it’s better to leave Everywhere for the best visibility.
-
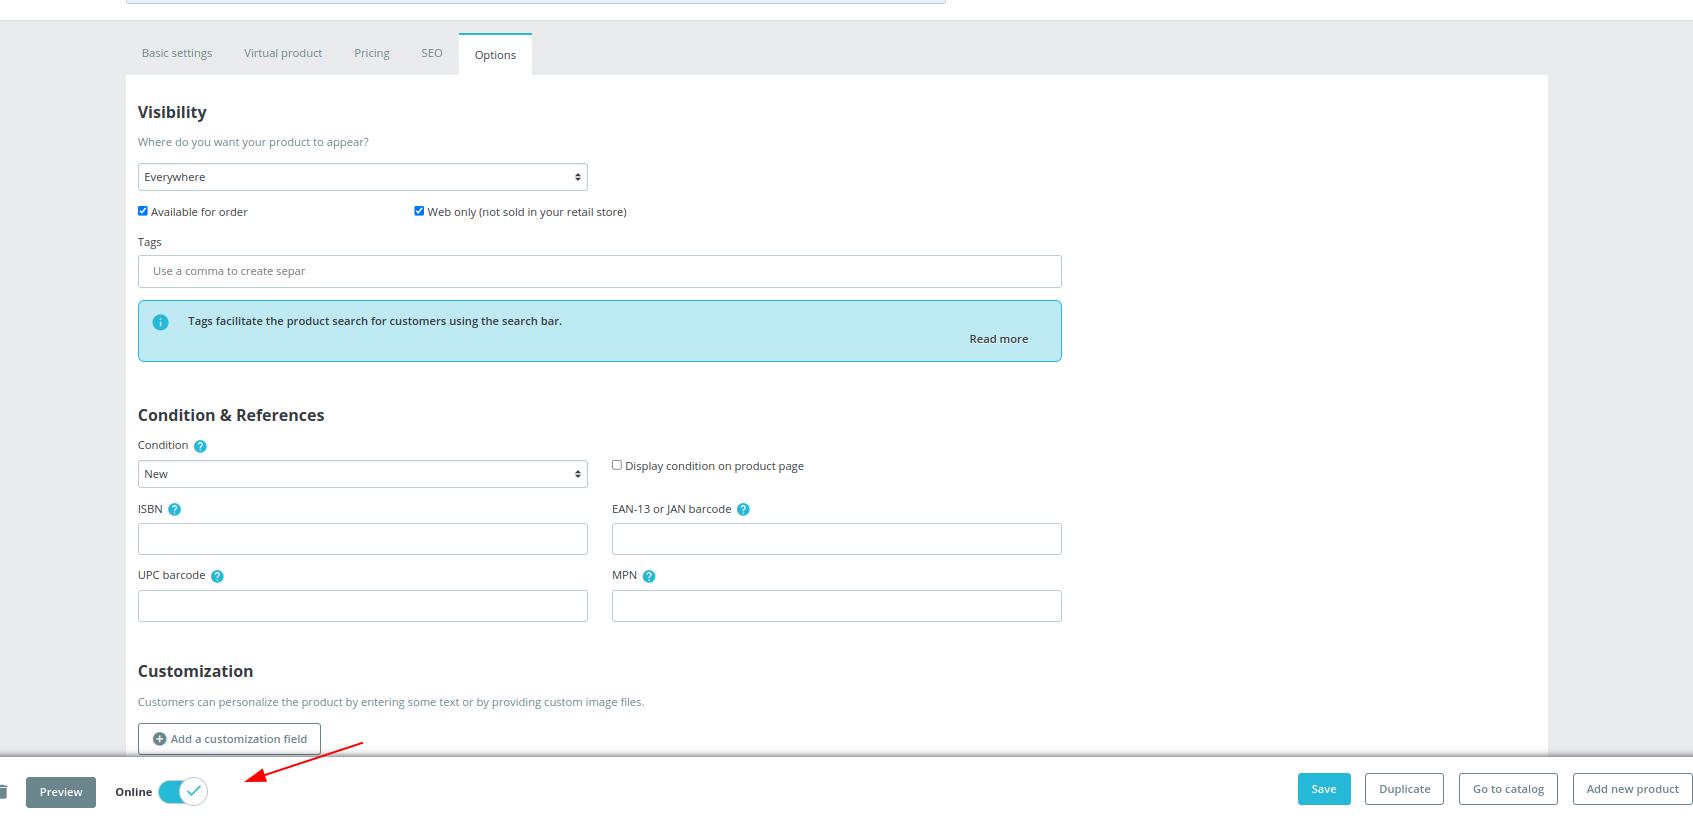
- Options: all the checkboxes have to be ticked including the Online only one.
- Condition: it is not possible to edit because you selected Virtual product.
Then add some information about your virtual product by filling in next categories:
- Short description: print in brief summary description of your product.
- Description: give all the details about the product.
- Tags: you may add a tag for your item here, but it is optional.

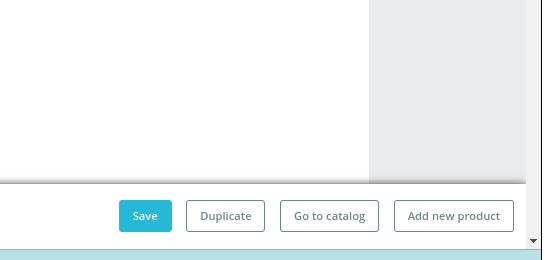
After providing all the necessary information, click on Save in the bottom right corner of the page. You may receive warnings at the top of the page, but don’t worry, as the message will disappear when you fill in the rest of the form.
In the menu on the left choose Price field and provide the following details:
- Pre-tax wholesale price: it is usually not relevant for a digital product, so you can leave it unchanged.
- Pre-tax retail price: fill in the price of your product before tax.
- Tax rule: choose a suitable tax rule from the dropdown menu.
- Unit price: this is relevant only if you sell a pack of products. It is used to define a price for each item of the pack.
- Display the ‘on sale’ icon...: tick it only in case if your item is on sale.
- Final retail price: it is automatically generated from the price and a tax rule provided above.
Then click Save in the bottom right corner.
Find and click the SEO tab in the menu on the left. 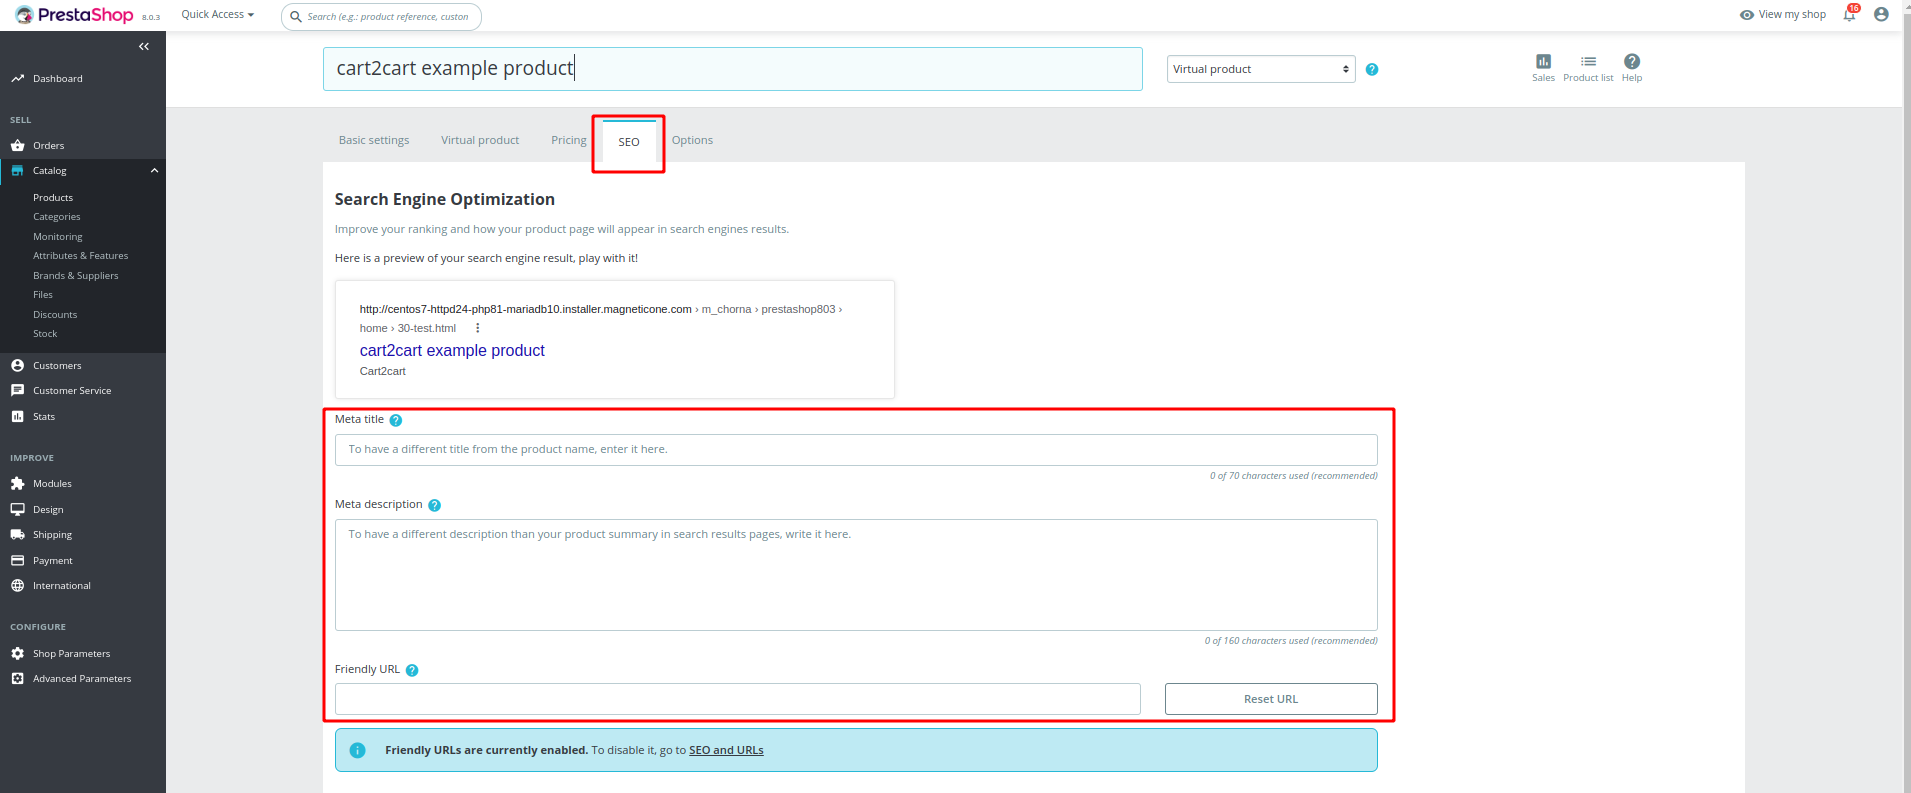
Now you will need to click on the Associations button.
On this page, choose a type of association category for your product from the Default category dropdown. Accessories' field: you can leave it blank, as there are usually no other items on your site that you can offer as an accessory to your product. Manufacturer’ field: provide the information about a manufacturer if possible. Click Save in the bottom right corner.
Here you can edit the Meta title and Meta description. PrestaShop indicates an appropriate character limits for each field and gives the option to generate friendly URLs which is great for SEO. In the end, click Save in the bottom right corner.
Now you will need to click on the Associations button.
On this page, choose a type of association category for your product from the Default category dropdown. Accessories' field: you can leave it blank, as there are usually no other items on your site that you can offer as an accessory to your product. Manufacturer’ field: provide the information about a manufacturer if possible. Click Save in the bottom right corner.
In the menu on the left choose Quantities section. In the box named Available quantities for sale write in the desired number of downloads available for the product. On the next step choose to Allow orders after the product is Out of stock, then click Save button.
In the section below named Availability setting, you can indicate a minimum quantity of your product that the customer has to buy in order to proceed with the checkout. There is no need to use this limitation for digital downloads as there is no shipping price indication. So set to 1 for disabling this feature. After, click Save at the bottom of the page.
Look for a Virtual product tab and click it in the menu on the left. A page will load showing a question 'Does this product have an associated file?'. Choose YES for your case.
After that, a field Add file will appear below. Click on it to browse your computer's files to pick up the file and add it to the product listing. The name of the file will be automatically depicted in the Filename field.
There are some other sections to complete:
- Number of allowed downloads: there is a possibility to put a restriction on the number of times your product can be downloaded. If it’s not your case, type in 0 for unlimited.
- Expiration date: You can set up expiration date, so after that date your product cannot be downloaded, or leave it blank for infinite.
- Number of days: you can define a number of days your file stays accessible for customer’s downloading. If you would like to give unlimited access - set to 0.
- Click Save in the bottom right corner.
On the next step choose Images button in the menu on the left. In order to add an image to your digital product - tap on the Add files button on the page and browse the files on your computer. After the right image is chosen click Upload.
After that, a green tick and a message showing the name of your image will appear on the page. In this section, you can also add a caption for your picture if you wish. In another case, your Product name will be used by default. Finally, click Save in the bottom right corner.
You can omit the following tabs like Features, Customization, Attachments or Suppliers because they are usually not relevant for digital downloads.
After you have successfully finished creating your new virtual product - click Preview button at the top right corner to evaluate the result.
The final view of your product will look like that, though take into account theme variations.
As far as you can see, PrestaShop platform lets you create and manage virtual products in an easy and smooth way. If you are already selling digital downloads on other platform and considering switching to PrestaShop, it can turn out to be a time-consuming and technically challenging task. However, there is an option to facilitate and speed up the process of migrating to PrestaShop with an automated migration service Cart2Cart, which supports over 120 e-Commerce platforms. It lets you transfer a vast array of entities like products, categories, customers, taxes, reviews and so on with minimum efforts.
In case you are currently using a marketplace, but would like to switch to a stand-alone PrestaShop store, you may simply export your products to CSV file and then perform import from CSV to PrestaShop easily and swiftly. Start with a Free Demo migration to move a limited number of entities just within a few minutes and see Cart2Cart service in action -- no programming needed!
Monthly Update – March 2026
As we advance into March 2026, the landscape for selling digital downloads with platforms like PrestaShop continues to evolve, emphasizing agility and customer-centricity. A prominent trend for this month is the integration of AI-powered personalization in product recommendations and customer support for digital goods. Leveraging AI can help PrestaShop store owners analyze customer behavior, predict preferences, and offer tailored digital product bundles or follow-up content, significantly boosting conversion rates and customer loyalty. Beyond sales, consider implementing AI chatbots for instant support, guiding users through download processes or troubleshooting common issues related to digital files. This not only enhances the user experience but also frees up valuable human resources. Furthermore, with the increasing adoption of Web3 technologies, explore possibilities for offering digital collectibles or NFTs as exclusive content, adding a layer of unique value to your virtual offerings. Staying updated with these technological shifts and focusing on a frictionless, personalized customer journey will be crucial for success in the competitive digital downloads market.
For more details, explore our FAQ section or schedule a call with a migration expert.