
Multi-store feature is an opportunity to set up and manage unlimited number of sub-shops within single back-office. Understanding the potential benefits of such a setup can highlight why this option is a great timesaver for those merchants who need to sell abroad, establish different prices per single product, more precisely target their customers, etc. Multi-store allows to exterminate everyday routine that you would have to handle while managing several shops from different admin zones.
Unsurprisingly, that all the top-end shopping carts aim to provide users with multi-shop option. PrestaShop that is currently considered to be one of the best e-Commerce platforms in the world didn’t stay behind and introduced the feature in version 1.5 and has continued to refine it through subsequent versions, including the latest PrestaShop 8.x. For a smoother process, consider reviewing our PrestaShop Migration Checklist. We already wrote about all the benefits of PrestaShop multi-store. So, now let’s discuss the technical part and discover some aspects of managing multiple shops.
How to Set Up PrestaShop Multi-Store
In order to activate multi-store feature you will have to follow some simple instructions.
- First of all log in to your PrestaShop back-office.
- Check the Preferences menu and go to General tab.
- Than find Enable Multistore checkbox and pick Yes option.
- Press Save button.
Terms
Before proceeding with multi-store configurations we need to check some key terms:
Multi-store tree - displays shop groups, stores and their URLs. Gives you a convenient way to navigate between your sub-shops.
Shop groups - a list of stores that you can group into separate folders in order to set up some common configurations or make some shared customizations, etc. For complex needs, explore our migration customization services.
Multi-store options - displays available options for the existing shops.
Default shop - will serve a central hub for all the other stores. It shares details with other stores (products, shipping, payment, etc.), and is the one that appears when you log in to the admin panel. For more insights on optimizing your store after setup, see our post-migration tips.
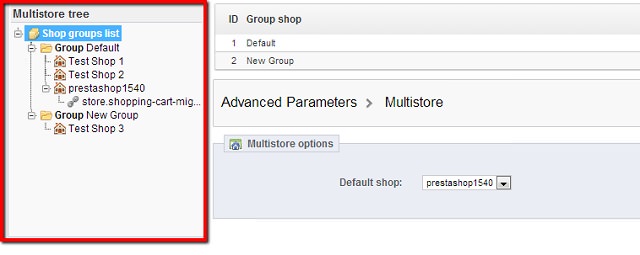
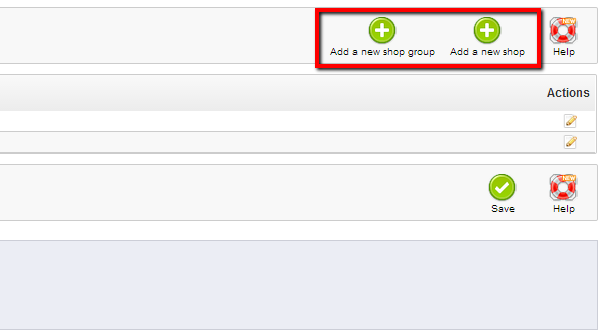
To start working with multi-store go to Advanced Parameters menu and choose Multistore tab. In order to add new Shop group or Shop click on the corresponding button in the right top corner.
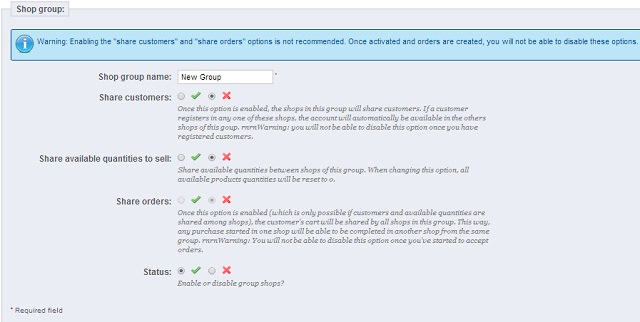
If you decide to add new Shop group you will have to name it and decide on the list of entities you would like to share between stores in this list: customers, orders, etc. For more on managing and migrating specific data, such as customer and order data, ensuring these relationships are preserved during any migration is crucial. Set the required settings and don’t forget to click Save button.
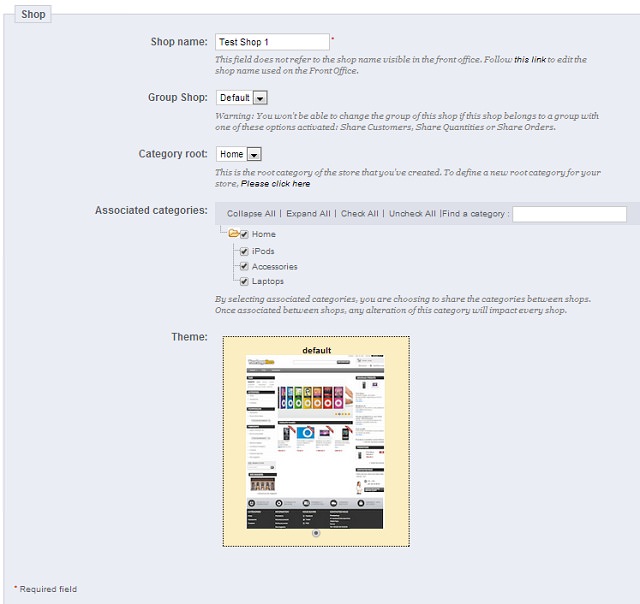
Now you can add new stores. First of all, provide a Name for a new sub-shop and then assign it into appropriate Shop group. You will be also able to establish root folder, categories, sub-categories and theme.
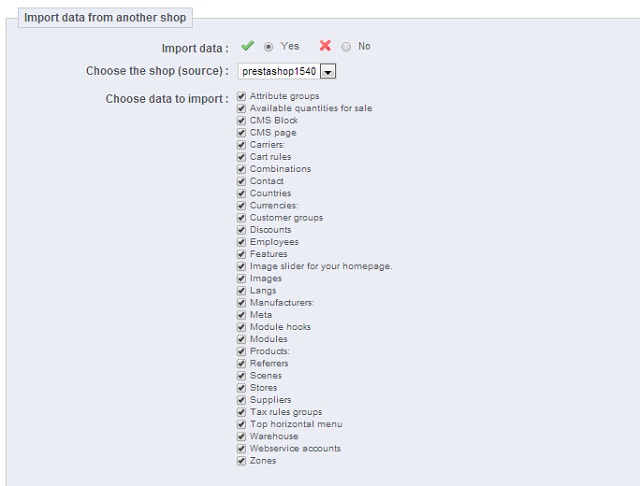
PrestaShop also offers a great opportunity to populate necessary entities from already existing sub-shops or default store. After setting up all the configurations press Save.
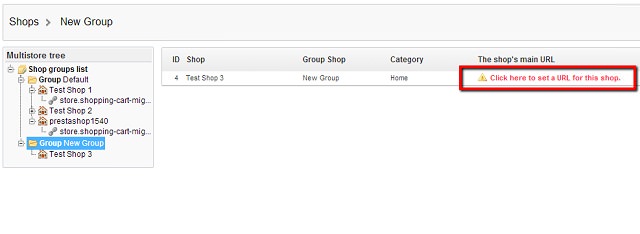
The final thing to do is to configure URLs and your multi-store will be ready to go. Properly migrating SEO URLs is vital for maintaining search engine rankings. At Multistore tree click at one of groups and then set a URL for required shops.
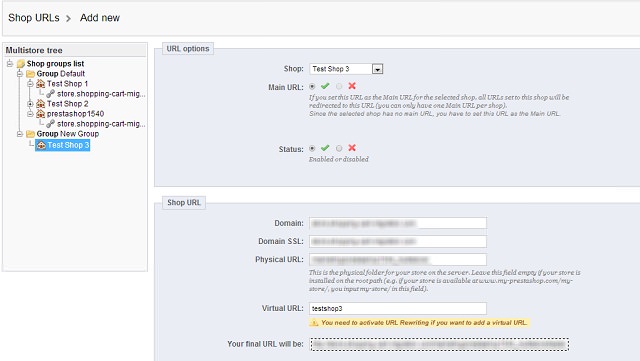
In this menu you will be able to set up your link structure in the most suitable for you way. After saving all the changes your store will be ready to sell.
And finally, taking into consideration sky-rocketing popularity of both the platform and its useful feature Cart2Cart developed a brand new option for PrestaShop multi-store migration. You can now migrate: several shops to PrestaShop Multi-Store, another multi-shop to PrestaShop Multi-Store, or PrestaShop Multi-Store to PrestaShop Multi-Store with no limitations or data loss. Check the detailed guide or visit our multi-store migration scenarios for more information.
Monthly Update – February 2026
For February 2026, a crucial aspect of managing a successful PrestaShop multi-store environment is ensuring seamless and secure data synchronization across all your storefronts. As e-commerce operations become more distributed and complex, maintaining consistency in product catalogs, customer data, and order processing across multiple sub-shops is paramount. Implementing real-time synchronization solutions can prevent discrepancies, improve inventory accuracy, and enhance the overall customer experience by ensuring up-to-date information regardless of which store they interact with. Furthermore, with evolving cybersecurity threats, strengthening the security posture of your entire multi-store ecosystem is vital. This includes regular audits, robust access controls, and encryption protocols for data in transit and at rest. Merchants should prioritize using secure APIs for integrations and regularly updating all PrestaShop modules and themes to mitigate vulnerabilities. A well-synchronized and secure multi-store setup not only streamlines operations but also builds customer trust and protects valuable business assets.
For more details, explore our FAQ section or schedule a call with a migration expert.


